Configuring a Reverse Proxy
Introduction
I’ve written about reverse proxies before. Here’s a good one for nginx proxy manager.
Before we go any further, let’s explain what a reverse proxy does. It is, quite simply, a web server that serves web servers. Most reverse proxies can also be a standalone web server in their own right.
Instead of serving files over HTTP, a reverse proxy instead redirects traffic based on the domain you come from (see why domains are important?). They also usually have some neat tricks like being able to redirect to different locations depending on path, encrypting the traffic to the browser, load balancing, etc.
Most of those we don’t need. The two critical capabilities we leverage are:
- Being able to serve legitimate encryption certificates via let’s encrypt
- Being able to serve traffic based on the domain
Let’s get going!
TL;DR
In this guide, we will:
- Register a domain/subdomain and point it at our IP
- Forward Ports to our reverse proxy
- Set up a reverse proxy with Caddy
- Serve Headscale over HTTPS
Getting Your Domain Sorted
Domains aren’t anything special. You can make your own domains, just by editing C:\windows\system32\drivers\etc\hosts and adding custom dns entries.
If you want your domain to get encrypted properly though, you need a publicly recognized domain.
Info
You can also technically set up a Public Key Infrastructure (PKI), but let’s not go there.
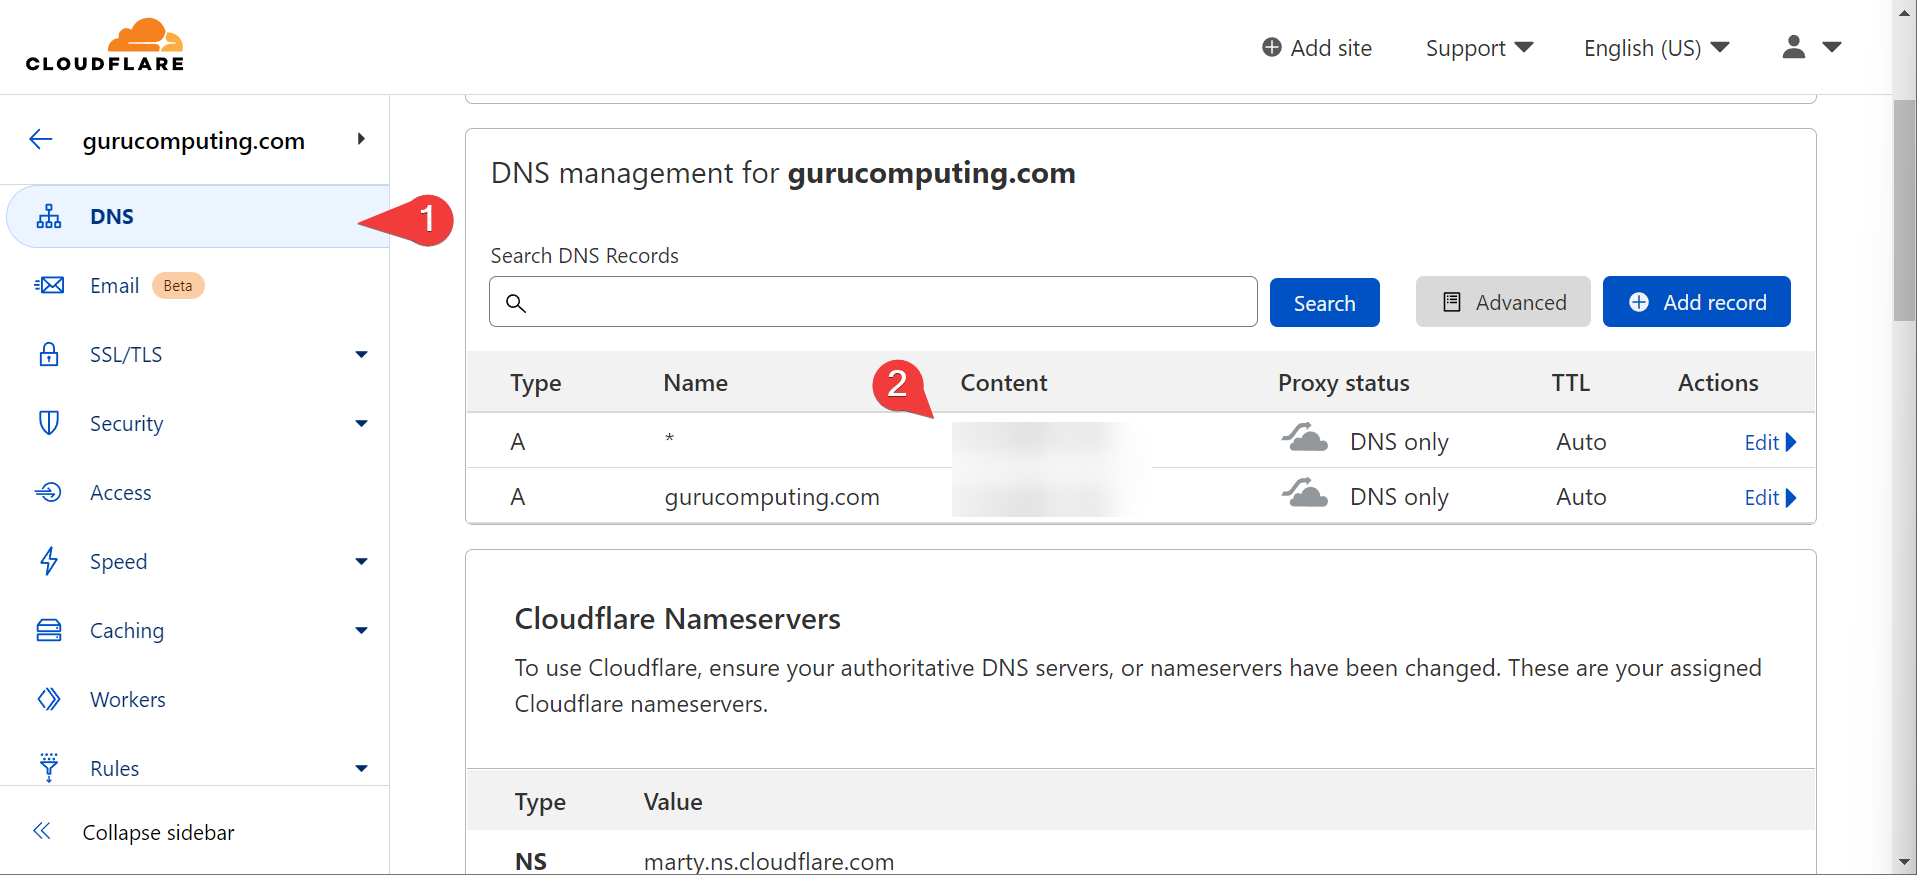
So you have to go to a registrar and go buy something to slap your name onto. Yes you have to pay for this, though it’s maybe 10 dollars a year for most domains. I recommend cloudflare. Point your domain’s DNS at your server’s IP address.
Info
If you are behind Carrier Grade NAT (CGNAT) you can’t directly host public services. Use a Virtual Private Server (VPS) like linode or look into reverse proxy services like cloudflared.
In this case, I have a lab domain (don’t use my domain thanks, it won’t work for you), pointed at my lab environment’s IP.
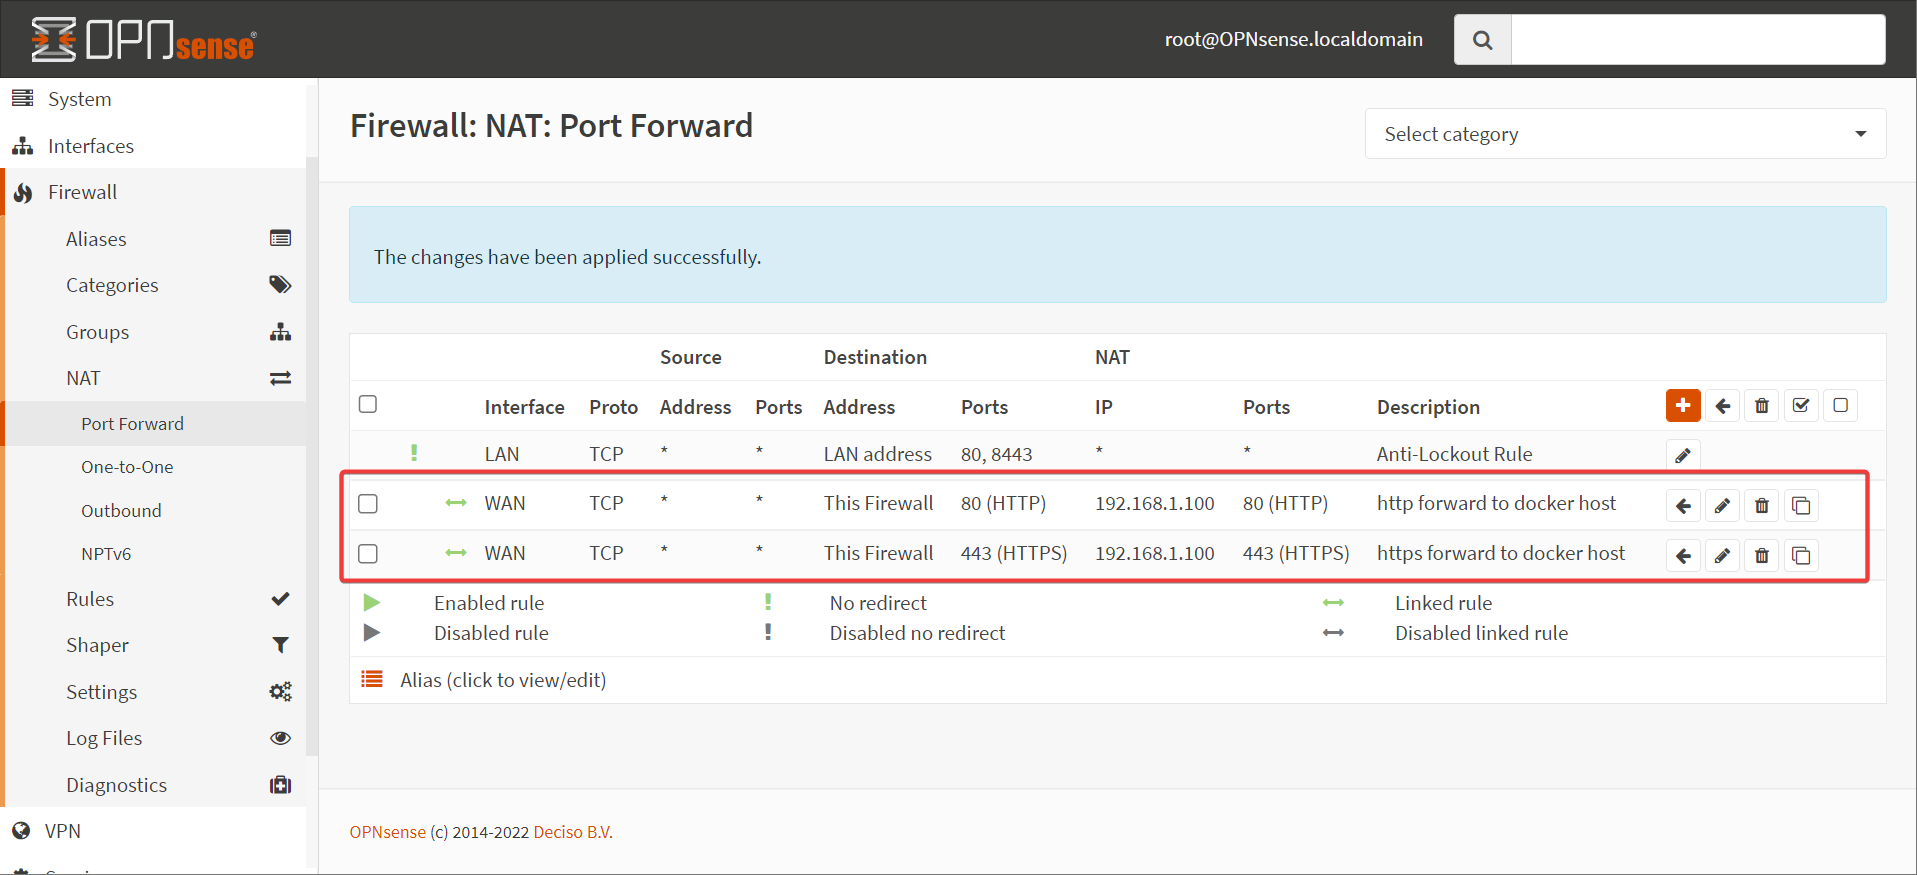
Forward Your Ports
Once you have your domain sorted, you need to forward ports to your docker host. Specifically, ports 443 and 80. I’m going to do this in OPNSense
Warning
Port Forwarding should only be done if you know what you’re doing with security. You can avoid this by using a reverse proxy service (mentioned above) or DNS let’s encrypt challenges (but then headscale will only work inside your network, defeating the purpose)
Set up your Reverse Proxy
Did I mention we’re going to use Caddy? We’re going to use caddy. Feel free to swap out your own reverse proxy if you have a favorite, but caddy is nice and simple. We will also leverage docker networks to let the reverse proxy magic happen inside the docker environment.
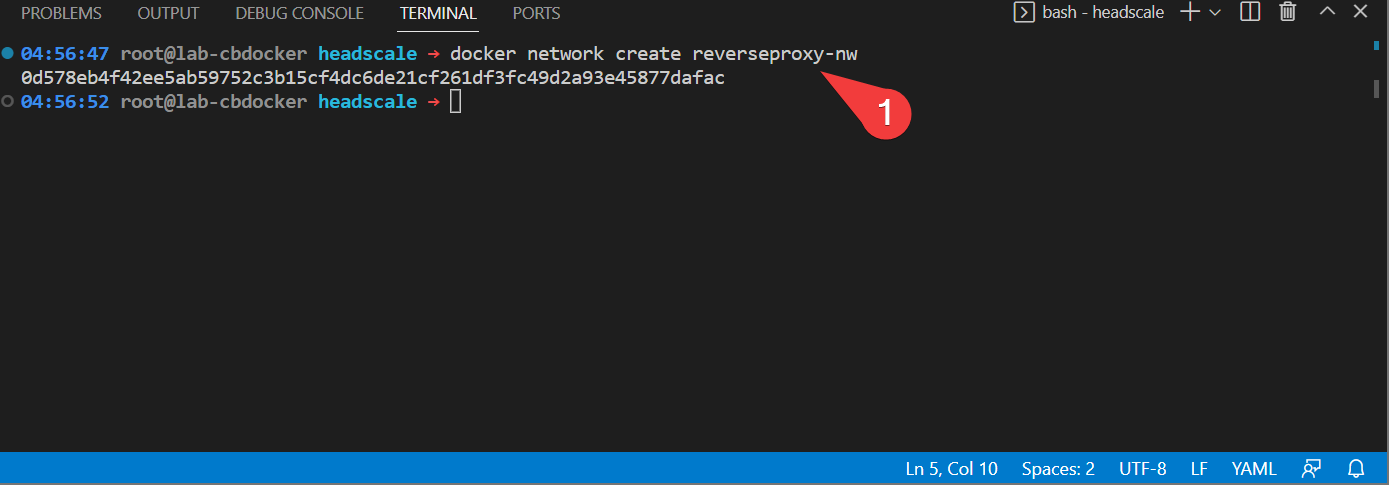
- Create a new network for your reverse proxy to sit on on the docker host.
- Create a new folder for
caddyand create a subfolder calledcontainer-config. Create aCaddyfileinsidecontainer-configwith the following (changeingyourdomainwith your actual domain:
Info
If that looks like a bizarrely simple config file, that’s because it is! That’s what’s great about caddy
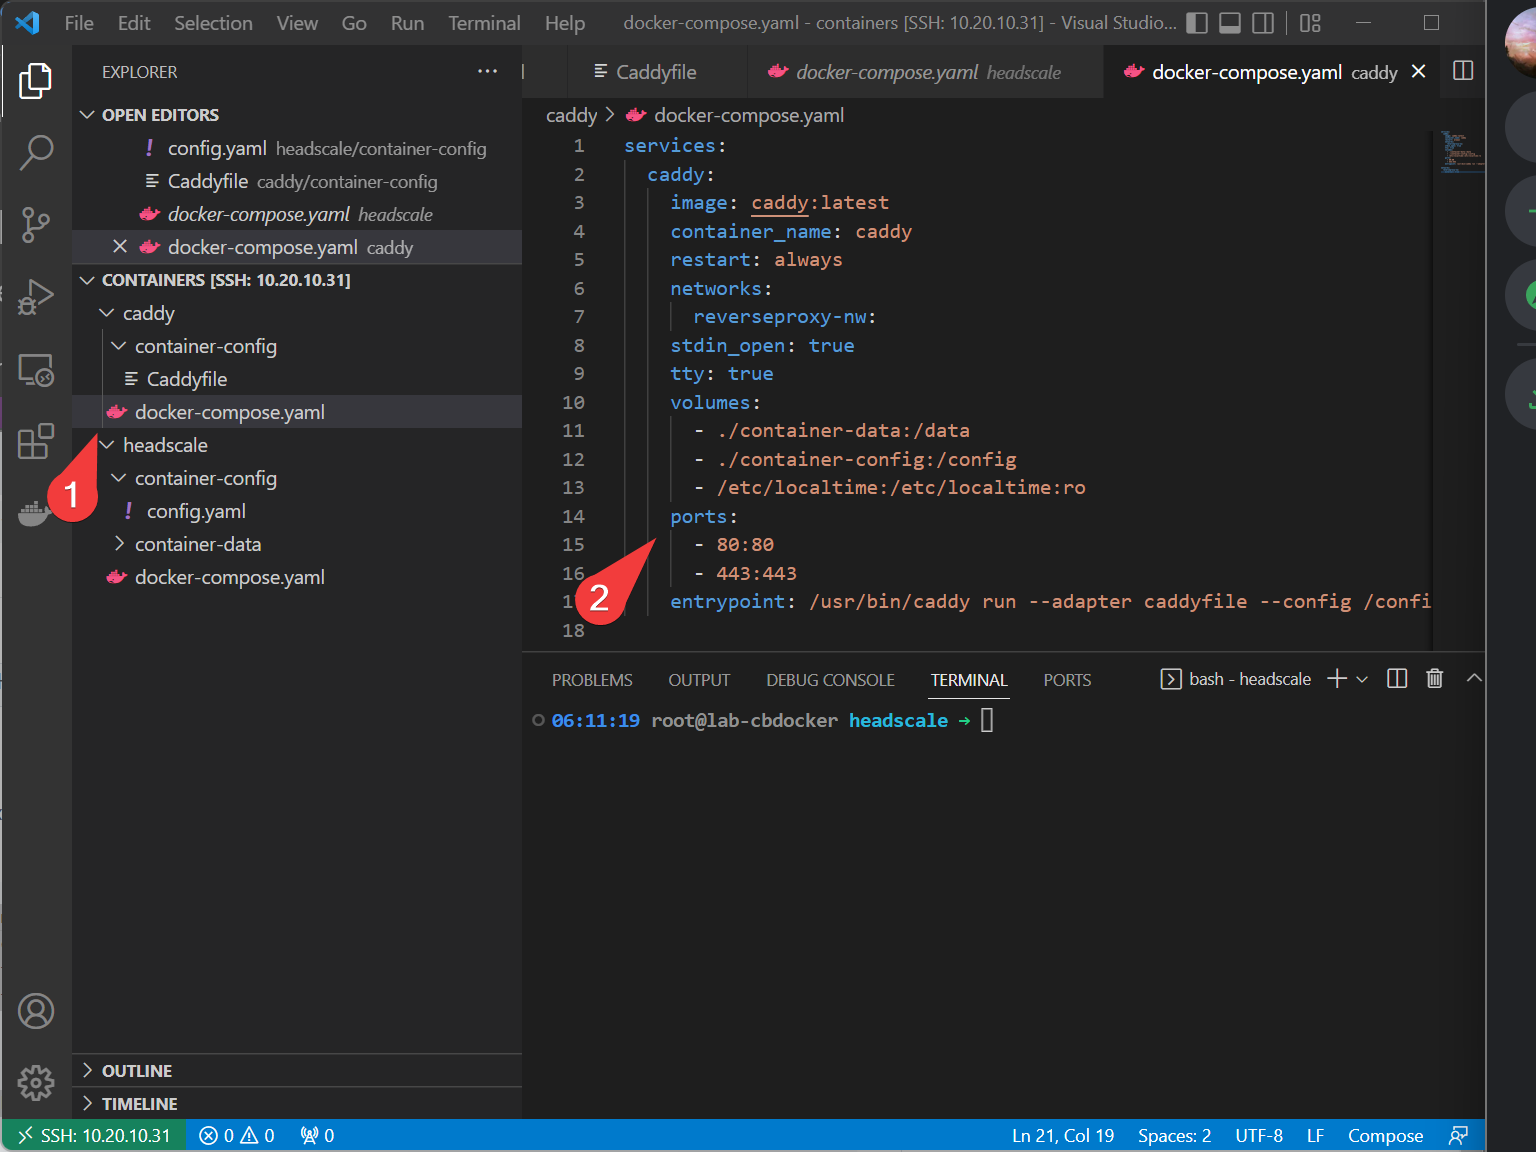
- Create a new
docker-compose.yamlfile in the caddy directory with the following:
services:
  caddy:
    image: caddy:latest
    container_name: caddy
    restart: always
    networks:
      reverseproxy-nw:
    stdin_open: true
    tty: true
    volumes:
      - ./container-data:/data
      - ./container-config:/config
      - /etc/localtime:/etc/localtime:ro
    ports:
      - 80:80
      - 443:443
    entrypoint: /usr/bin/caddy run --adapter caddyfile --config /config/Caddyfile

networks:
  reverseproxy-nw:
    external: true
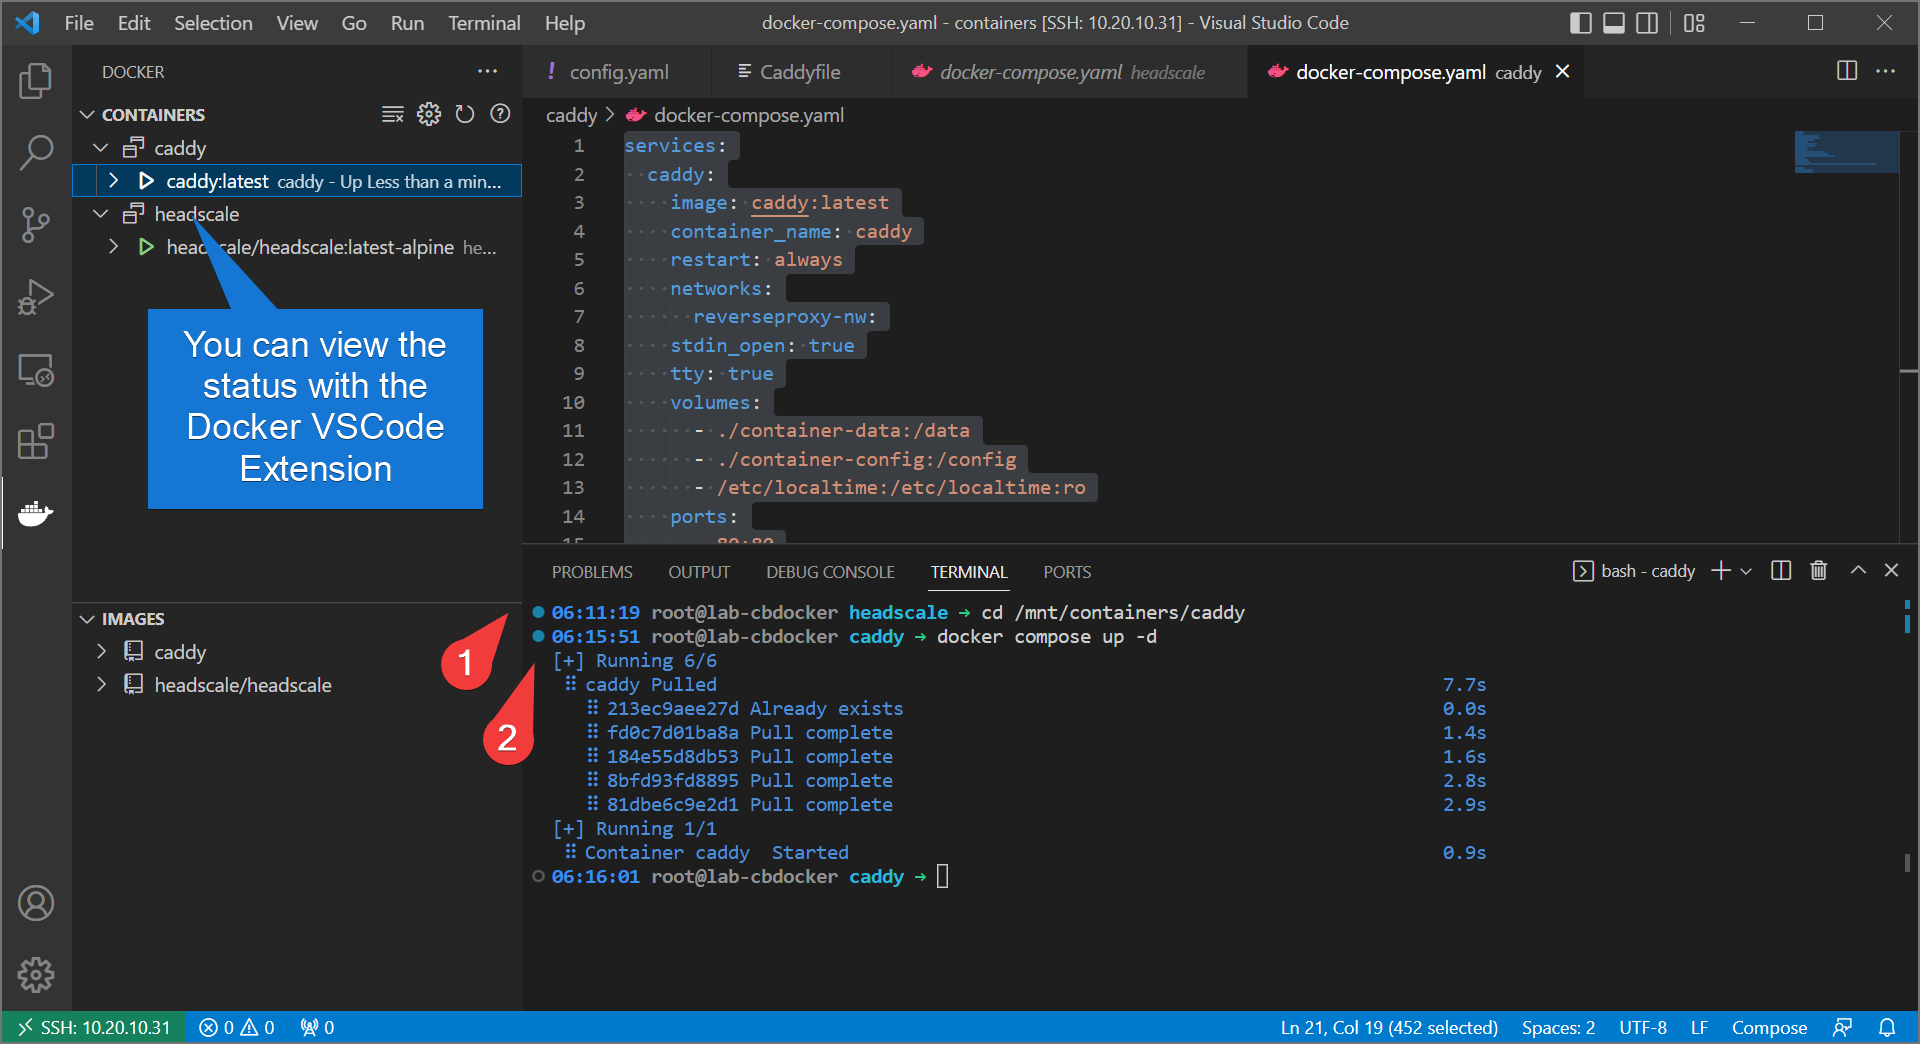
- Bring up caddy with:
Info
By default, caddy will attempt a let’s encrypt challenge over HTTP and HTTPS. This will not work if you haven’t done the domain and port forwarding steps, and you won’t get a website.
- Alright, let’s test! Go to
https://<your-domain>/windowsand see if you’re serving headscale properly.
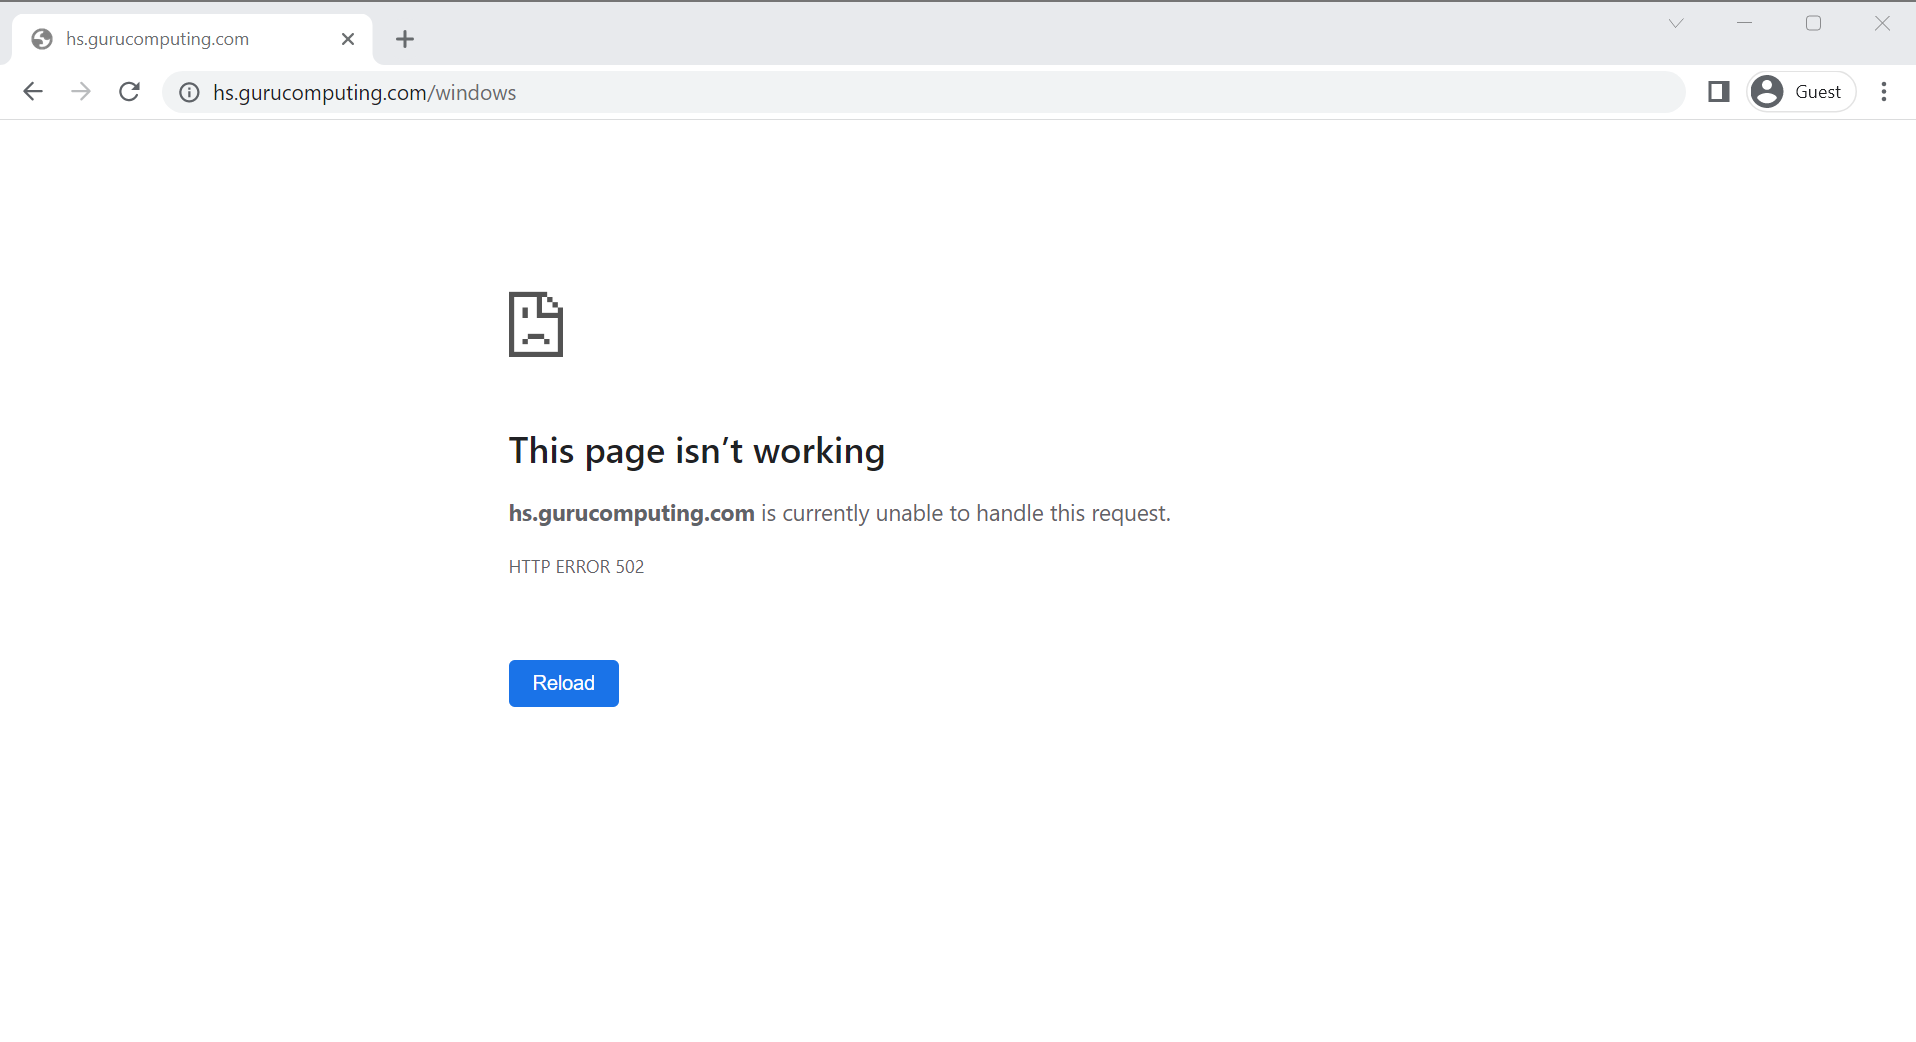
Hmm… No joy. Oh right! That’s because we need to add headscale to that new docker network so caddy can find it by the container name.
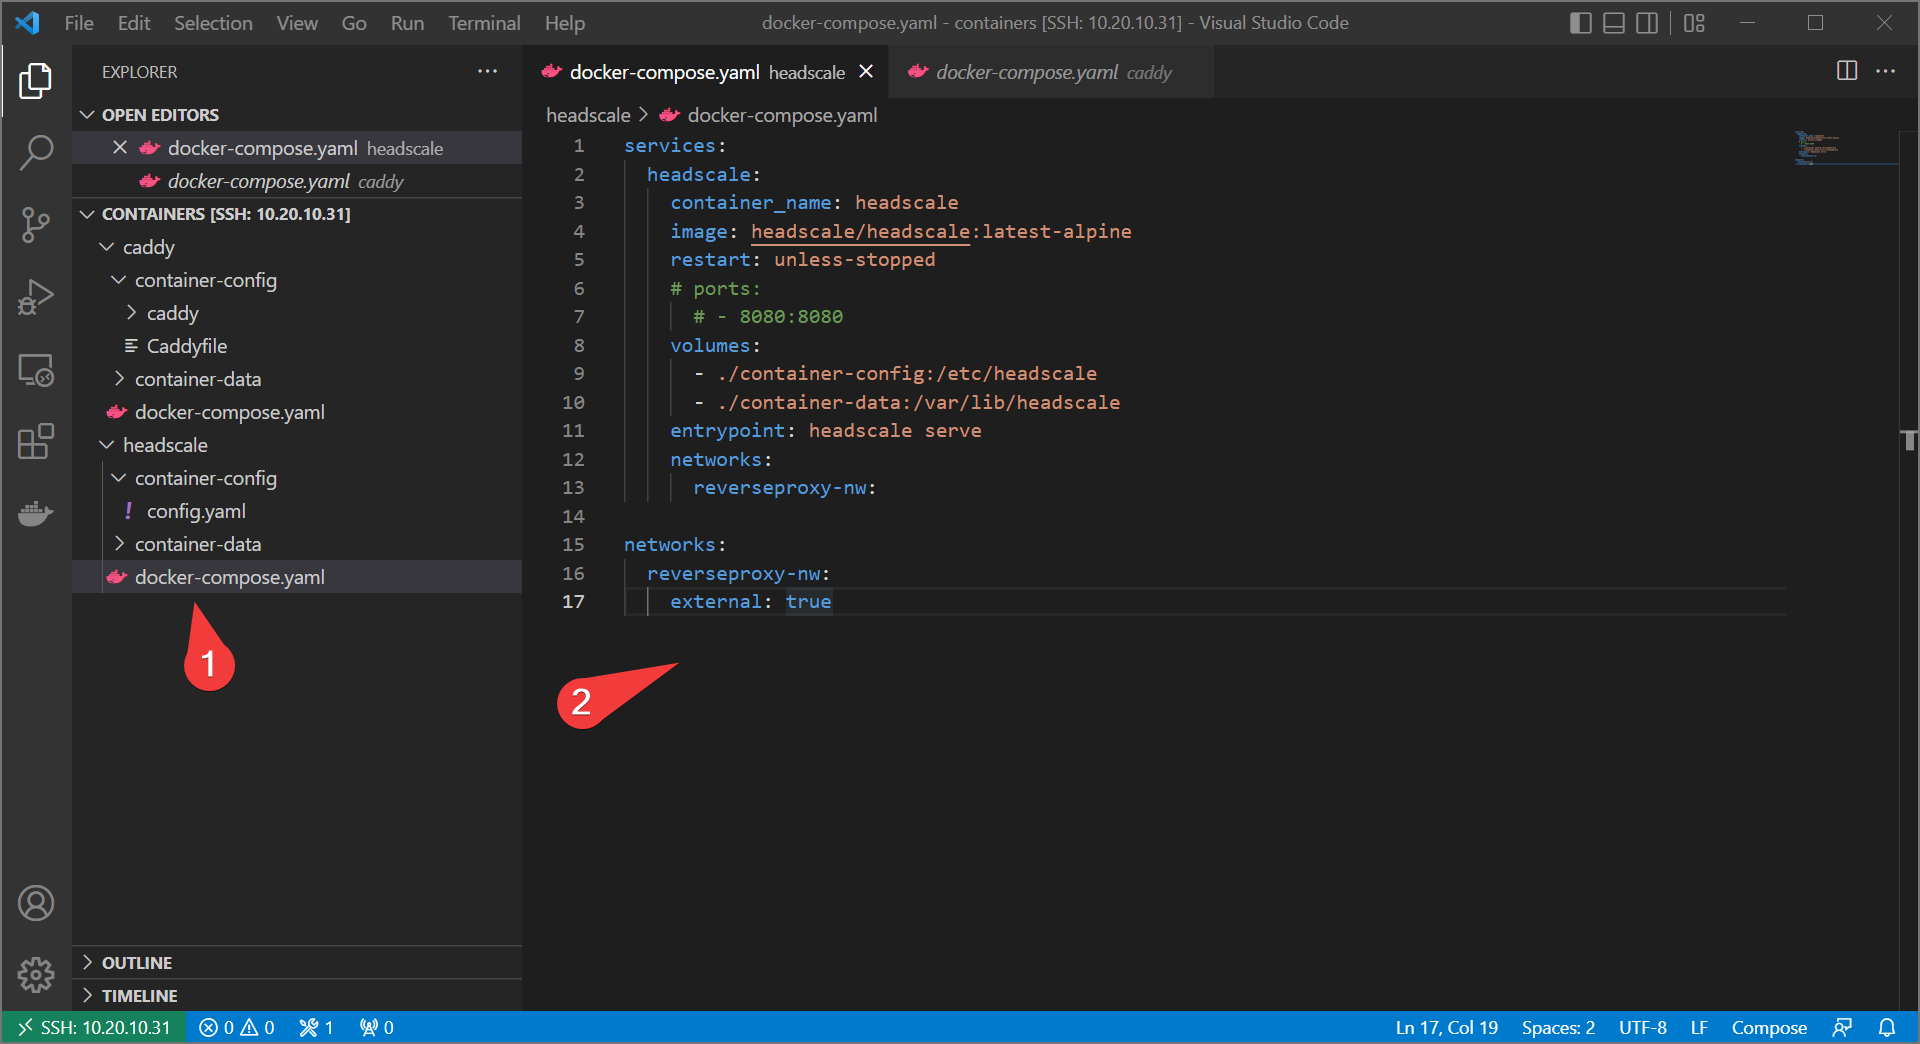
- Redo the headscale
docker-compose.yamlto resemble the following:
services:
  headscale:
    container_name: headscale
    image: headscale/headscale:latest-alpine
    restart: unless-stopped
    # ports:
      # - 8080:8080
    volumes:
      - ./container-config:/etc/headscale
      - ./container-data:/var/lib/headscale
    entrypoint: headscale serve
    networks:
      reverseproxy-nw:

networks:
  reverseproxy-nw:
    external: true
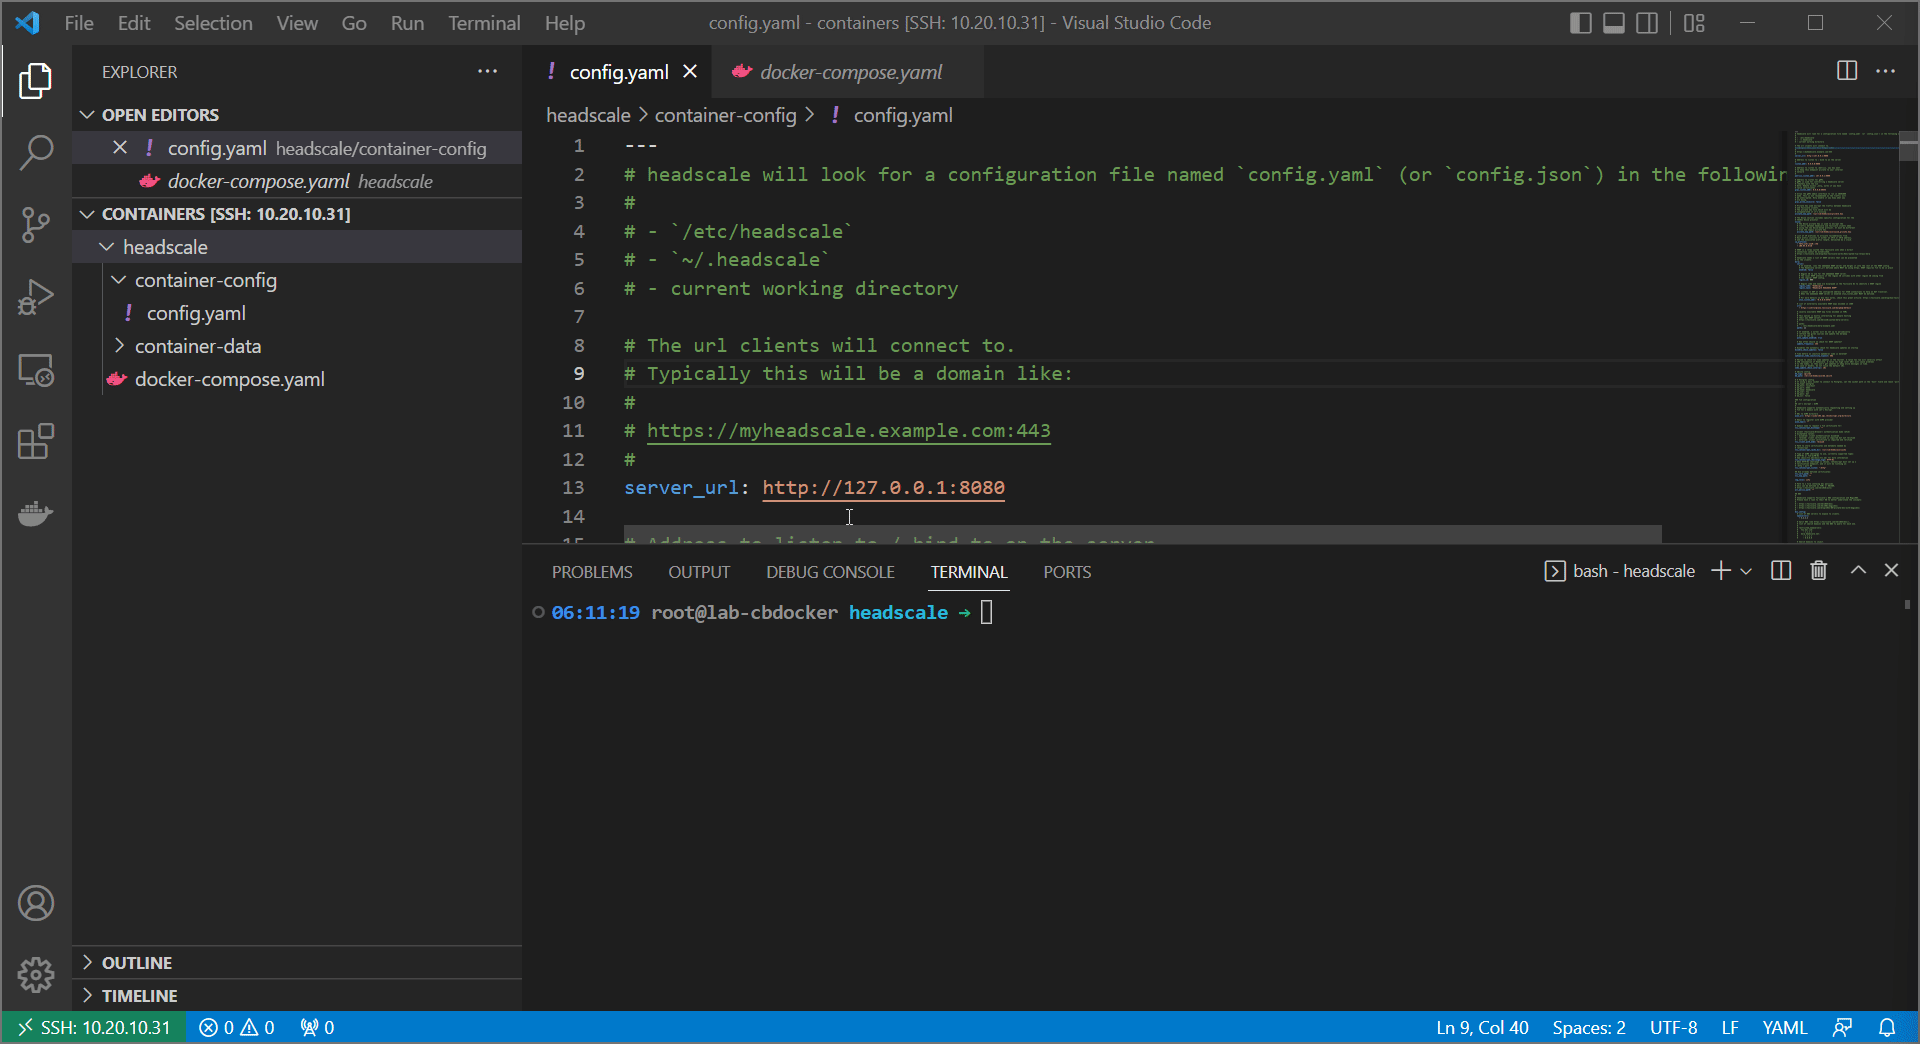
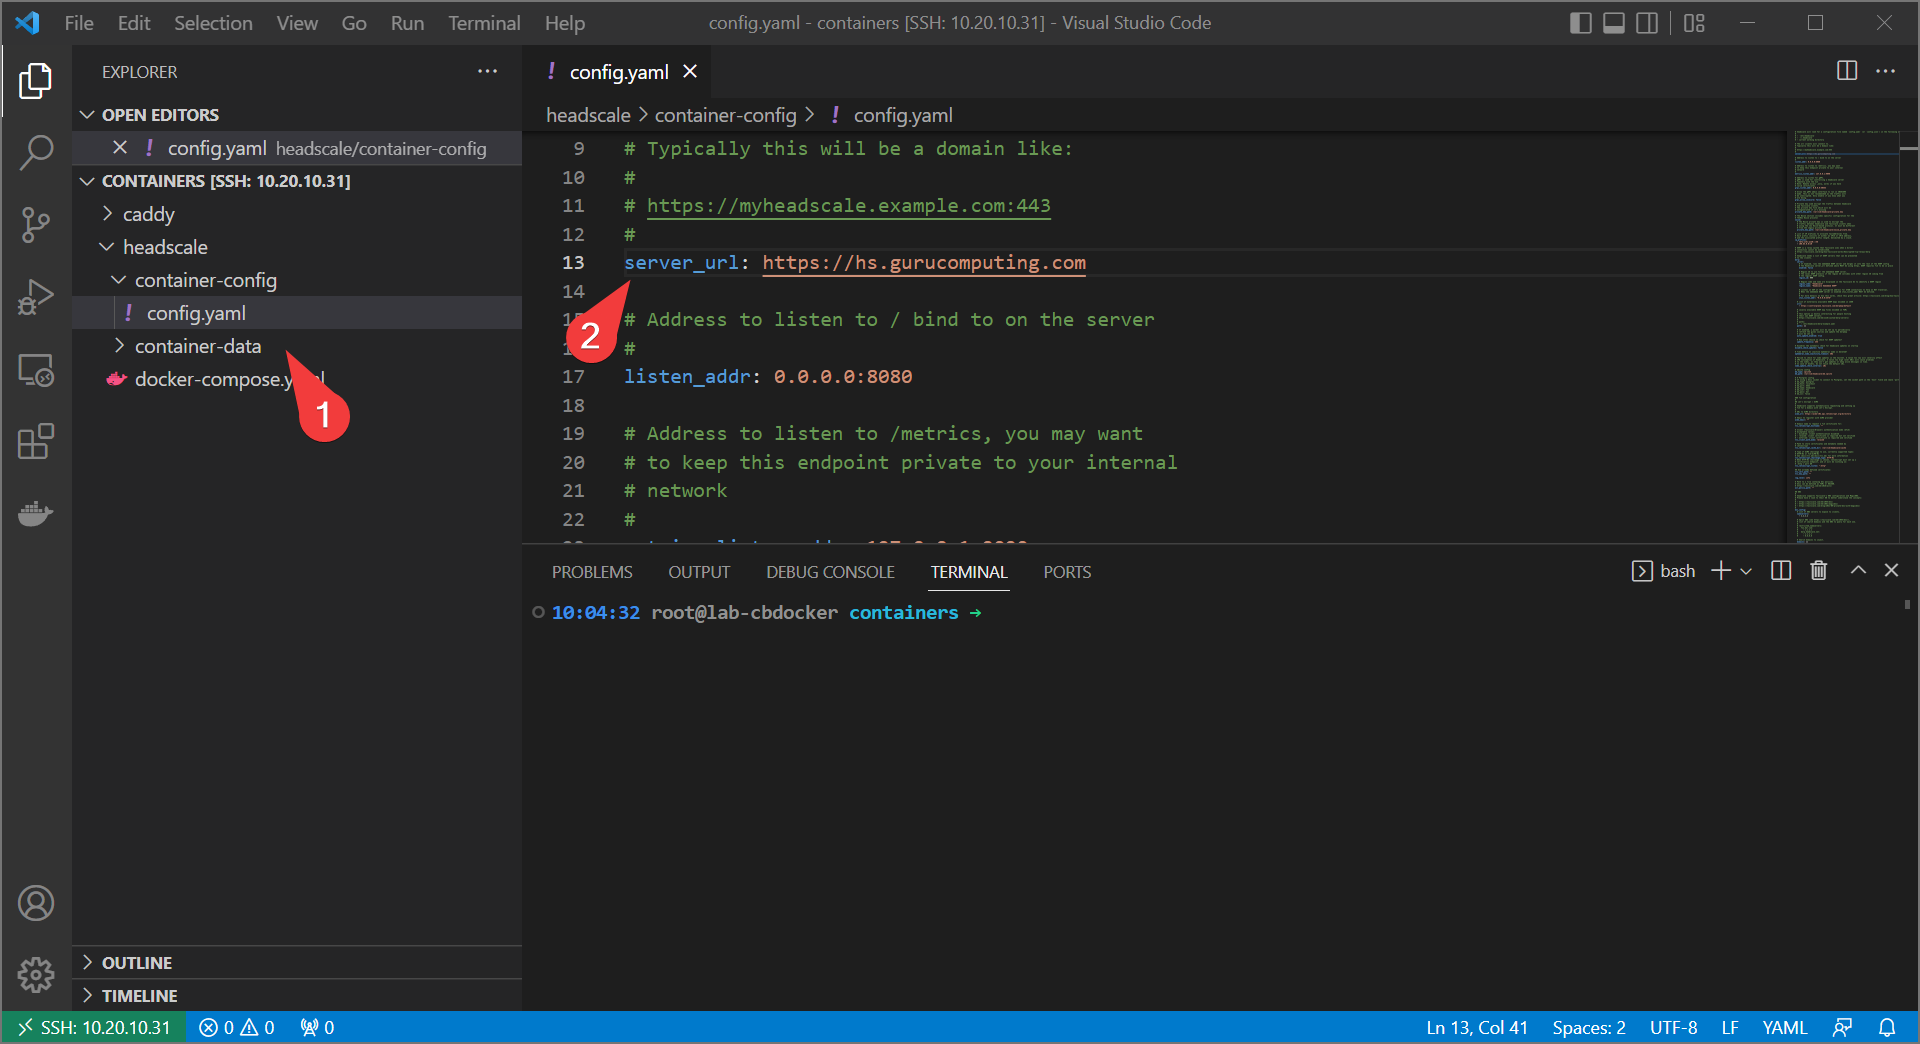
- Also, update the headscale
config.yamlfile with your new URL
- Rebuild headscale with:
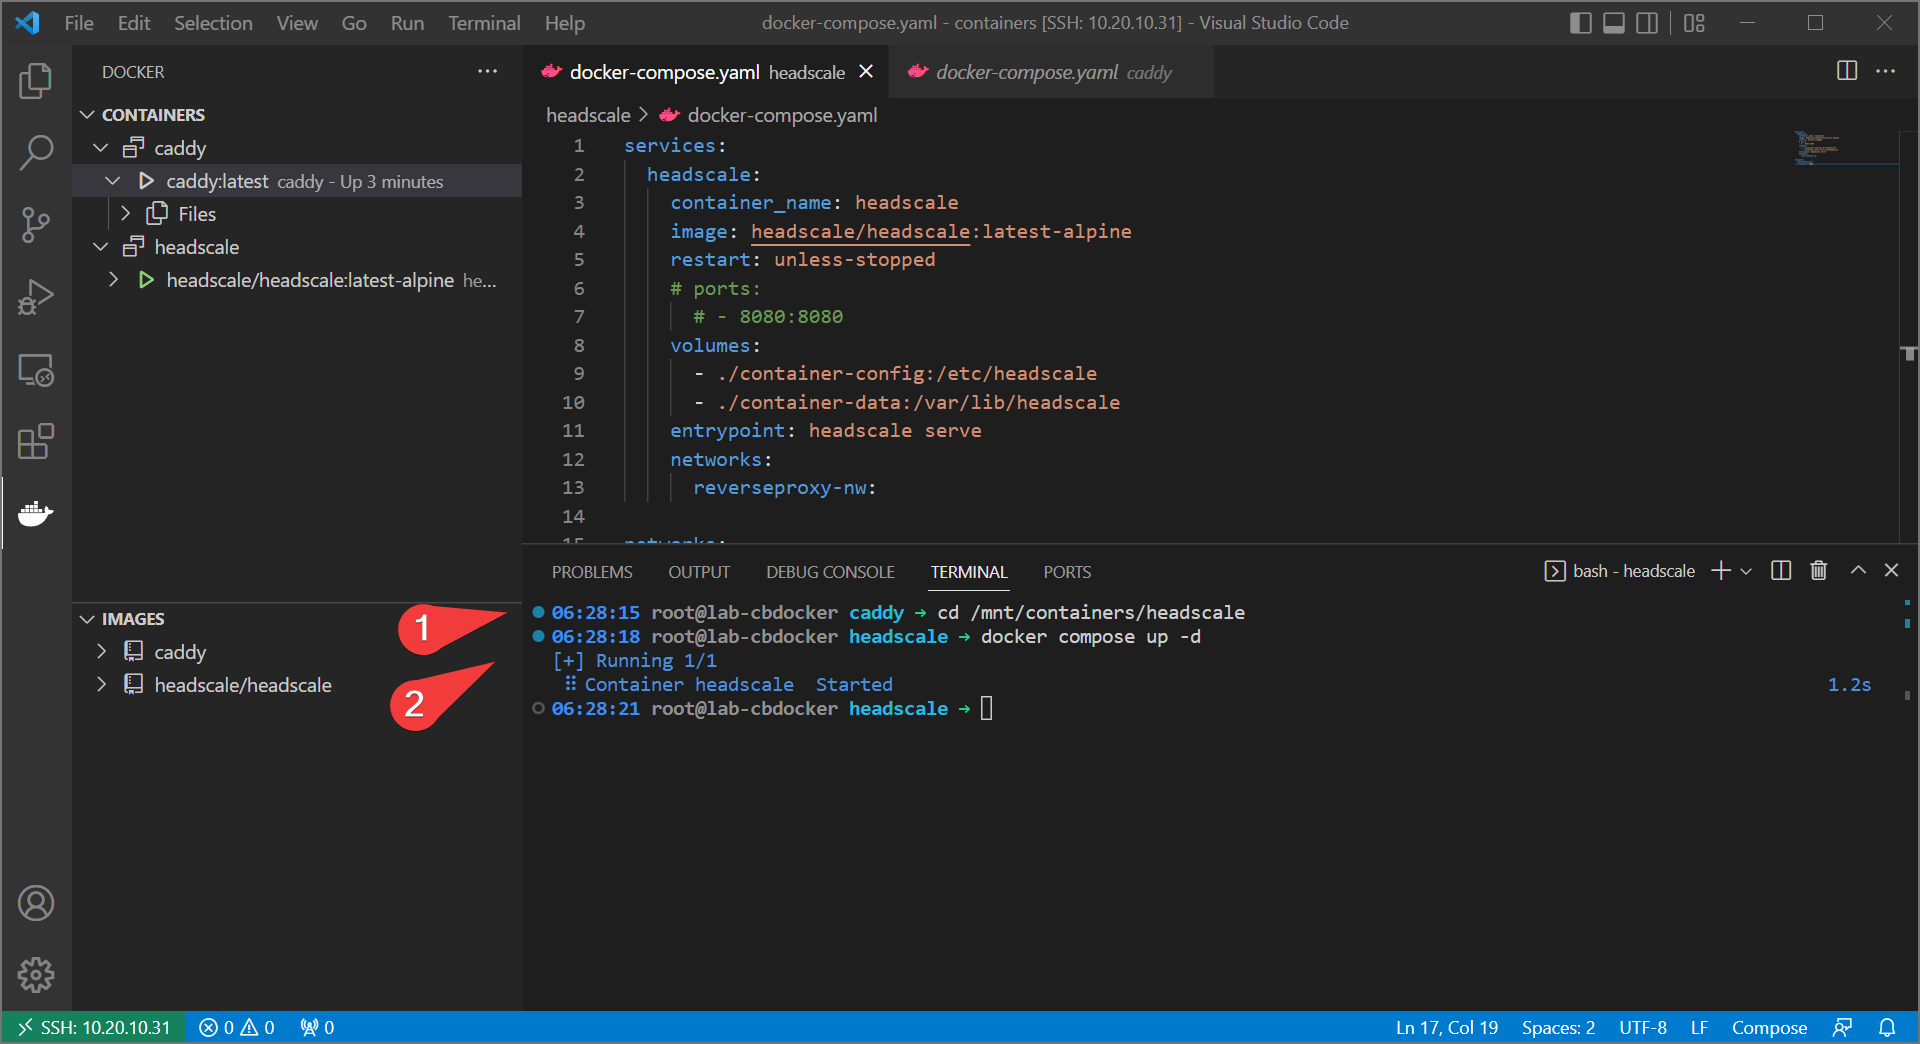
- Take Two!
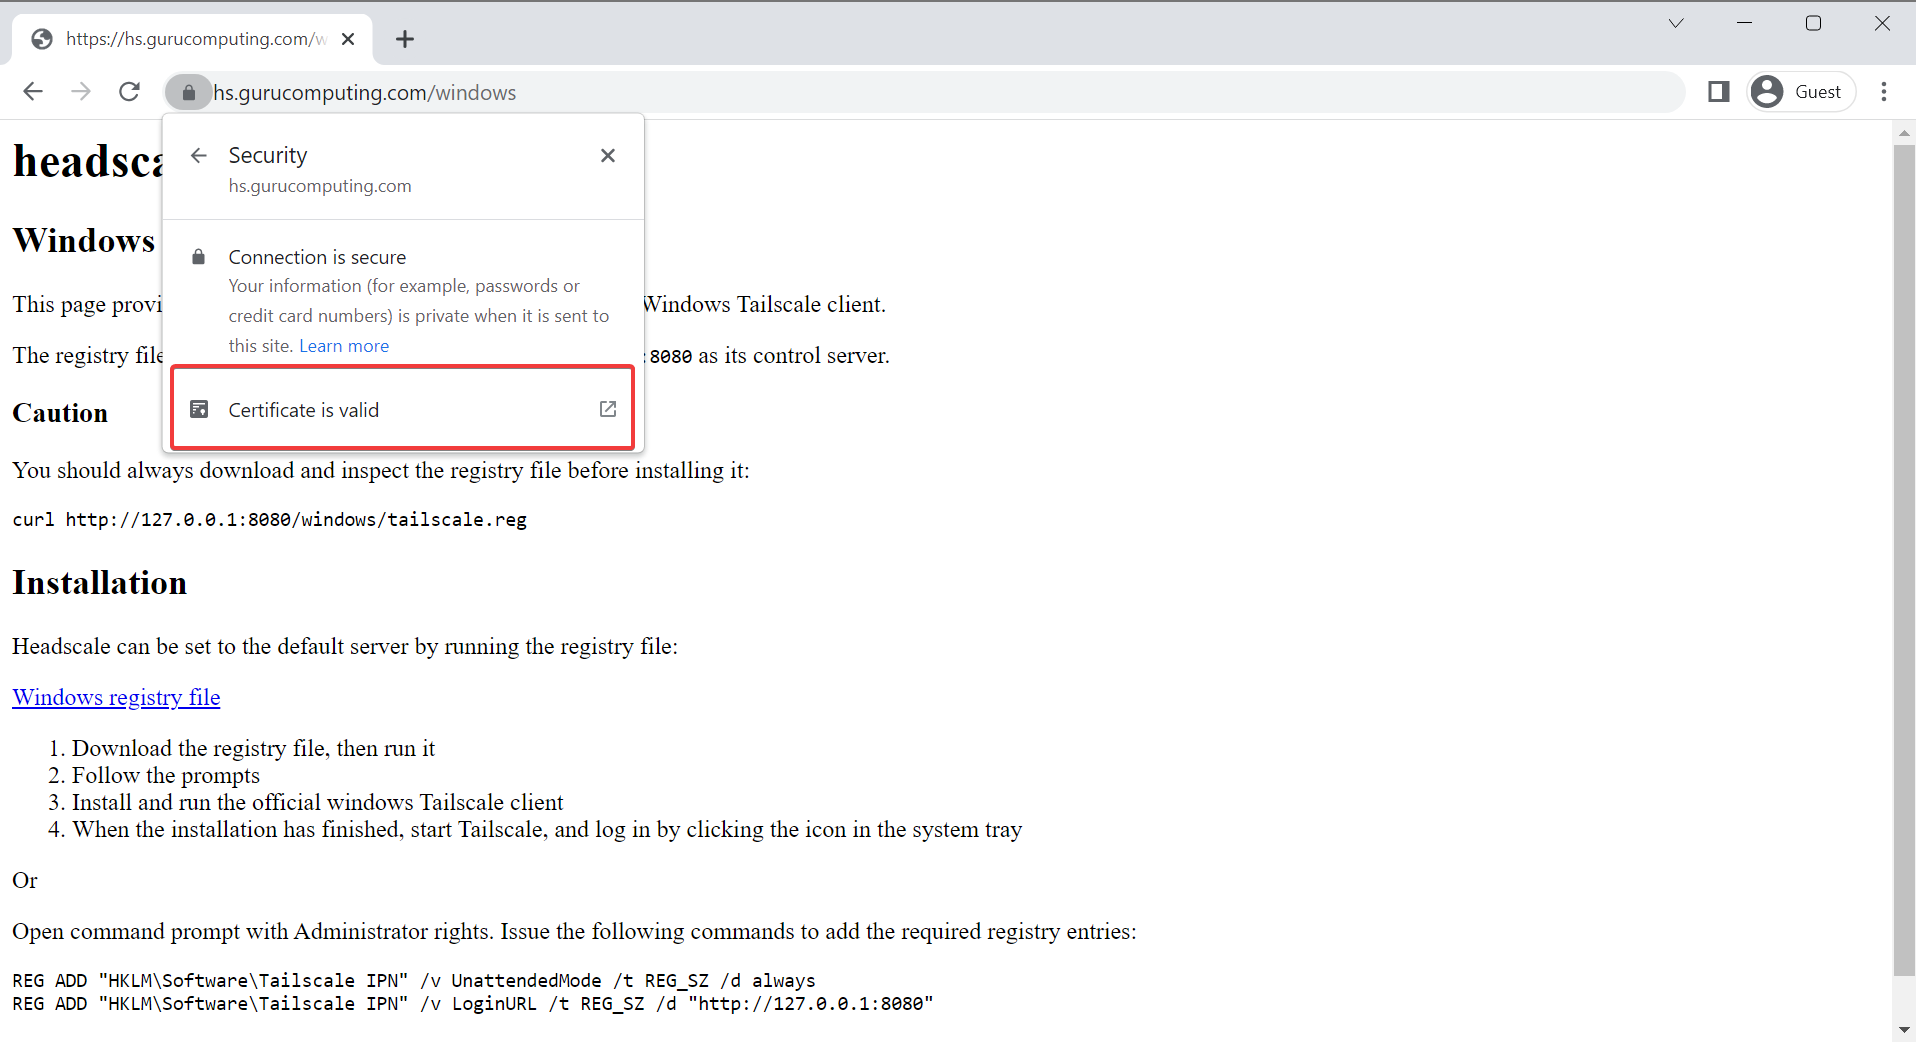
That’s better.
Moving On
Alright, we have a headscale instance now, and we’re serving it properly on a domain with correct certificates. Now, let’s actually try connecting a client to it! in 03-configuring-tailscale-clients.