Creating a Virtual NAS Appliance
Introduction
Generally the first step anyone makes in a homelab journey is sharing their files over the local network. This is typically using one of two protocols:
smb, the windows based file sharing protocolnfs, the linux based file sharing protocol
Good news is we can quite easily do both! Most people use a dedicated appliance for this: Synology is quite popular in the homelab community. I recommend it, synologies are great!
We’re going a bit more… manual in this guide.
Requirements
To follow this guide, you will need:
- A locally installed proxmox
- An attached (internal or external) storage device
TL;DR
In this section, we will:
- Create a VM and physically attach a hard-disk to the VM
- Install a base ubuntu virtual machine for our NAS OS
Choosing a NAS Operating System
Answering this question is surprisingly difficult. There’s a lot of options. A lot of options. Let’s list them!
- TrueNAS (BSD/ZFS based, high minimum requirements)
- Rockstor (OpenSUSE/BTRFS based)
- OpenMediaVault (debian/ext4 based)
- Unraid (slackware/ext4 based)
- XPEnology (synology clone, legally questionable)
- Ubuntu with cockpit plugins (ubuntu based, very flexible)
With the exception of that last option, every one of these systems makes opinionated decisions about how your data is stored. For a homelab we want flexibility: if we didn’t, we would just be using a Synology appliance (still a good idea!) So let’s go with ubuntu and cockpit!
Downloading the ISO
Well by default, a Virtual NAS appliance is.. well… virtual. we’re leaving Proxmox to do what it does best, and installing a new operating system for our appliance. This follows the philosophy of process isolation: Letting a device do only one thing and do it well.
First we need to fetch the ISO installer for ubuntu. We can do so by directly downloading ubuntu server 20.04 LTS (which is the current version supported by 45-drives).
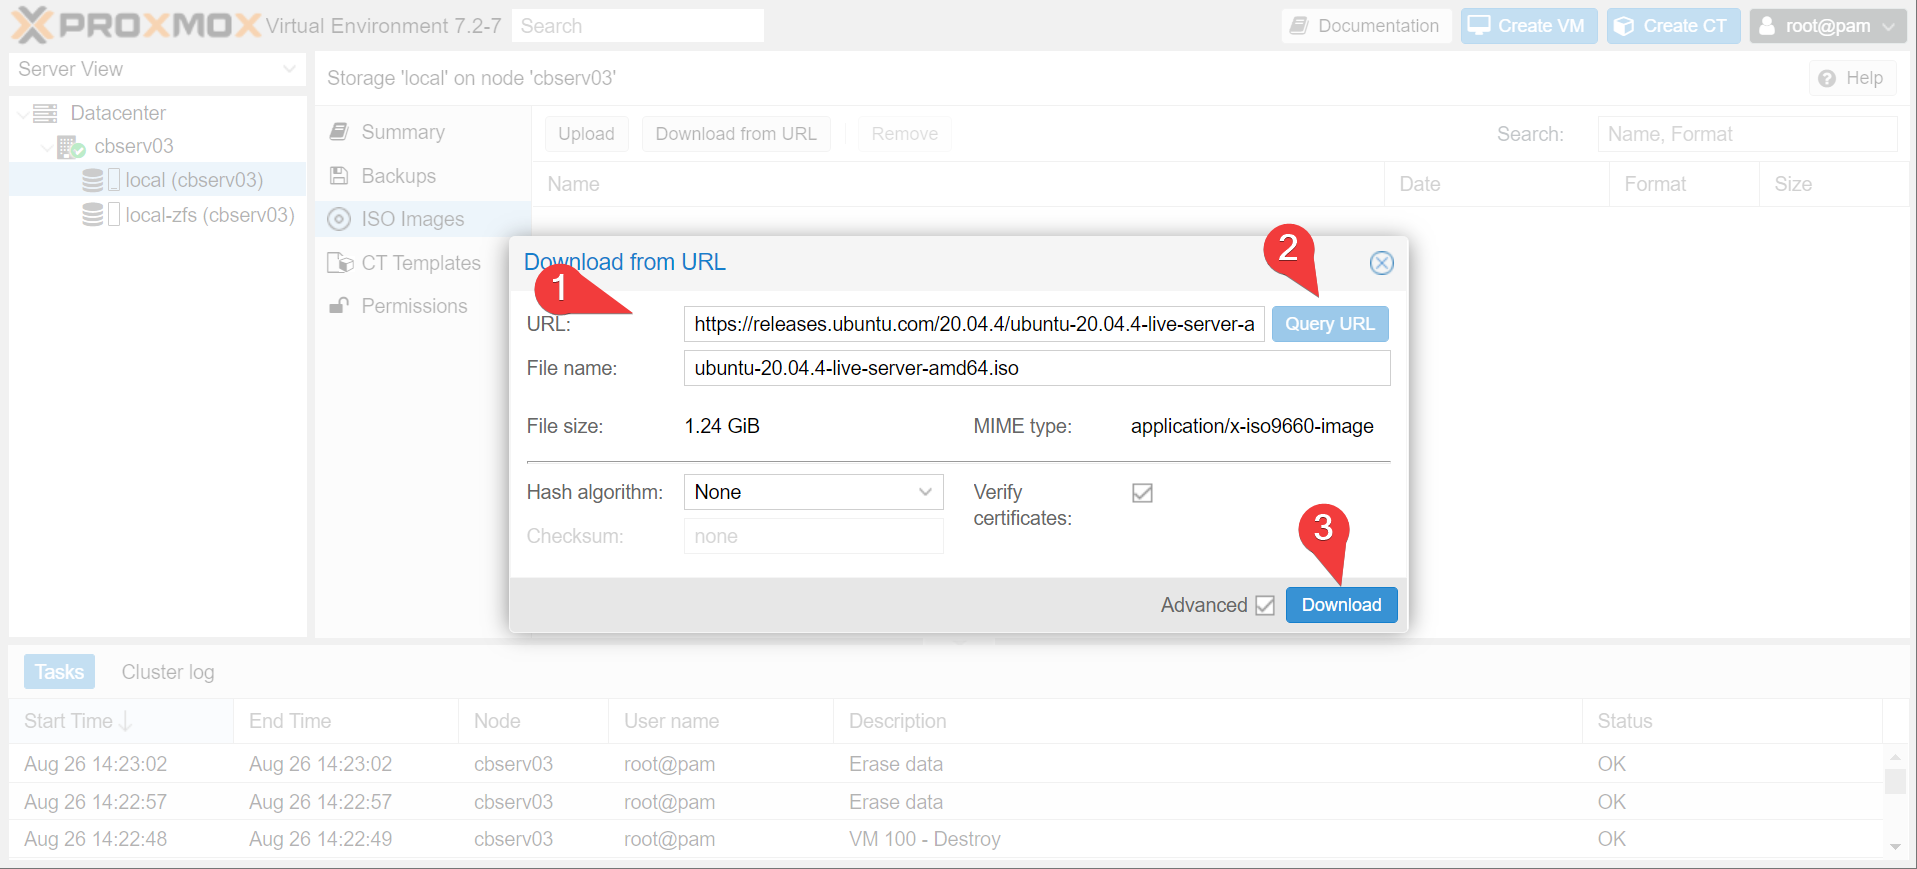
- Navigate to the
localstorage section of your proxmox node and choosedownload from urlunderiso images
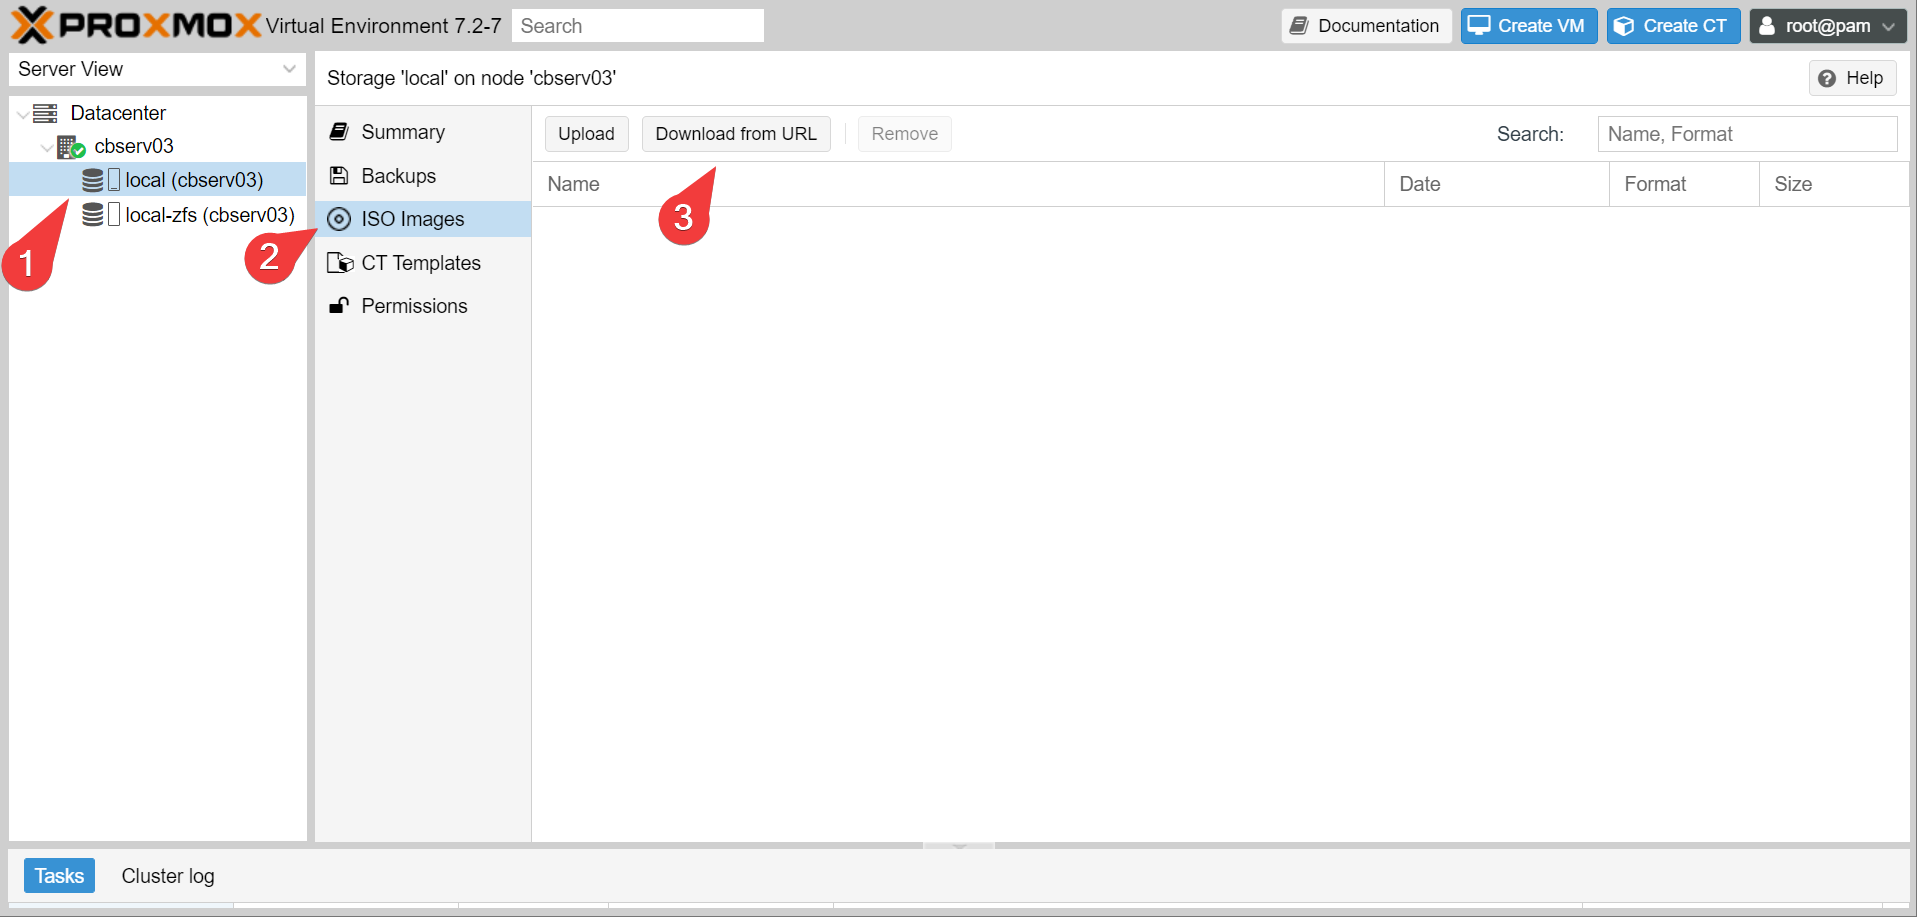
- Query and download the ubuntu ISO (currently
https://releases.ubuntu.com/20.04.4/ubuntu-20.04.4-live-server-amd64.iso)
Installing Ubuntu
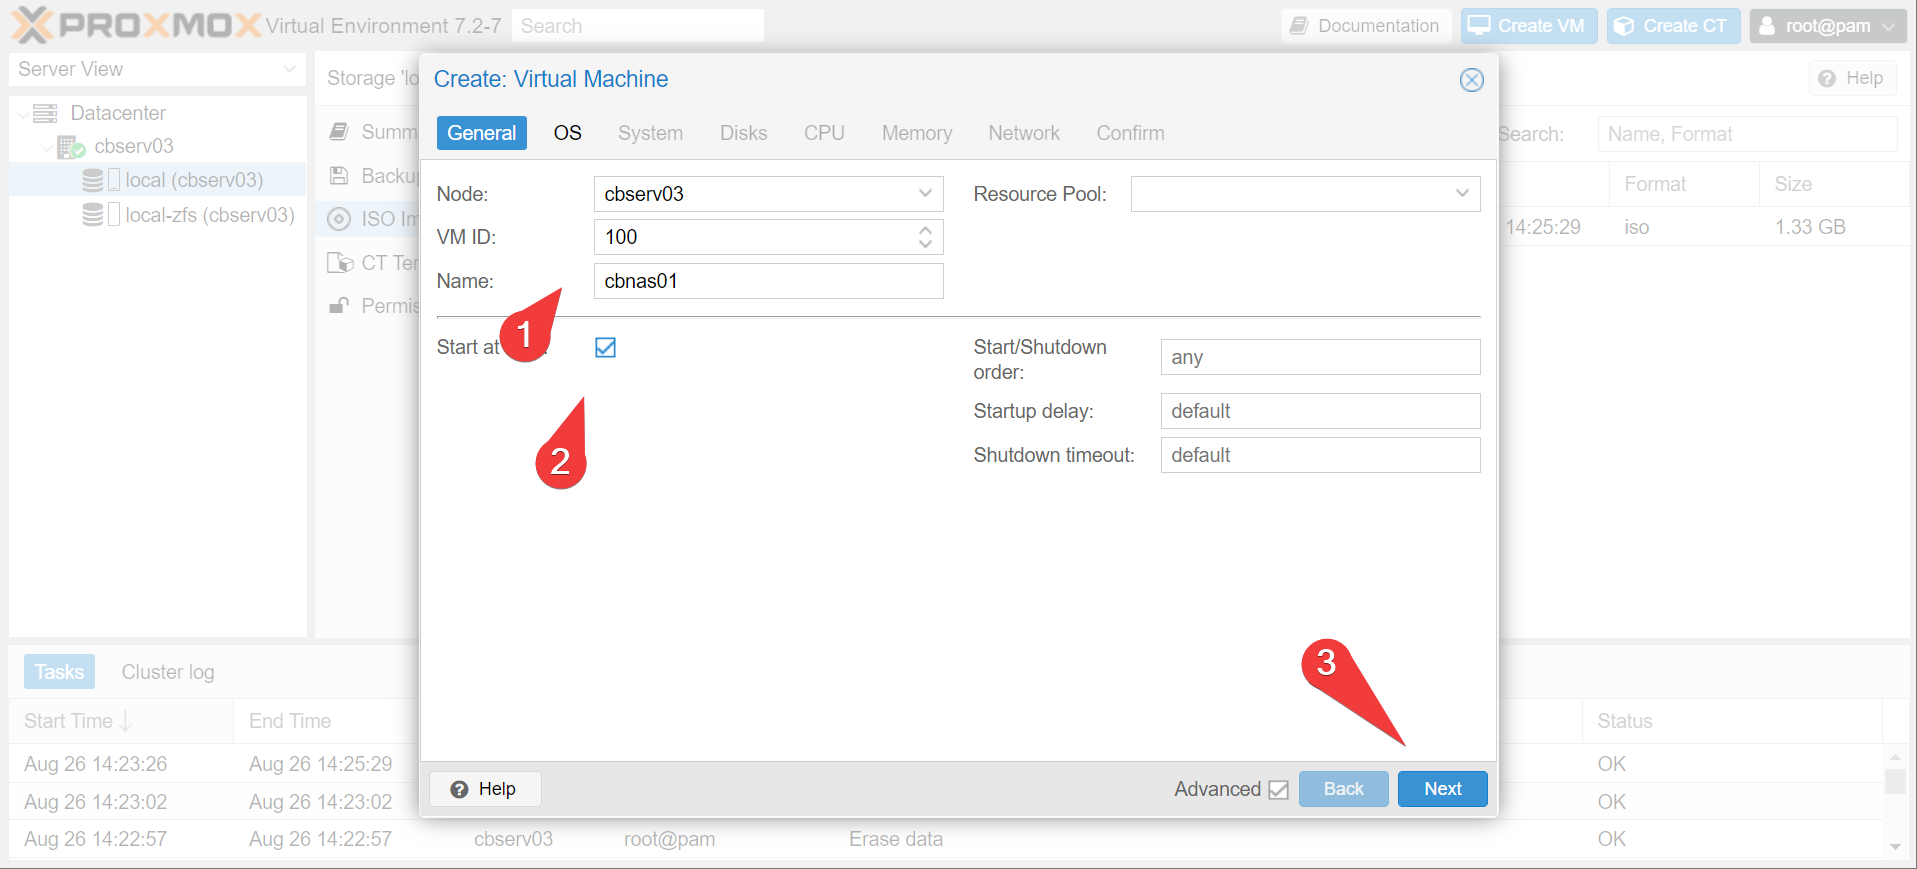
Once the ISO is downloaded, you’ll have to create a virtual machine:
- Choose
Create VMat the top and give the OS a name
Info
You’ll notice a Create CT option there, which is to create a container (as opposed to a VM). We’ll come back to that, but containers don’t interact nicely with NFS and drive passthrough so we’ll make this a virtual machine
- Choose the ISO you just downloaded, and head
next
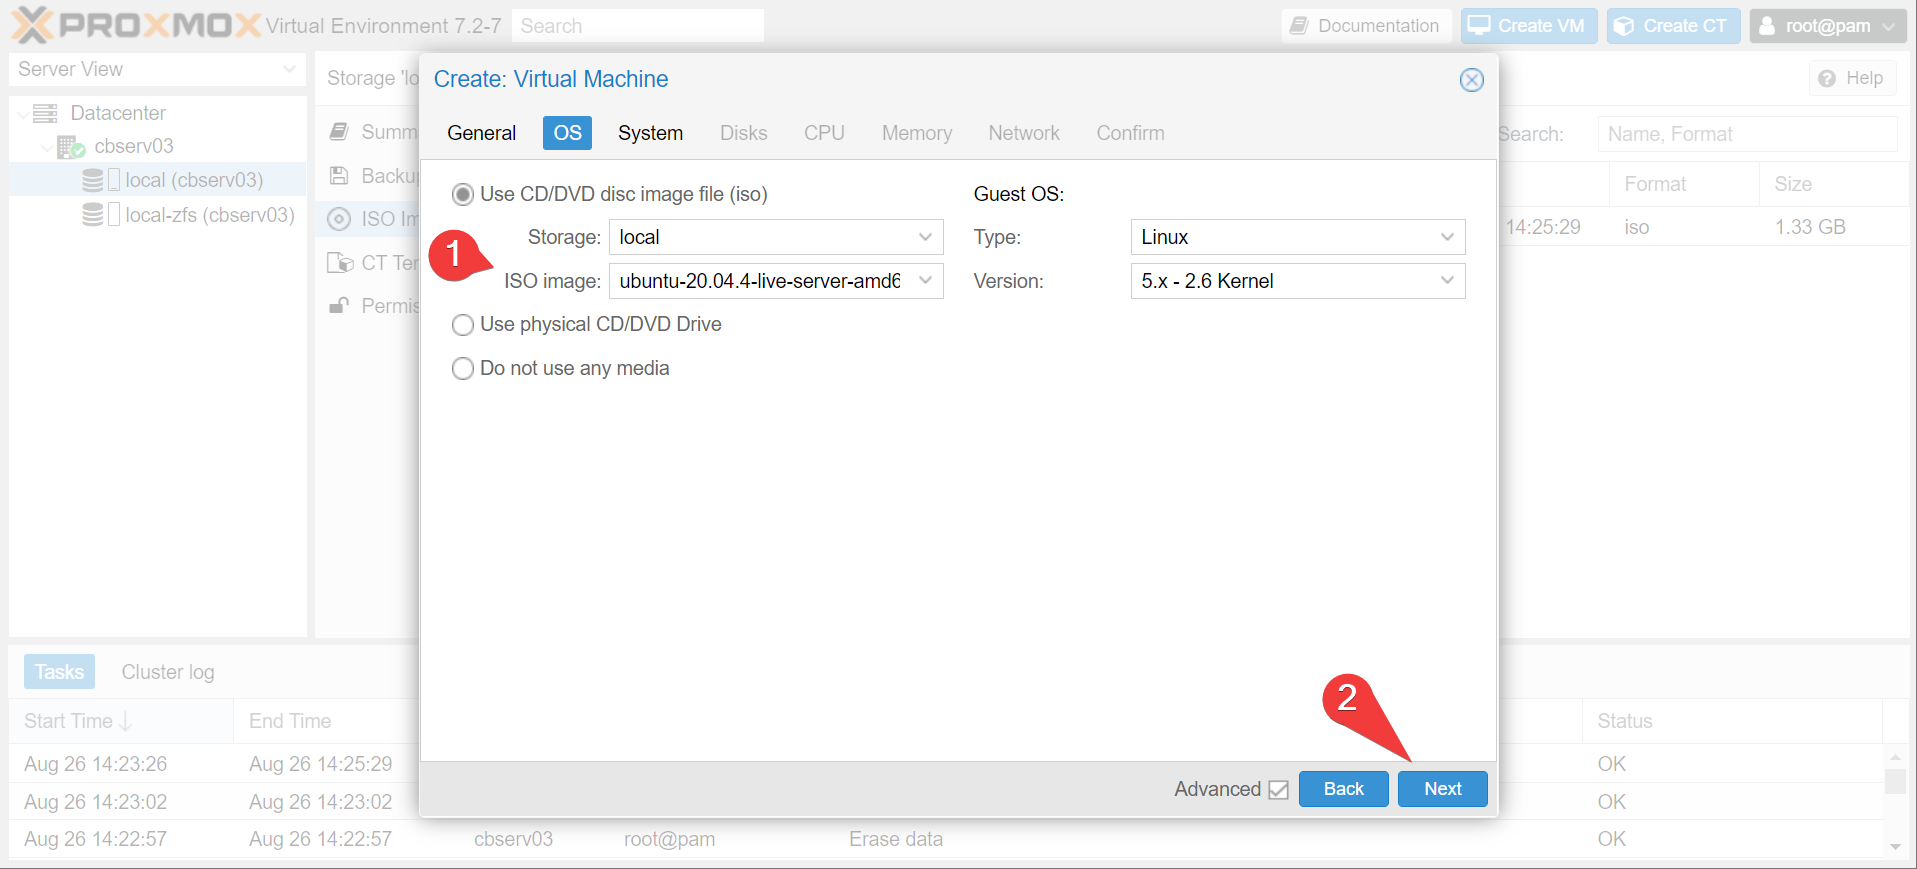
- Include the
Qemu Agentin the next screen
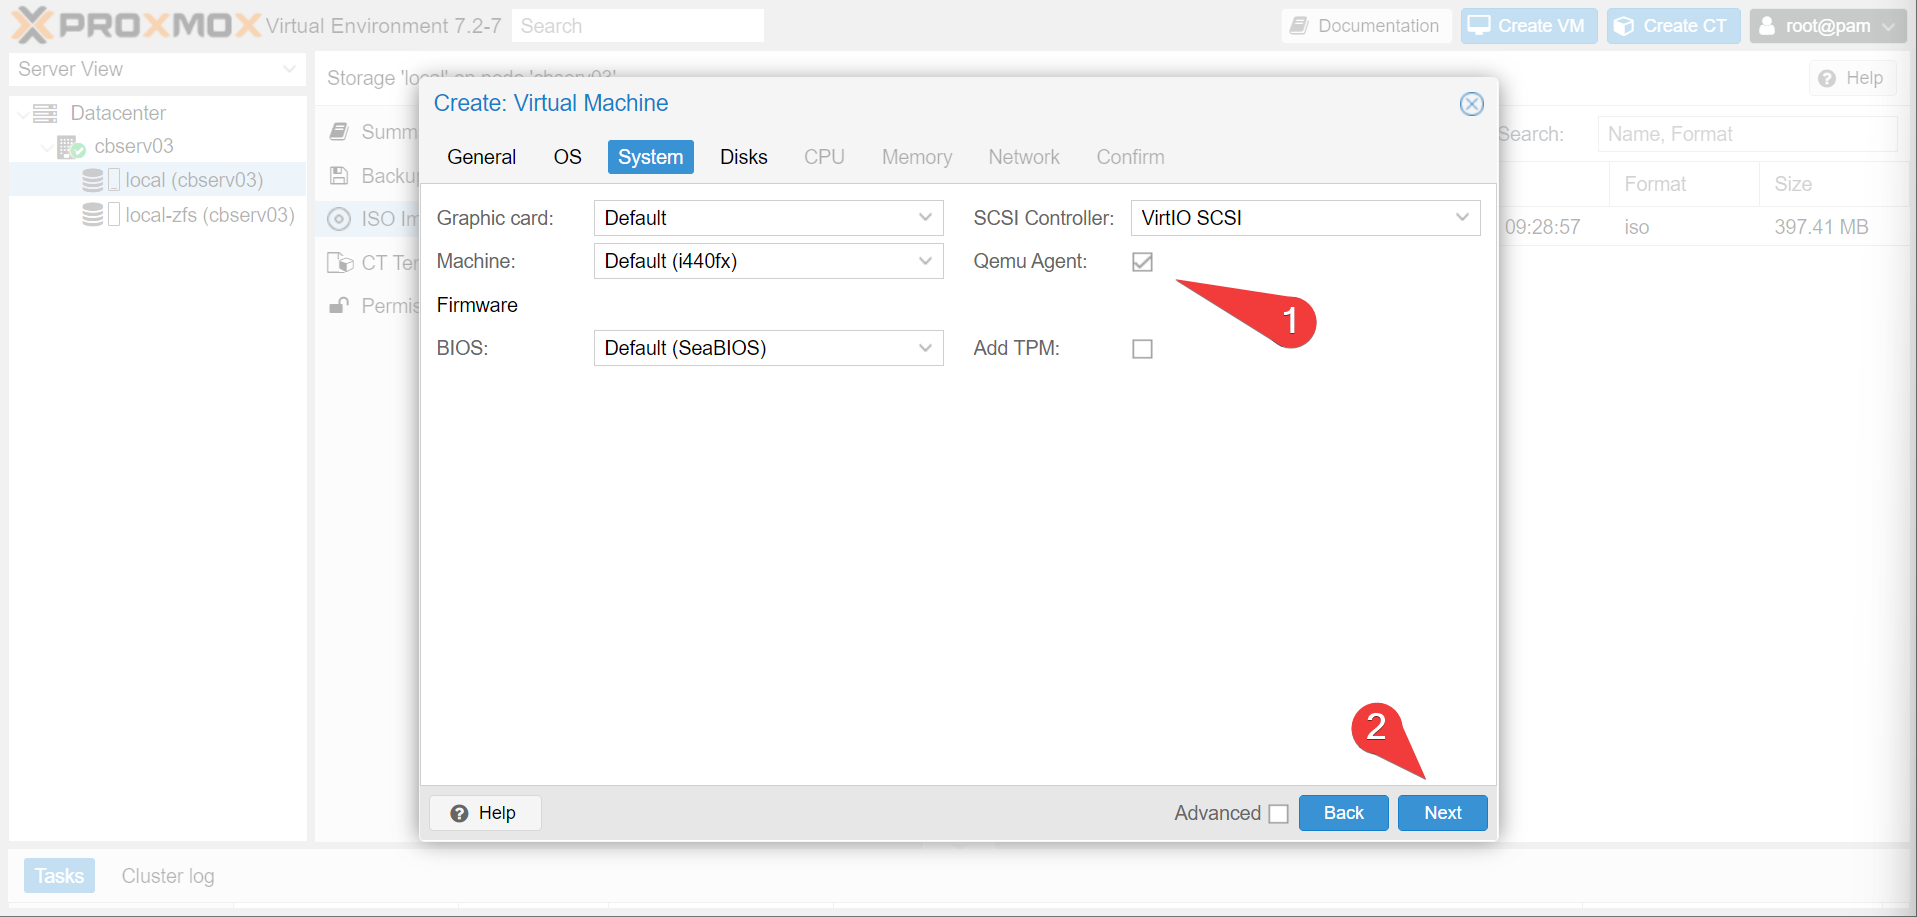
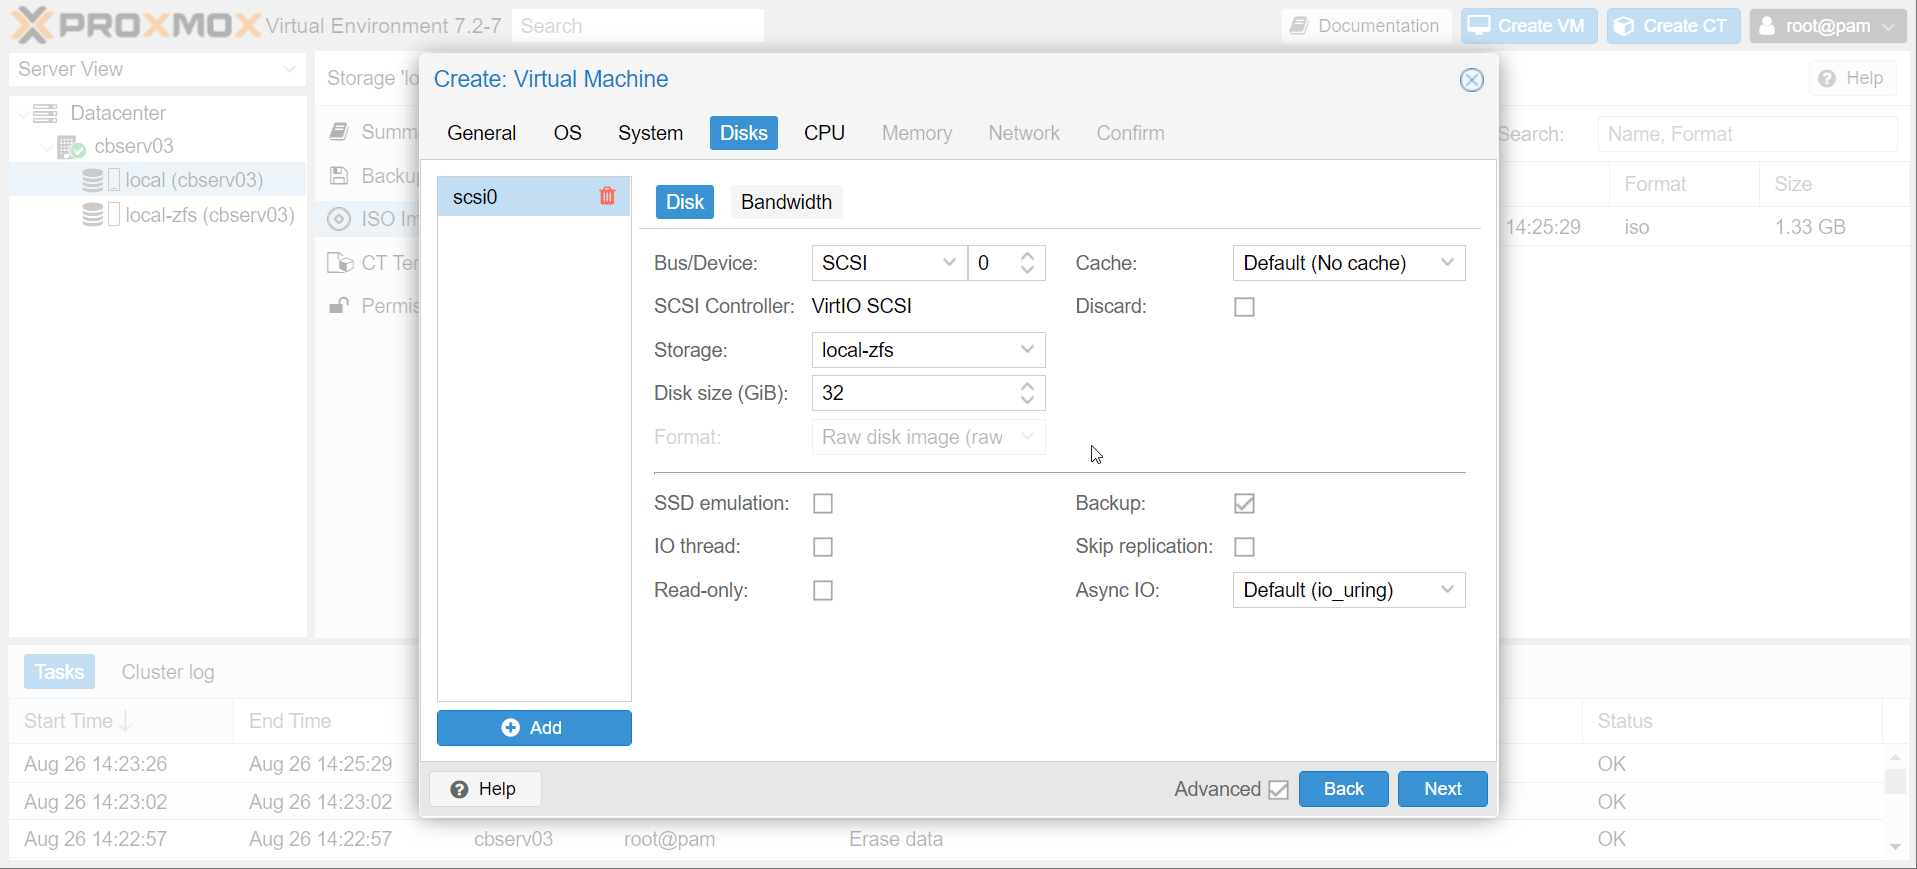
next-next-nextyour way through. The defaults should be fine (1cpu and 2gb of ram, a fileshare doesn’t require much resources). Now you have a Virtual Machine!
Attaching a Hard-Disk
Now we need to start attaching your NAS storage. This can be done in one of two ways:
- Passing through the individual drives (better if you’re using on board/passthrough SATA connectors)
- Passing through the whole drive controller (better if you’re using a hardware RAID controller)
Info
To pass through a RAID card, you need to enable IOMMU (if your device supports it). You can read up on that here.
We’re using individual drives.
Info
You may want to install ubuntu on the VM first before attaching the drives just to avoid any accidental erasure. For brevity we’re gonna do it now.
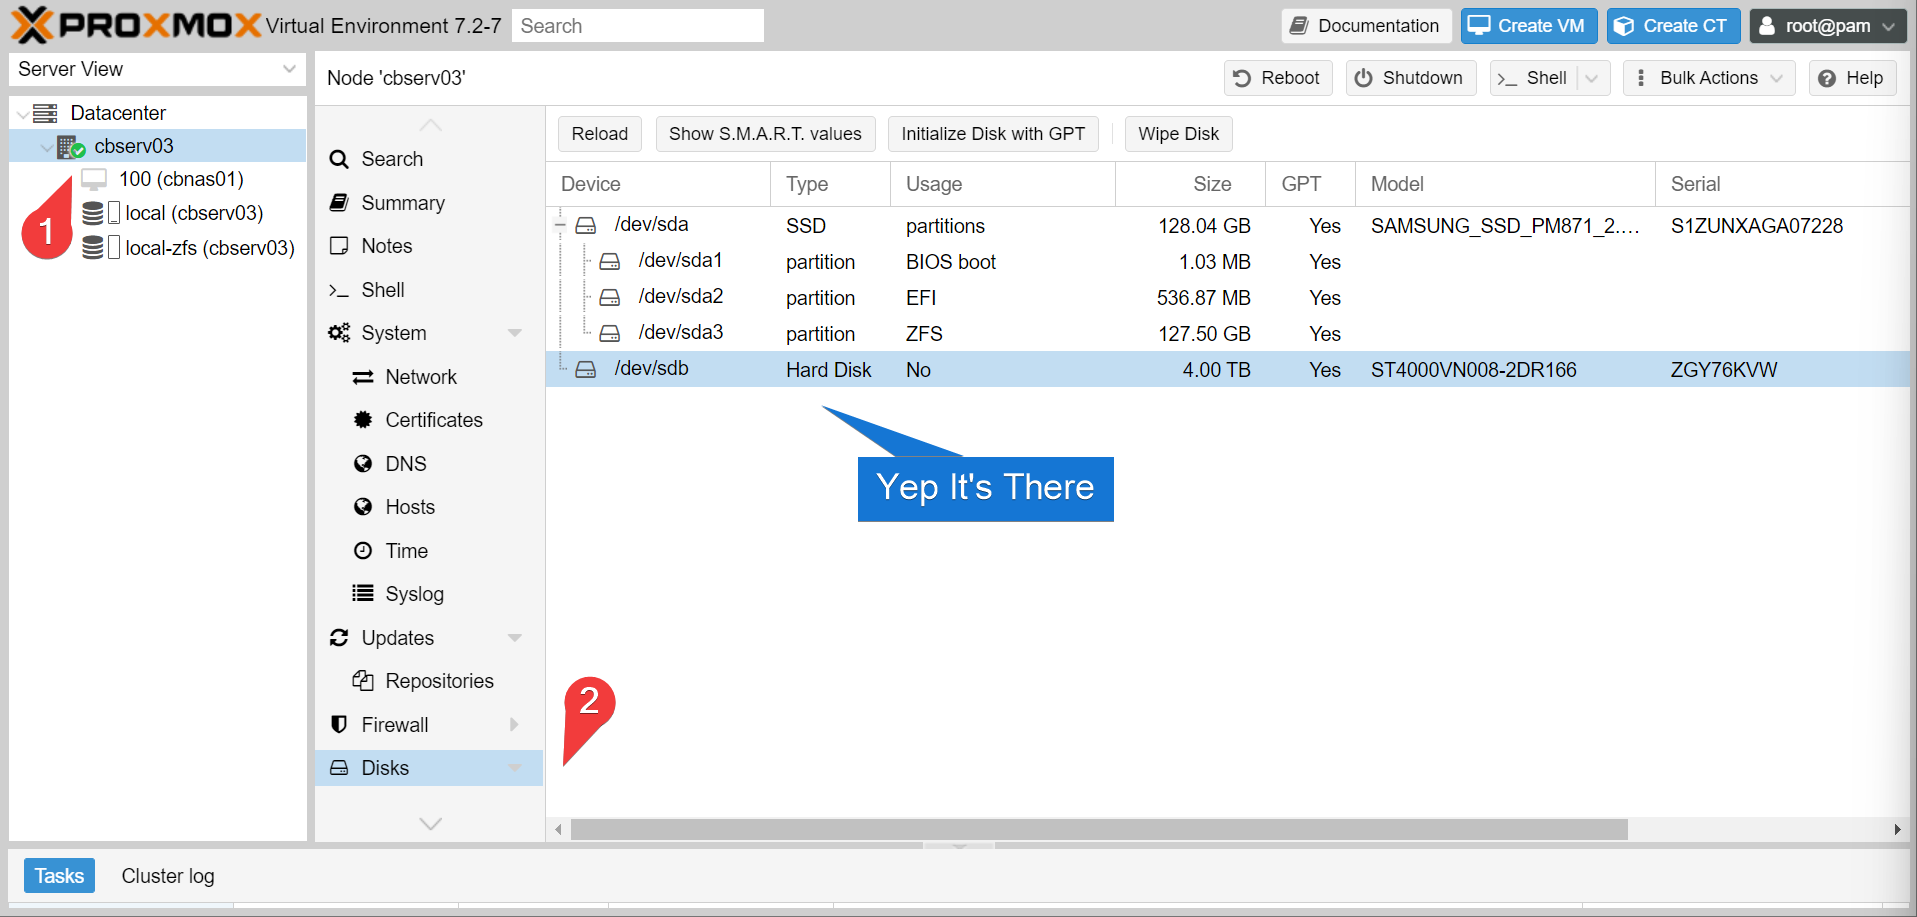
- Make sure your drive is actually present on the host. You can check this under
node→disks
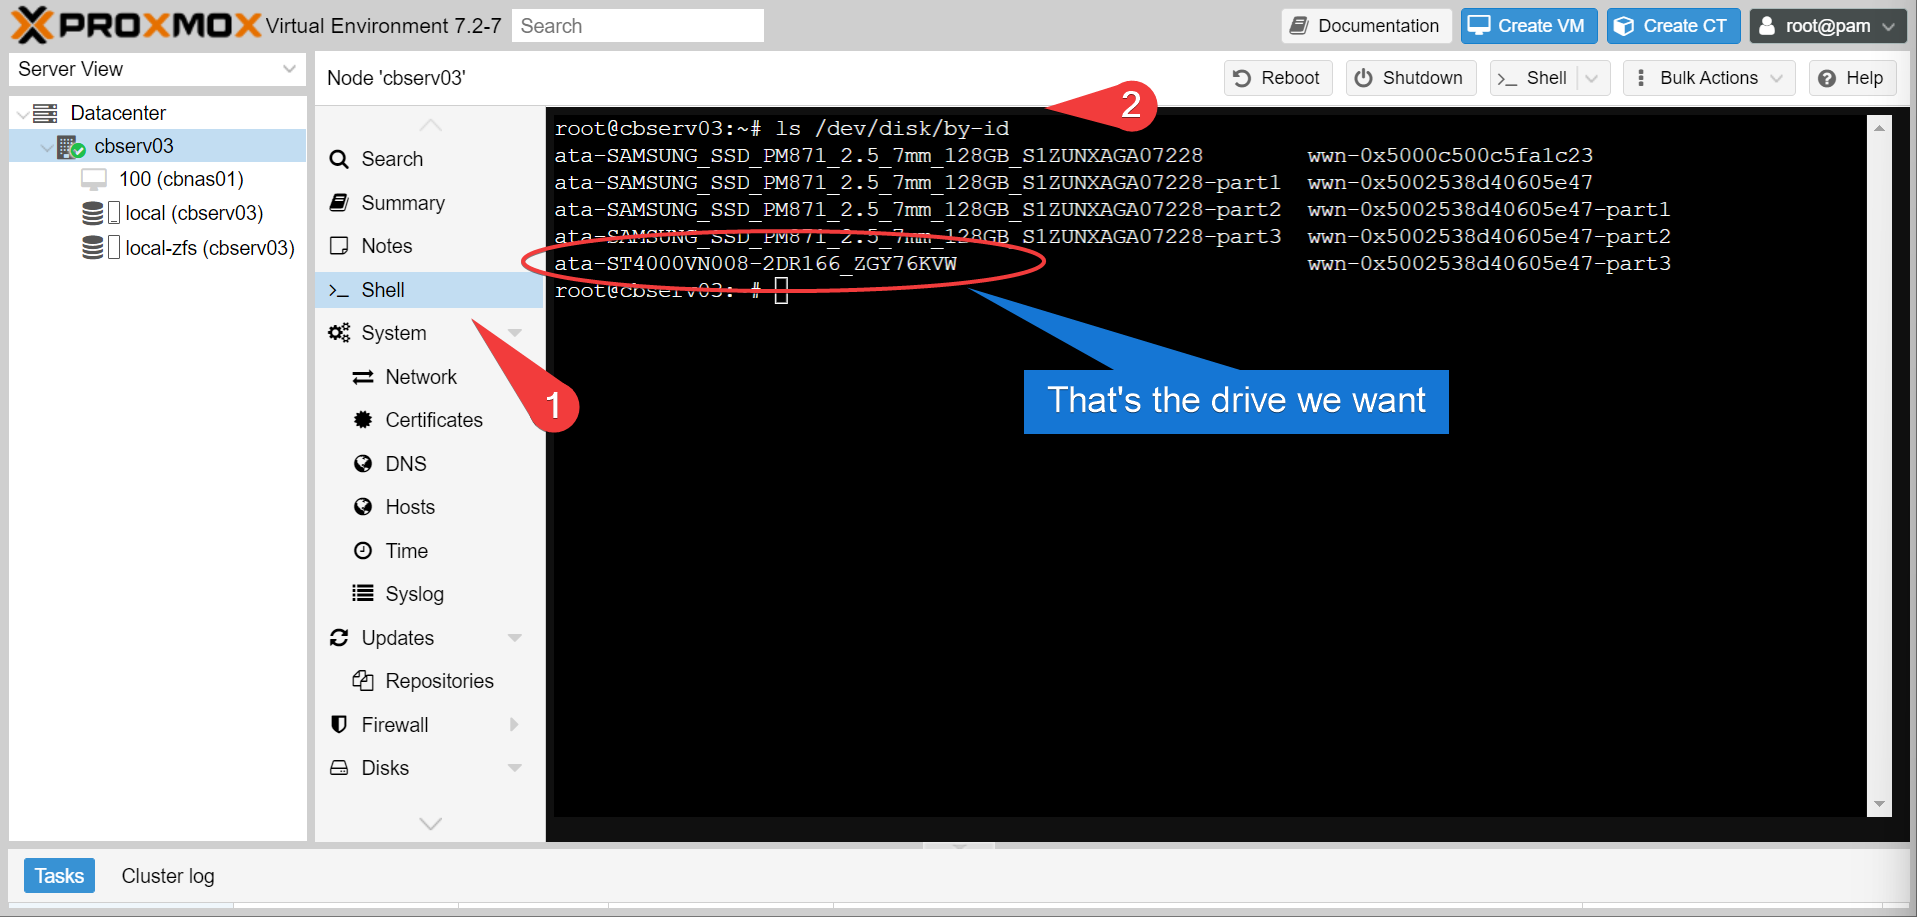
- Great, let’s pass it through. choose the
shelloption and identify your drive by running:ls /dev/disk/by-id
- We can then attach that disk by running
qm set <vm ID> <bus number> <full drive path>

- We can confirm that it’s attached by looking at the VM under
cbserv03
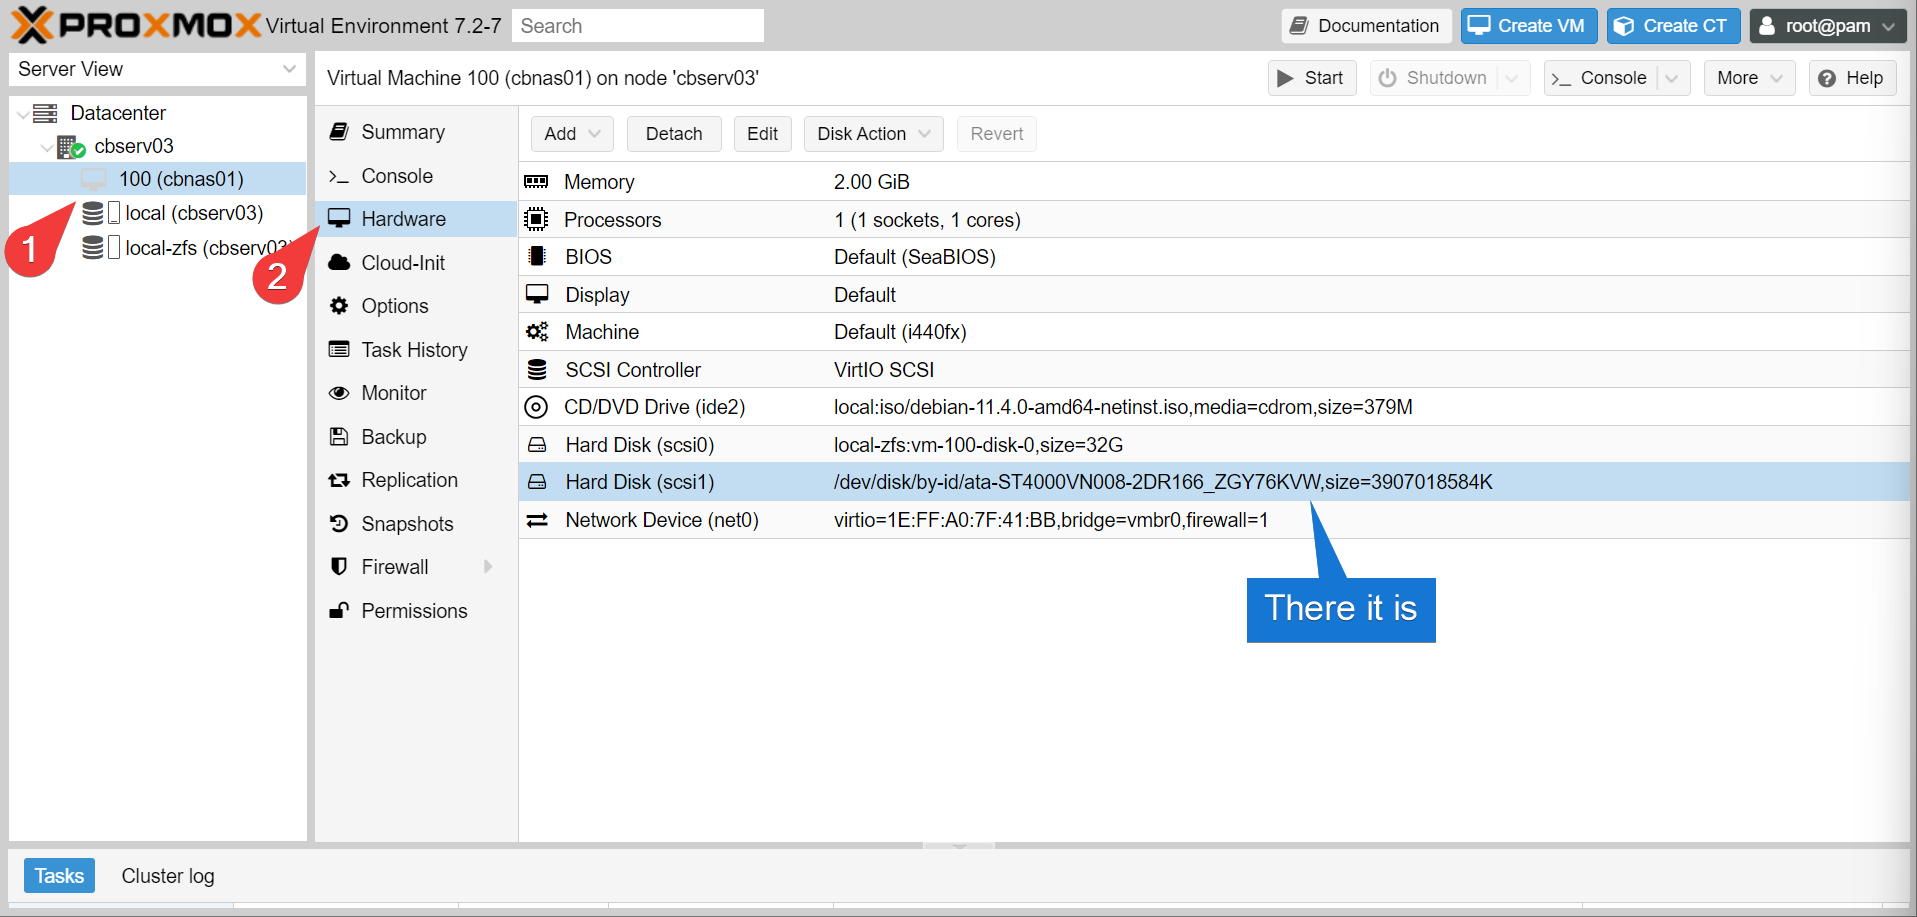
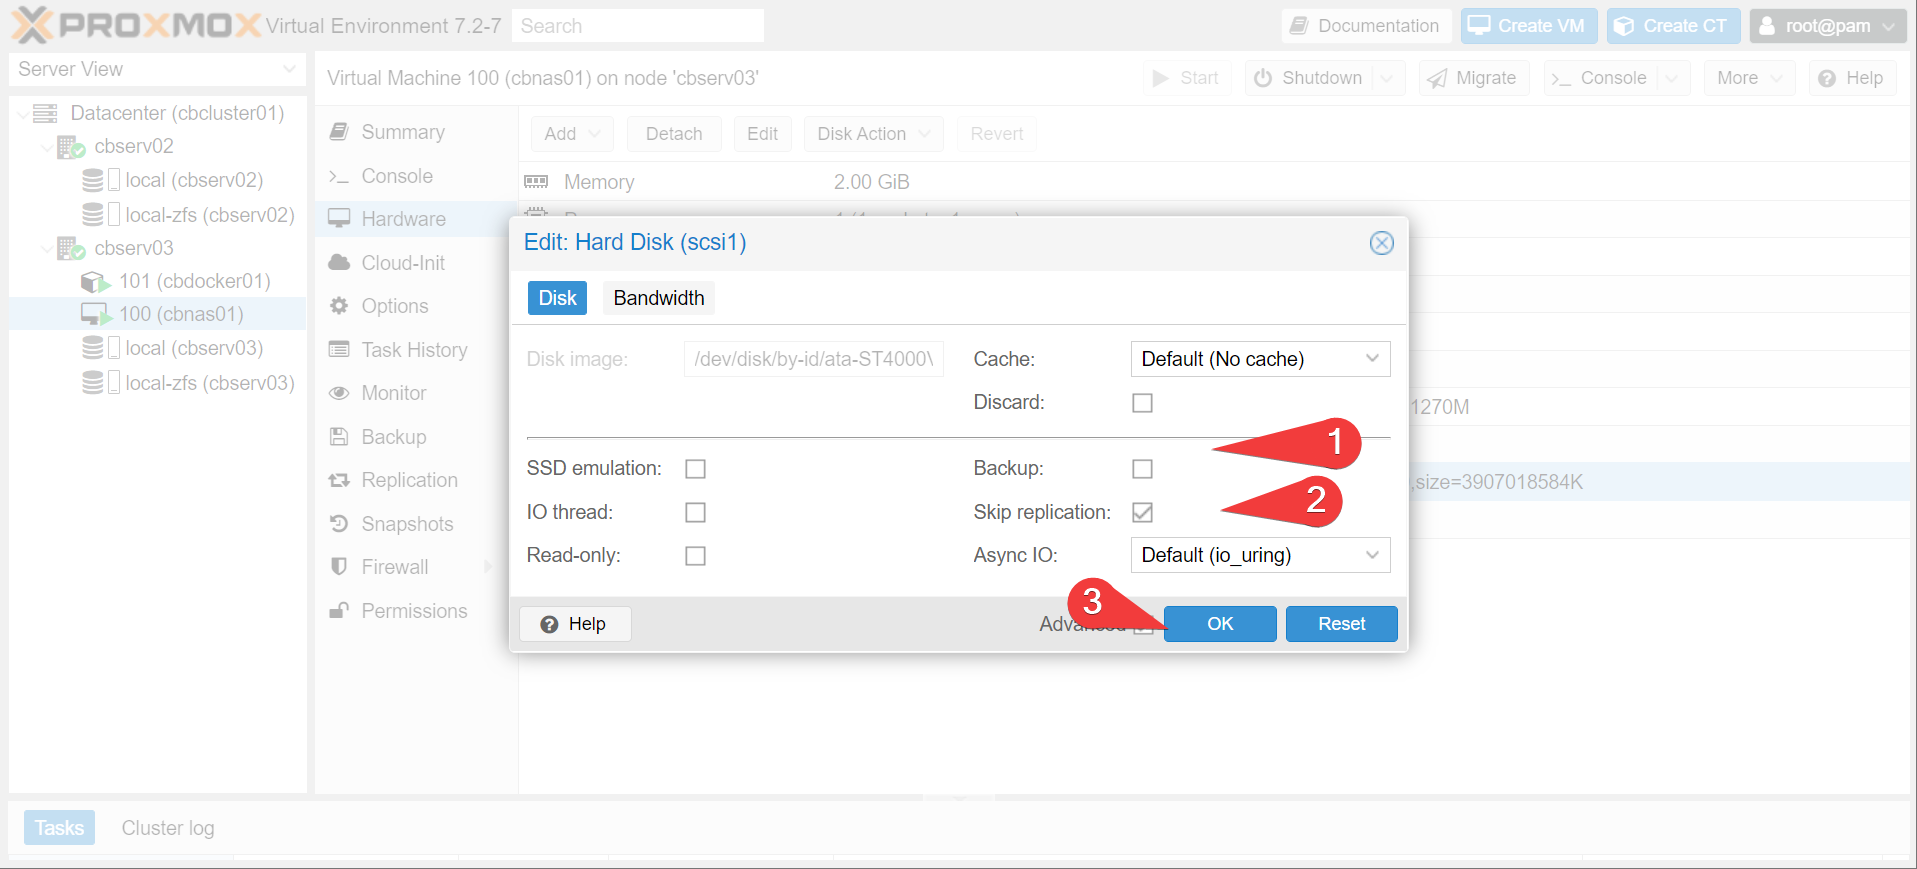
- While we’re at it, let’s also exclude directly attached disks from backup and replications
Install Ubuntu
- Install ubuntu now! Just hit
startand go to theconsole

Info
This guide won’t step you through the whole ubuntu install process, there’s plenty of guides around to do that.
- Install while enabling SSH, don’t worry about any additional packages.
Moving On
Alright, let’s now start with Configuring a Virtual NAS Appliance.