Configuring Tailscale on OPNSense
Introduction
So for most of you, I can hear you say “Hold on, we’re three articles deep now! When the heck are we actually going to set up the VPN”. Well guess what: we just did!
Info
If you’re just here to figure out how to install the UI, you can skip this article and move onto the next one
Headscale is not like a normal VPN where all the data gets tunneled through a central server (referred to as a hub-and-spoke configuration). Instead, Tailscale does all the heavy lifting on the client side in a peer to peer fashion.
This means that the headscale server we set up isn’t a VPN host, it is a control plane. This also makes headscale incredibly bandwidth efficient: if it can take a direct route, it generally does. Tailscale just reaches out to headscale for configuration details, key exchanges, and to help with NAT traversal.
Info
You can read more about the magic of how tailscale works here.
That also means that we have everything in place to start actually using headscale!
Setting up site to site access in OPNSense
First thing you’ll probably want to do is figure out how to access your internal resources with a VPN. That’s a very traditional usage of a VPN. So let’s install tailscale on our router!
Info
There’s lots of routers out there. Tailscale supports OPNsense, PFsense, and OpenWRT (except the latest version. I opened an issue about it). You can also install tailscale on a generic server and set up a static route instead.
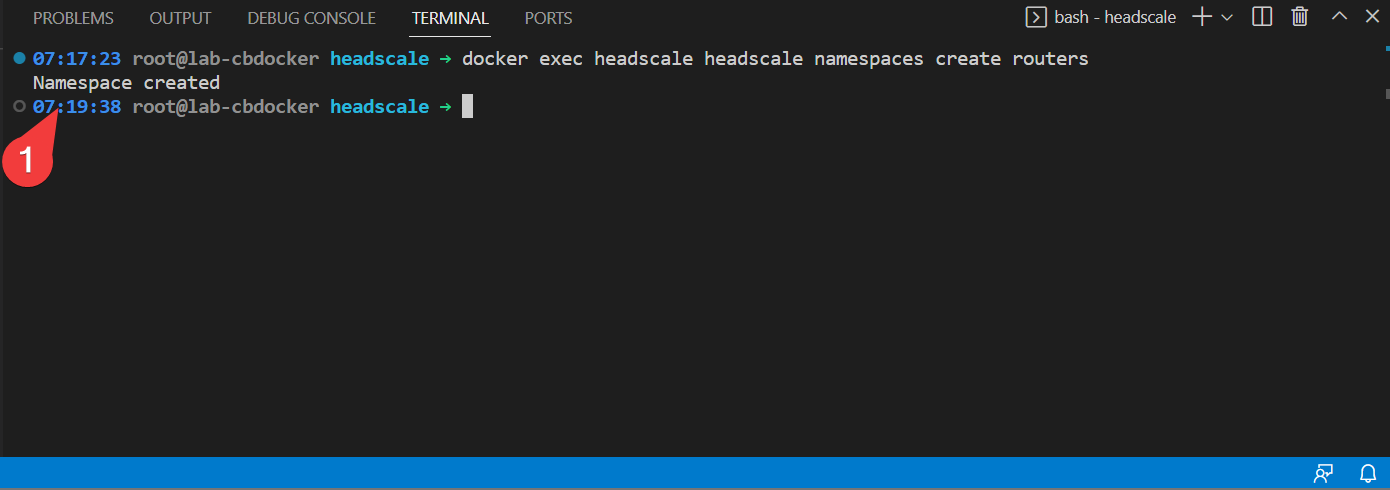
The first step you have to ask is “how do I authenticate to headscale”. Well in our current configuration we have two ways:
- Have a user install headscale (with the right reg keys to point to our domain) and follow the instructions server side
- Generate a namespace (or user, depending on terminology) and create a one-time key to pass to the tailscale installer. This is referred to as a pre-auth key.
Either method requires using the headscale command line to work, so let’s show how that’s done.
- On your docker server, run the following (and no the double headscale isn’t a typo):
- Also generate a preauth key for that with:
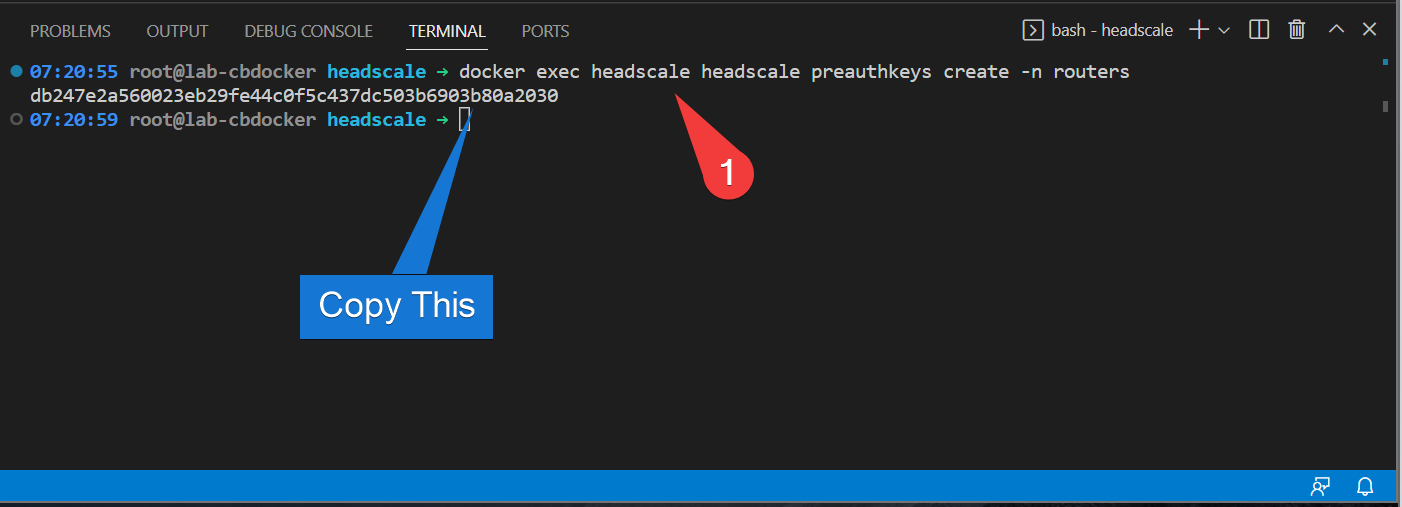
That generates a one-time use key to preauthenticate a device.
Install tailscale on OPNSense
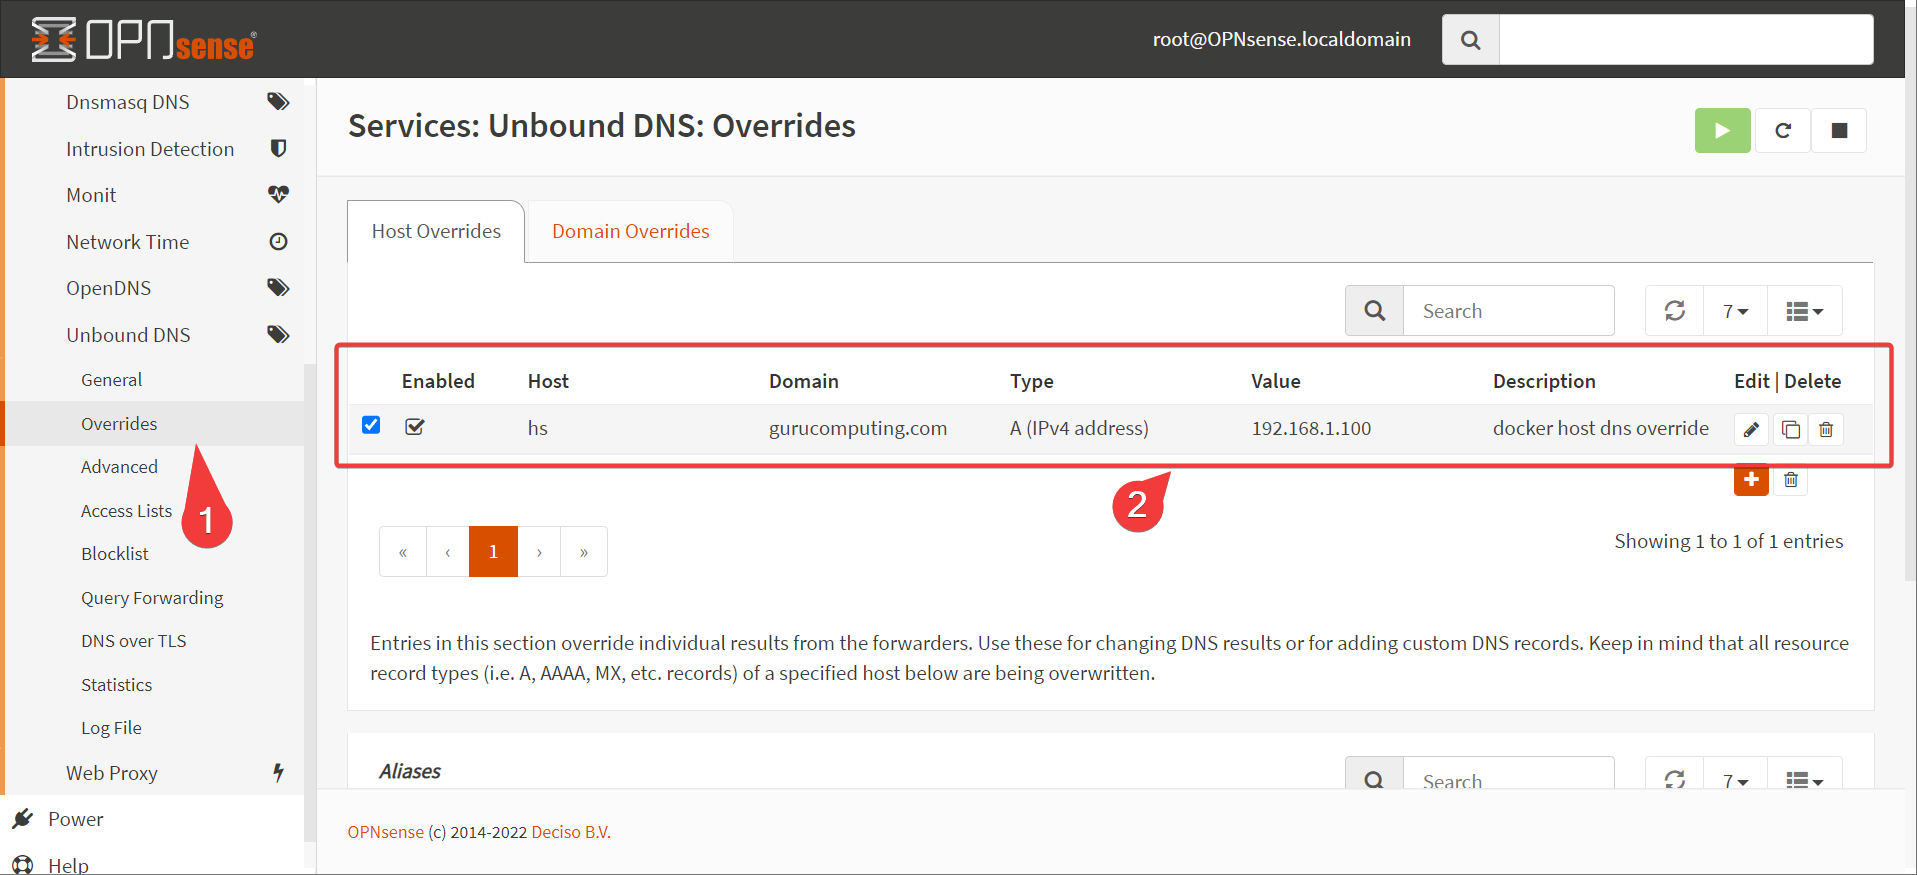
- If your headscale server is sitting behind your router (it is in our configuration), put in a special hosts entry to route your headscale domain the local docker IP. This is referred to as a split dns configuration.
Info
In a production setting, host your headscale instance separate from the networks you’re VPNing, like in a VPS or cloud instance. It’ll save you headaches. Actually in a production setting, just use the tailscale SaaS product.
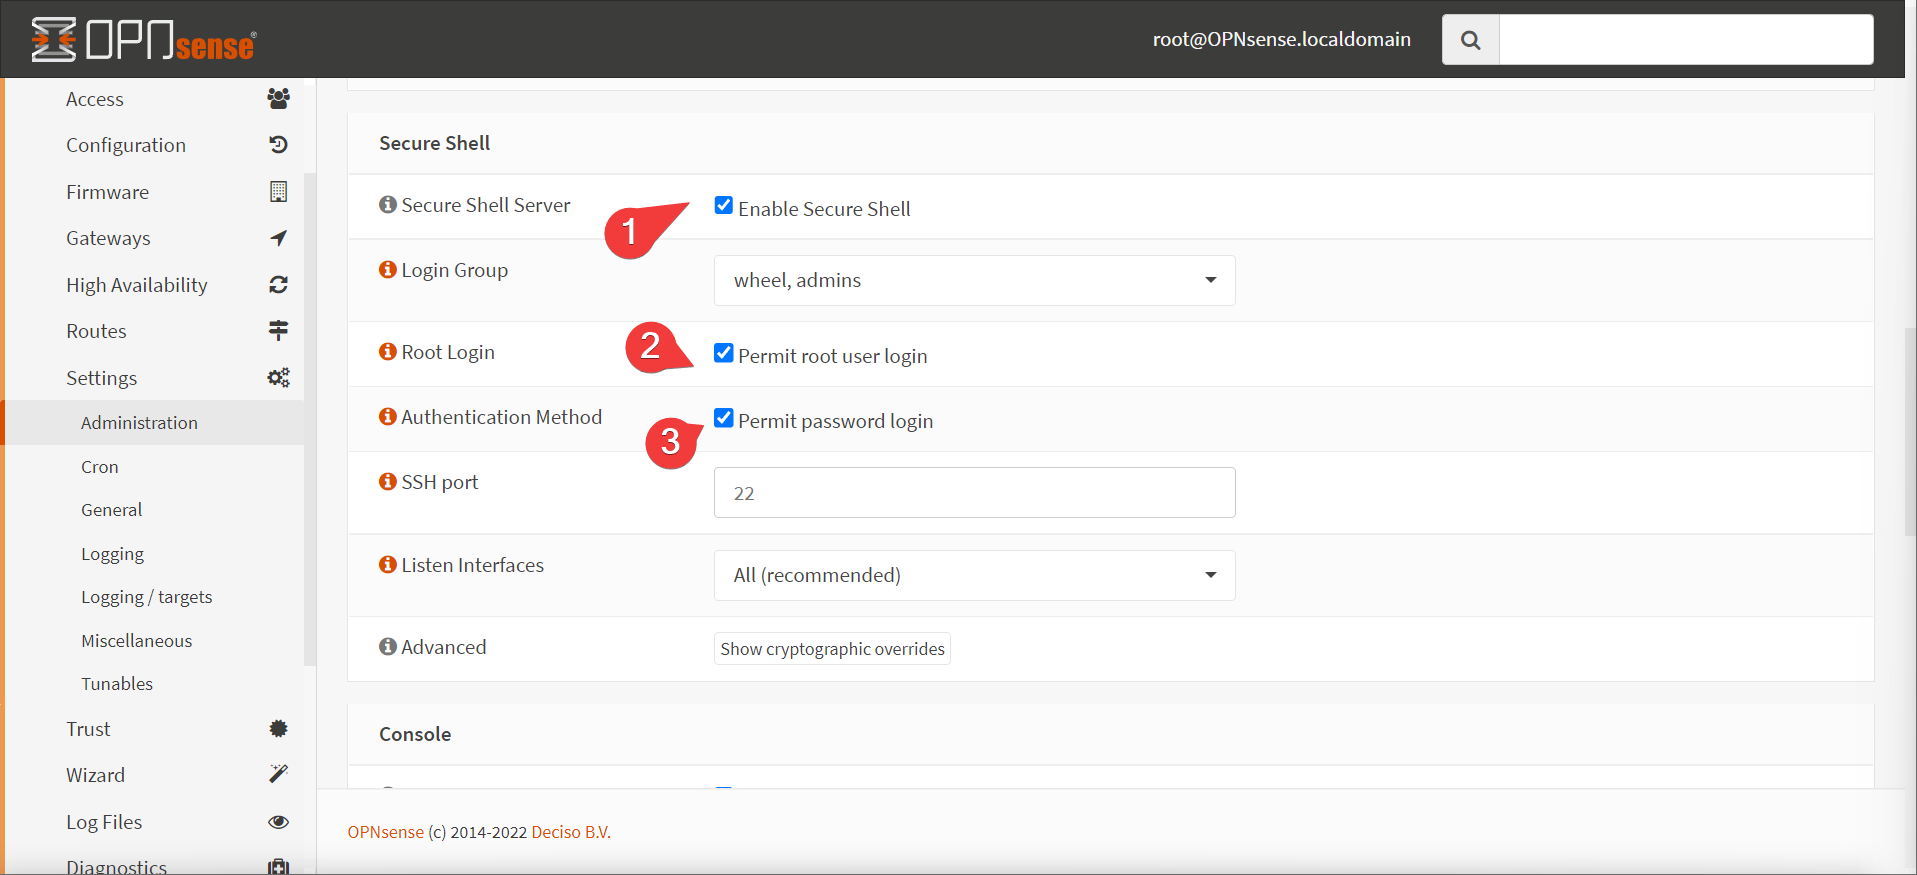
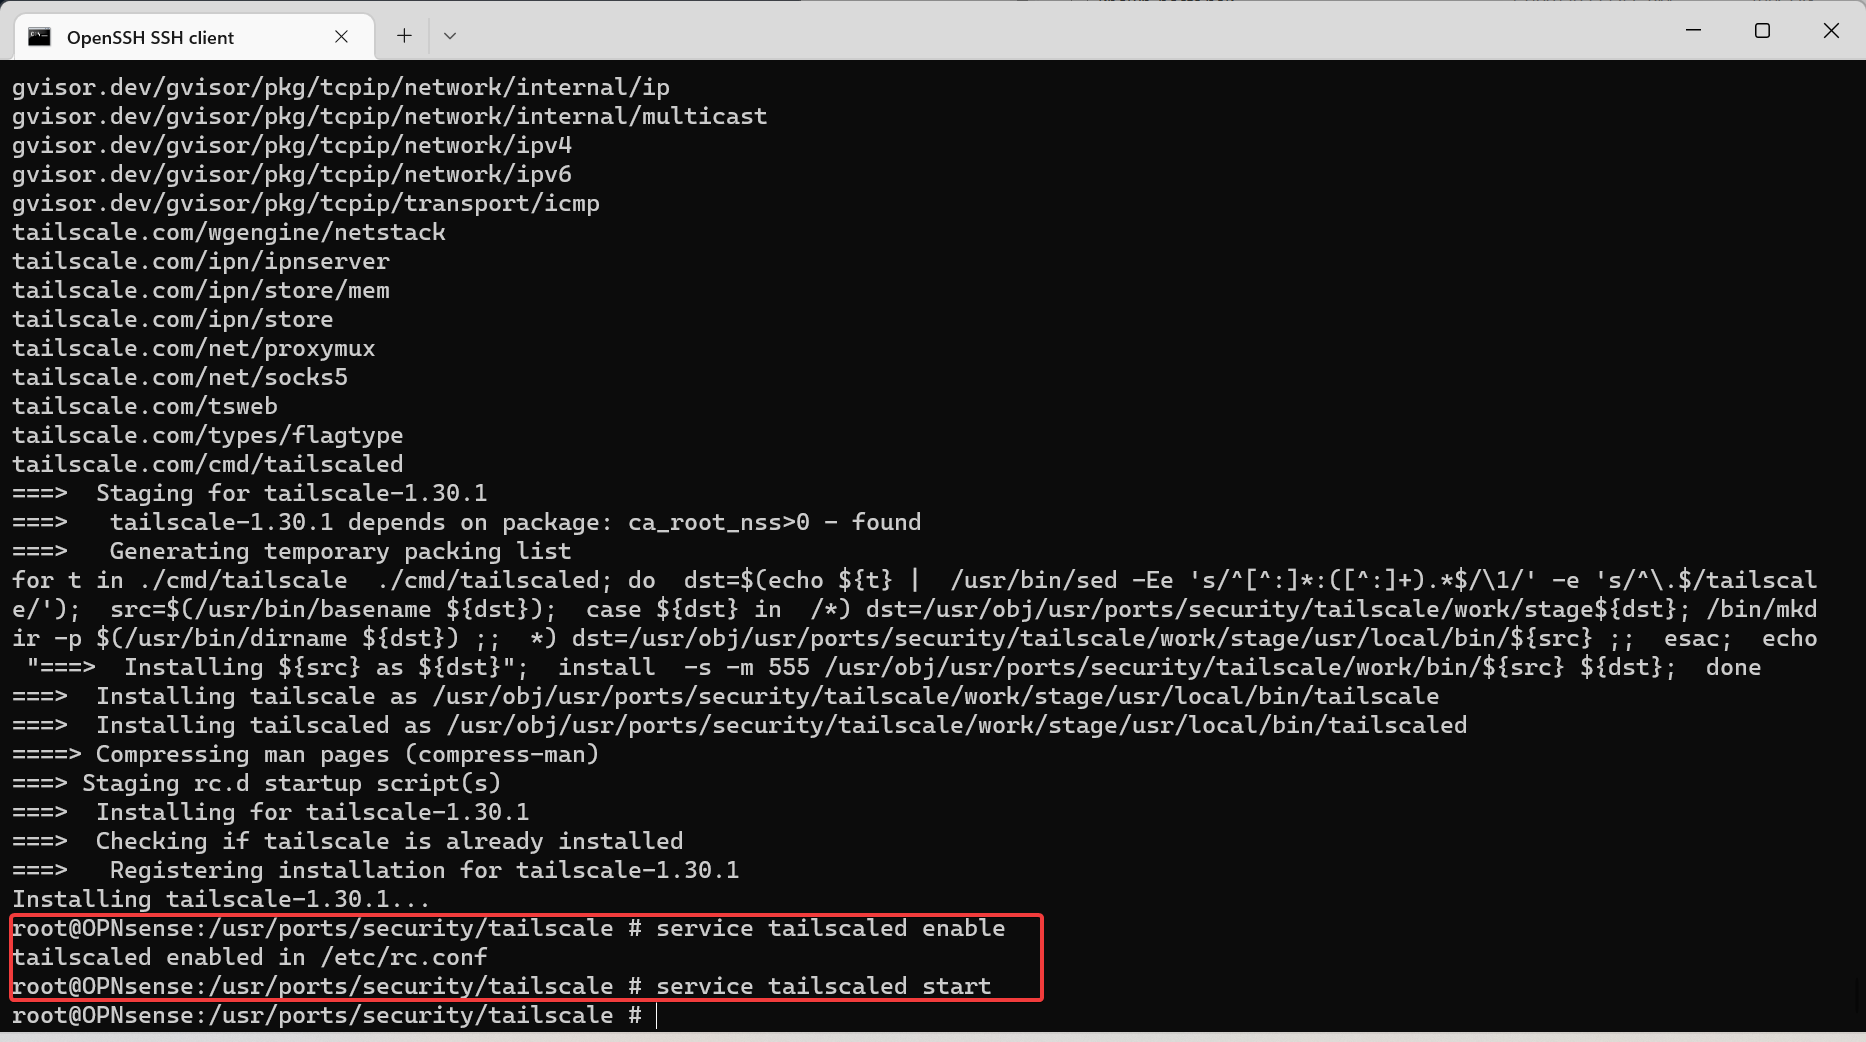
- enable secure shell access (preferably temporary). SSH into the router
- Follow the instructions on tailscale’s website to install via command line (it’s building from source so it takes a little while)
opnsense-code ports
cd /usr/ports/security/tailscale
make install
service tailscaled enable
service tailscaled start
- Configure tailscale with the following command (replacing the preauth key, advertised subnet, and login server as required):
tailscale up --authkey=<preauth-key> --accept-dns=false --advertise-routes=<your home subnet> --login-server=https://<your-domain>

Allow the Route
Now we head back to our docker instance and see if our router shows up (ignore the first device, I’ve been reading ahead).
- Run the following:
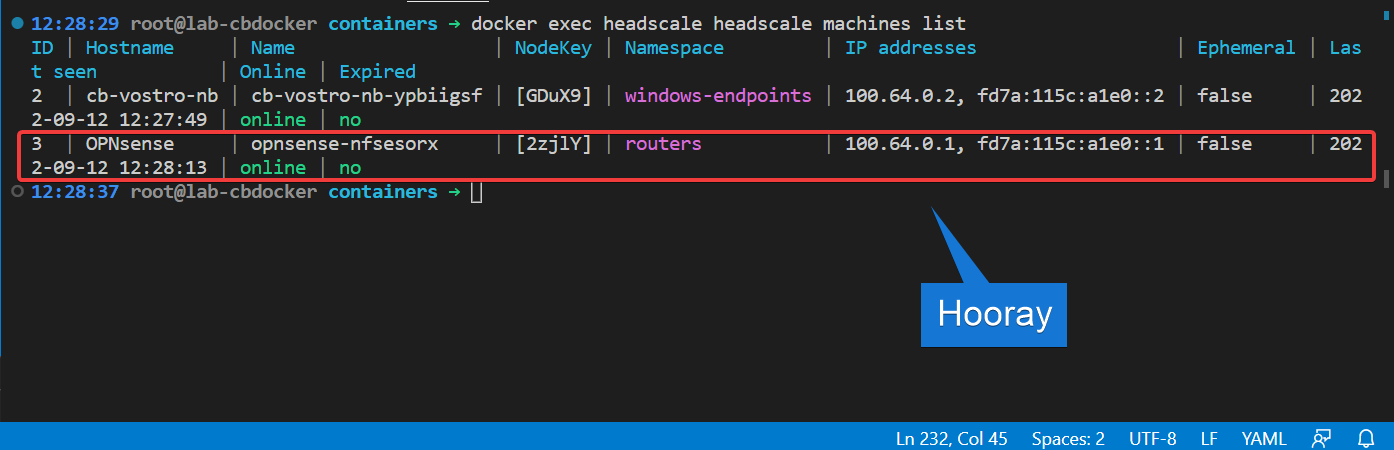
- Now we have to approve the routes our router wants to advertise. Enable the route (replacing
3with the ID of your router, probably1):

That’s it! You’re now able to route clients to your personal network. Well, when you have clients.
That was rough
Yeah that was rough. Isn’t there a UI for headscale?
There is! I made it. Yep, shameless self promotion! Let’s set it up in Configuring the headscale UI