Protecting Applications with SSO
Introduction
In the previous guide, we stood up a standalone keycloak instance. Which looks pretty, but isn’t really doing anything right now. How do we protect applications and use our keycloak logins for other sites? Well we do that by setting up a federated identity.
Protocols and Handshakes
The primary way of SSO federation use two major protocols:
- SAML
- OIDC
if you have a choice, typically OIDC is preferred: they both achieve the same goal, but OIDC is simpler and less likely to have a bungled misconfiguration. These are both web protocols. They’re essentially special guidelines for two sites to communicate with eachother and share identity data.
However, both of these protocols need something: The application needs to be aware of these protocols and provide a way for the application to talk back to keycloak.
Info
There is a way to protect services with SSO without the application being aware, and we’ll go into that in a later article.
So let’s set up a an application to test our federation on. How about gitea? that’s a nice self hosted source control platform that does support SSO.
Installing Gitea
Gitea is easy enough to install.
Info
you can get more documentation for installing gitea here.
- Create and assign ownership to the gitea data folder (as gitea defaults to running as non-root):
mkdir -p /mnt/containers/gitea/container-data
chown -R 1000:1000 /mnt/containers/gitea/container-data
cd /mnt/containers/gitea
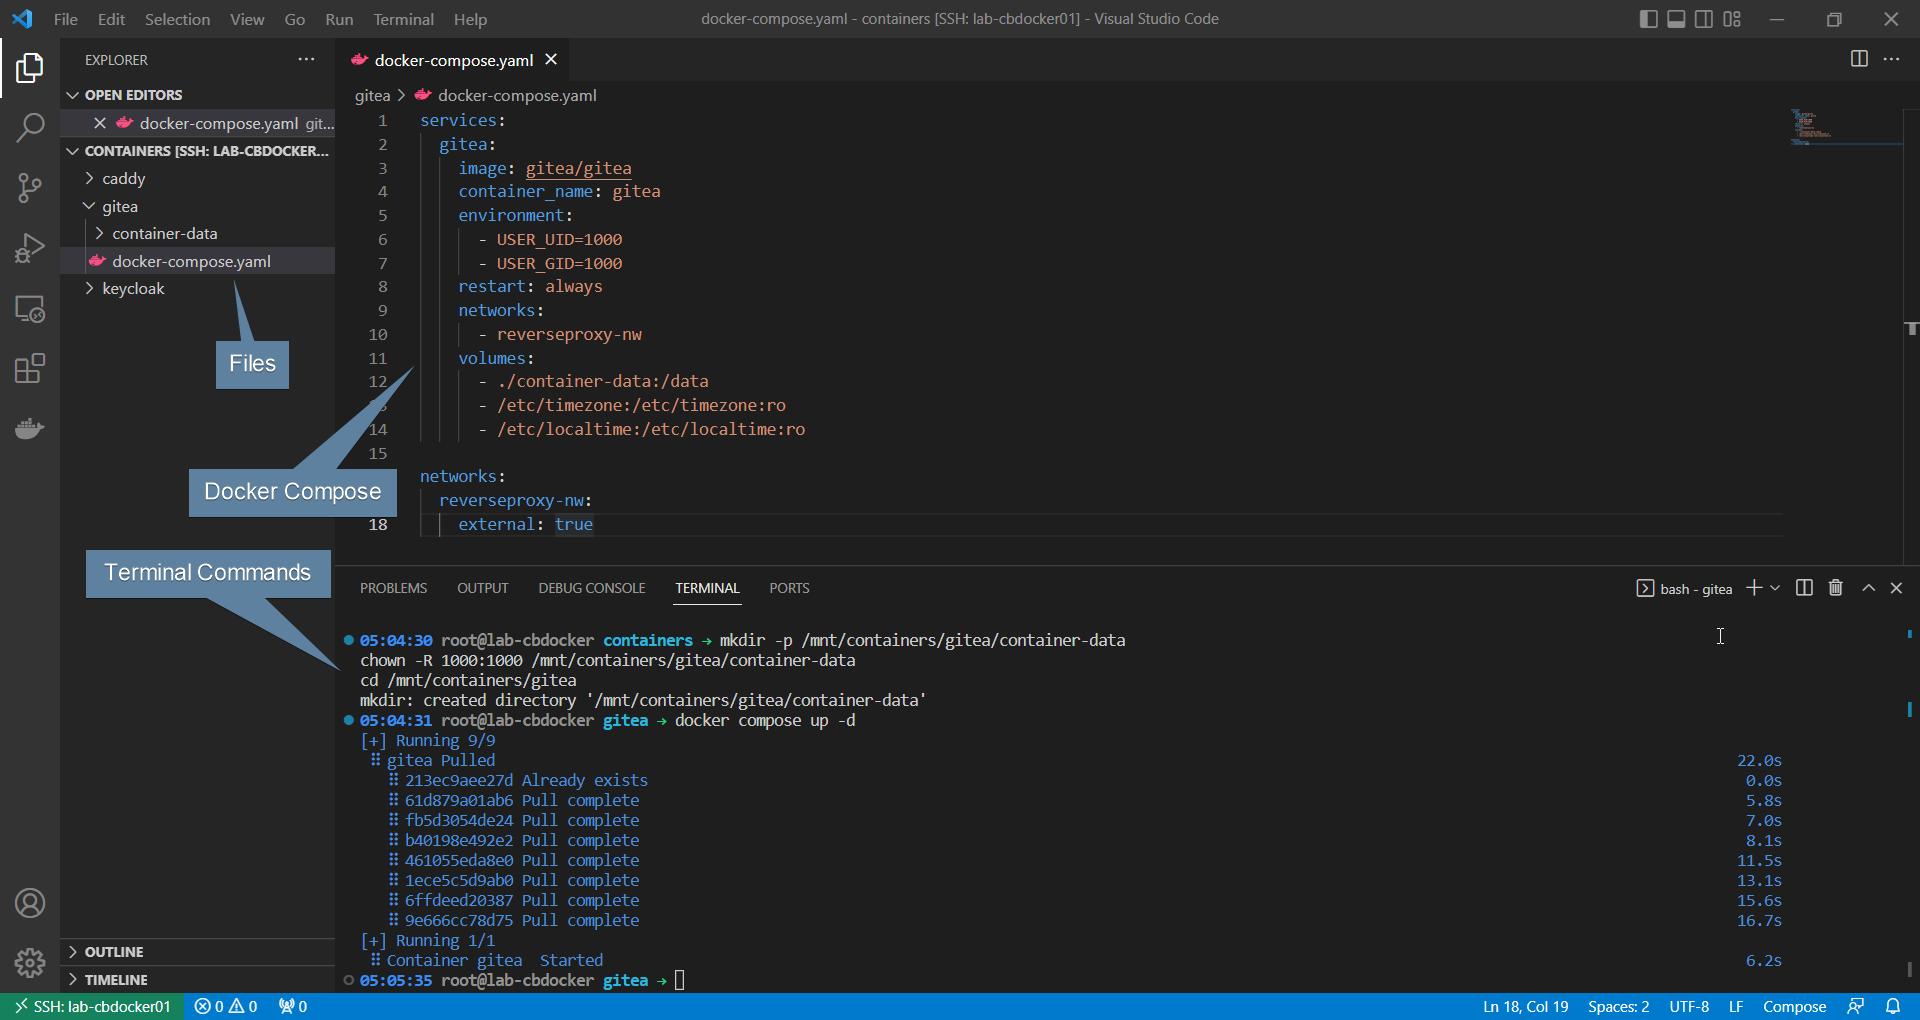
- Set up the gitea container
/mnt/containers/gitea/docker-compose.yaml:
services:
  gitea:
    image: gitea/gitea
    container_name: gitea
    environment:
      - USER_UID=1000
      - USER_GID=1000
    restart: always
    networks:
      - reverseproxy-nw
    volumes:
      - ./container-data:/data
      - /etc/timezone:/etc/timezone:ro
      - /etc/localtime:/etc/localtime:ro

networks:
  reverseproxy-nw:
    external: true
- Start it up
Reverse Proxy Settings
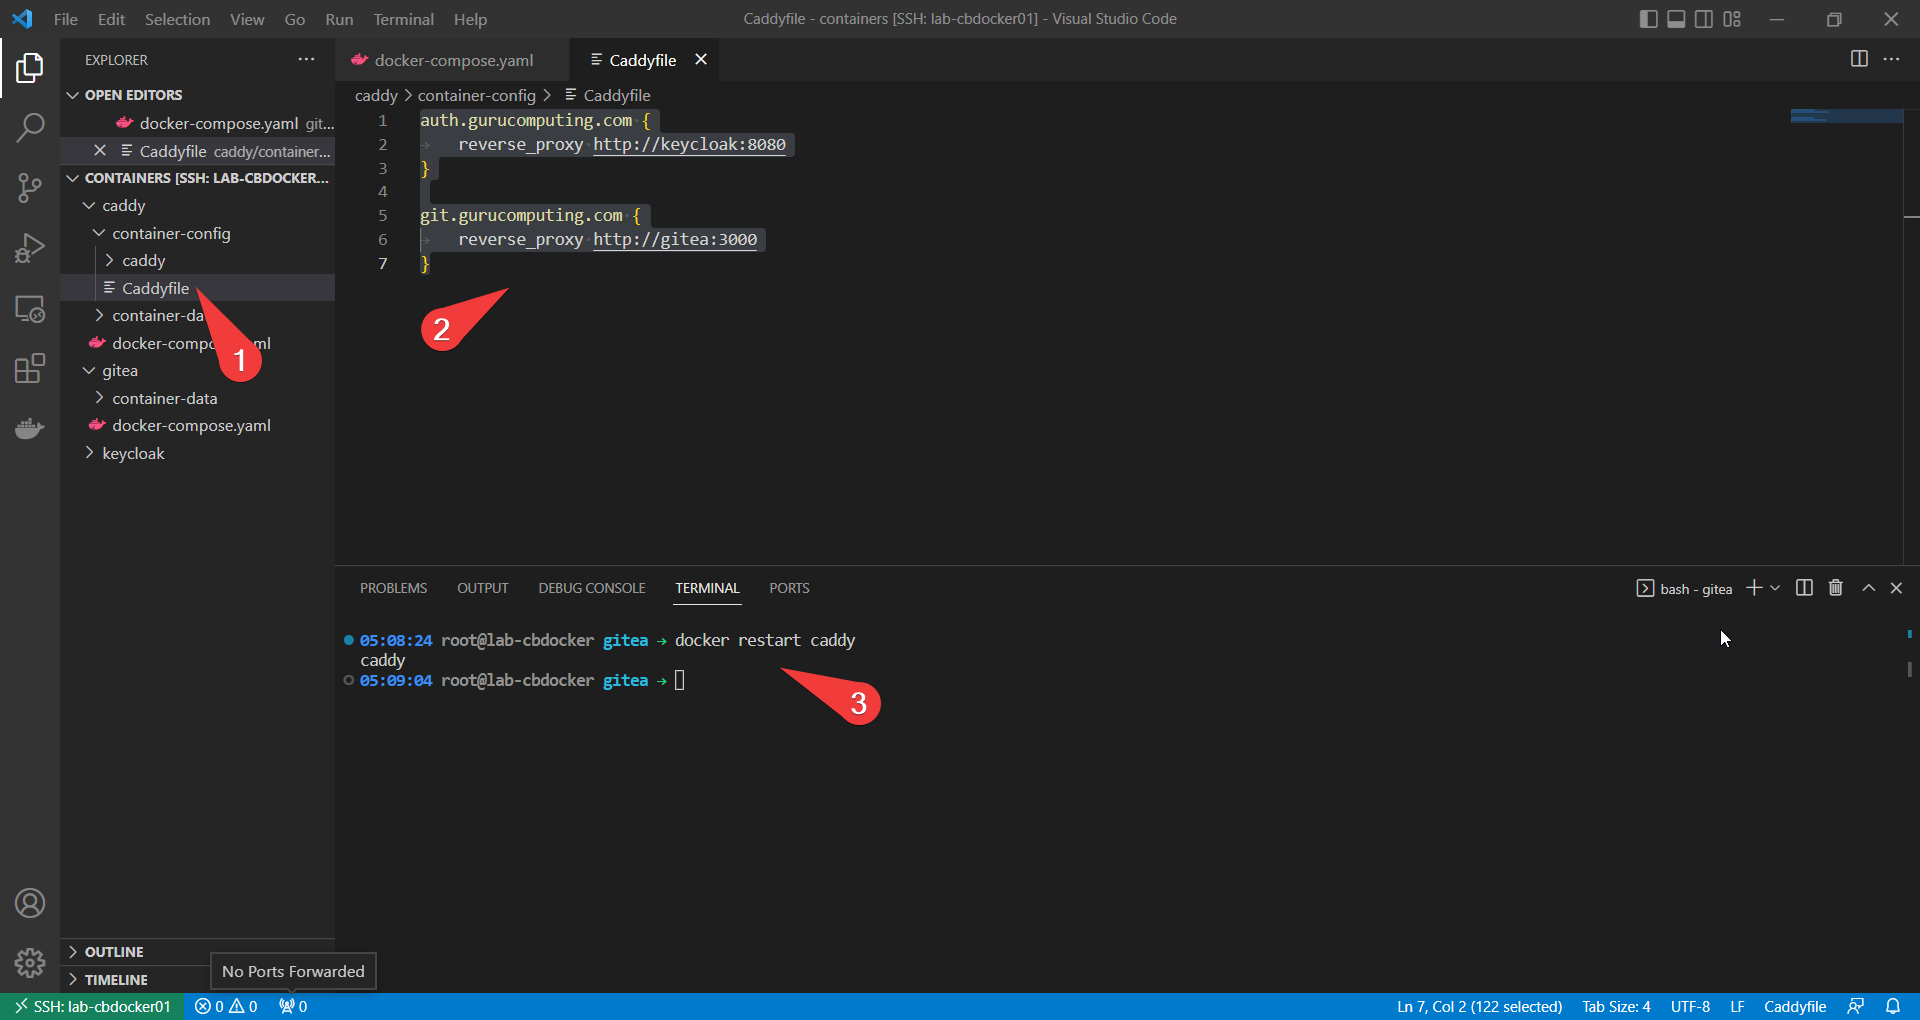
Now of course we haven’t exposed any ports, because we’re going to reverse proxy gitea too. Let’s modify /mnt/containers/caddy/container-config/Caddyfile (replacing gurucomputing.com with your domain)
auth.gurucomputing.com {
    reverse_proxy http://keycloak:8080
}

git.gurucomputing.com {
    reverse_proxy http://gitea:3000
}
and restart caddy
Installing Gitea
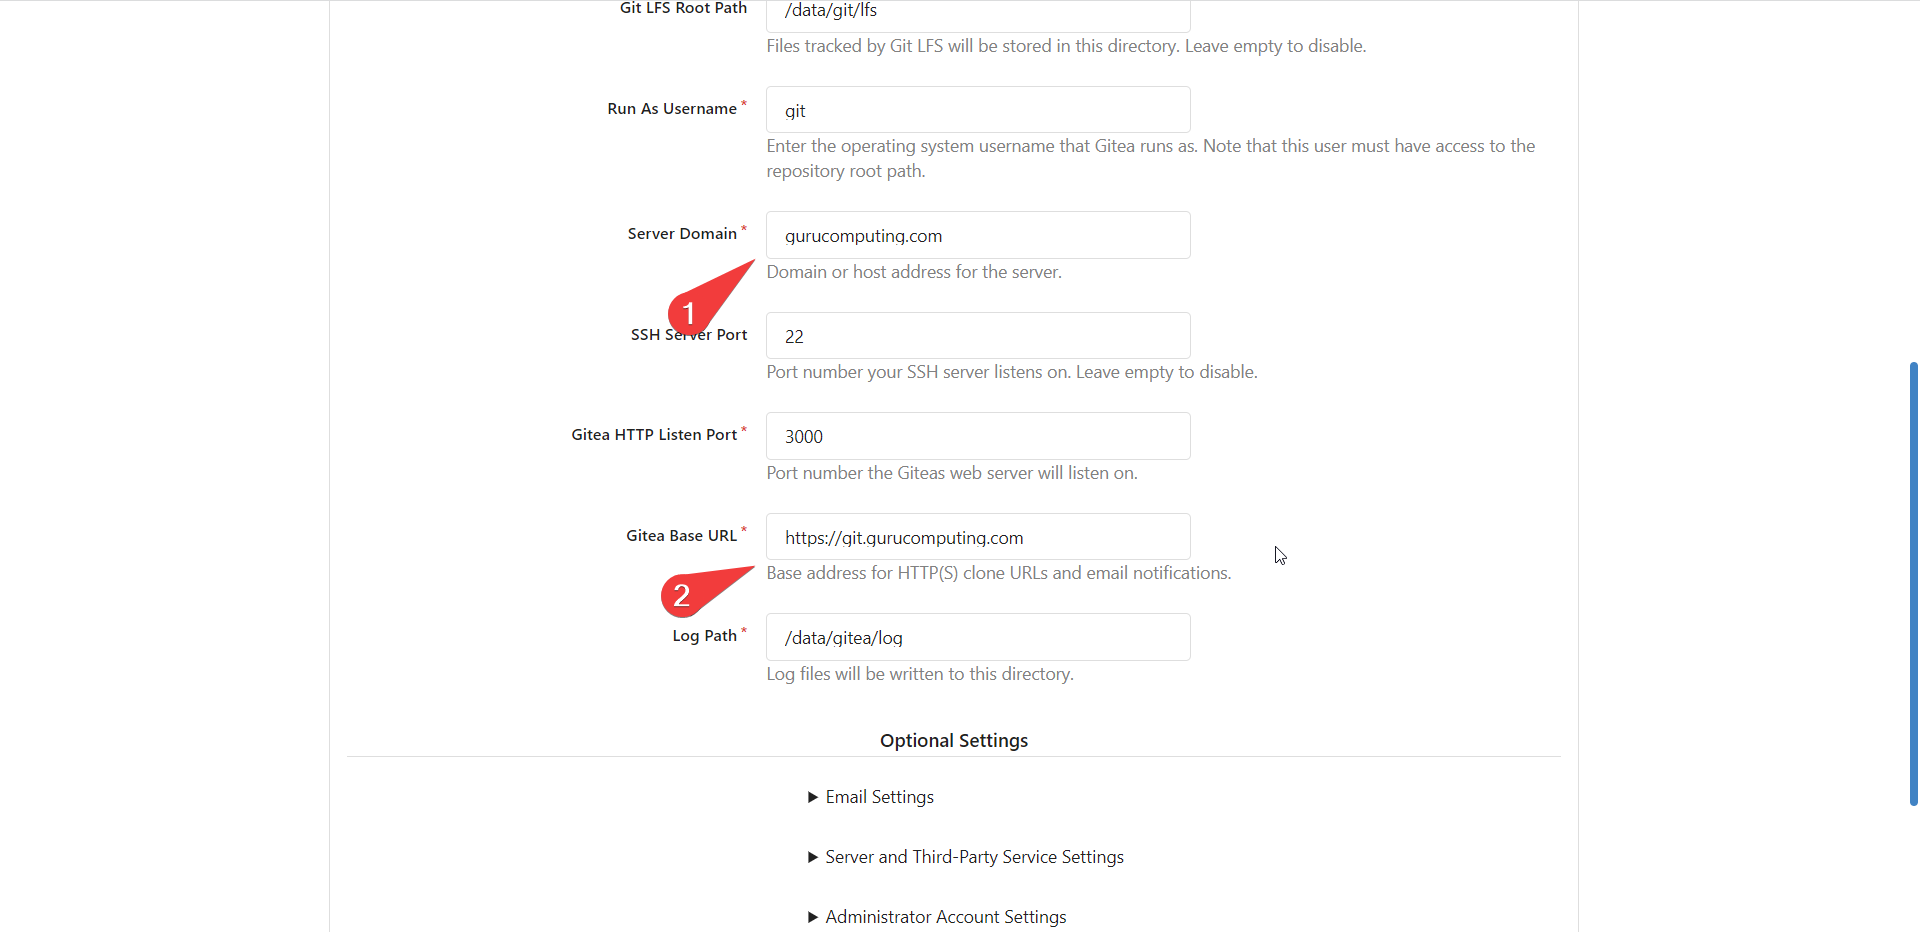
Alright, if all has gone well, you should now have a gitea installation ready to roll at your designated URL!
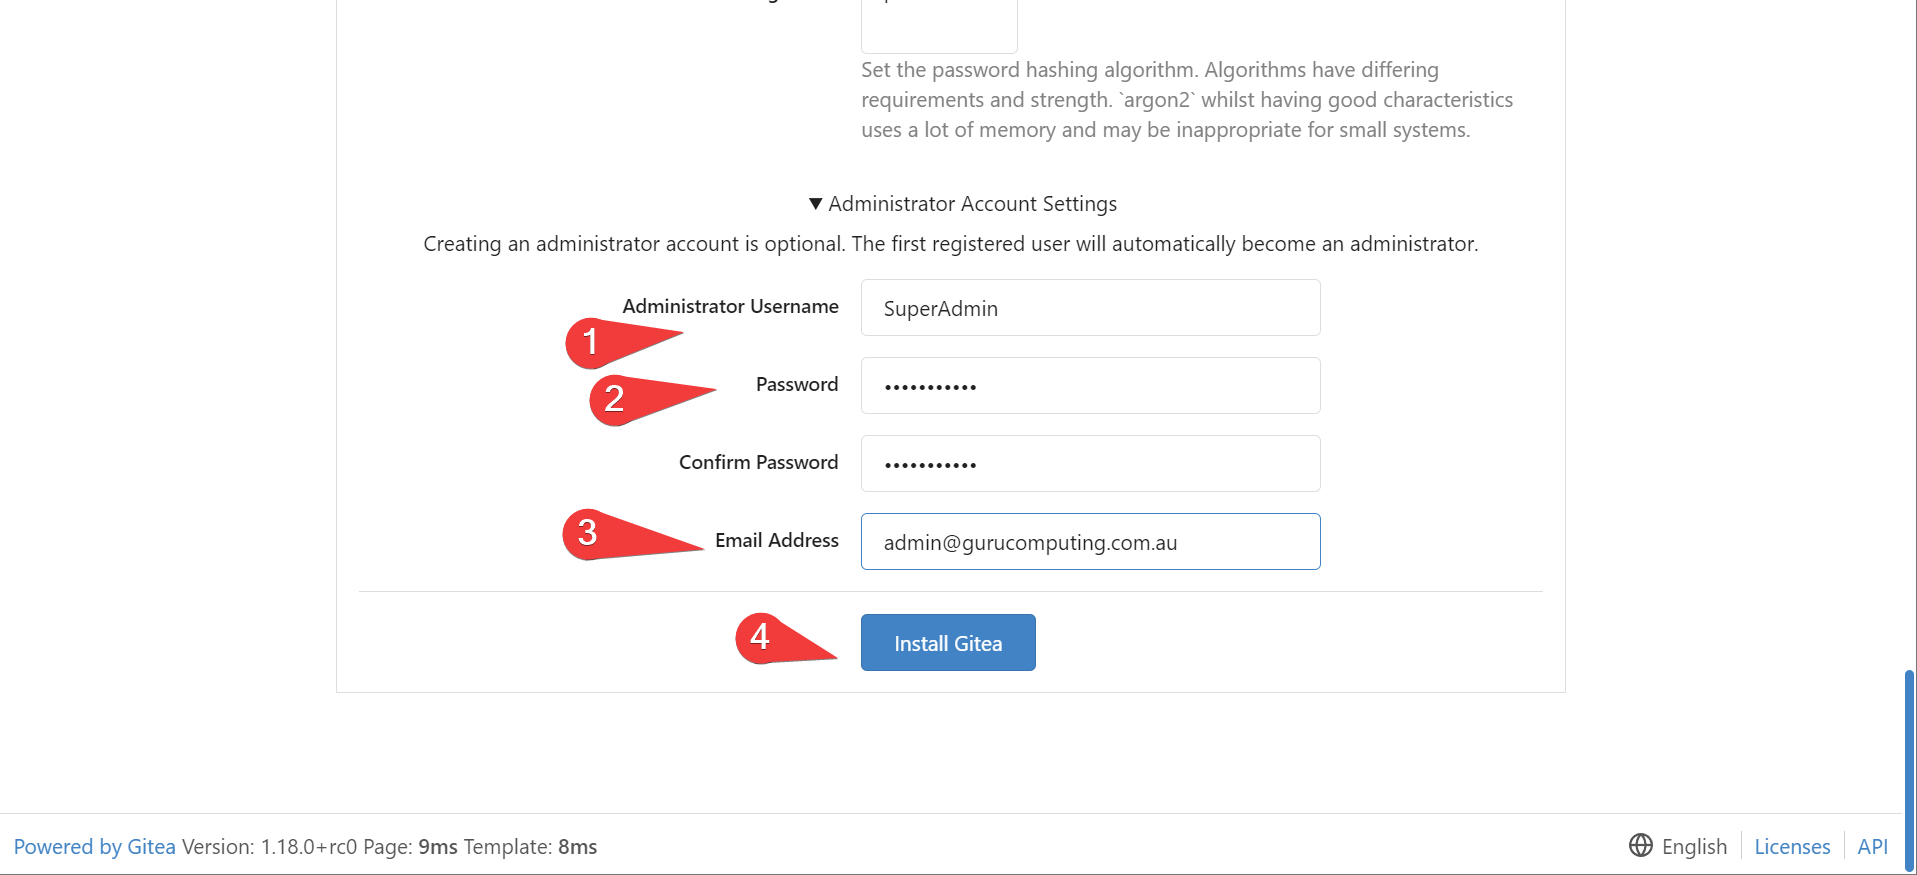
- Set your domain and base URL
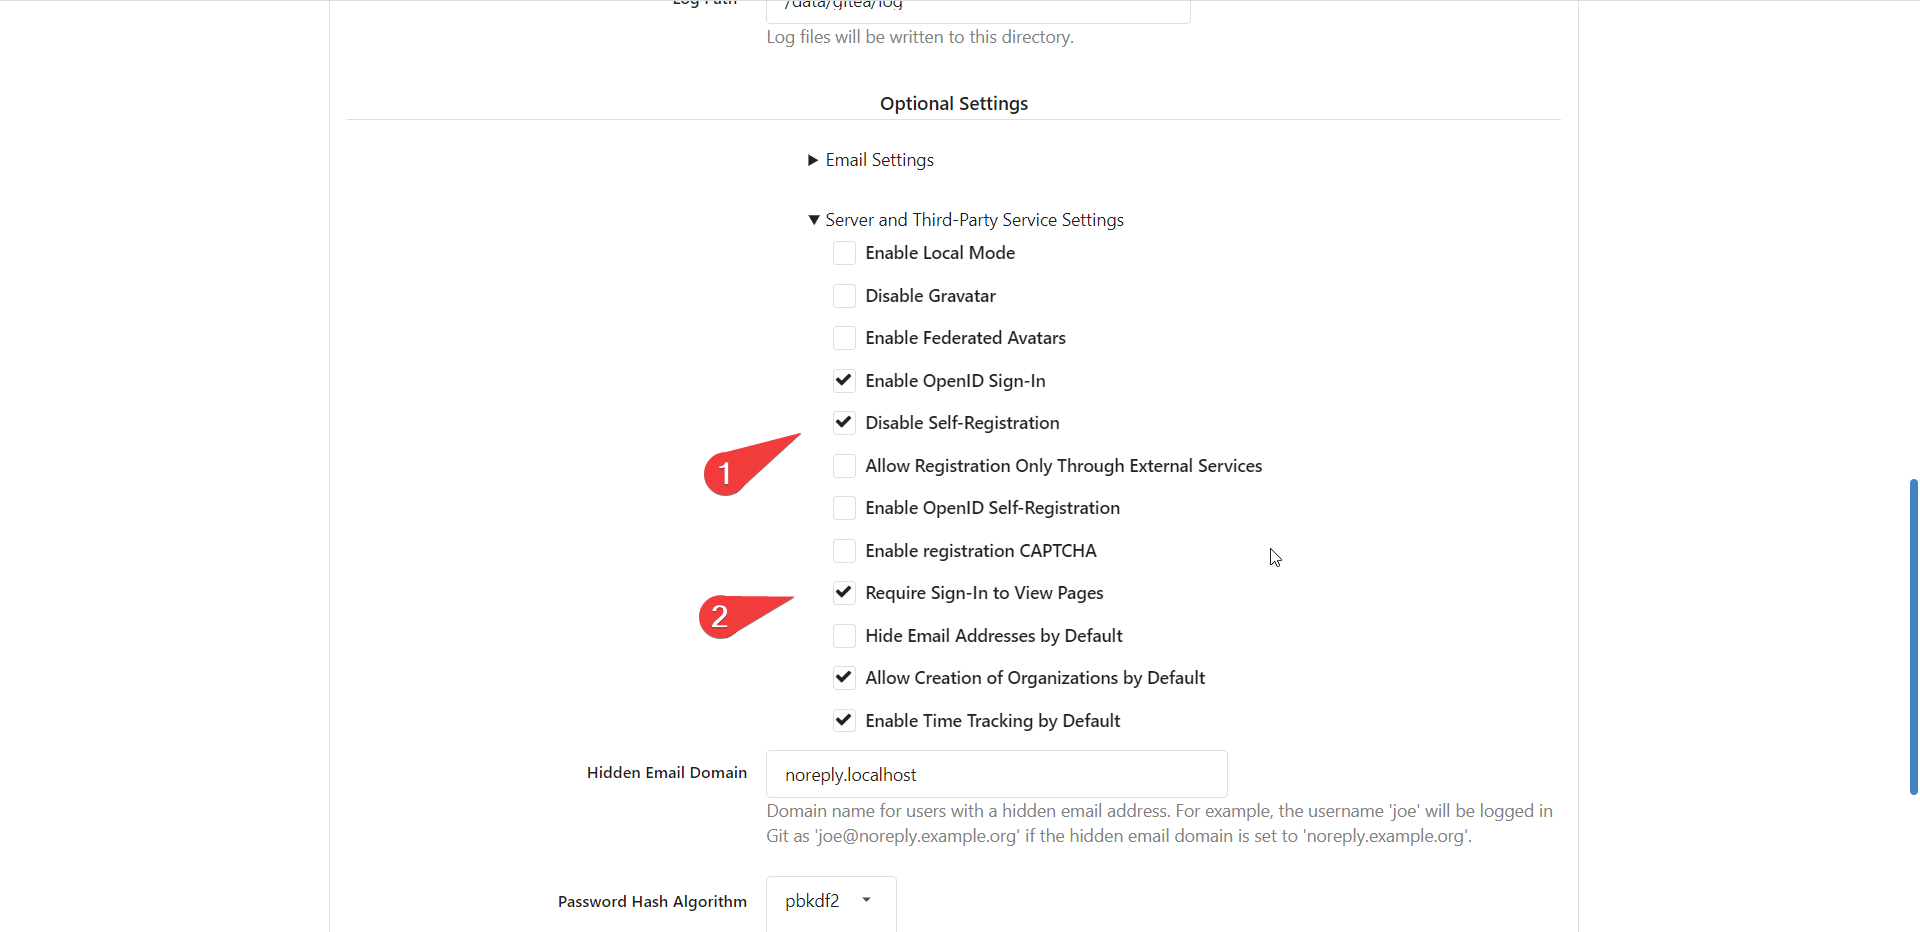
- (optional) disable self registration and public viewing:
- Set your administrative account details (and a safe, long password)
Configuring Keycloak
For us to have Keycloak be the authentication source for Gitea, we need to set up Gitea as a client of Keycloak:
- Under Clients in keycloak, Create Client
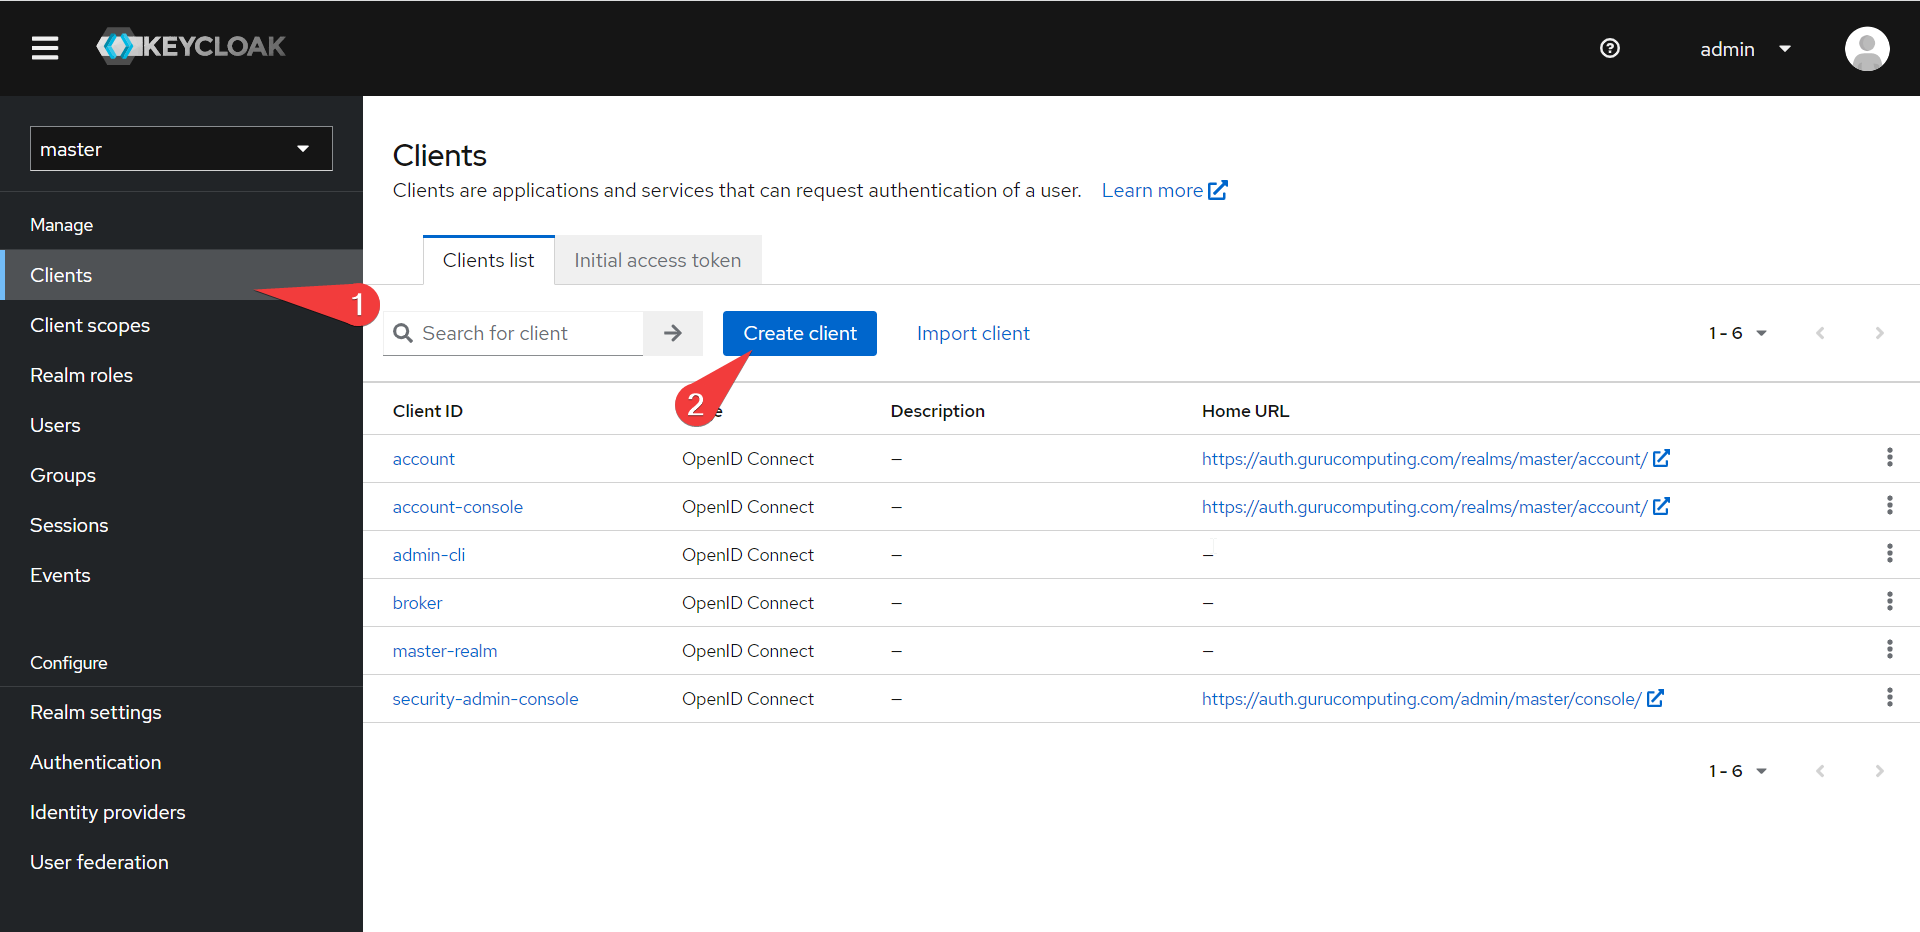
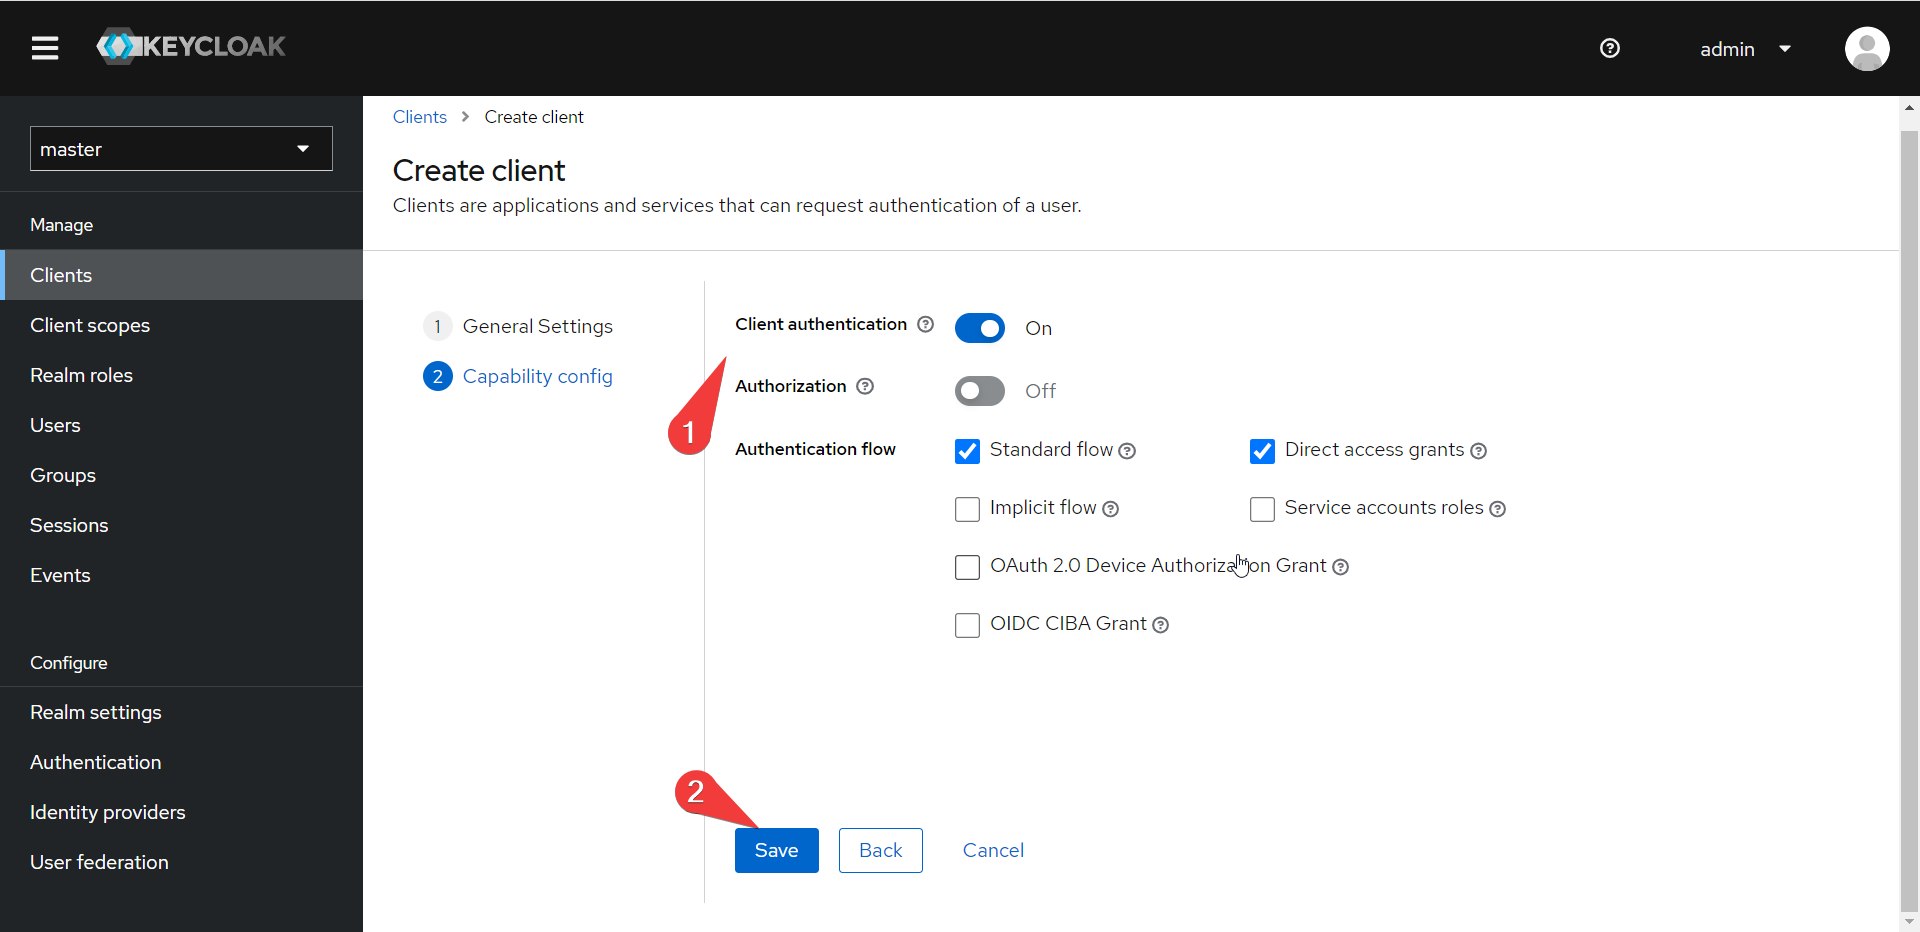
- Give the client ID a unique name (gitea works) and fill out descriptors as needed:

- On the next screen, turn on client authentication and save
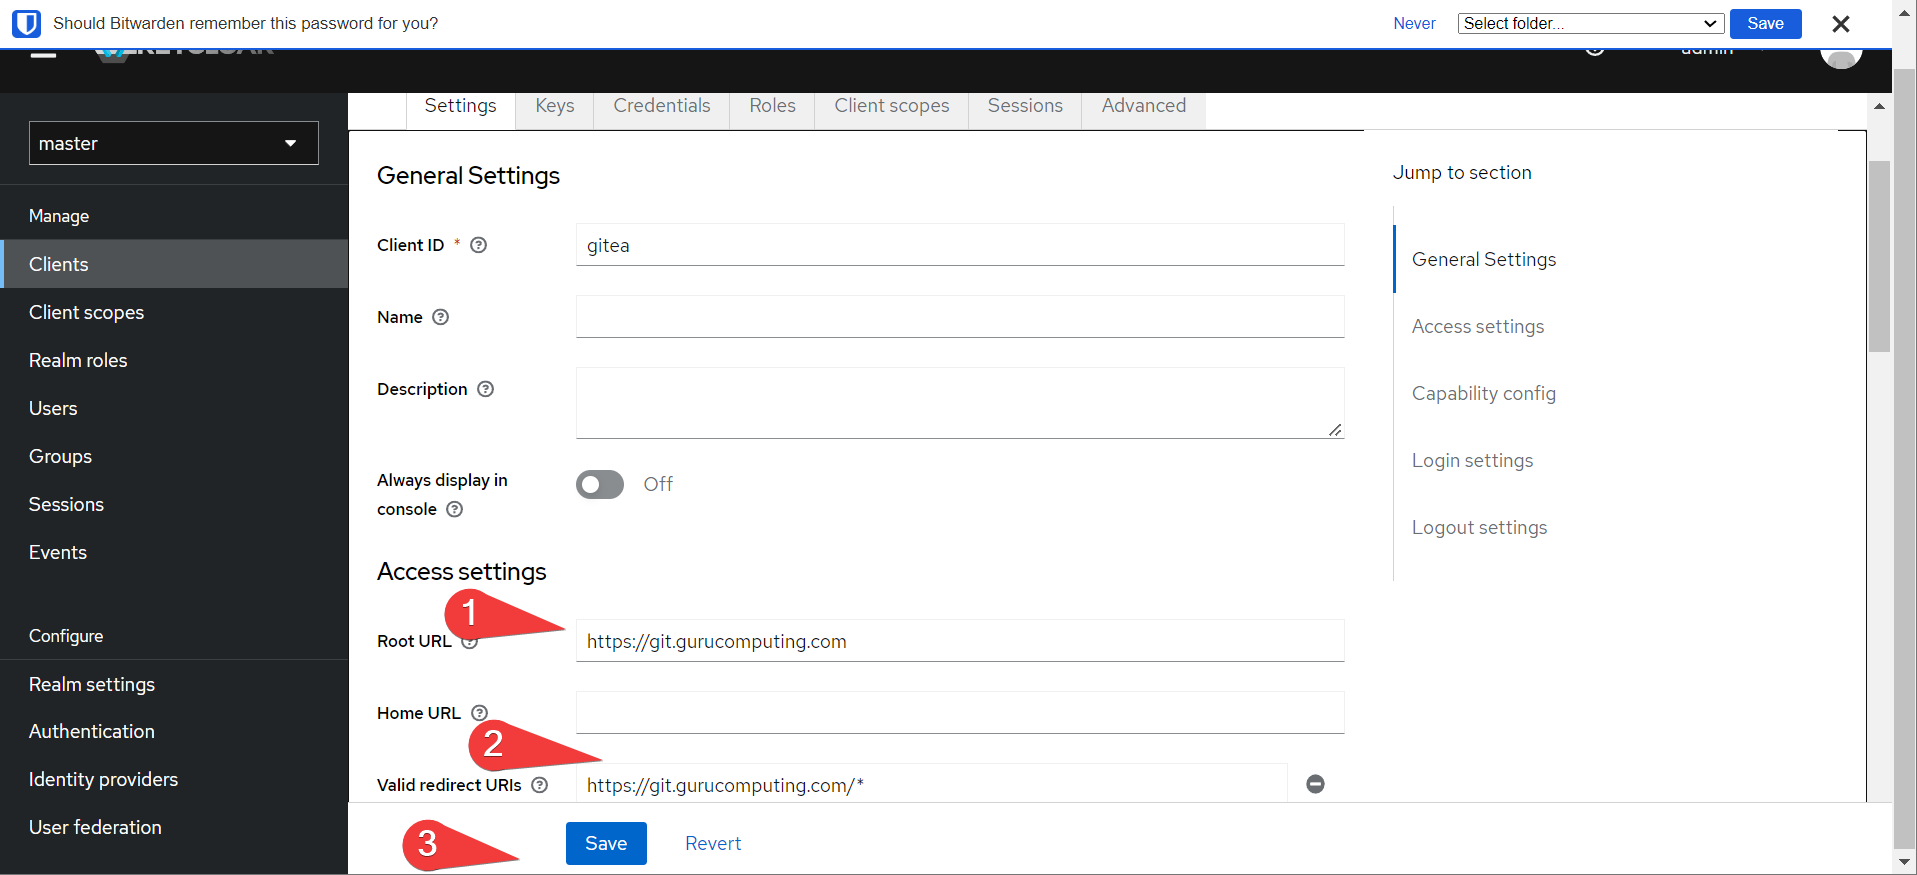
- Now there’s a ton of settings keycloak exposes, and it’s easy to get overwhelmed. The easiest and most important setting is the root URL and Redirect URL. Set the root URL to the client service you want to be authenticating to, and set the redirect URL back with a wildcard (depending on the application you can improve security by setting a specific URI).
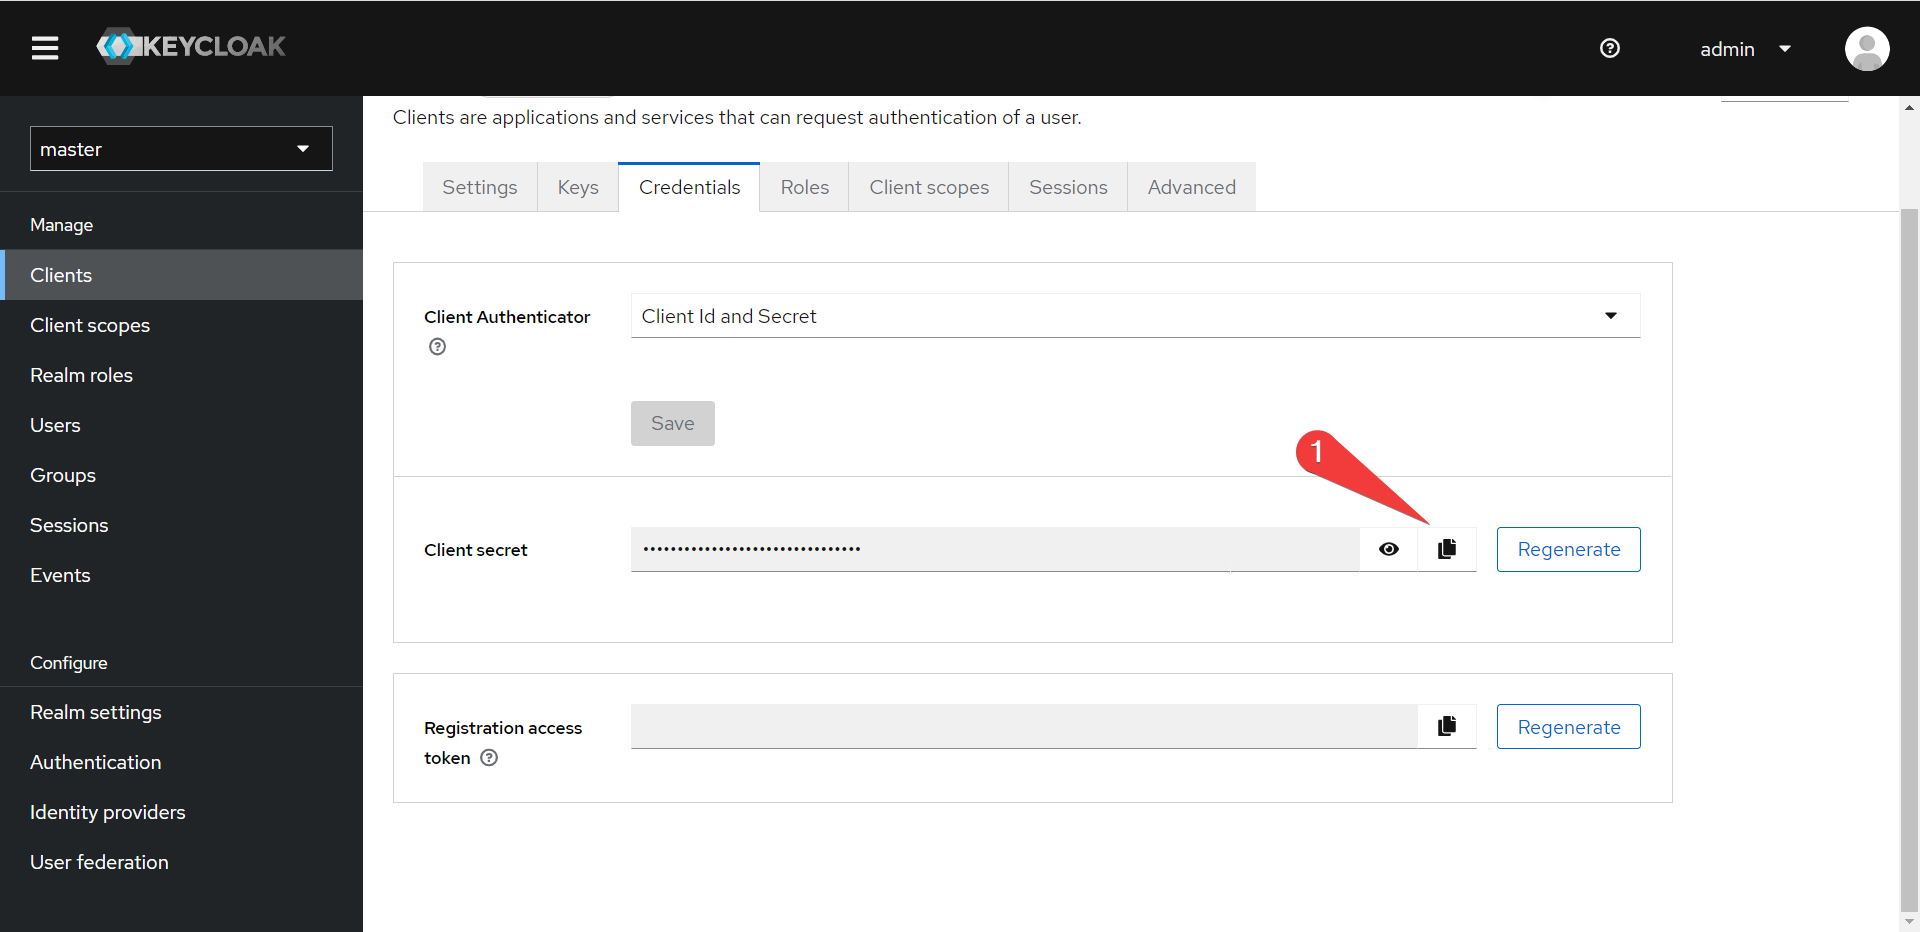
- Under “Credentials” note the client secret (we will need it shortly):
Setting up SSO
Alright, we’re here. Let’s do this.
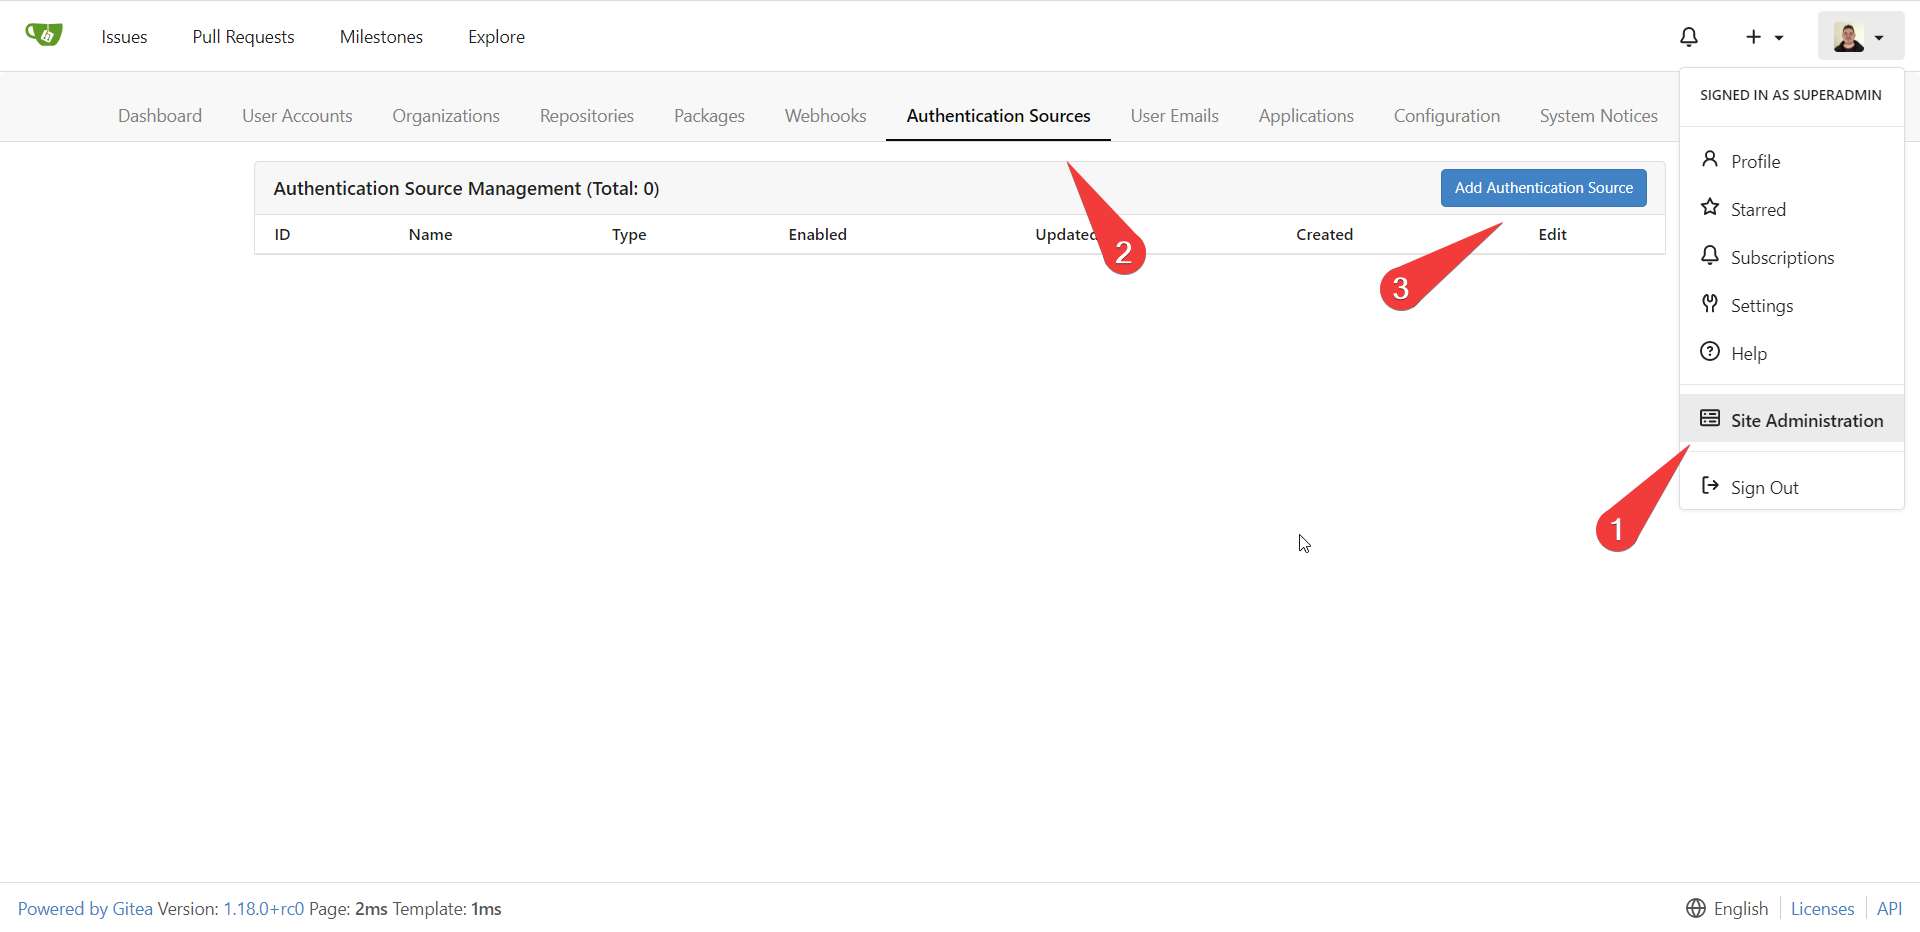
- Under site administration, add an Authentication source
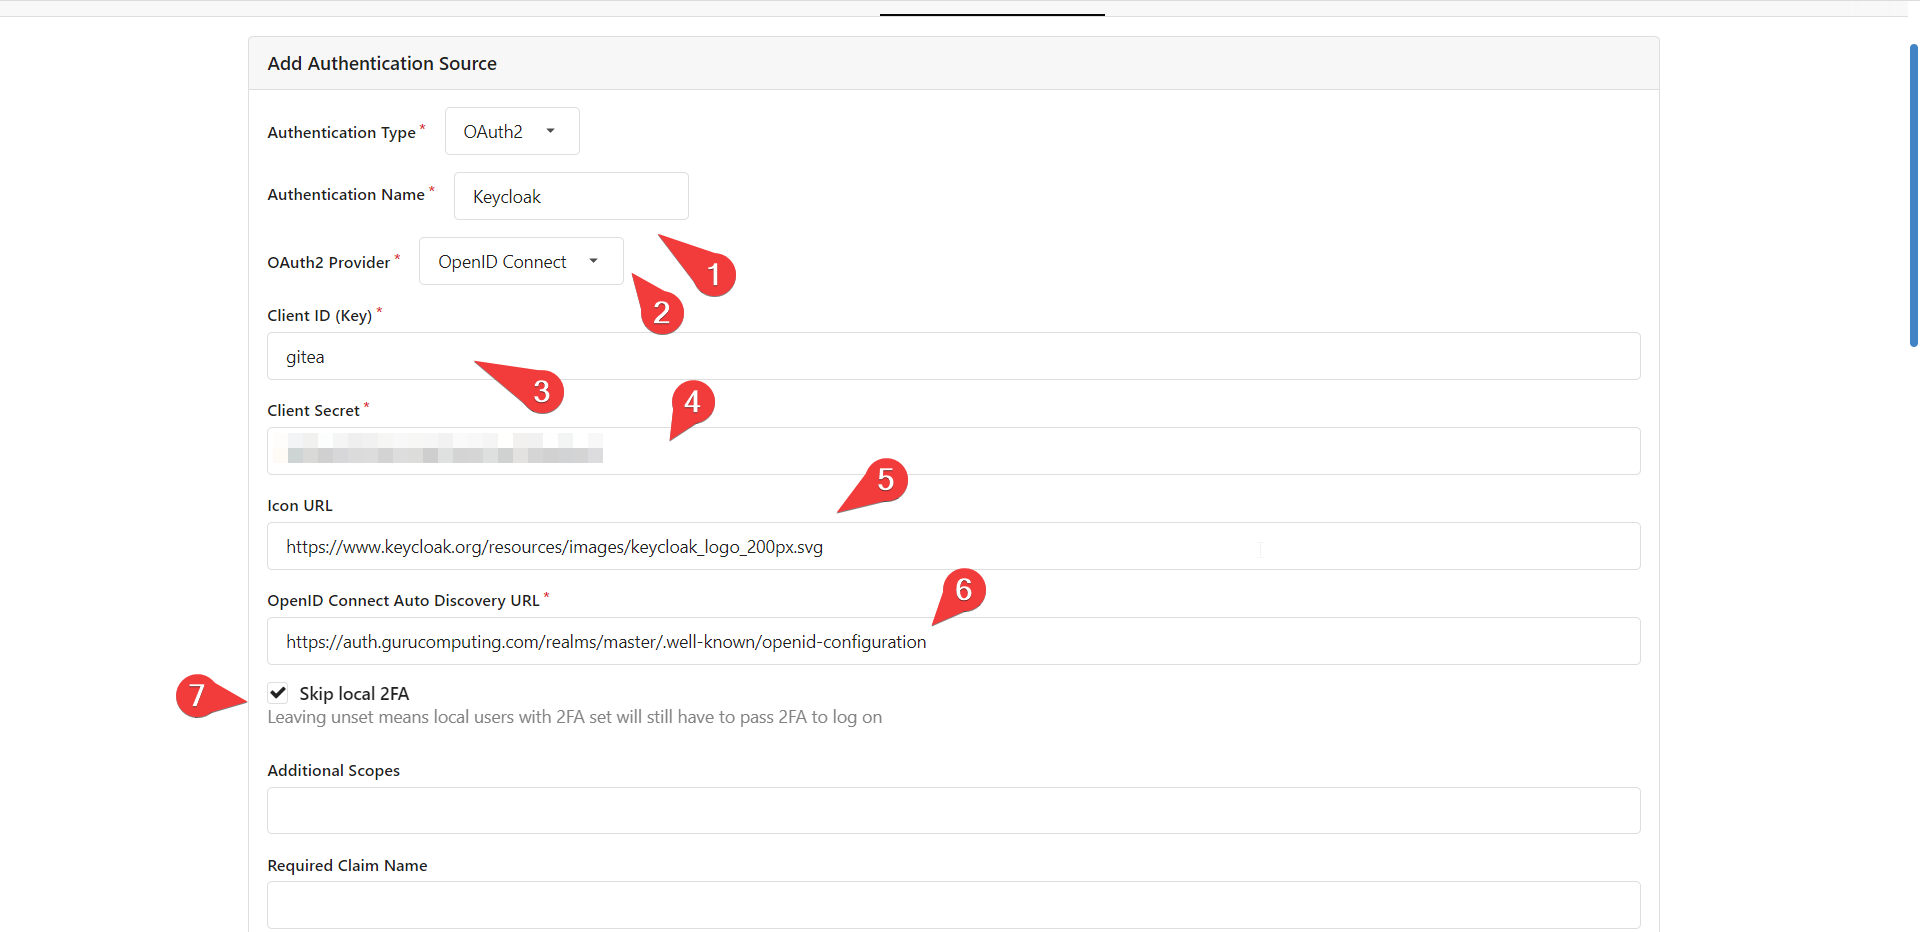
- Now let’s set a bunch of settings:
- Authentication Name to Keycloak
- Oauth2 Provider to OpenID Connect
- Client ID to the client ID you set (probably
gitea) - Client secret to the secret you copied before
- Icon URL to anything you like, I set it to the public keycloak icon:
https://www.keycloak.org/resources/images/keycloak_logo_200px.svg - Auto Discovery URL to
https://auth.<yourdomain>/realms/master/.well-known/openid-configuration. Note that some services need you to copy paste data from that URL rather then just provide the URL. - Skip Local 2FA
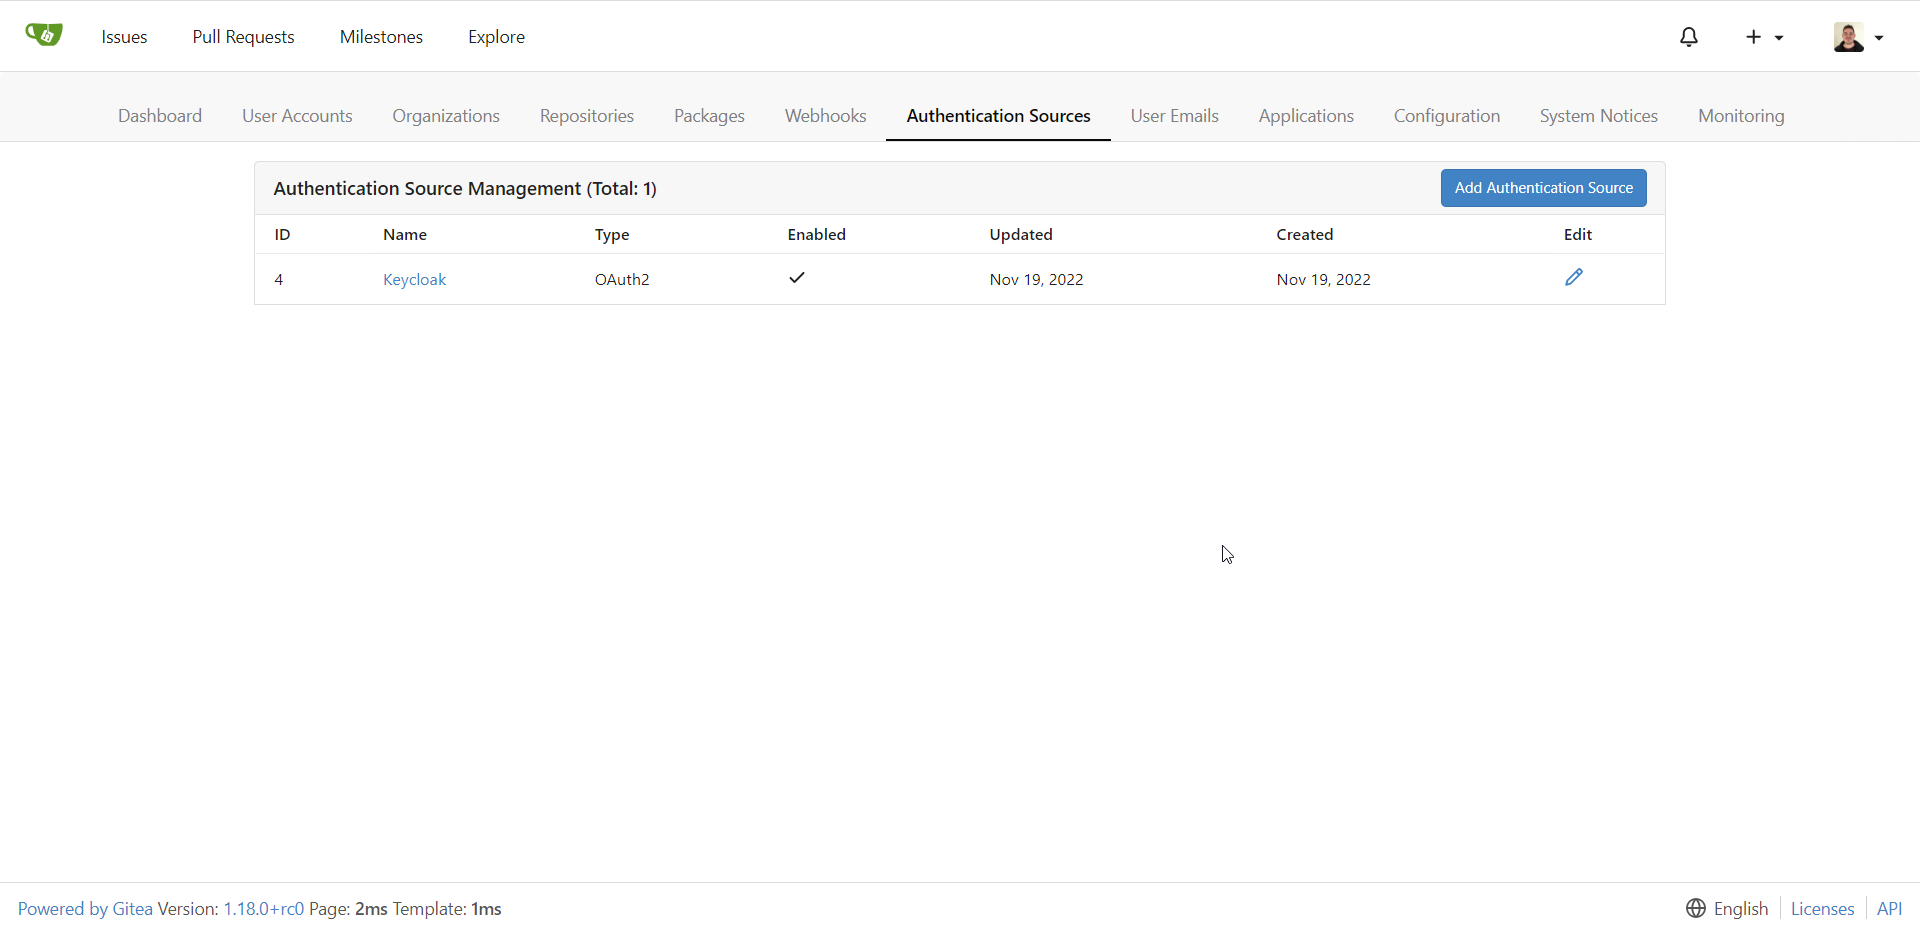
- If all goes well it should be added! If you get a 500 error your autodiscovery URL is probably not resolving.
Bringing it all together
Alright, this is a lot of work so far, but it’s something you only need to do once per (compatible) service.
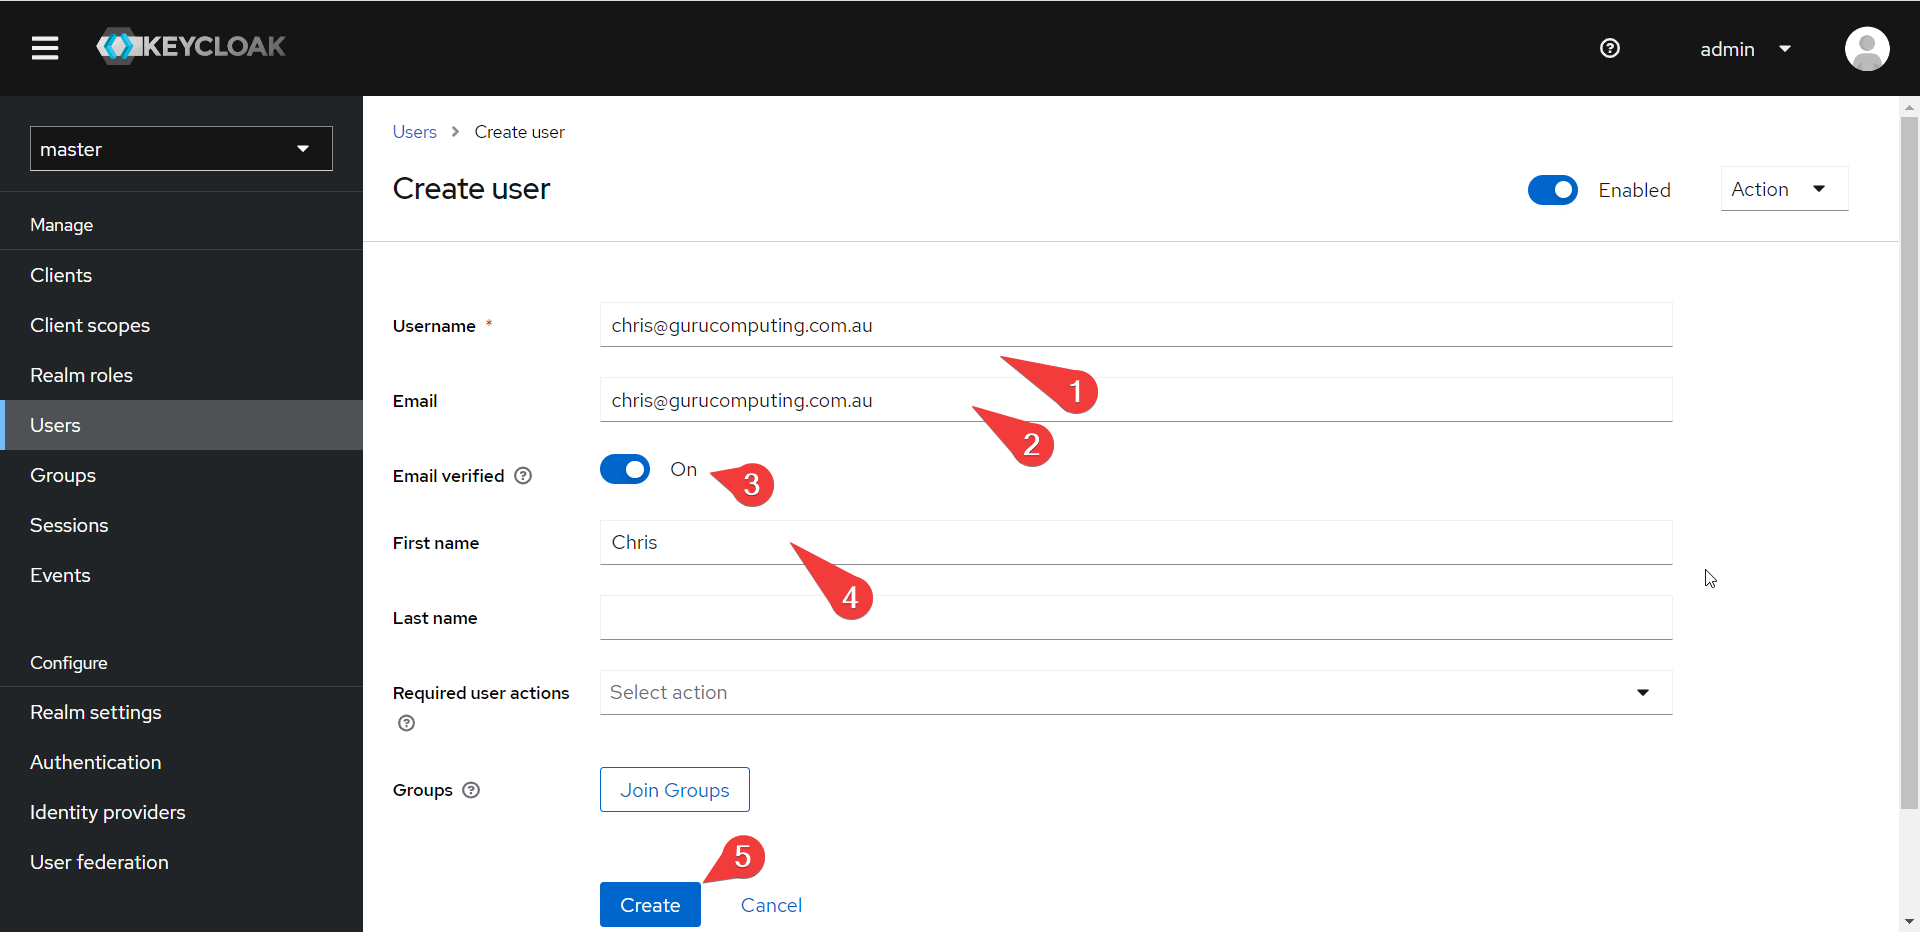
- Create a non-admin user in keycloak. Yeah you can use your admin account (technically) but SSO shouldn’t need it. Assign 2FA to it to feel even more secure if you like.
Info
The local admin accounts you created in keycloak and gitea should be assigned randomized passwords and stuck in a password safe. These are referred to as break glass accounts.
- Create a new user that uses keycloak as the authentication source in gitea
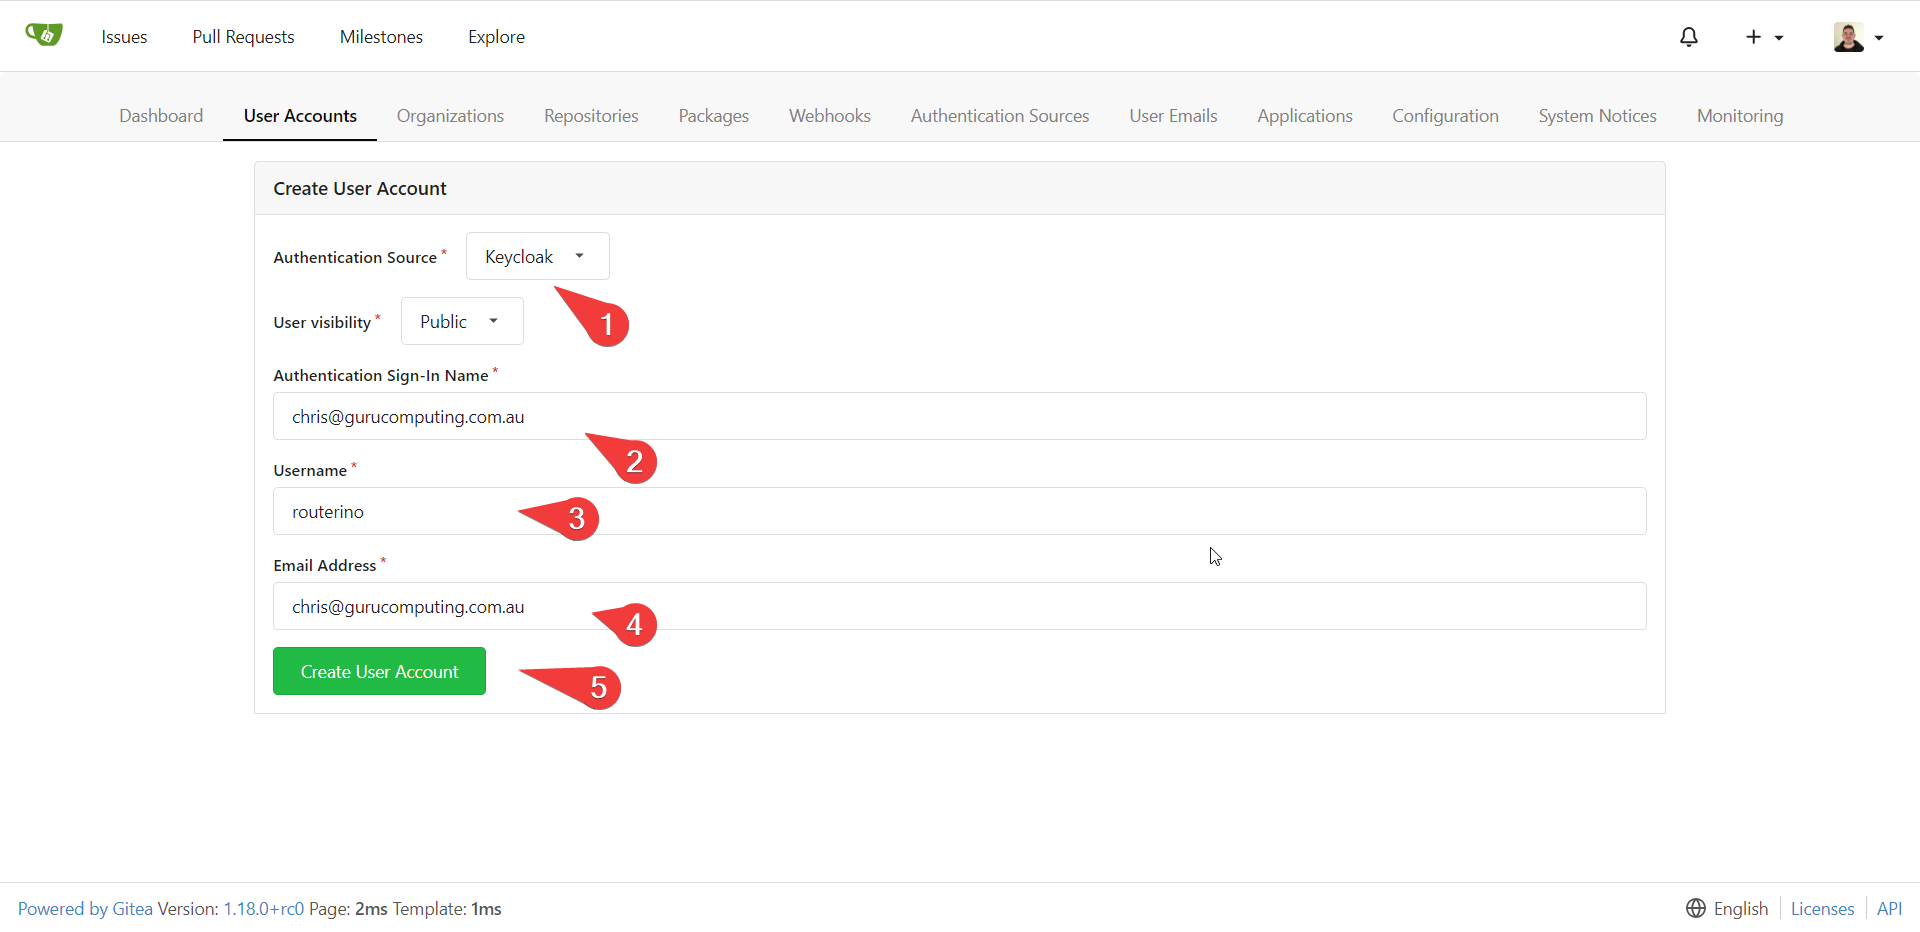
- Test it out! Log off and log back on via the new icon in the sign in screen. You should be able to log in via keycloak! You can either create a new account or associate it with your super admin account (preferably the first option, to keep the break glass separation).
Info
Note that Gitea also requires creating a local password in conjunction with a SSO login. This isn’t always needed (and in fact is usually not preferred, see this issue)
Conclusion
Well that was a lot of effort, seemingly just to replicate a much more simple local login. The value isn’t clear so far. However, as you scale up and scale out, the value becomes very clear. By enabling SSO you gain the following advantages:
- One sign in for multiple applications (hence the name Single Sign On). Hooray!
- Easier hardening process. It’s much easier to harden one login source than 20.
- Easier MFA. Just need to register one MFA source and you’re done
- Following enterprise best practices. Good for both work and for homelabbing, creates real world experience.
- Narrower attack surface. It’s much easier to choose a good authentication provider (keycloak, azure AD, etc.) than make sure every application is implementing authentication correctly