Enabling Reverse Proxy Features
Introduction
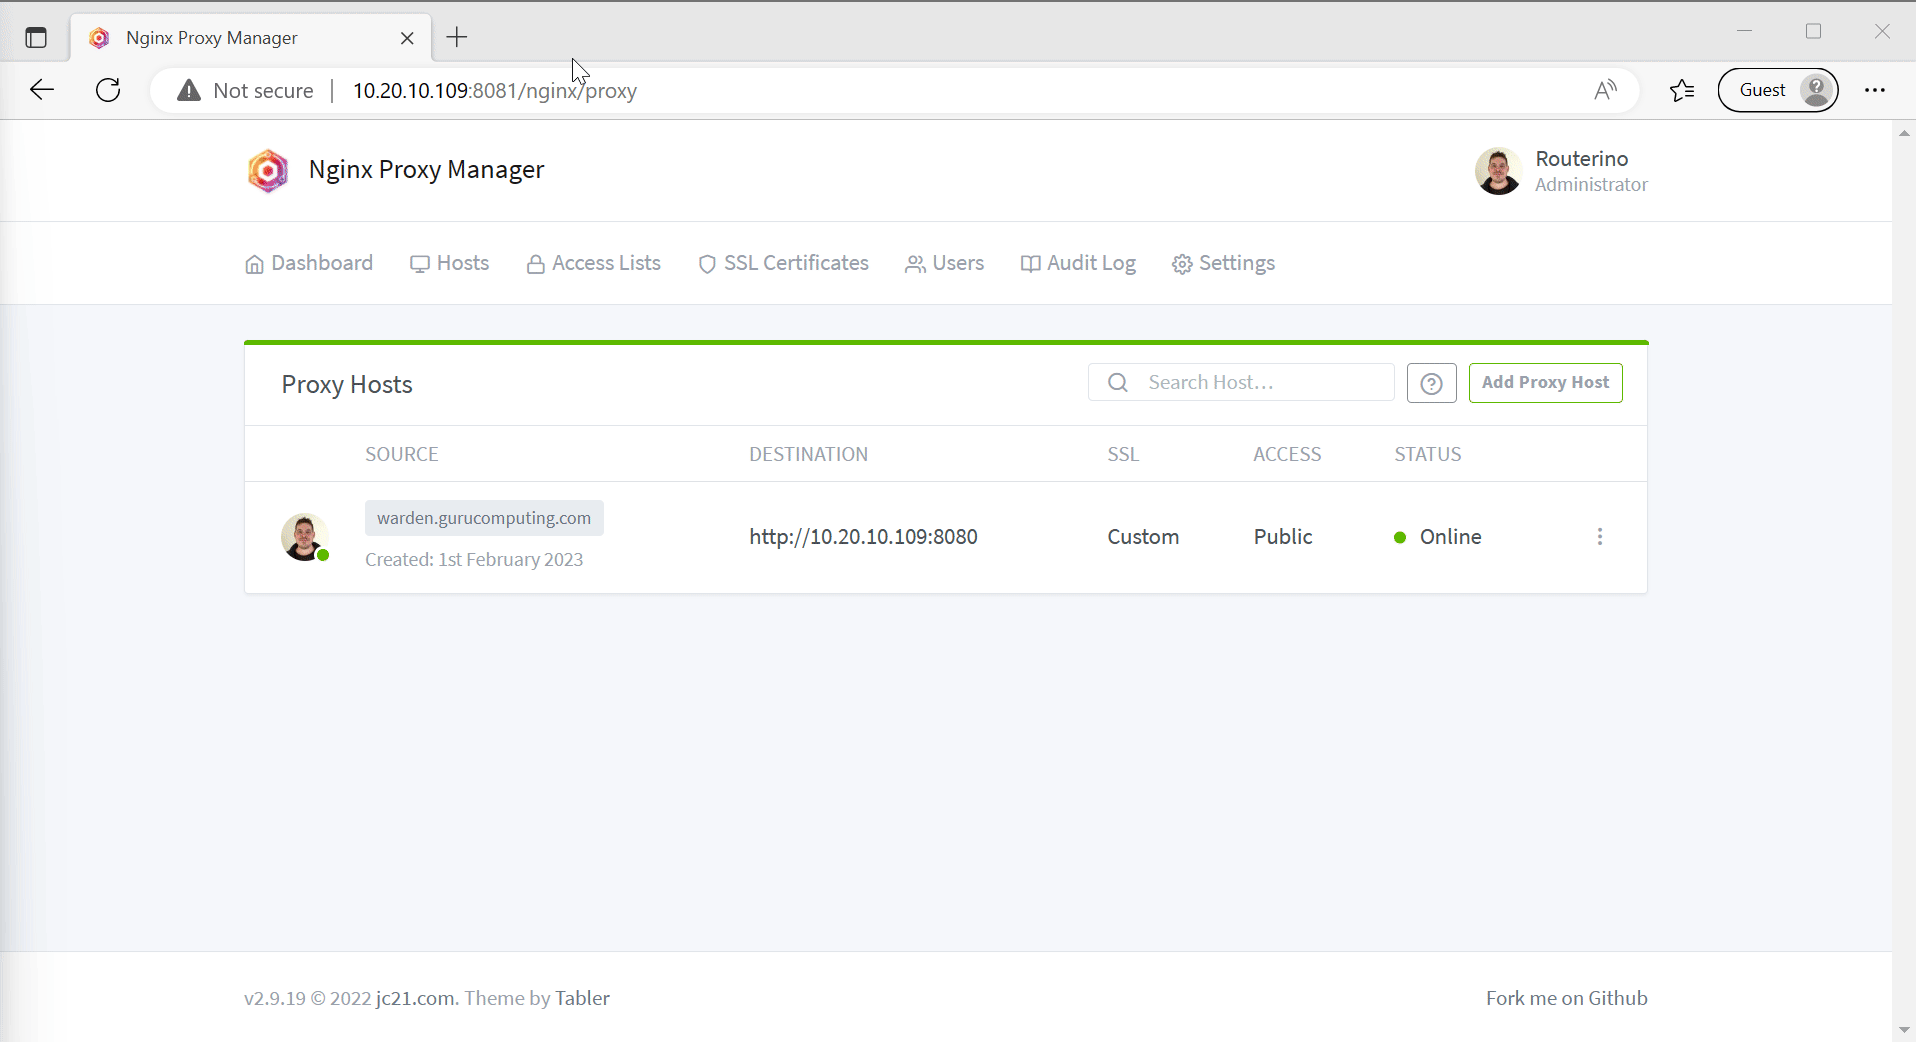
Where we left off, we had managed to redirect our service from a standalone IP/Port into an actual URL. But, we got some problems:
- There is no encryption! No encryption = unhappy browser.
- No IP Whitelisting. Especially if we end up publicly port-forwarding the reverse proxy, we need to make sure that we restrict who can access what servers.
- Our
8080and8081ports are still exposed on the IP, even though we can use the reverse proxy. Boo.
Let’s fix these problems.
Encryption
Encryption is the most important thing to fix so let’s fix that first using a self signed cert.
Info
If you plan to use let’s encrypt certificates, you can potentially skip this encryption section
- We need to generate a cert. On your server, run the following and fill out the prompts:
openssl req -newkey rsa:4096 \
            -x509 \
            -sha256 \
            -days 3650 \
            -nodes \
            -out site.crt             -keyout site.key
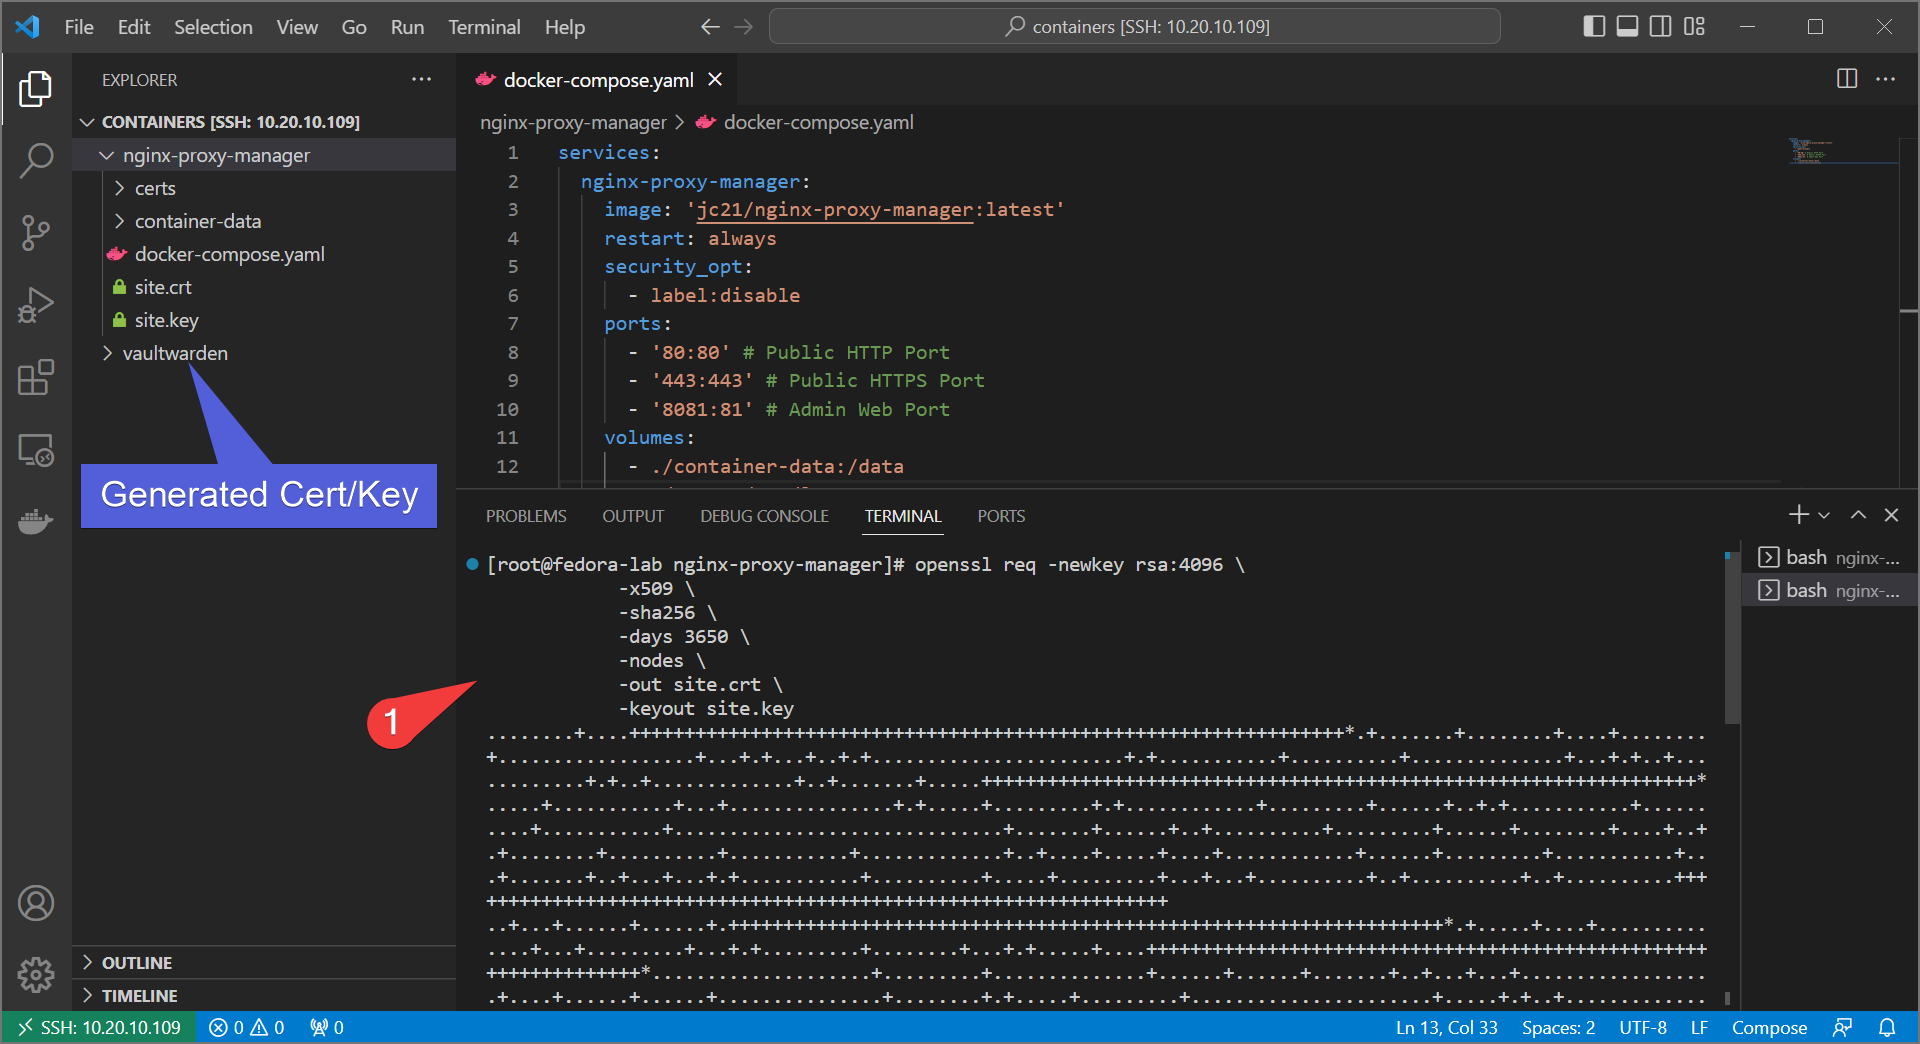
- Download the cert/key to your local computer. In VSCode you can simply do it by right-click→download for each file. If not using VSCode, you can use
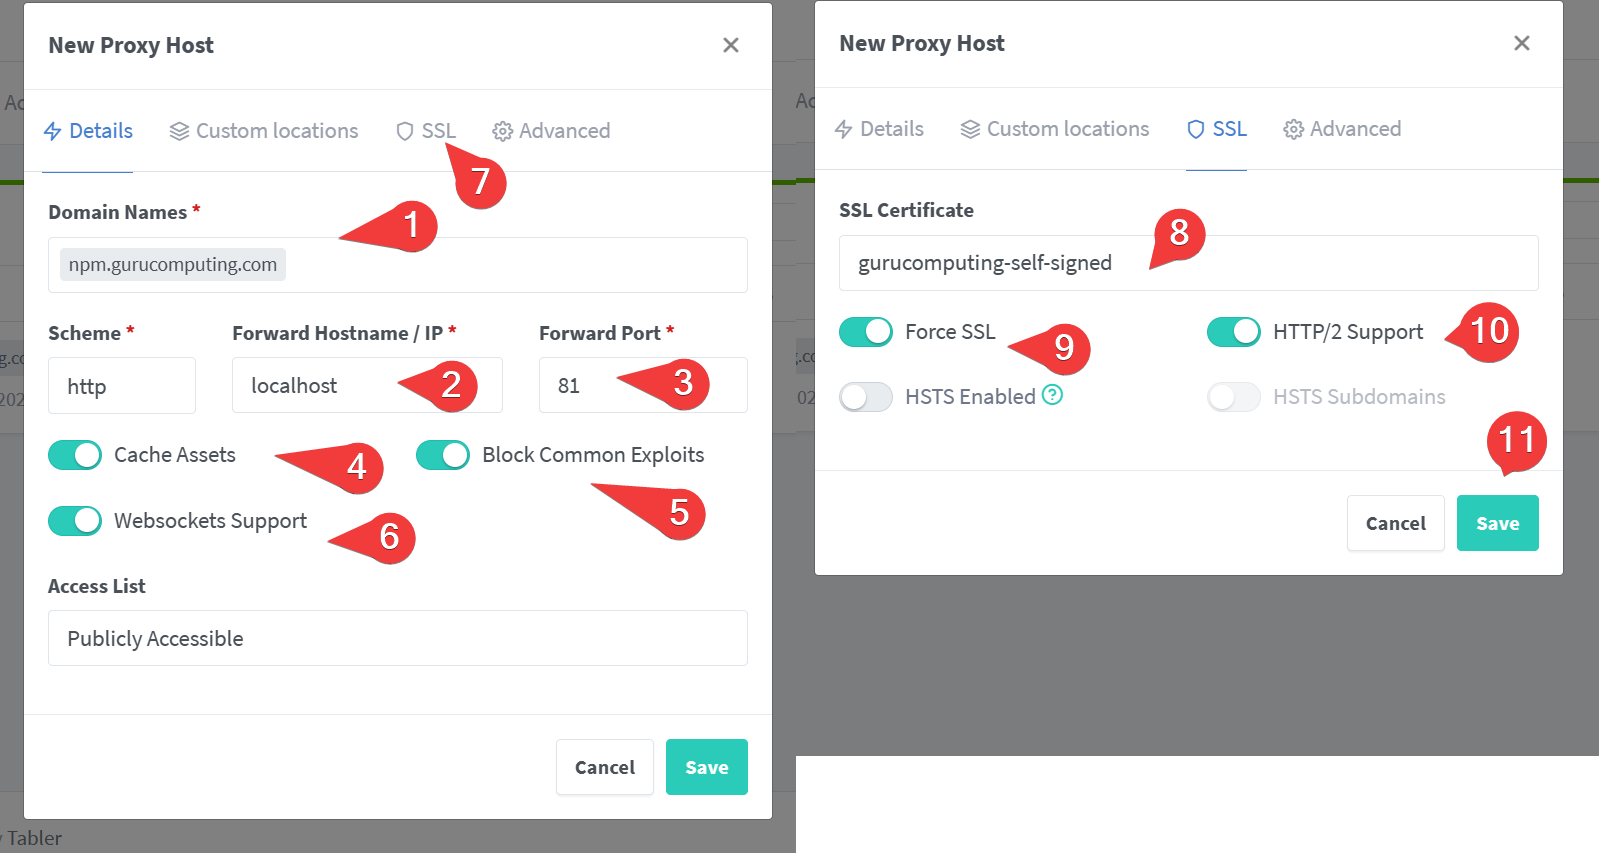
scpor winscp. - Upload the custom cert to Nginx Proxy Manager
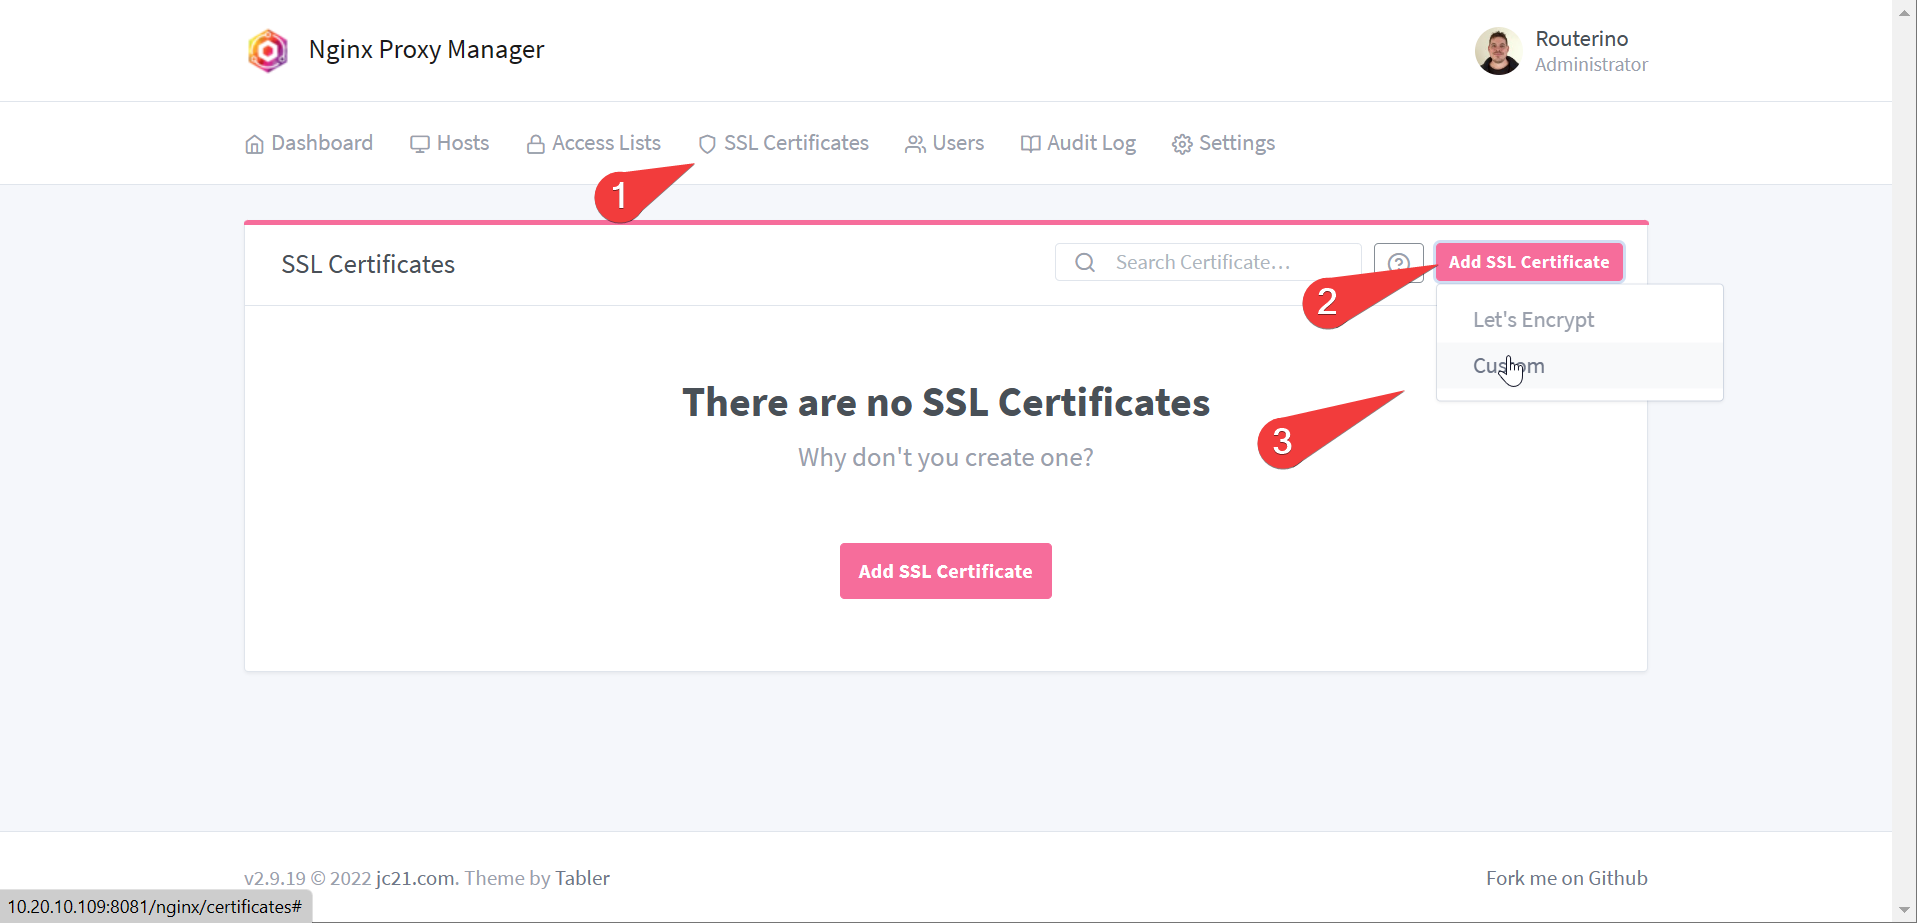
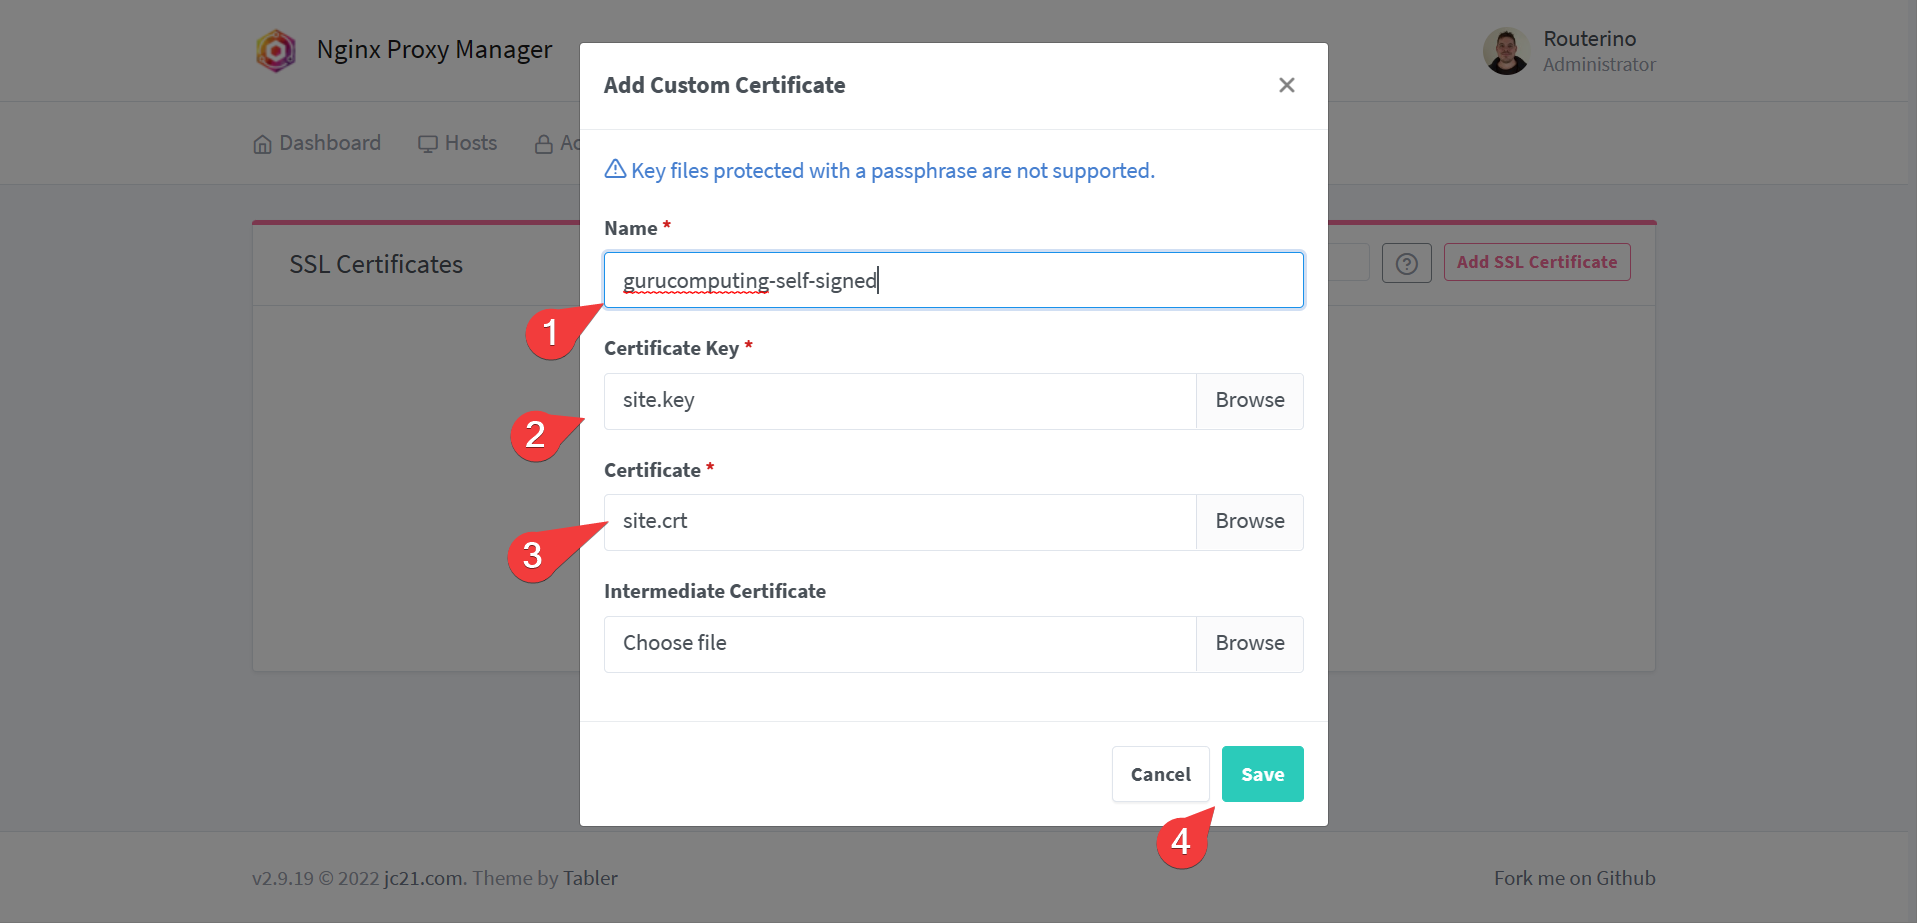
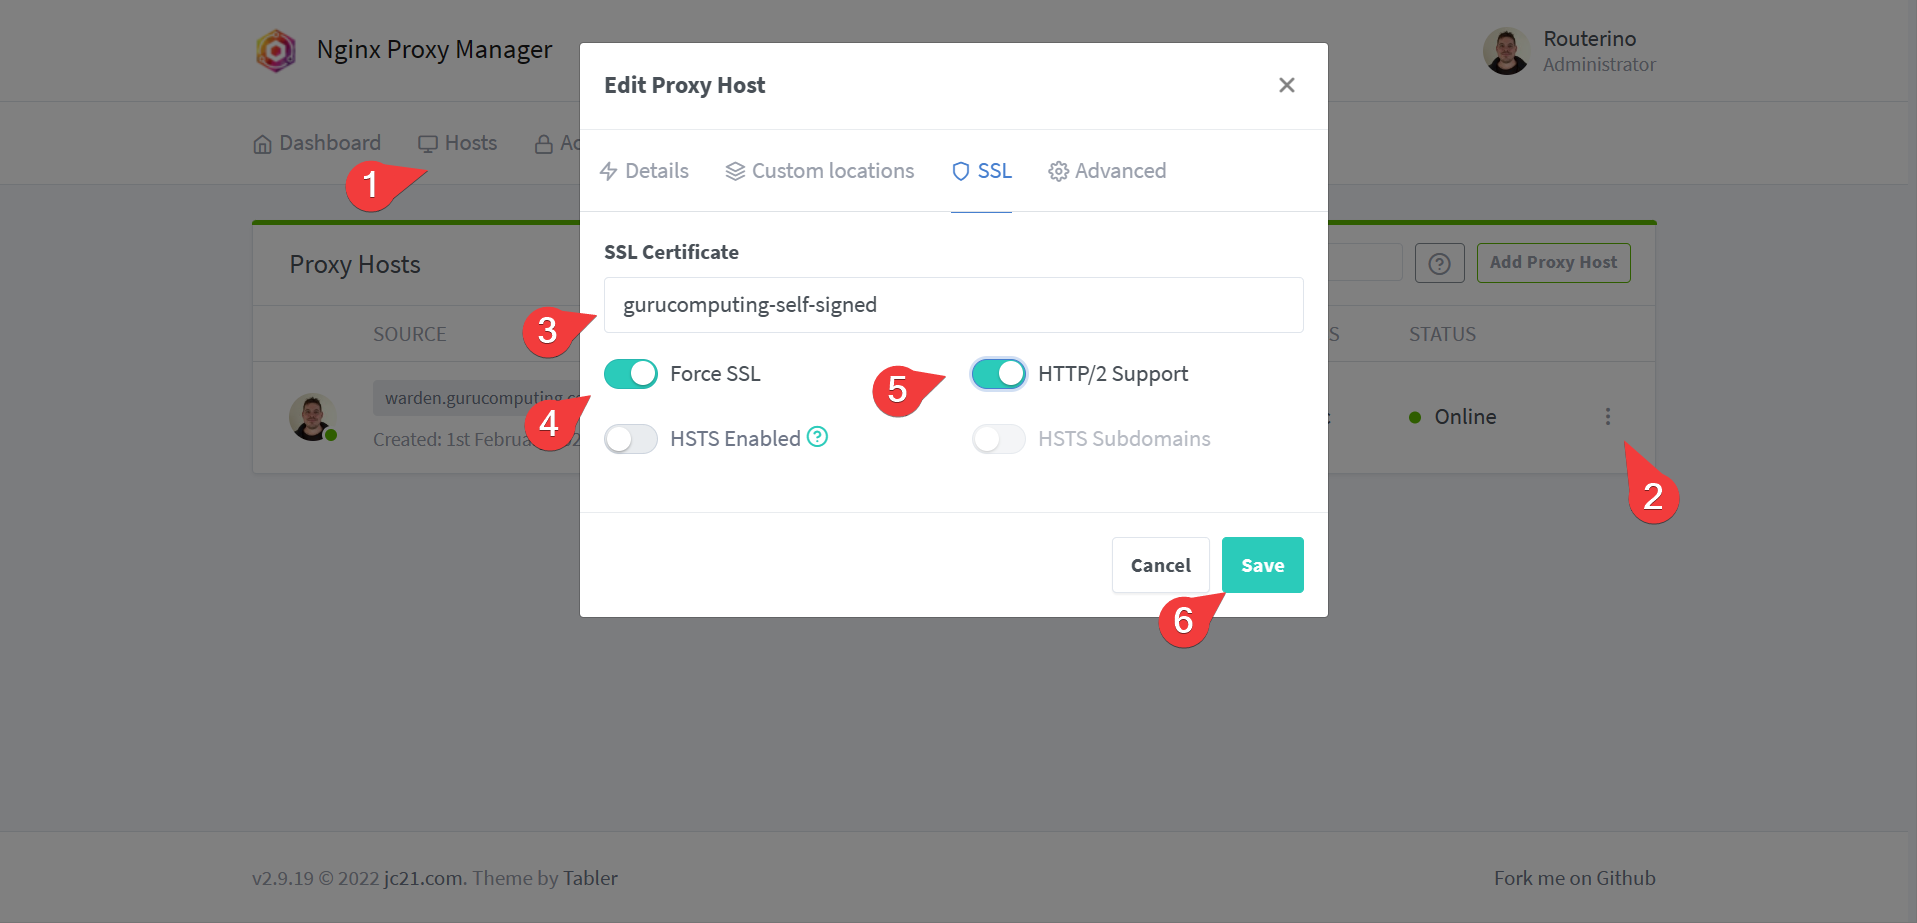
- Once uploaded, go back to hosts and change the site to use the certificate under SSL settings. Also turn on force redirect.
- Test your site! It should now give a scary warning (but now be encrypted).
IP Whitelisting
Not everyone needs to view every site. In fact let’s show that with the nginx proxy management console.
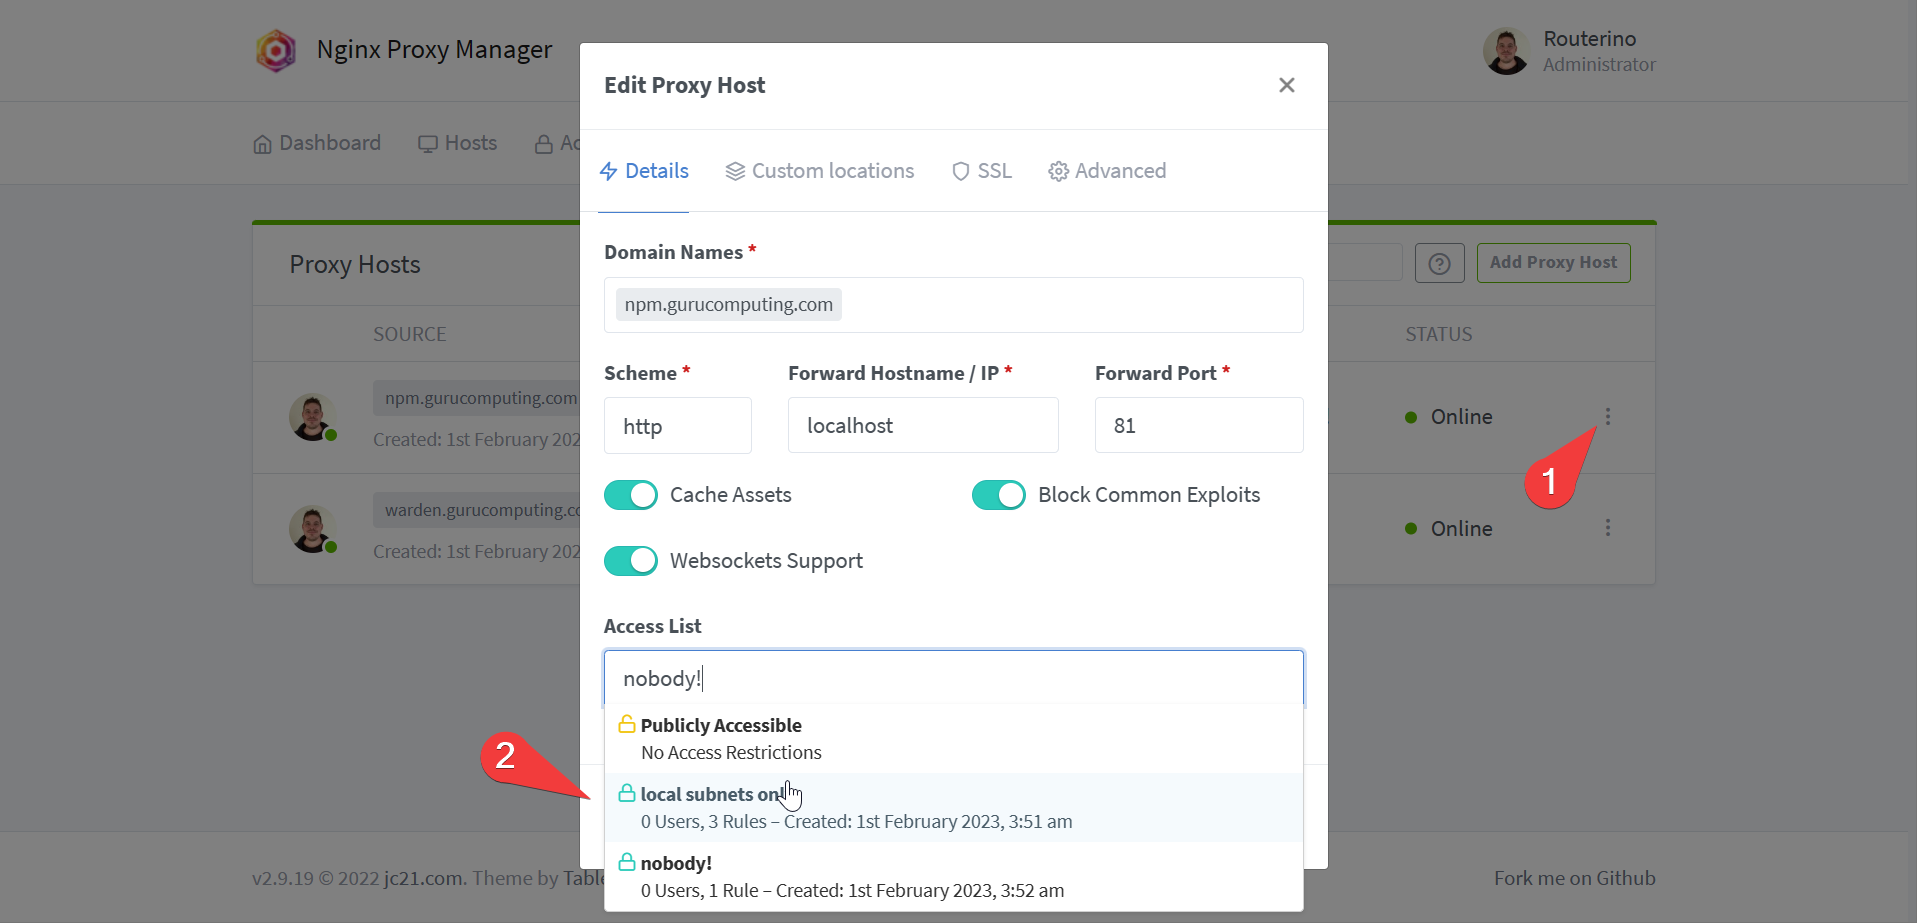
- Under Access Lists, create a “local subnets only” access list
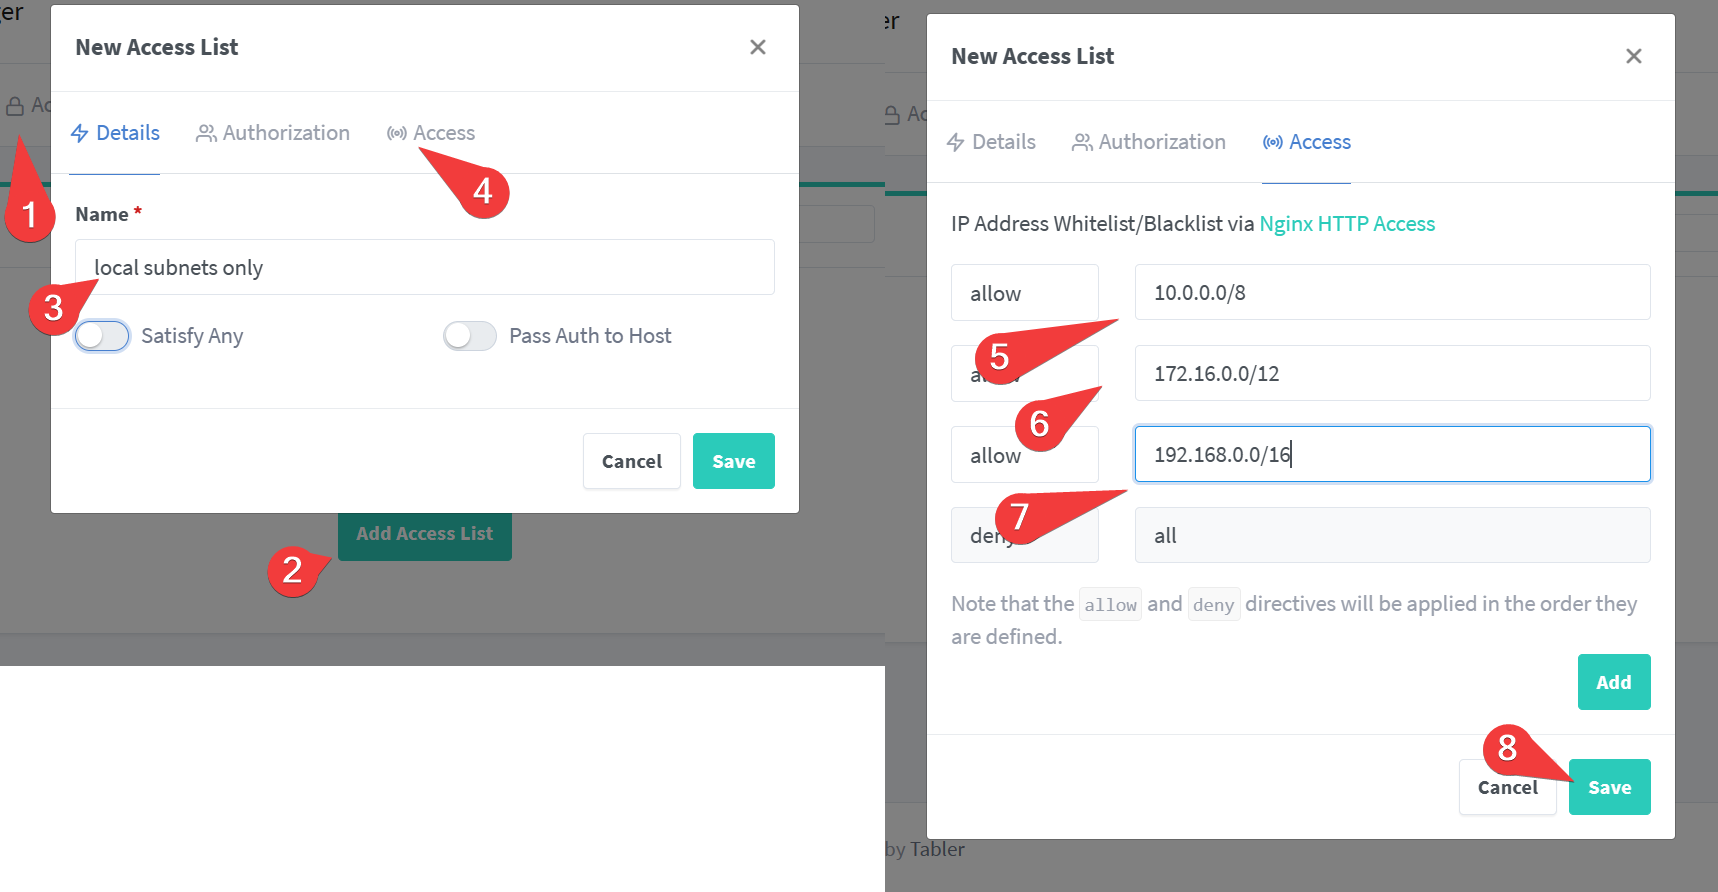
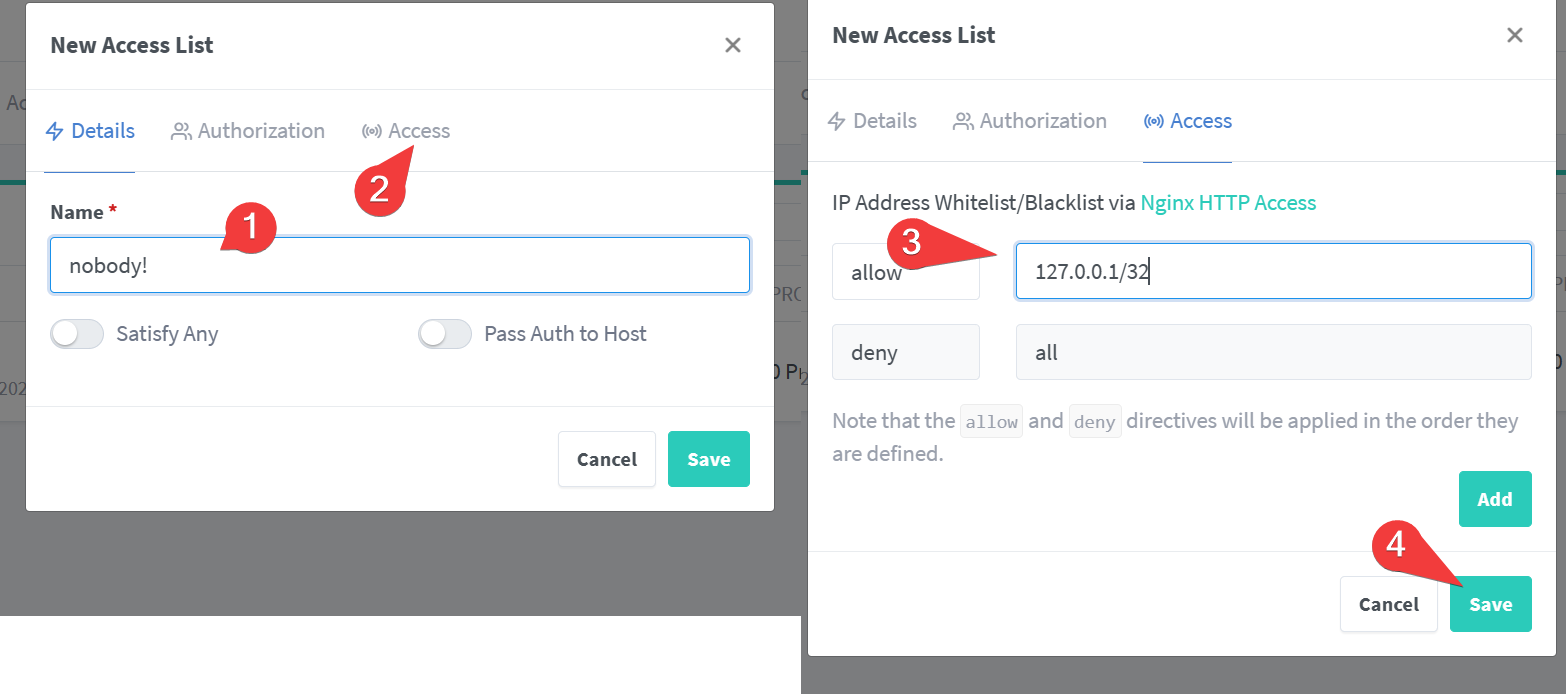
- For fun, create an empty access list for no access
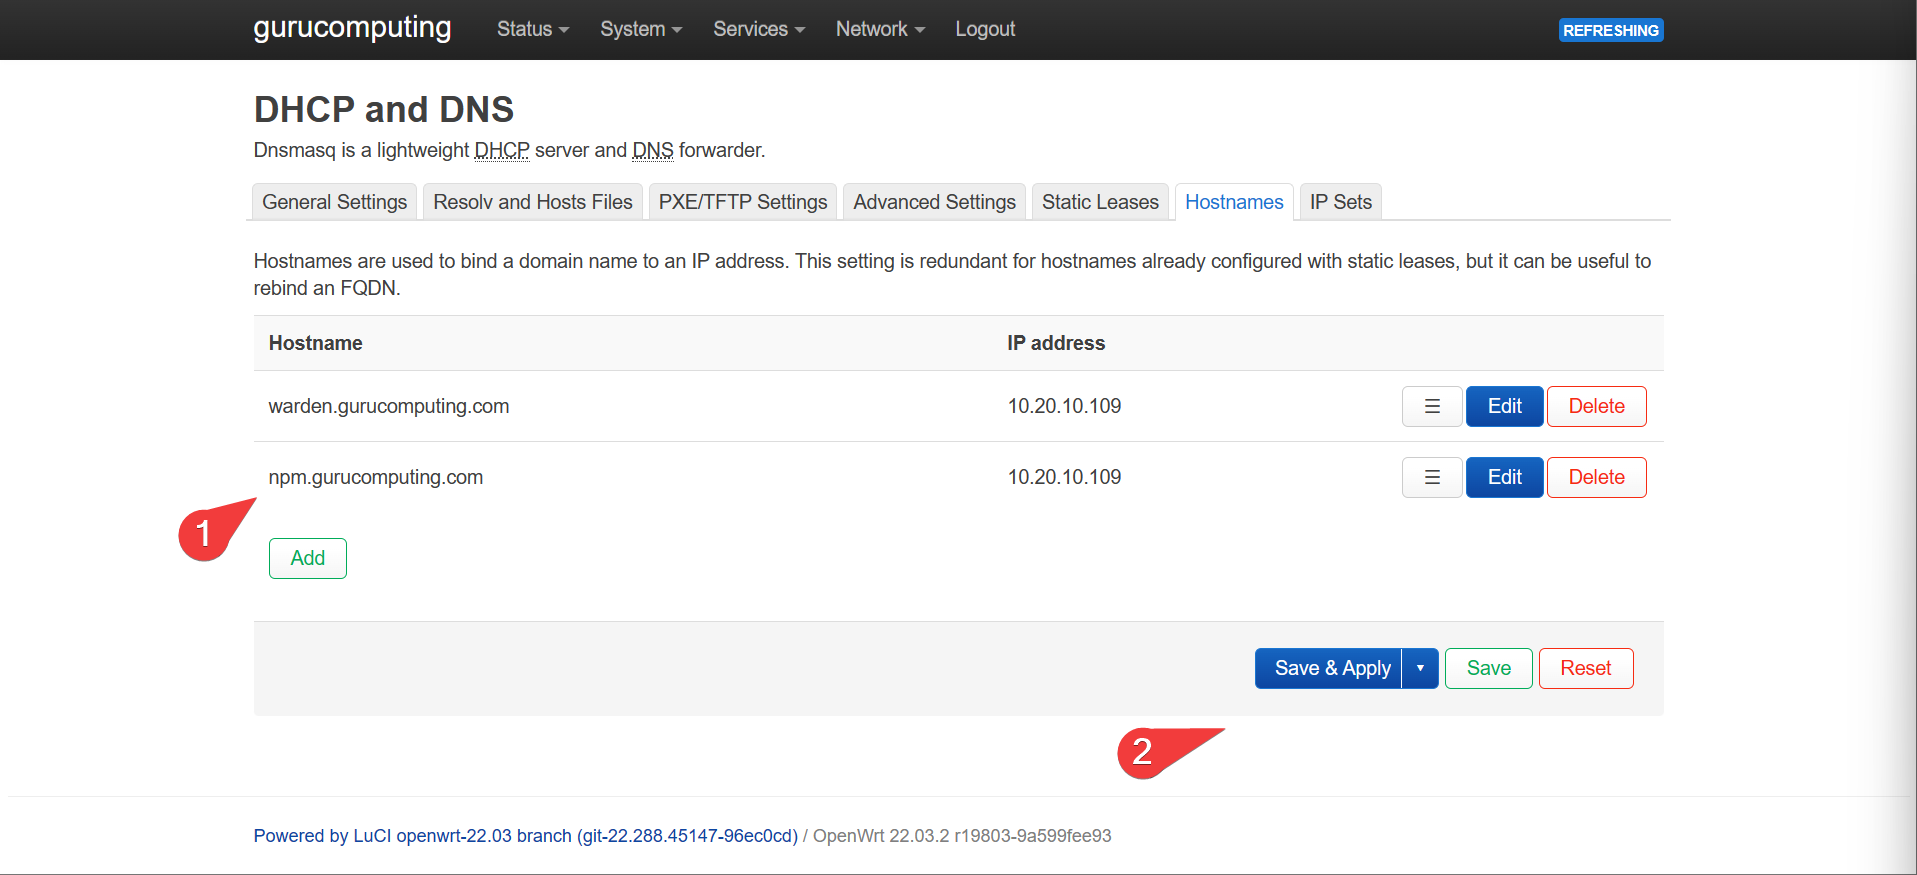
- Create a new DNS entry for your management interface. I will use
npm.gurucomputing.com.
- Generate a new Proxy Host. Set the url to
npm.<your-domain>and the target ashttp://localhost:81. also set the SSL Settings.
Info
Because we are targeting the internal container’s management port, we don’t have to reference the outside 8081 port.
- Check that you can access
npm.<your-domain>. Once verified, edit the proxy host and change the Access List fromPublicly AccessibletoNobody!. Verify doing so prevents access to the site.
- Whoops, locked ourselves out. Go back to the ip/port directly and change it to something more sane like
Local Subnets.
Leveraging Docker Networks
As we just found out, we don’t actually have to expose the port to reference it within Nginx proxy manager. Instead we can use the internal docker ports. However, so far this only works with the management interface because it’s on the same container as nginx. For other containers we need to have an internally shared network.
- Create a docker network for internal sharing. We can call it
reverseproxy-nw.
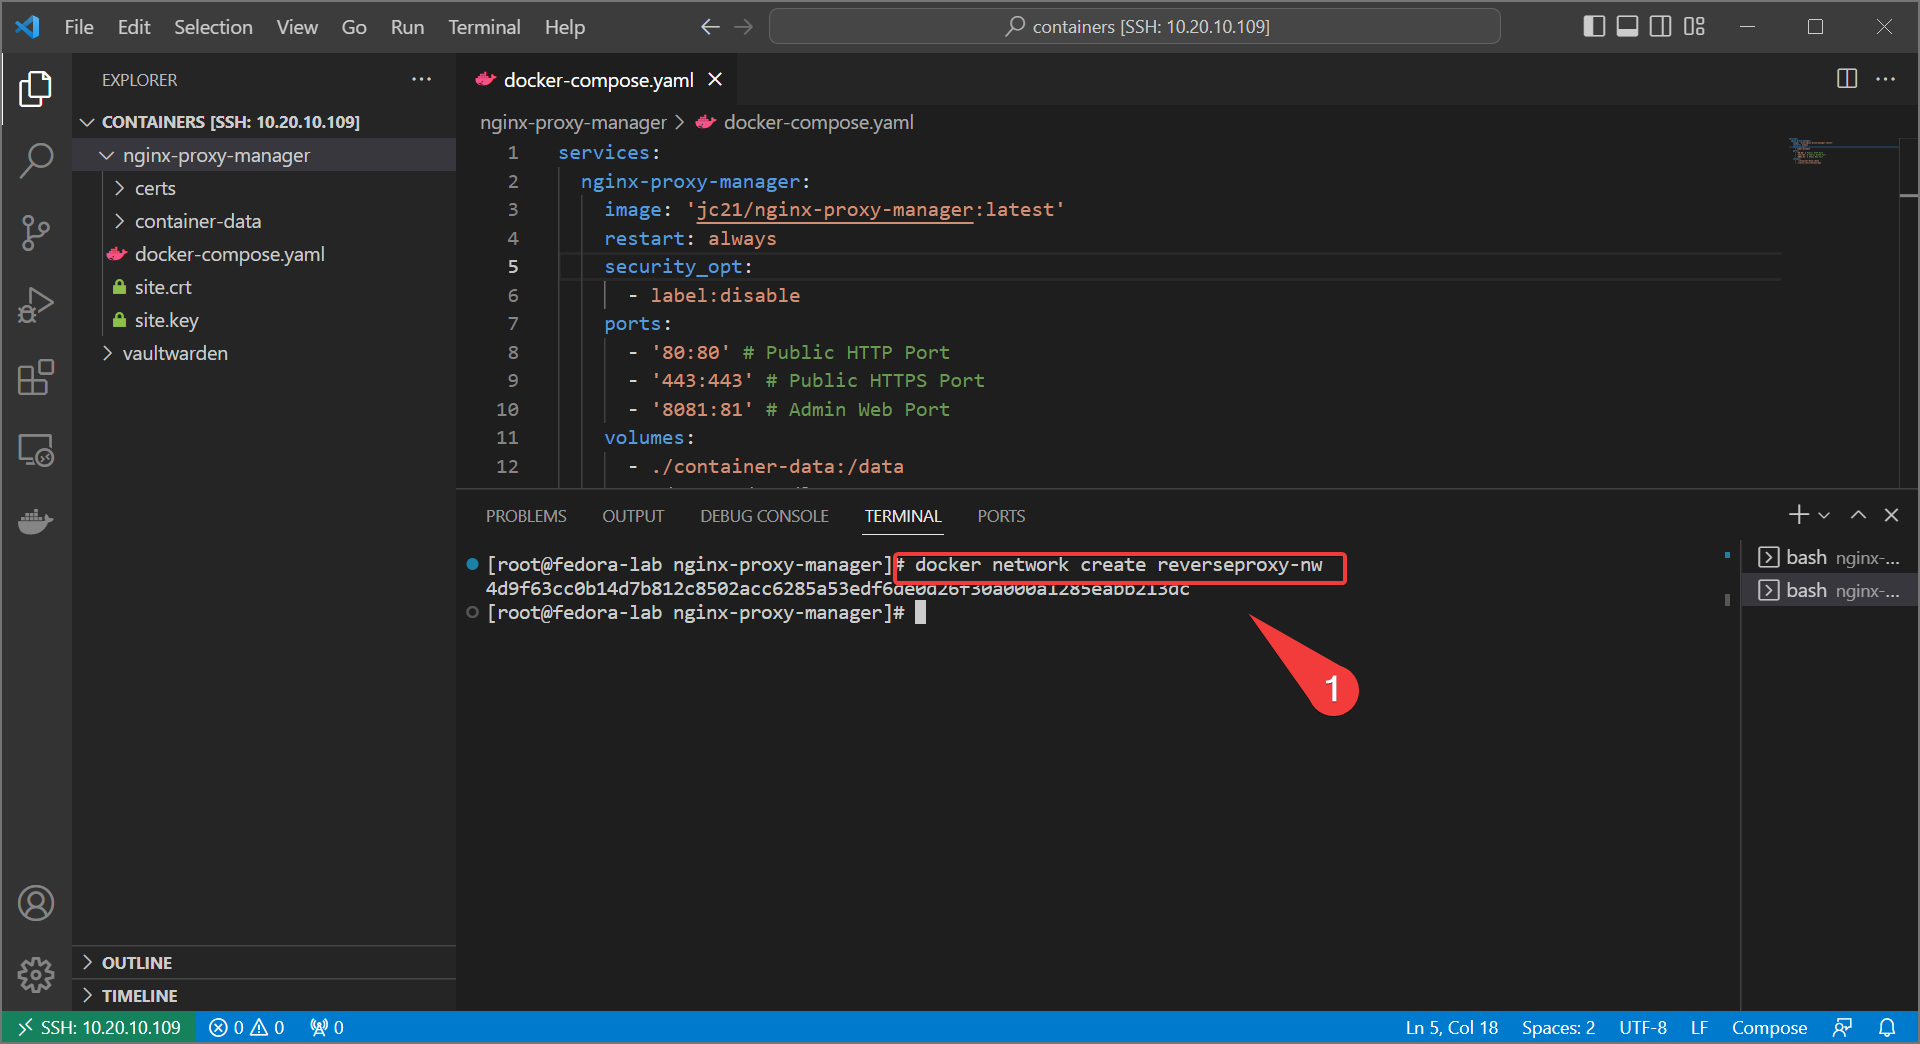
- Update your docker-compose for nginx proxy manager with the following:
Info
we also comment out the admin web port, because that’s getting proxied now
services:
  nginx-proxy-manager:
    image: 'jc21/nginx-proxy-manager:latest'
    restart: always
    security_opt:
      - label:disable
    ports:
      - '80:80' # Public HTTP Port
      - '443:443' # Public HTTPS Port
      # - '8081:81' # Admin Web Port
    volumes:
      - ./container-data:/data
      - ./certs:/etc/letsencrypt
    networks:
      - reverseproxy-nw

networks:
  reverseproxy-nw:
    external: true
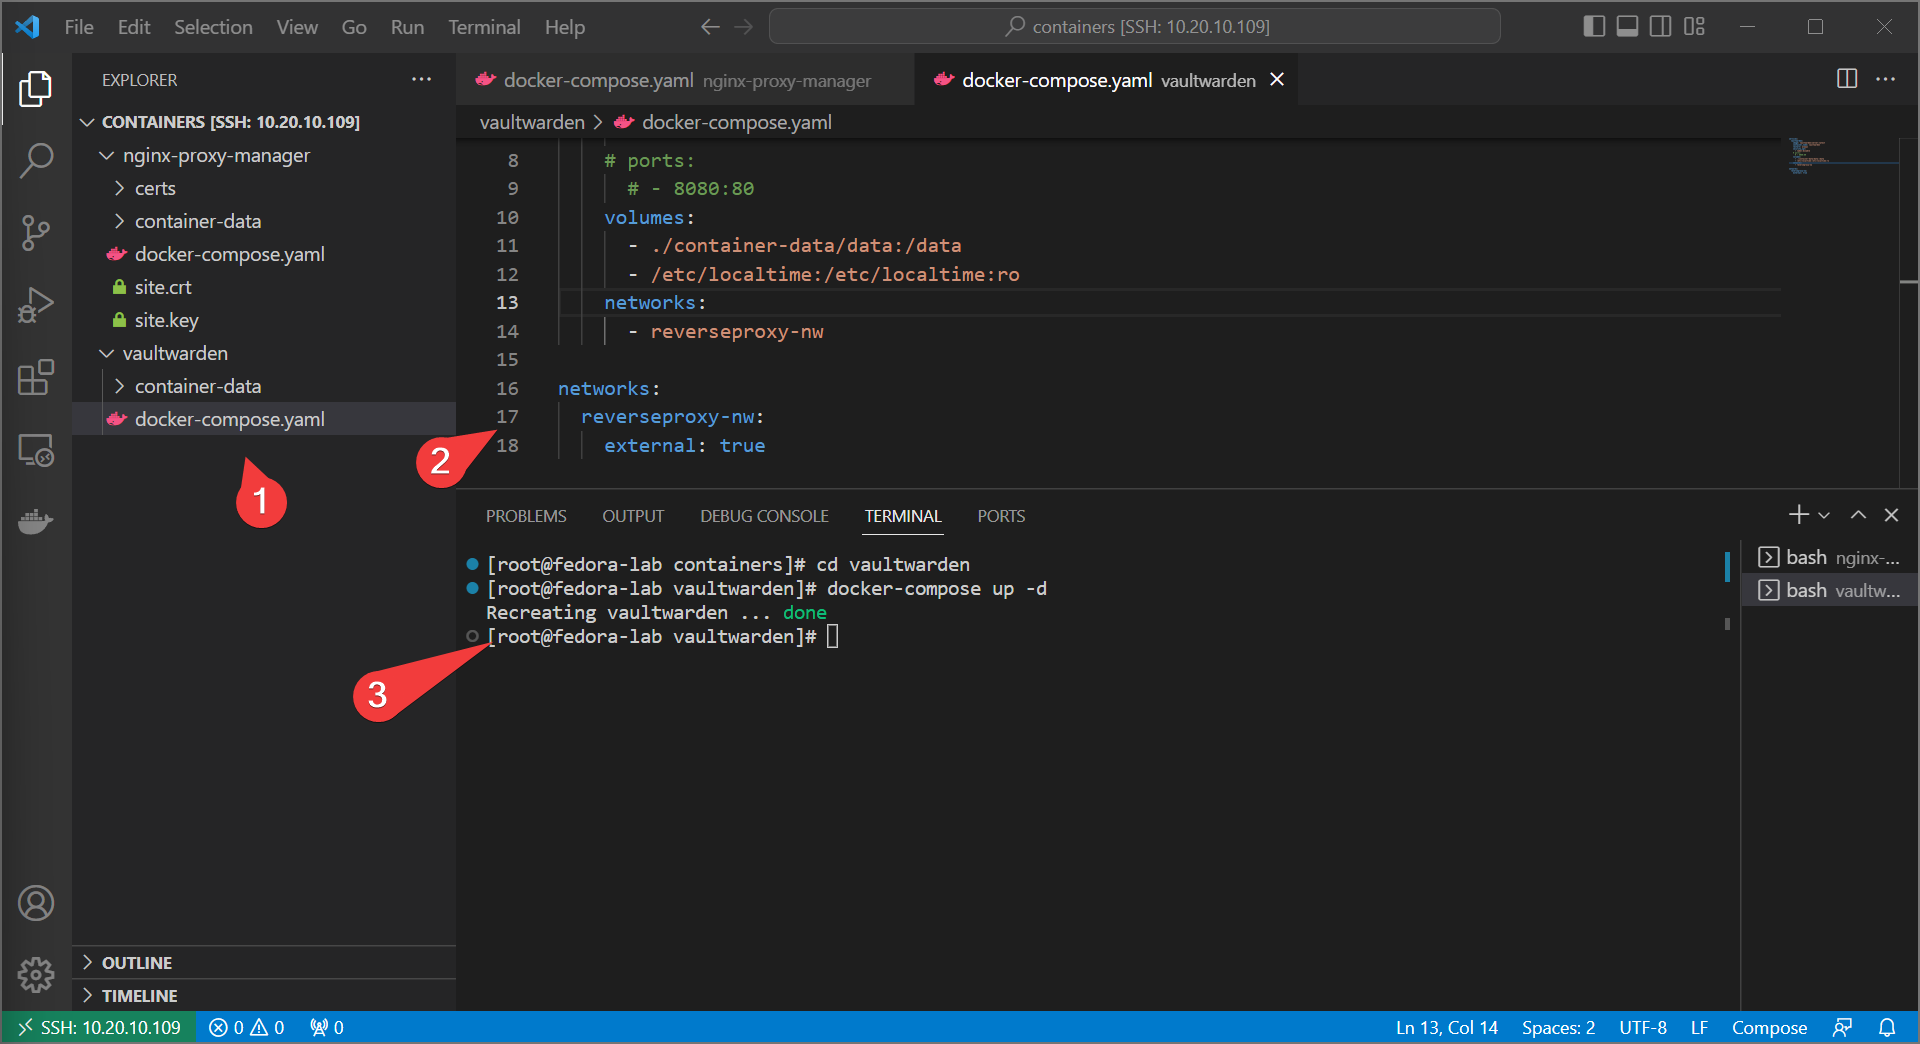
- bring up with
docker-compose up -d - Do the same with your other web service, adding the
reverseproxy-nwand commenting out the exposed port.
Info
If your container has multiple services (like a database), you may wish to declare two networks - one for the container services to communicate internally and one for the reverseproxy to communicate with the containers.
services:
  vaultwarden:
    image: vaultwarden/server:latest
    container_name: vaultwarden
    restart: always
    security_opt:
      - label:disable
    # ports:
      # - 8080:80
    volumes:
      - ./container-data/data:/data
      - /etc/localtime:/etc/localtime:ro
    networks:
      - reverseproxy-nw

networks:
  reverseproxy-nw:
    external: true
- Update the proxy host in the manager to point directly at the web service container internally. You can use the container name for this.
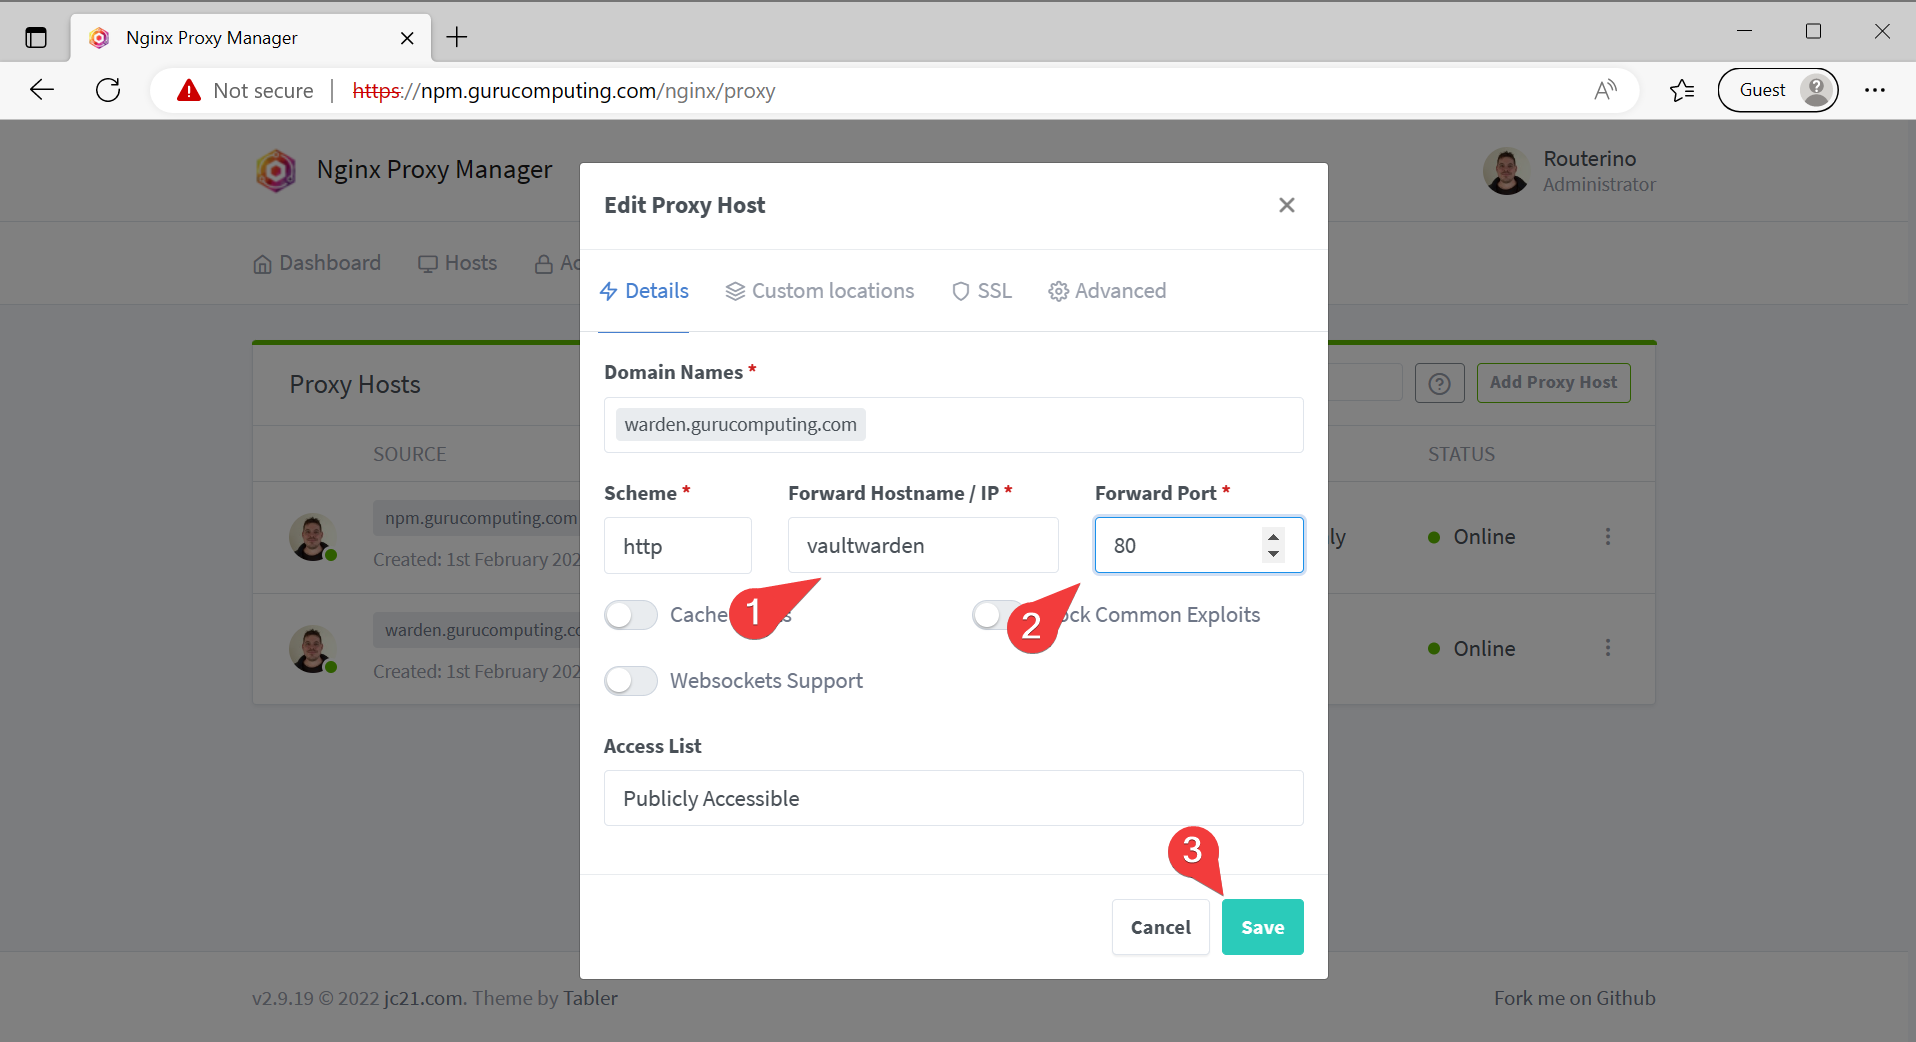
- Verify you can still access vaultwarden despite the port no longer being exposed

Moving on
So we actually have done enough to leverage a successful reverse proxy. We are serving multiple services on the same port, can put in IP controls (and optional basic auth), and have SSL encryption.
But wait! Because of our certs being self signed, the browser still hates us (arguably giving us a worse warning than no encryption at all!) To get a trusted cert, we need to look at signing our certs with a trusted Certificate Authority. We can do that next in Nginx Proxy Manager and ACME Certs.