Installing a Docker Environment
Introduction
I like using docker for homelabbing. That should be clear based on the other guide I wrote for docker. We can set up a virtual docker environment in proxmox too!
However, there’s a thing that sucks about virtualization. That’s resource allocation. Specifically, virtual machines suck down RAM like a vaccuum cleaner because you can’t share RAM resources between VMs. Also you’re loading a fresh operating system per VM, and that adds a ton of RAM overhead.
Well that’s where the magic of containers come in. Docker fixes that problem, by sharing core OS resources with the host. But Docker isn’t very VM-like. It’s more of an application orchestrator.
Here’s a secret though. We can do that container resource allocation and have a VM-like isolated environment. With the magic of proxmox LXC Containers.
TL;DR
In this article, we will:
- Create a debian based LXC container
- Use that container to install docker
- Start using docker in a nested container
Creating a Container
To start with, we aren’t going to create a VM for our docker environment. Instead, we’ll create a container!
Info
officially proxmox recommends docker runs in a VM, not a container. That’s because (LXC) containers running (docker) containers can get a bit wibbly wobbly for support. In practice, doing so is fine, albeit with some special docker features requiring privileged container access.
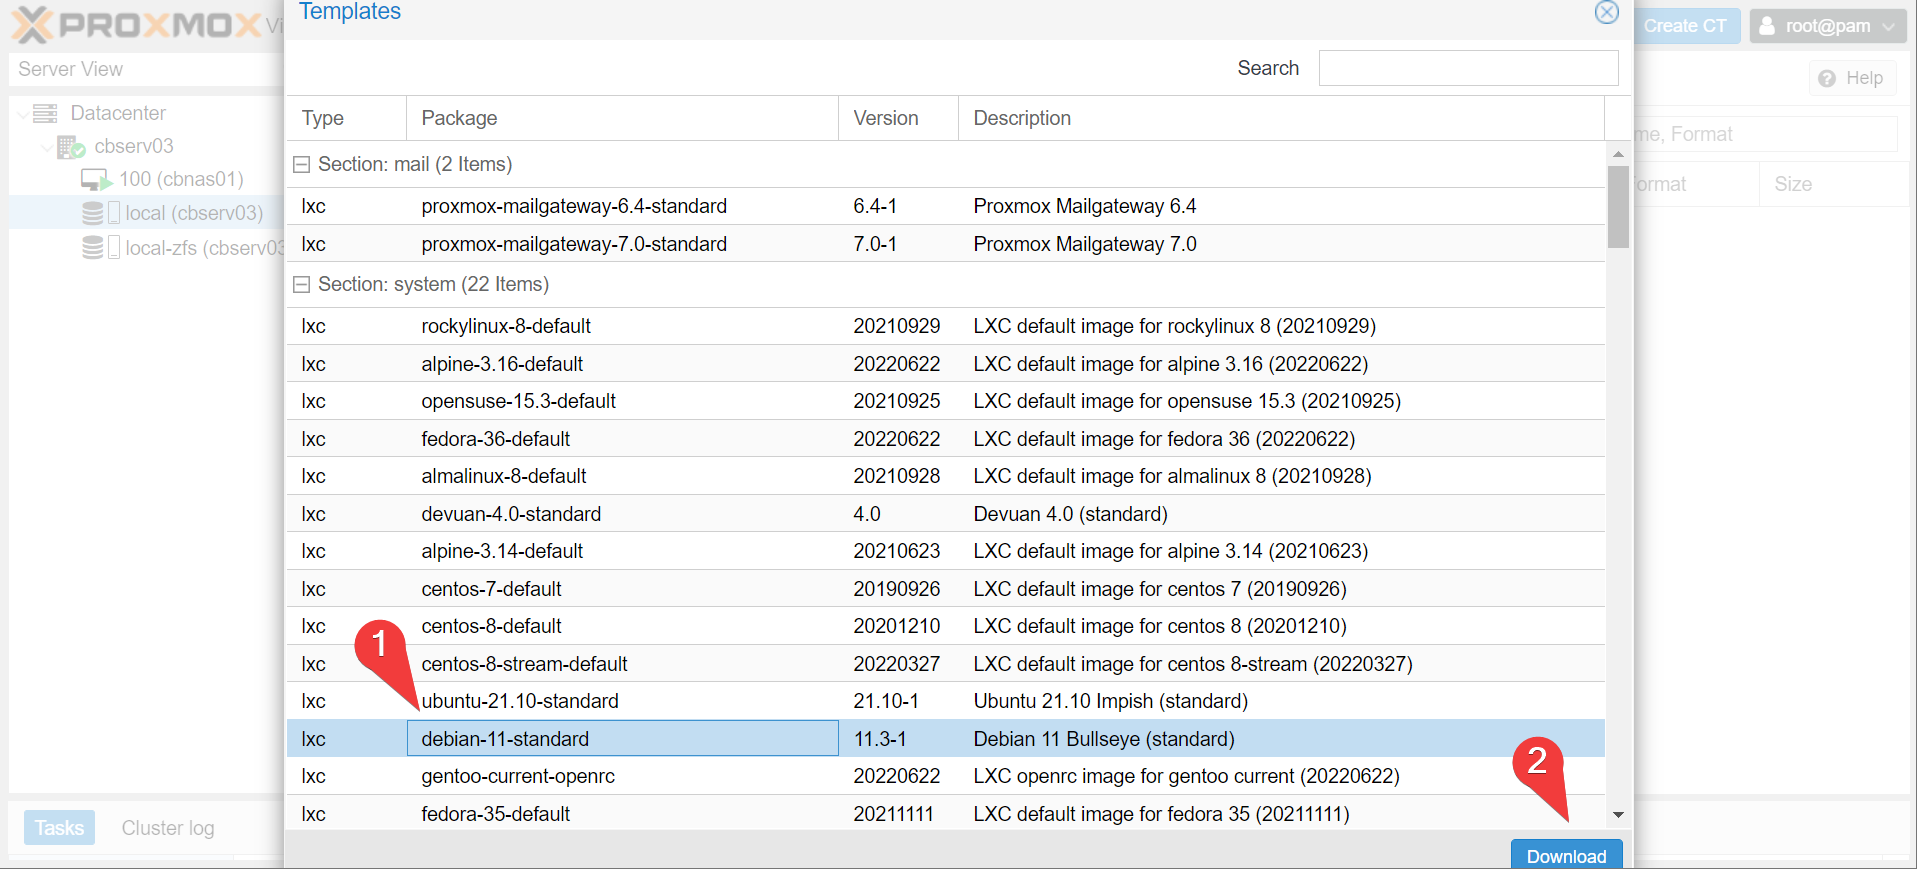
Let’s download an OS template to start with. Proxmox actually runs debian under the hood, just like ubuntu and many other distro’s. Since we’ll be sharing Proxmox’s kernel, let’s also stick to debian for consistency (although you can use another distribution, even a non-debian based one, without issue).
- navigate to templates under the CT Templates in the node storage

- Choose the latest debian template (debian 11 as of right now).
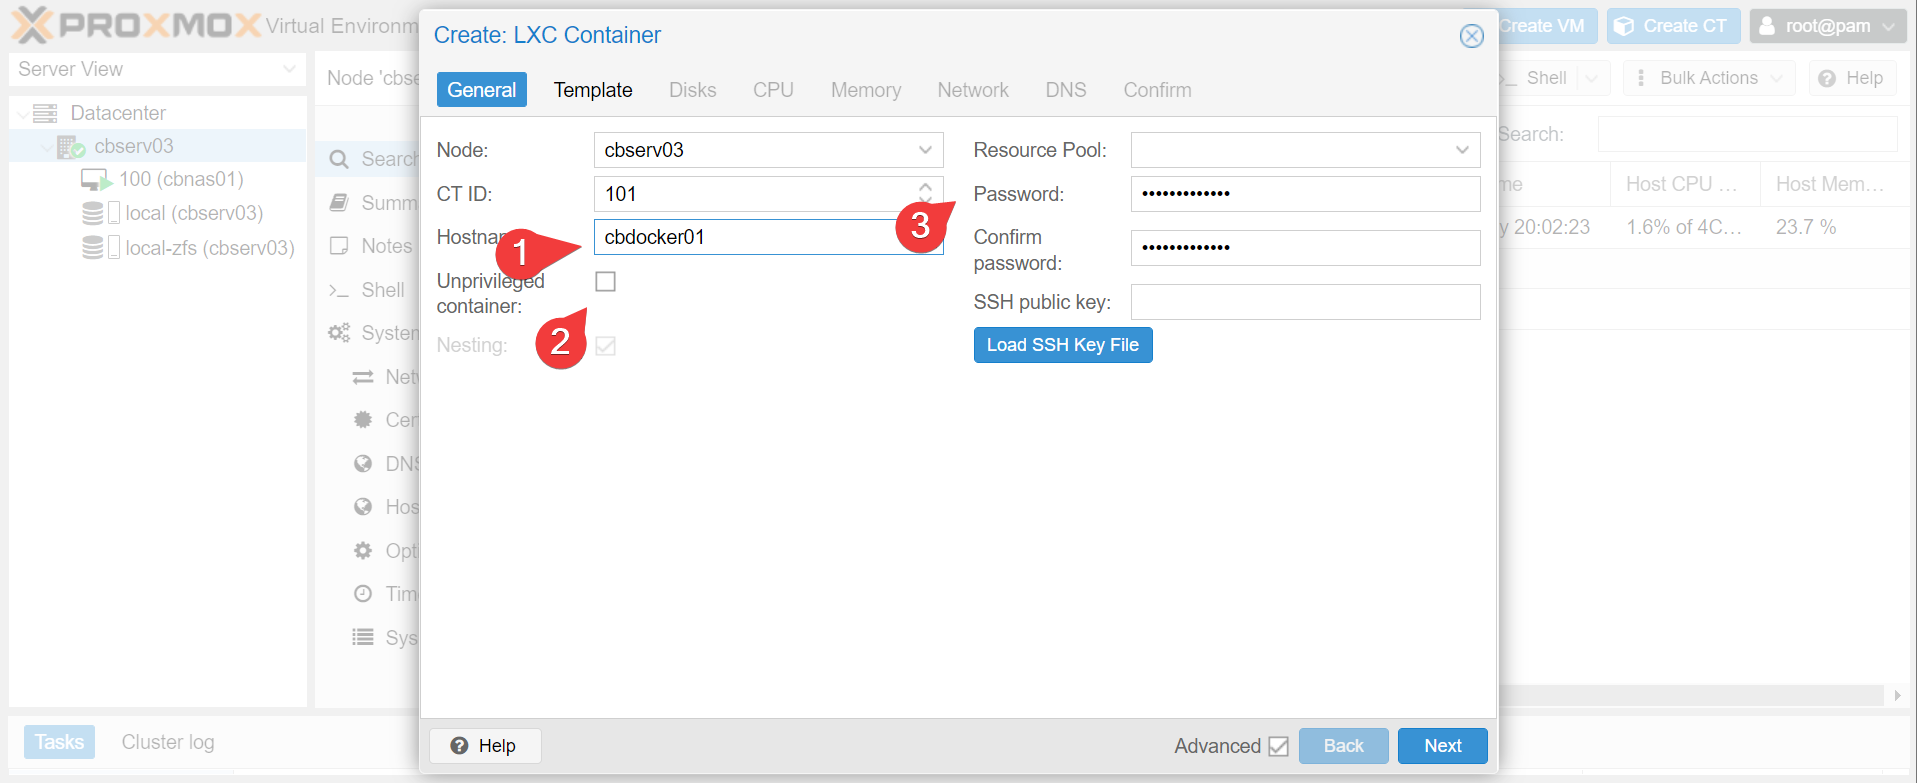
- Once downloaded, choose create CT, uncheck
unprivilegedand give the container a hostname and password.
Warning
We set cbdocker01 to be a privileged container so docker has the capability to mount nfs exports later on. Doing so has some security implications. If the docker host gets compromised, there are no guarantees an attacker can’t jailbreak the LXC container into proxmox. If this is a concern, do what proxmox recommends and run cbdocker01 as a VM instead.
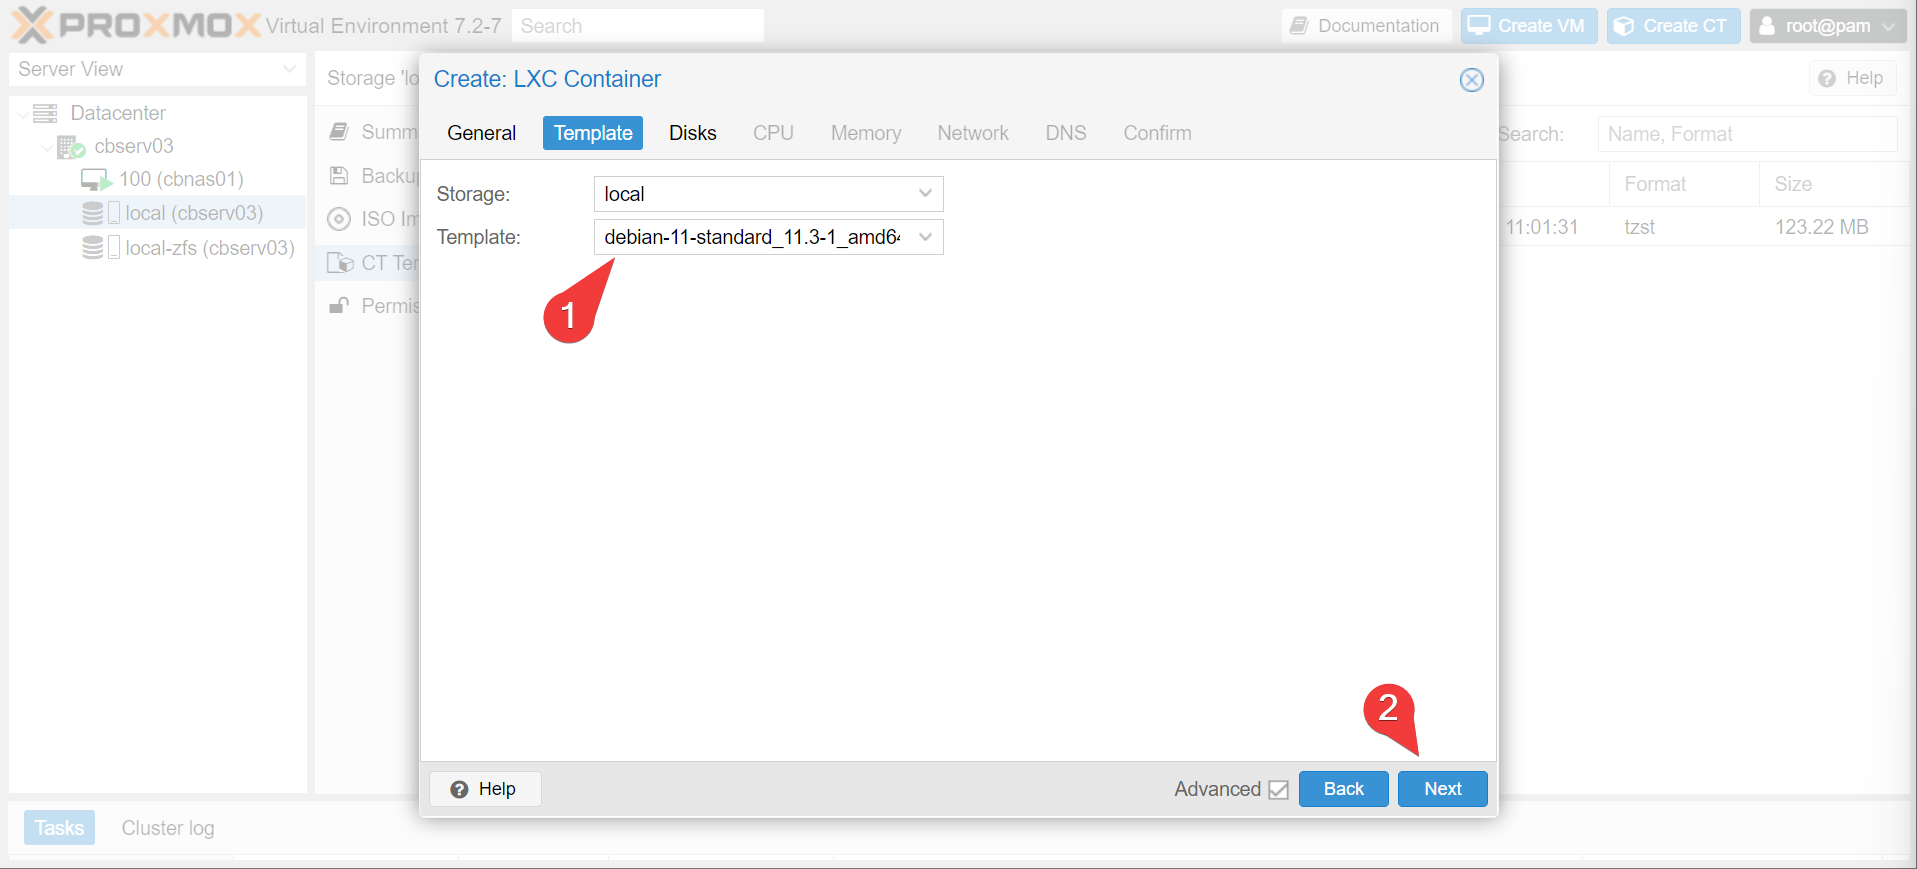
- Next page, choose the template we just downloaded:
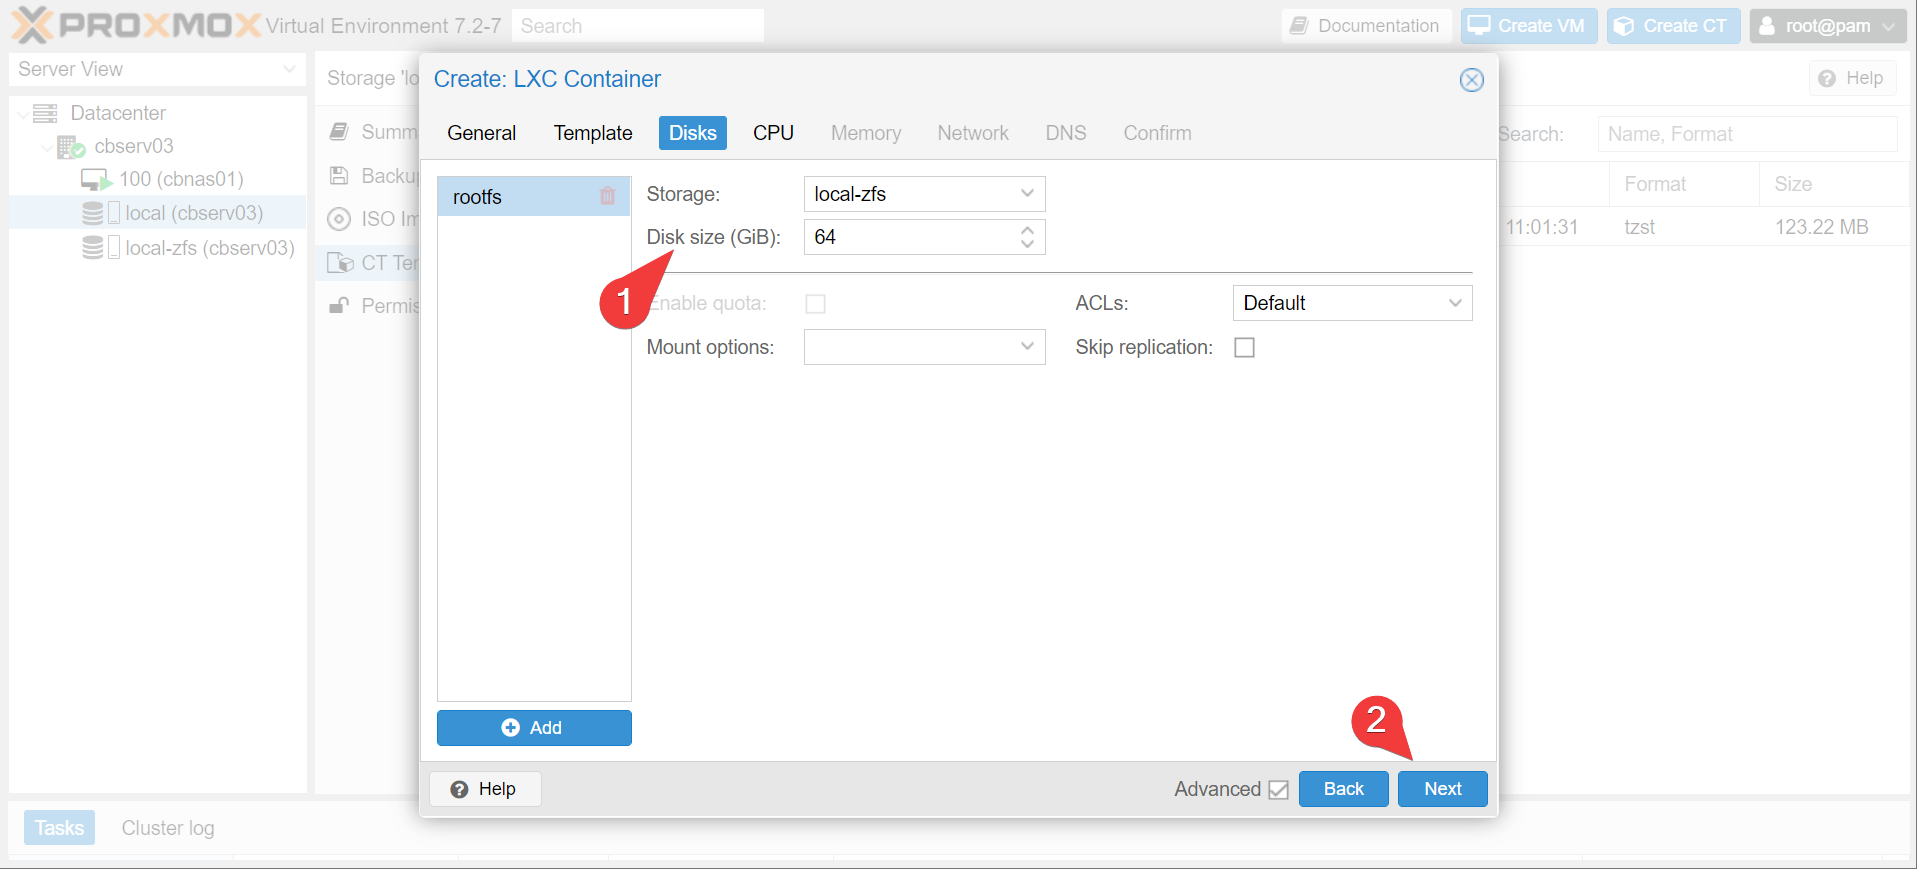
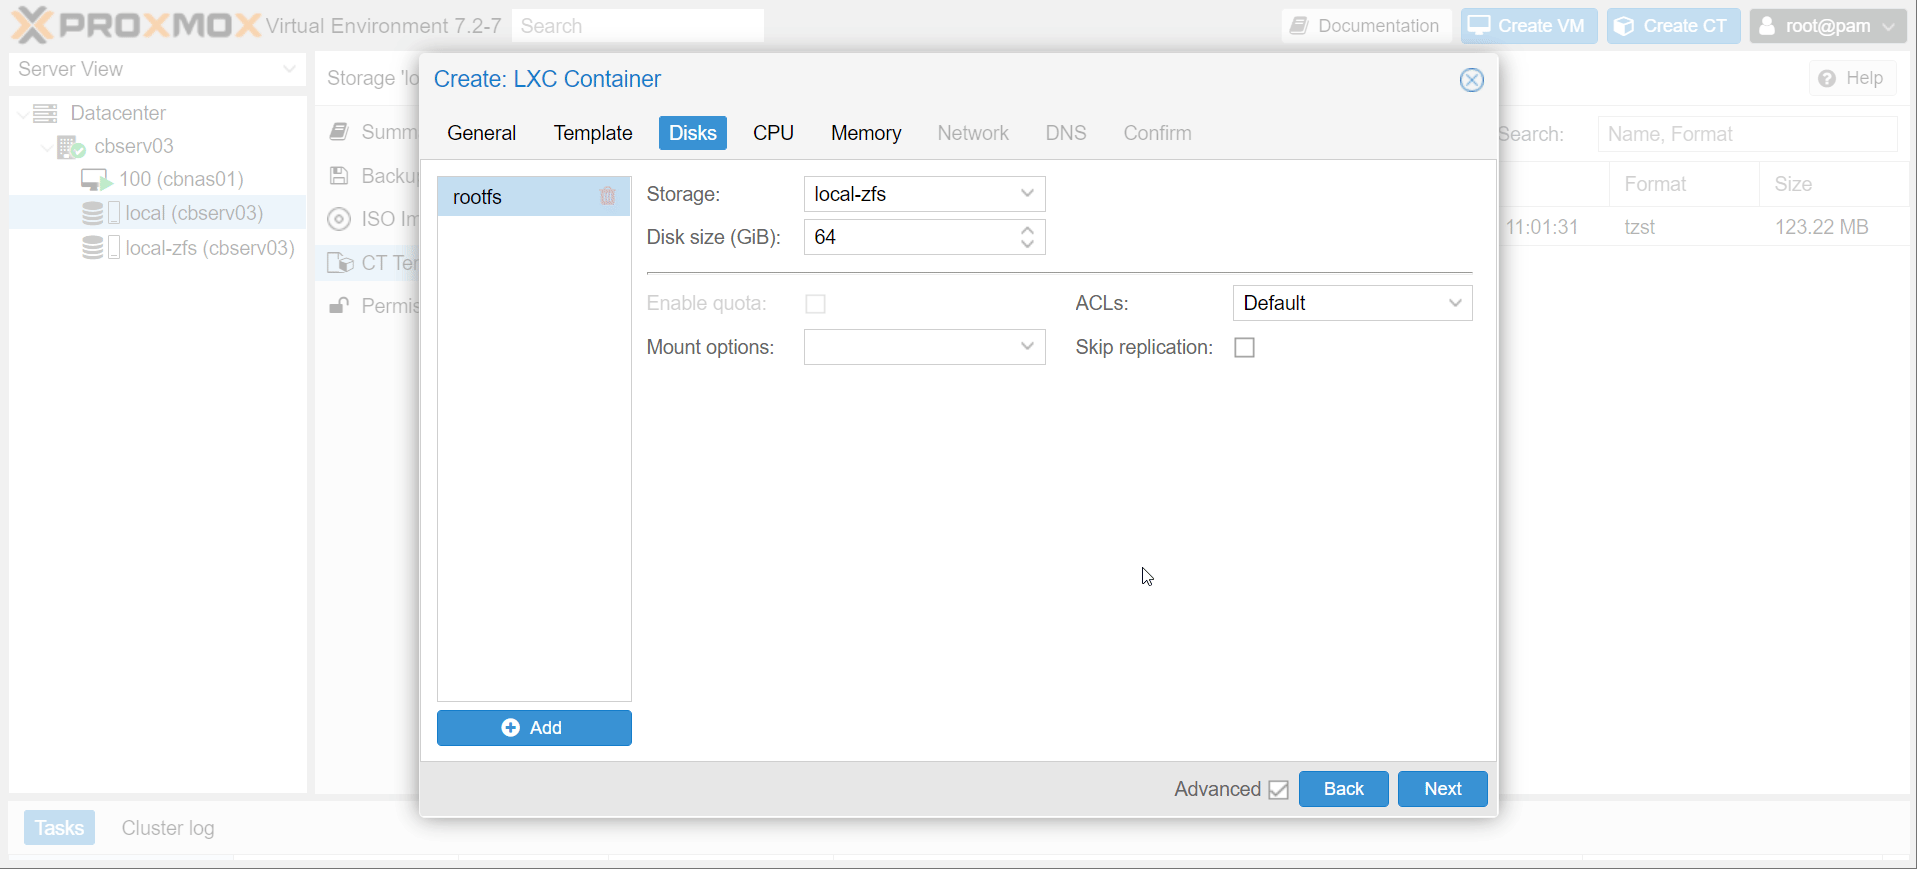
- Give your docker host some space. I’m going to default to 64 gigs but it’s really just a question of how much docker space you’re going to take. Remember, the image cache for docker takes up a bit of space, especially if you don’t prune it.
- Set CPU, memory, and network allocation. I’ll just breeze through this in a gif:
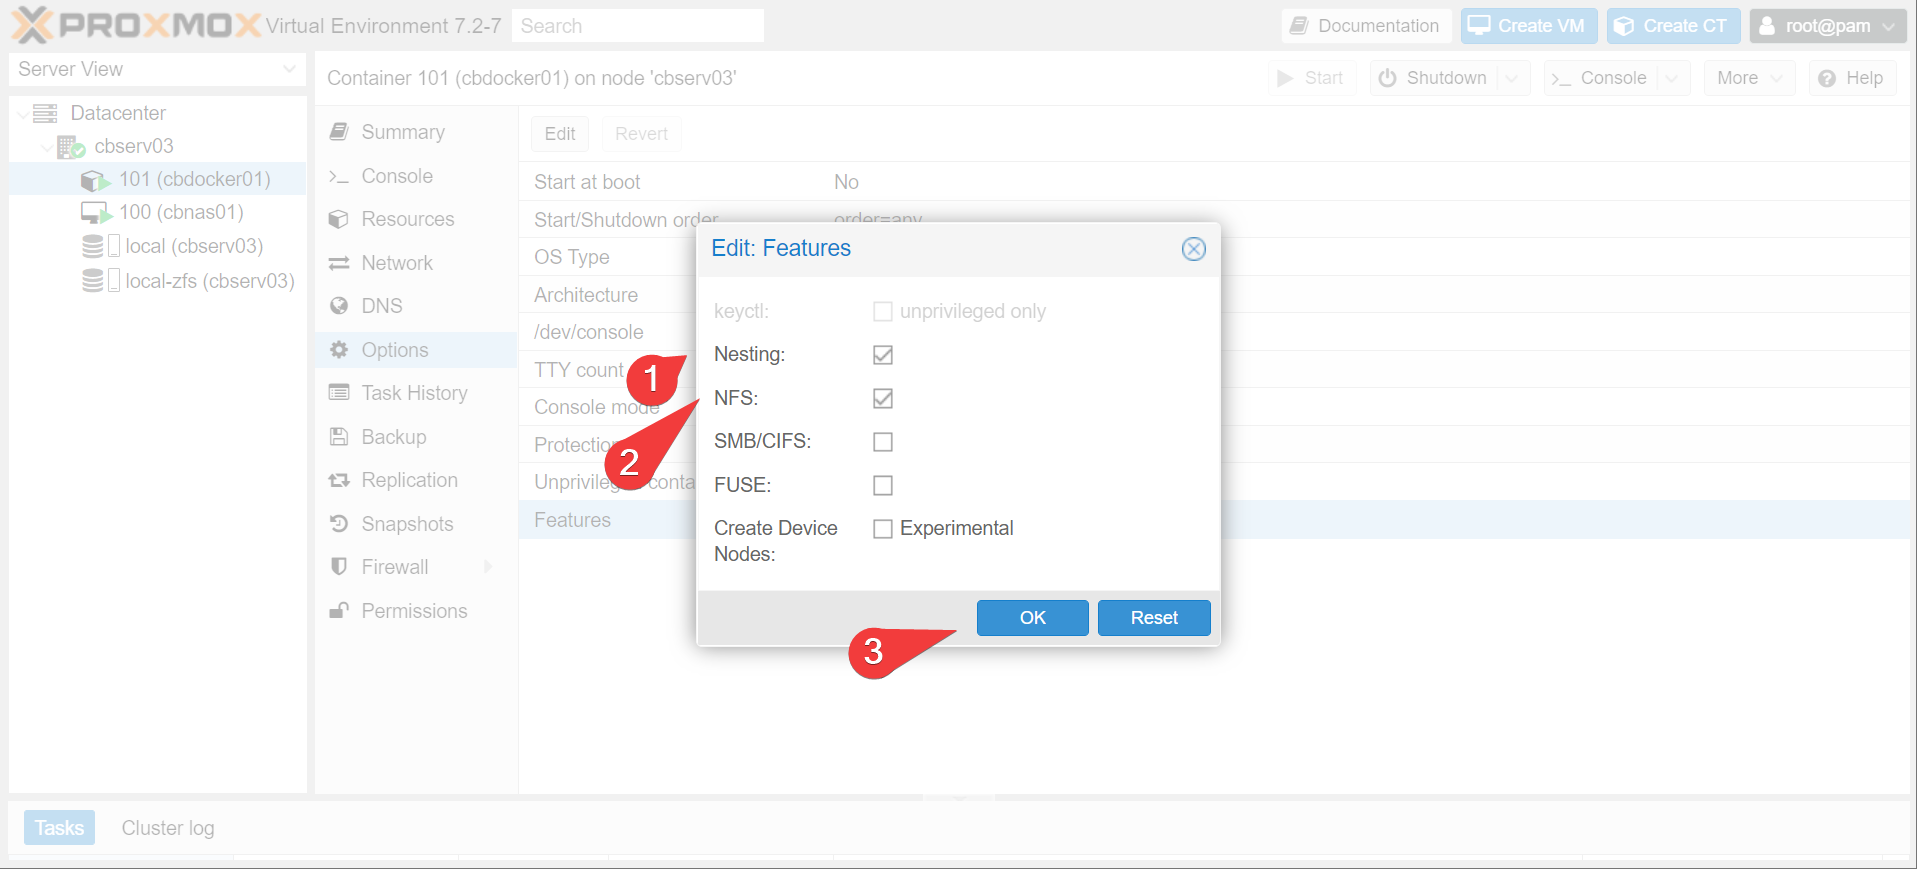
- Under options, enable
nestingandNFS. start the container.
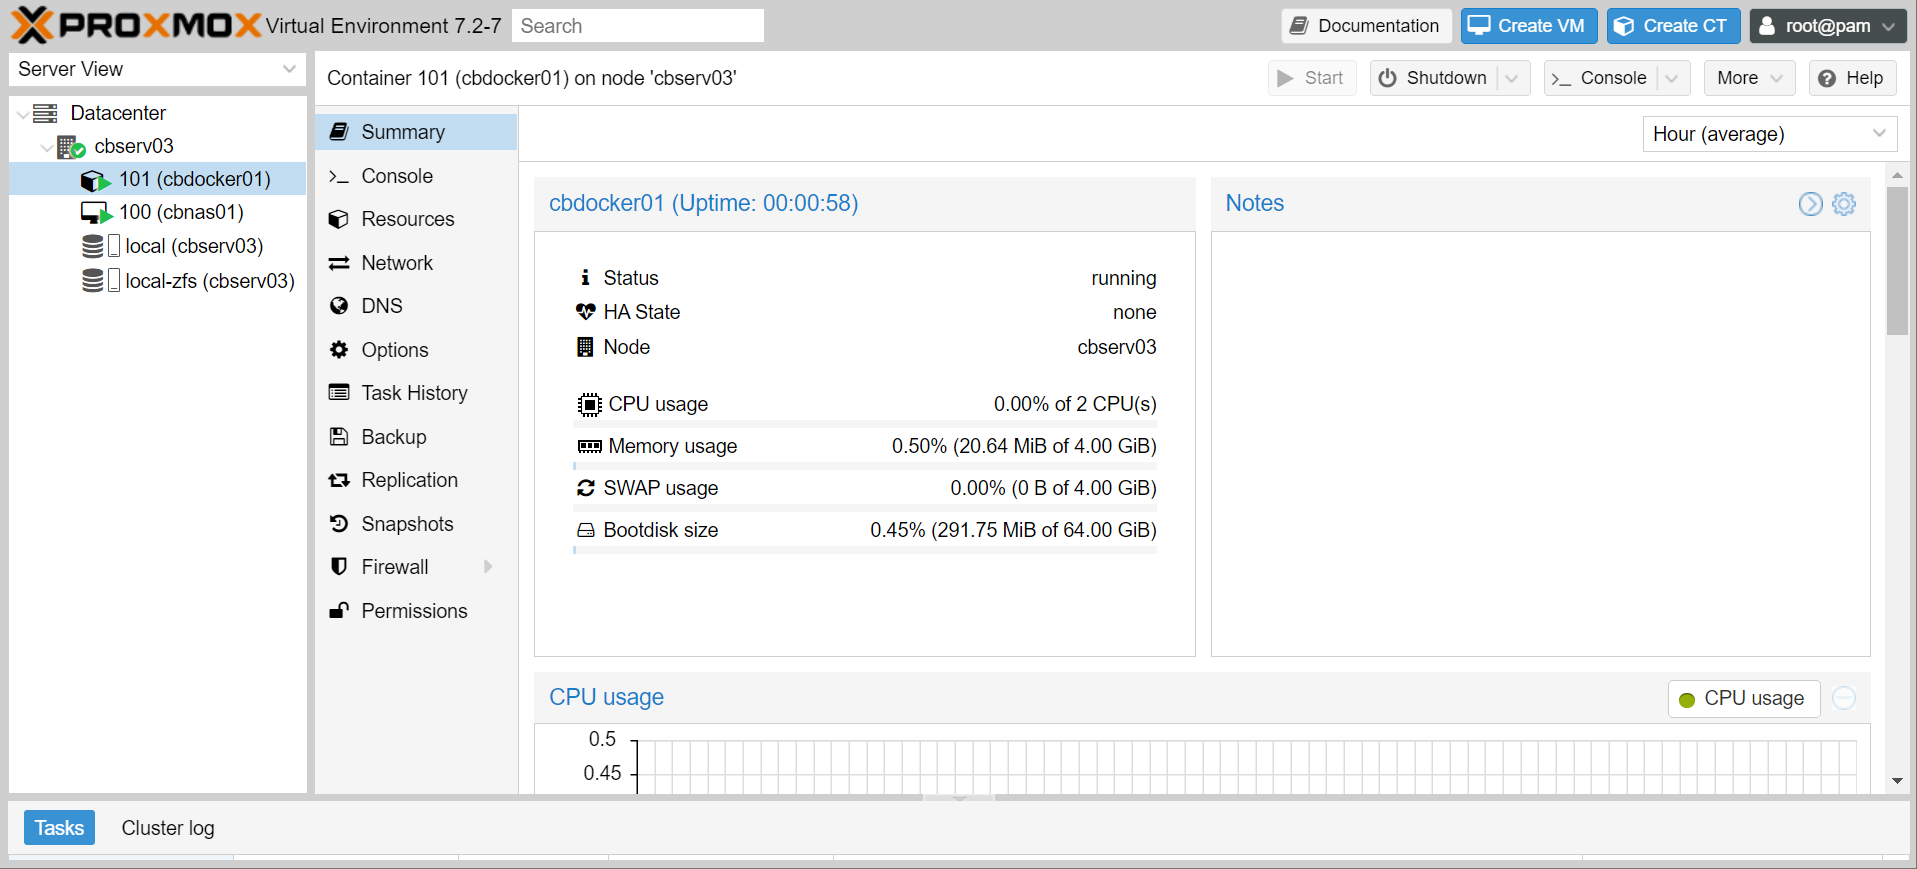
- That’s it! You now have a base debian environment to play around in, using very little machine overhead. How little? 0% cpu, 20mb of memory, and 300mb of space. Bugger all!
Installing Pre-Requisites
Alright, let’s actually get docker installed on this new machine. Actually, let’s get cockpit installed too, since we’re already familiar with it for our NAS management (albeit without the NAS plugins).
Info
The default user is root for LXC containers
- Run the following in your shiny new debian installation
apt-get update
apt-get dist-upgrade -y
apt-get install -y cockpit
wget https://get.docker.com/ -O docker-install.sh
chmod +x docker-install.sh
./docker-install.sh
Info
You will notice that the container behaves pretty much identically to a base debian installation. That’s because that’s what it is! It’s just relying on kernel resources from proxmox, just like how docker works. Some people (not me) will stay away from docker entirely and just set up a bunch of LXC containers for their applications instead, to similar effect.
- Give it a bit of time and
reboot, then let’s have a look at the cockpit web interface. Yep, looks like a full server.
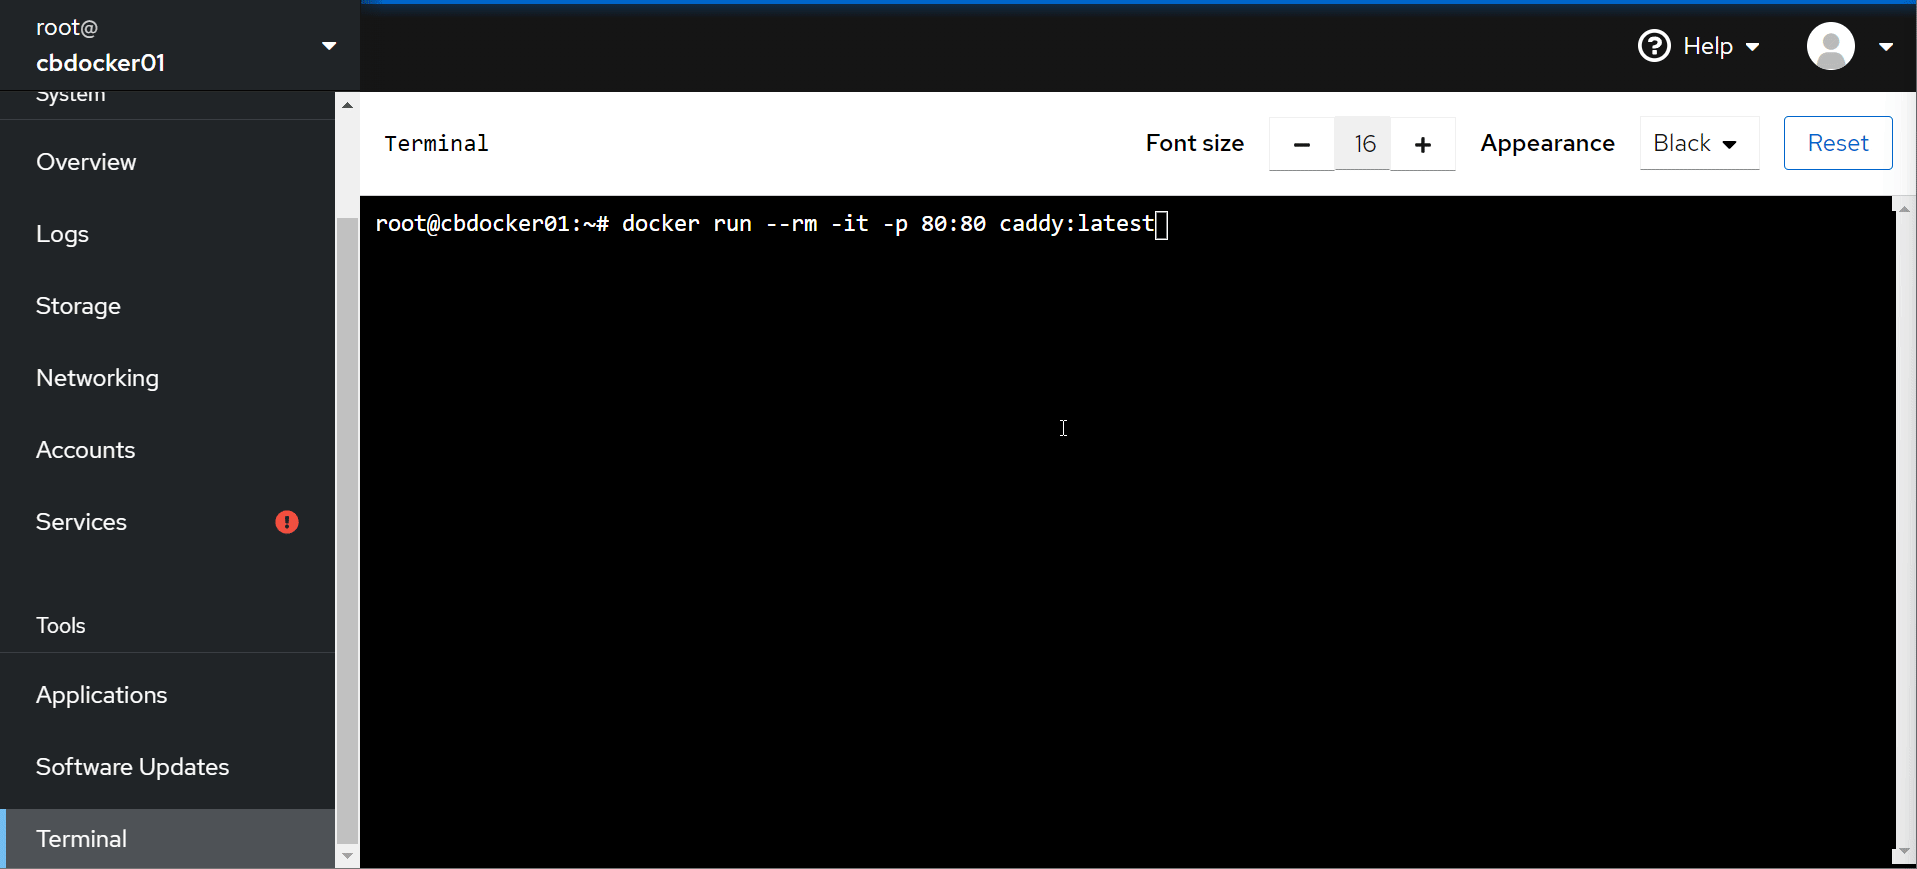
- Let’s test docker with
docker run --rm -it -p 80:80 caddy:latest
Moving On
success! You now have a very lightweight, fully (well mostly fully) isolated docker environment. But it’s not super user friendly yet. Also we’re not utilising our NAS. Let’s show some tricks with configuring the docker environment.