Deploying Source Control with Gitea
Introduction
Where we left off, we had been presented with a management dashboard for managing our docker environment:
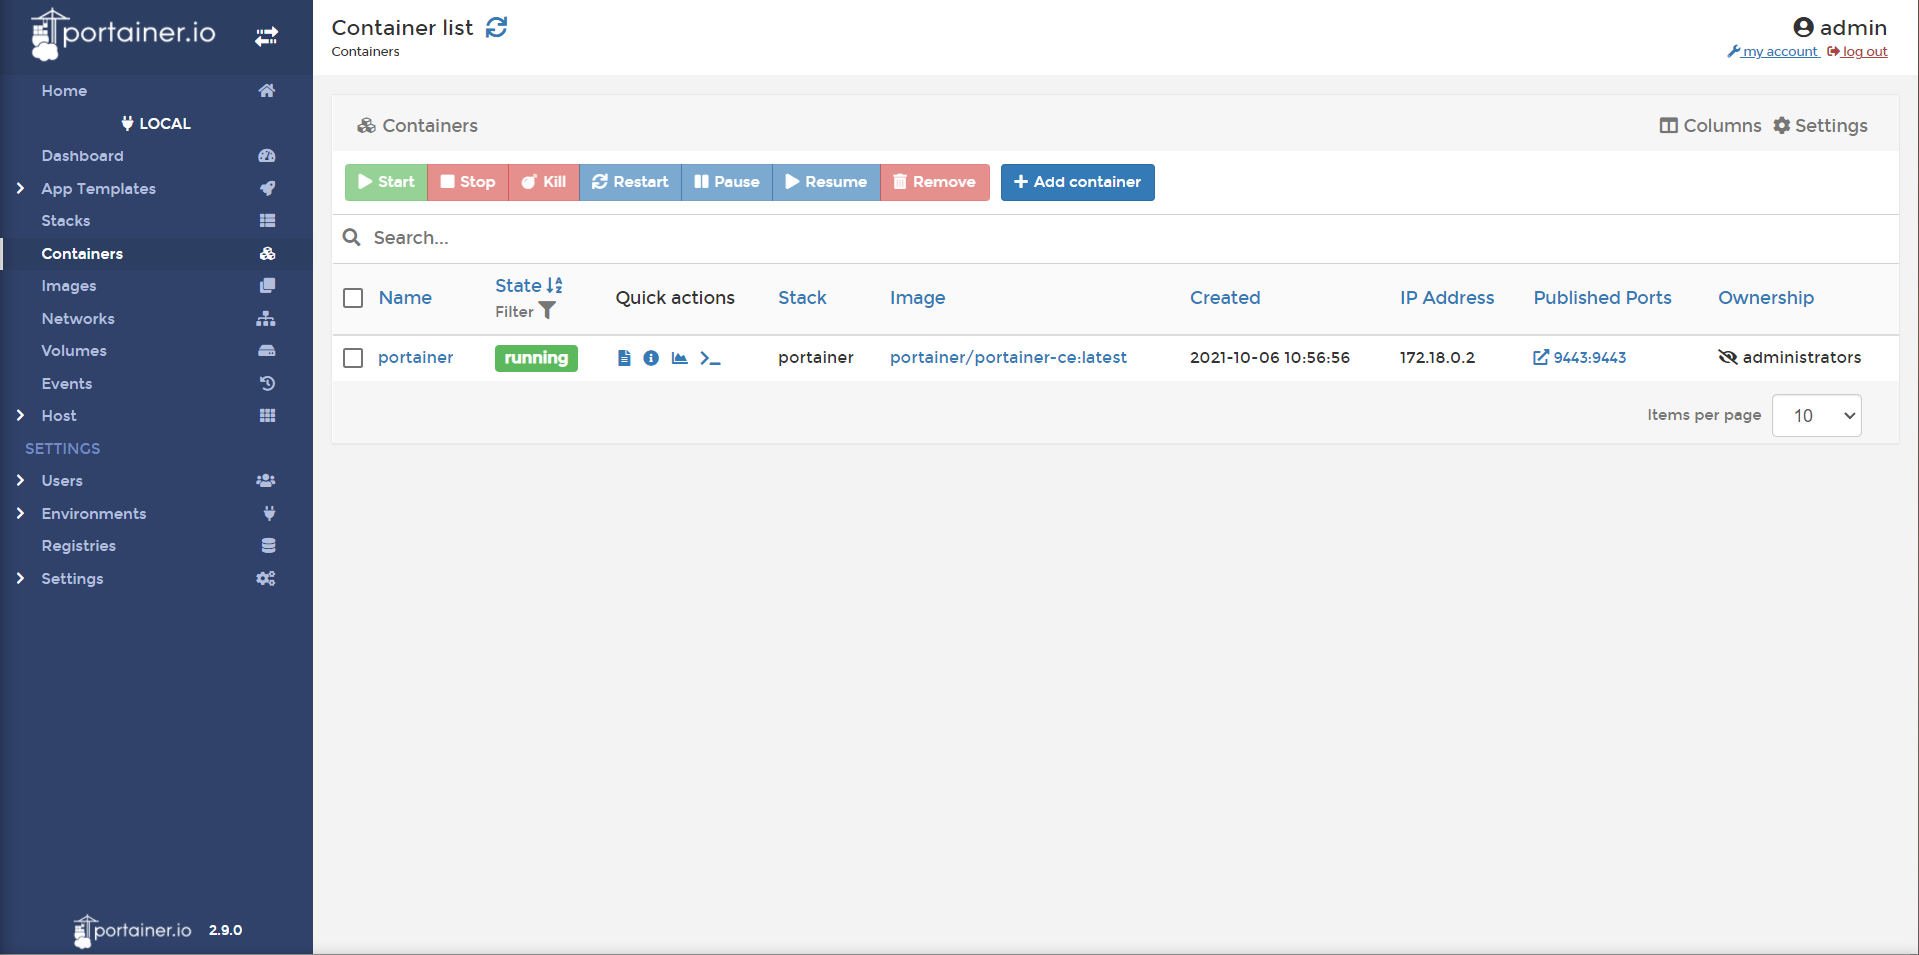
Feel free to browse. Portainer has a very robust container deployment GUI. If you want, you can simply deploy containers by pointing-and-clicking your way through the containers category on the sidebar.
However, we want to deploy code as infrastructure: we don’t want to point-and-click our way to victory. To do so, we will primarily be using the Stacks category on the sidebar.
Info
portainer Stacks is their terminology for docker-compose files. Portainer also offers pre-configured docker-compose files, referred to as App Templates.
TL;DR
In this article, we will:
- Use portainer stacks to deploy our docker-compose file
- Deploy gitea and create a repository for our docker-compose files
Deploying Source Control
An important concept of Infrastructure as Code is source control. This is the idea that any config changes we make becomes versioned, and we can reference previous changes to see what happened (or what went wrong).
By far the most popular source control protocol is git. Git is the de facto standard by a large margin: pretty much all other source control methods are due to legacy cruft (or aggressive marketing). You are most likely already familiar with git via github: most popular open source products have a github page to manage their source control.
Github is far from the only way to use git. You can use it entirely on the command line if you want, no website needed. No server needed. That said: most of your are probably familiar with a web management interface for git, and gitea is a fantastic choice for this. Let’s install it now.
Info
to install git in Fedora, you can do so with dnf install -y git
Prepping the Folder
Many containers run as root. In fact, it’s the default. This is because the container is using a sandboxed version of root that does not have access to the host (unless we bind mount folders, or use a privileged context).
Root isn’t necessarily a good thing to run as. If someone breaks out of the sandbox, they have root permissions to the whole host! That’s bad. Because of this, many containers provide the option to run as a specific (non root) user. Gitea does this, and it’s a good idea. But it means we need to create the folders for it in advance and change the ownership of those folders.
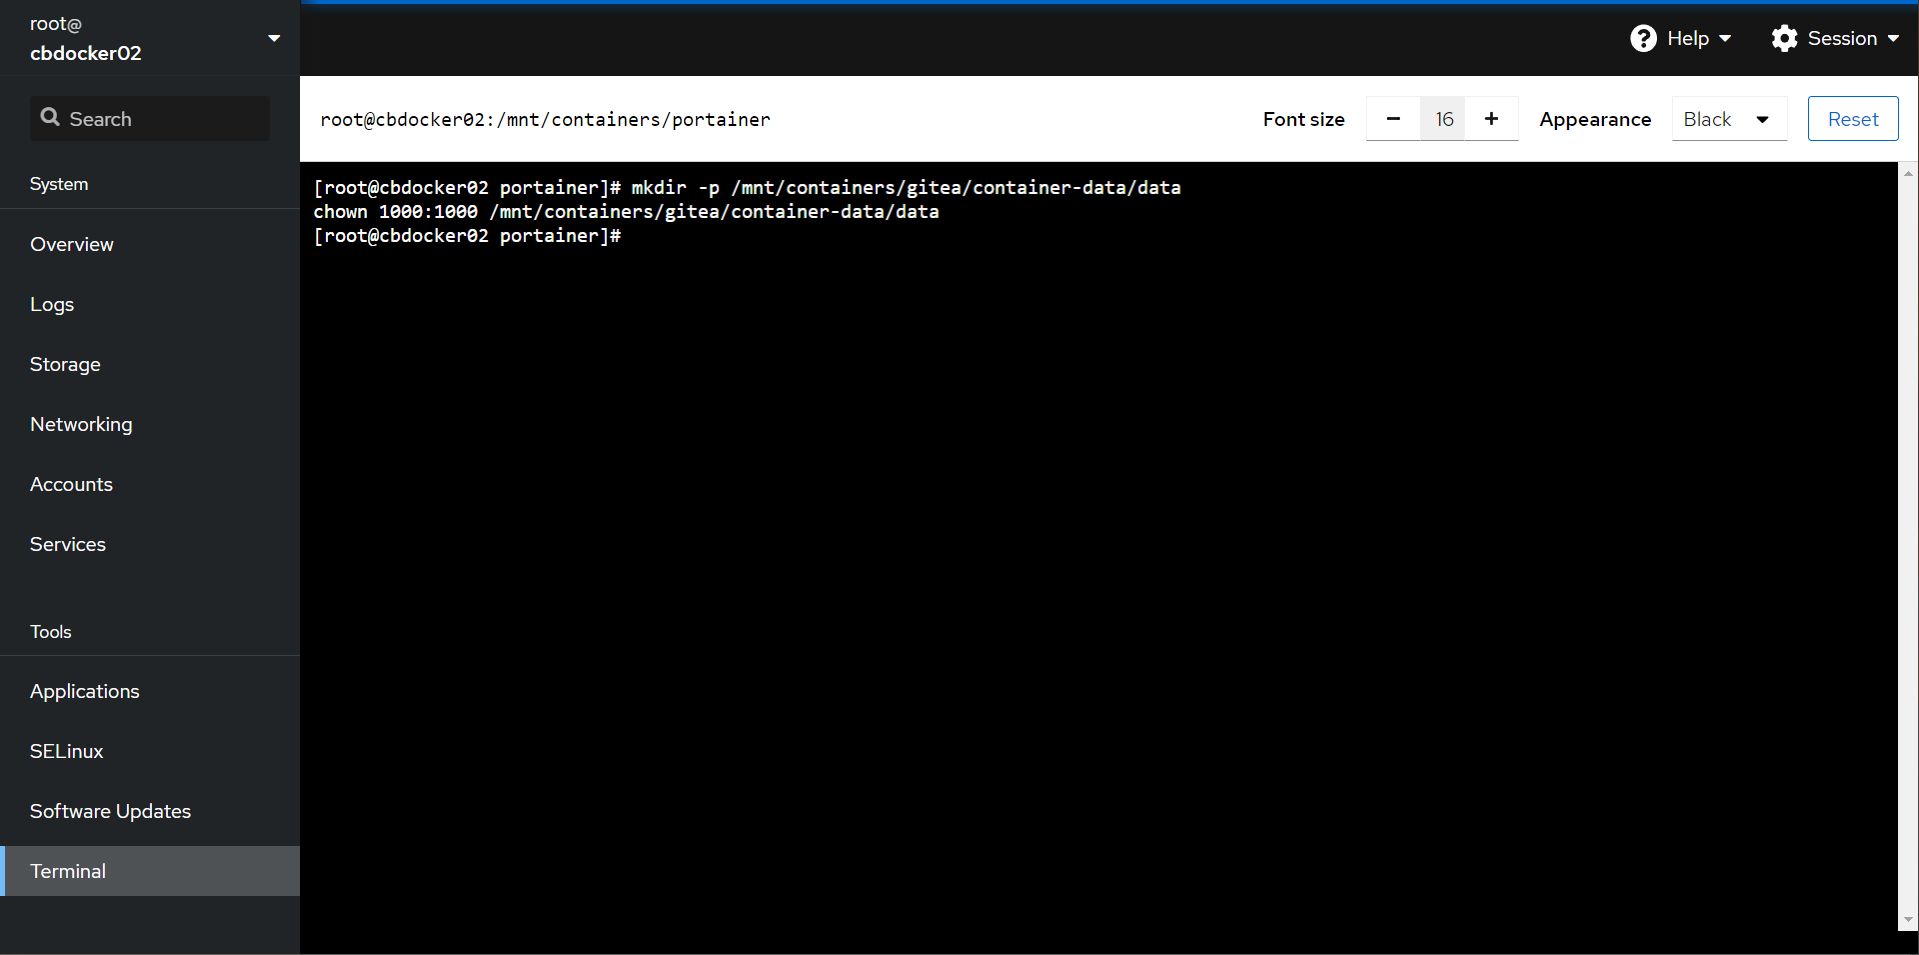
- In Cockpit, run the following to prep the gitea folder
mkdir -p /mnt/containers/gitea/container-data/data
chown 1000:1000 /mnt/containers/gitea/container-data/data
Warning
If you are running a container as a different user from the host, you have to be careful about mucking around in the bind mount as the host machine. Your changes may cause permission issues down the track.
This command created the folder ahead of time, and then we assigned the user ID 1000 and group ID 1000 to own the folder.
Info
Linux (unlike Windows) does not use unique user IDs. Your user ID might be the same user ID as a different person on another system (personally, I think Windows has the right idea using unique GUIDs for users). The root user is always ID 0. Service accounts are usually between 1 and 999. Normal user accounts are usually 1000 and up.
Deploying Gitea
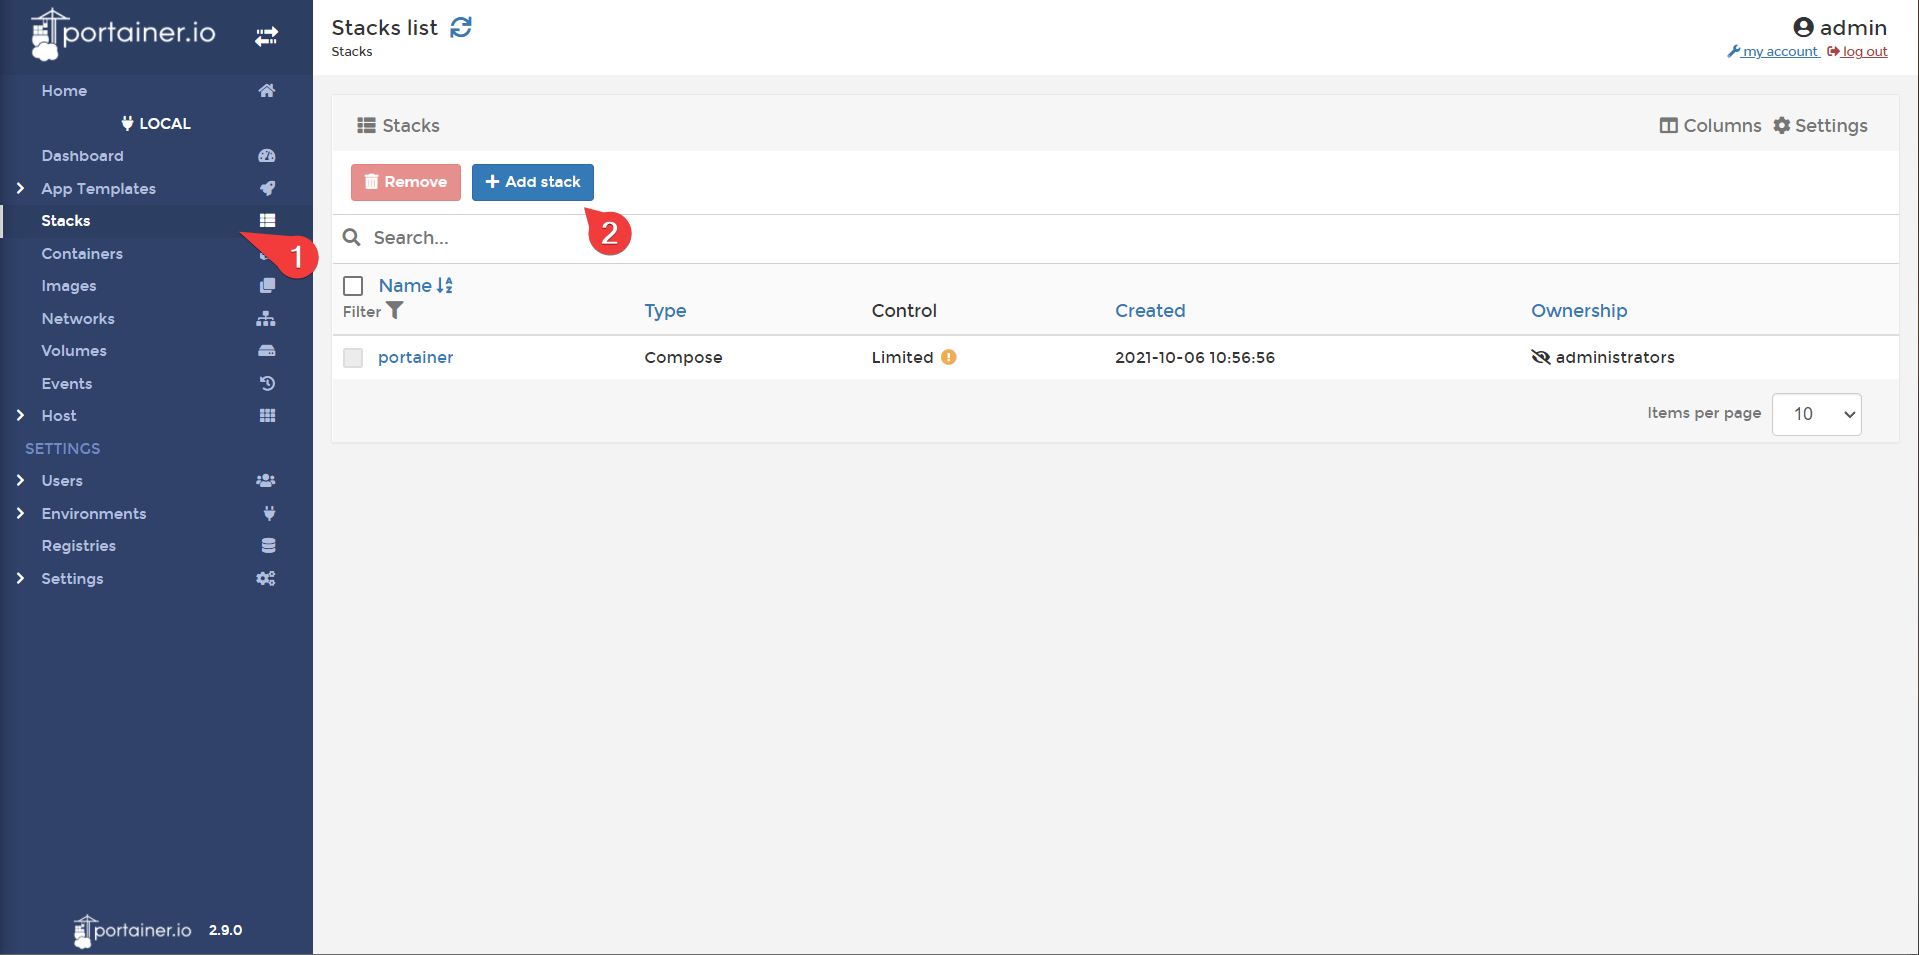
Let’s head to the stacks category and choose add stack.
Now you should be presented with a blank slate, ready for a docker-compose file. Cool! Let’s paste in the following:
version: "3"

services:
  server:
    image: gitea/gitea:latest
    container_name: gitea
    environment:
      - USER_UID=1000
      - USER_GID=1000
    restart: always
    volumes:
      - /mnt/containers/gitea/container-data/data:/data:Z
      - /etc/timezone:/etc/timezone
      - /etc/localtime:/etc/localtime
    ports:
      - "3000:3000"
Info
Most containerized services provide a docker-compose file for you to base your file from. For gitea, you can find it here. We also do not label the timezone bind mounts as they are read only
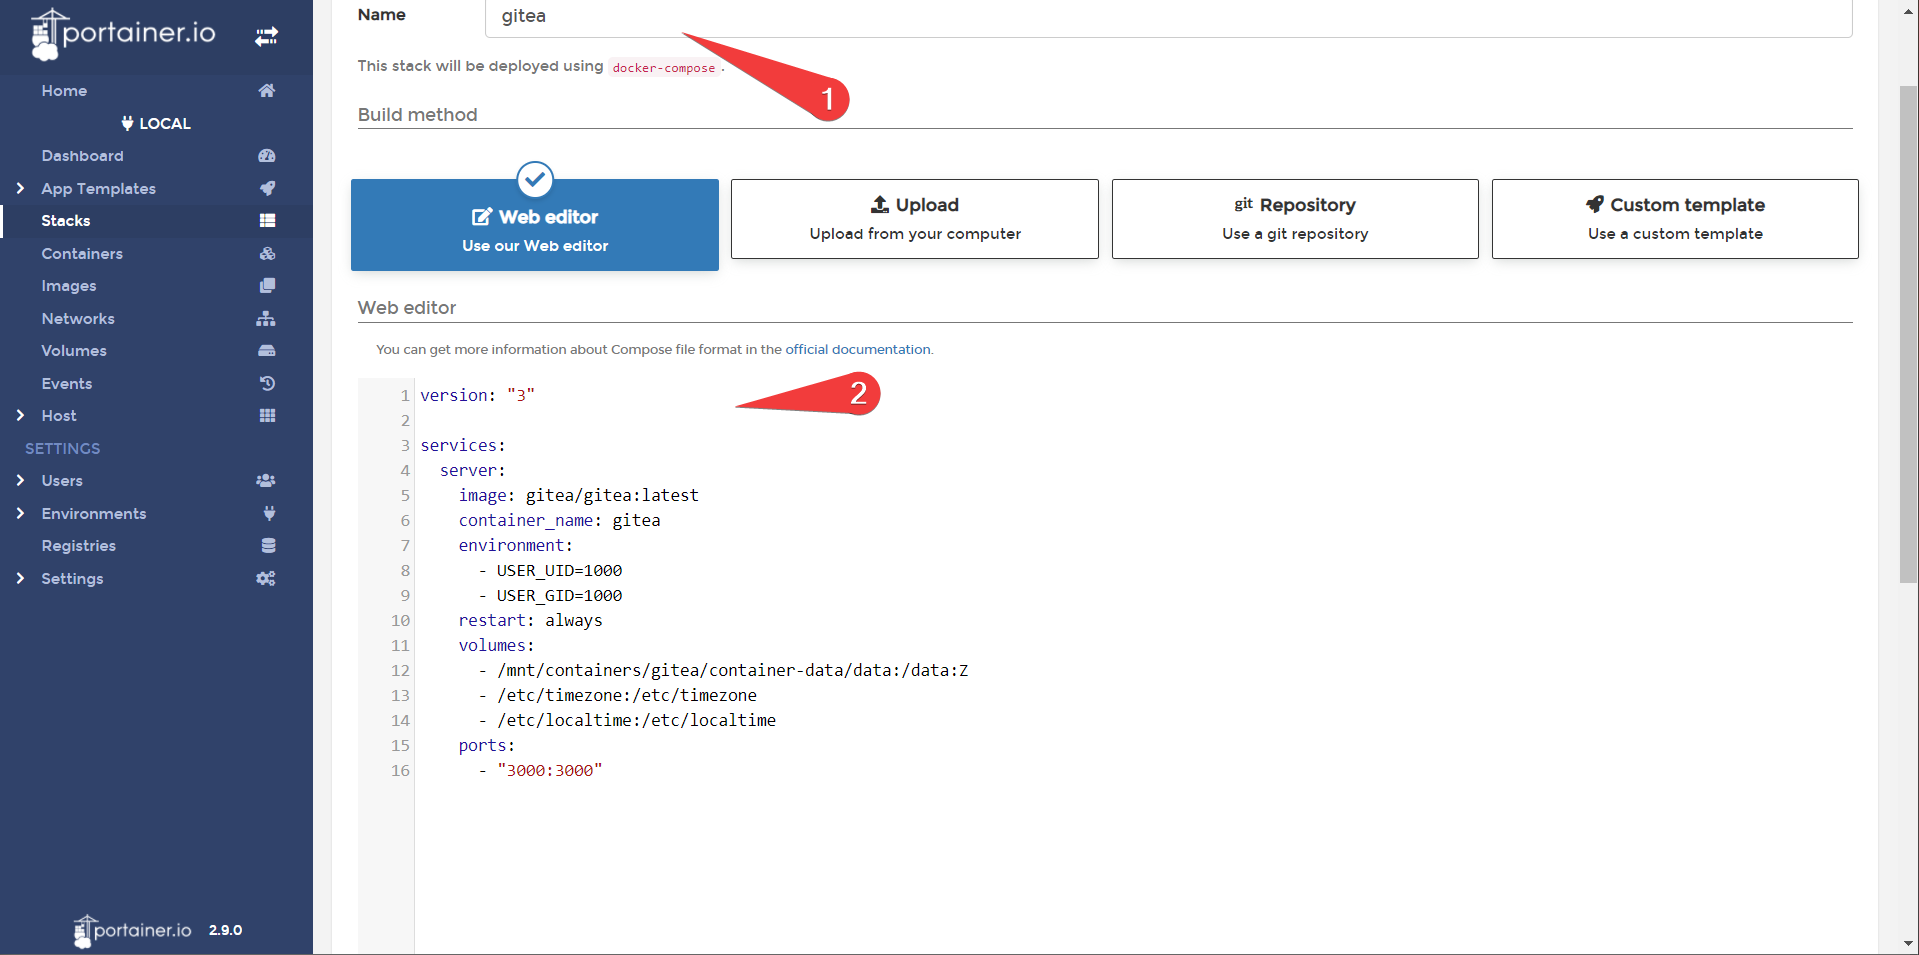
Scroll to the bottom and deploy the stack. If all goes well, you should successfully deploy gitea!

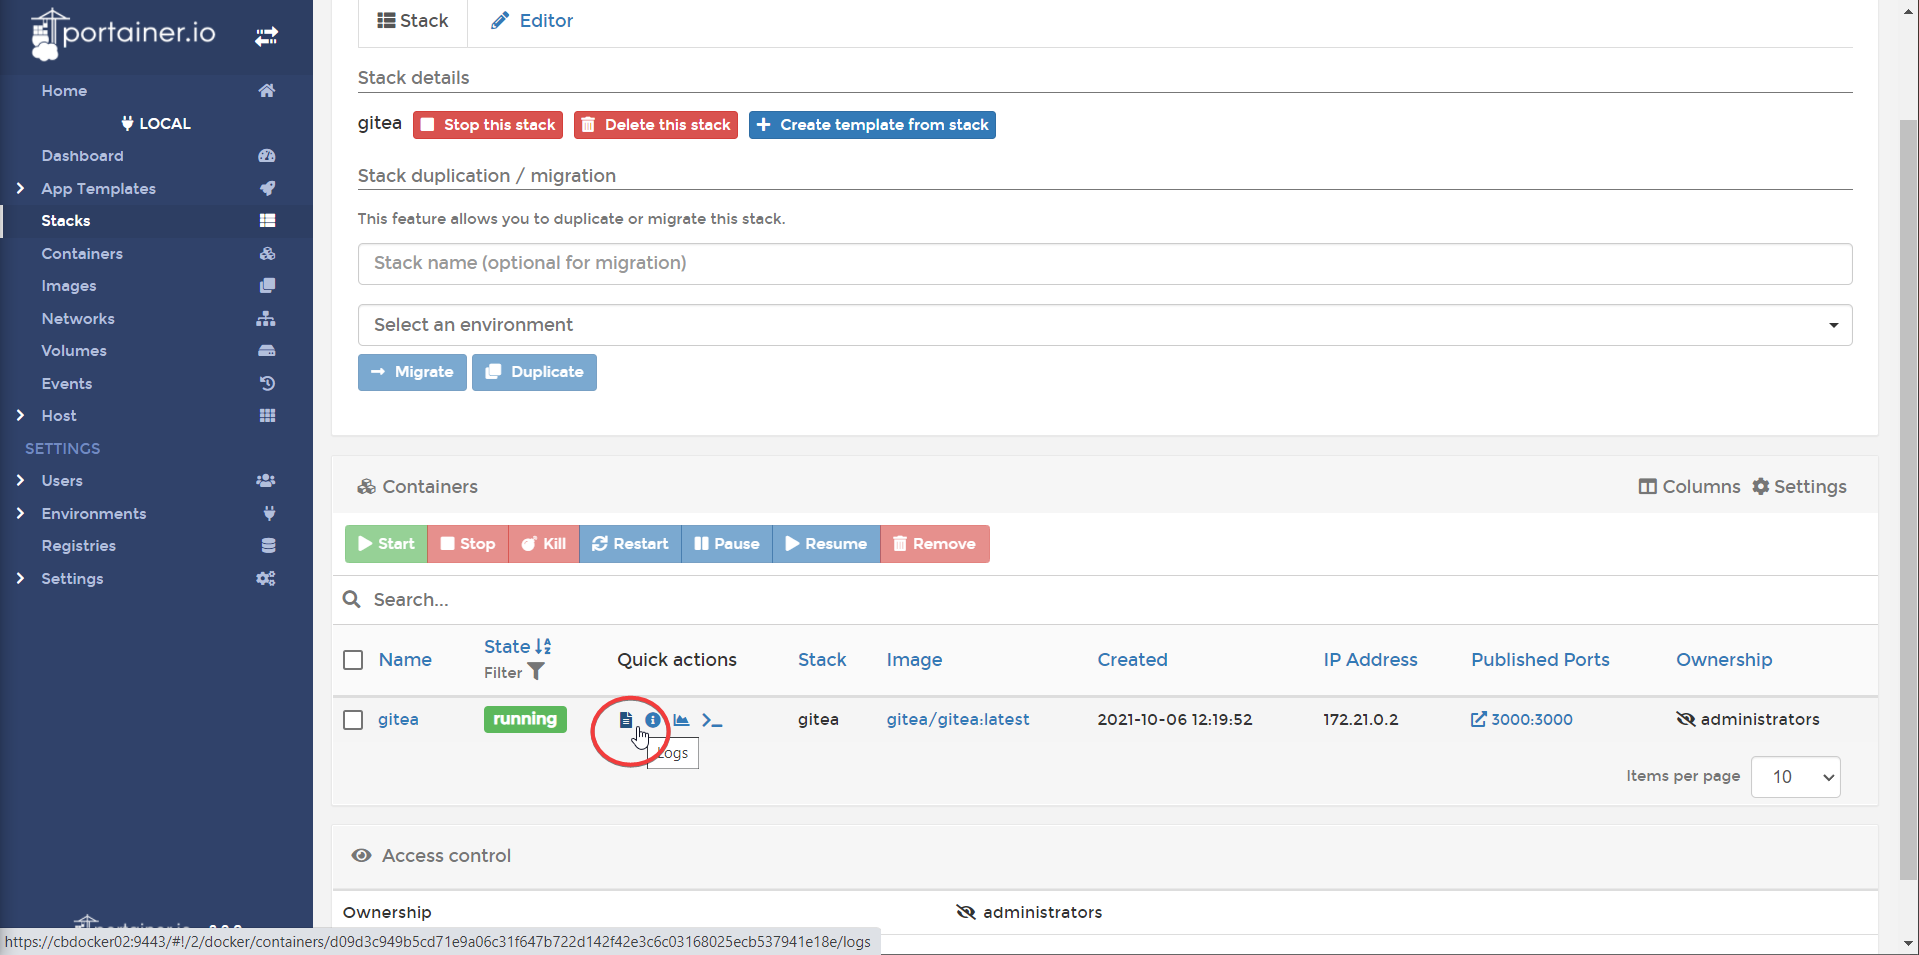
You can now check the status of your stack by navigating inside of the stack, and checking logs
Info
This is a useful technique for diagnosing what's gone wrong if a container doesn't start right.
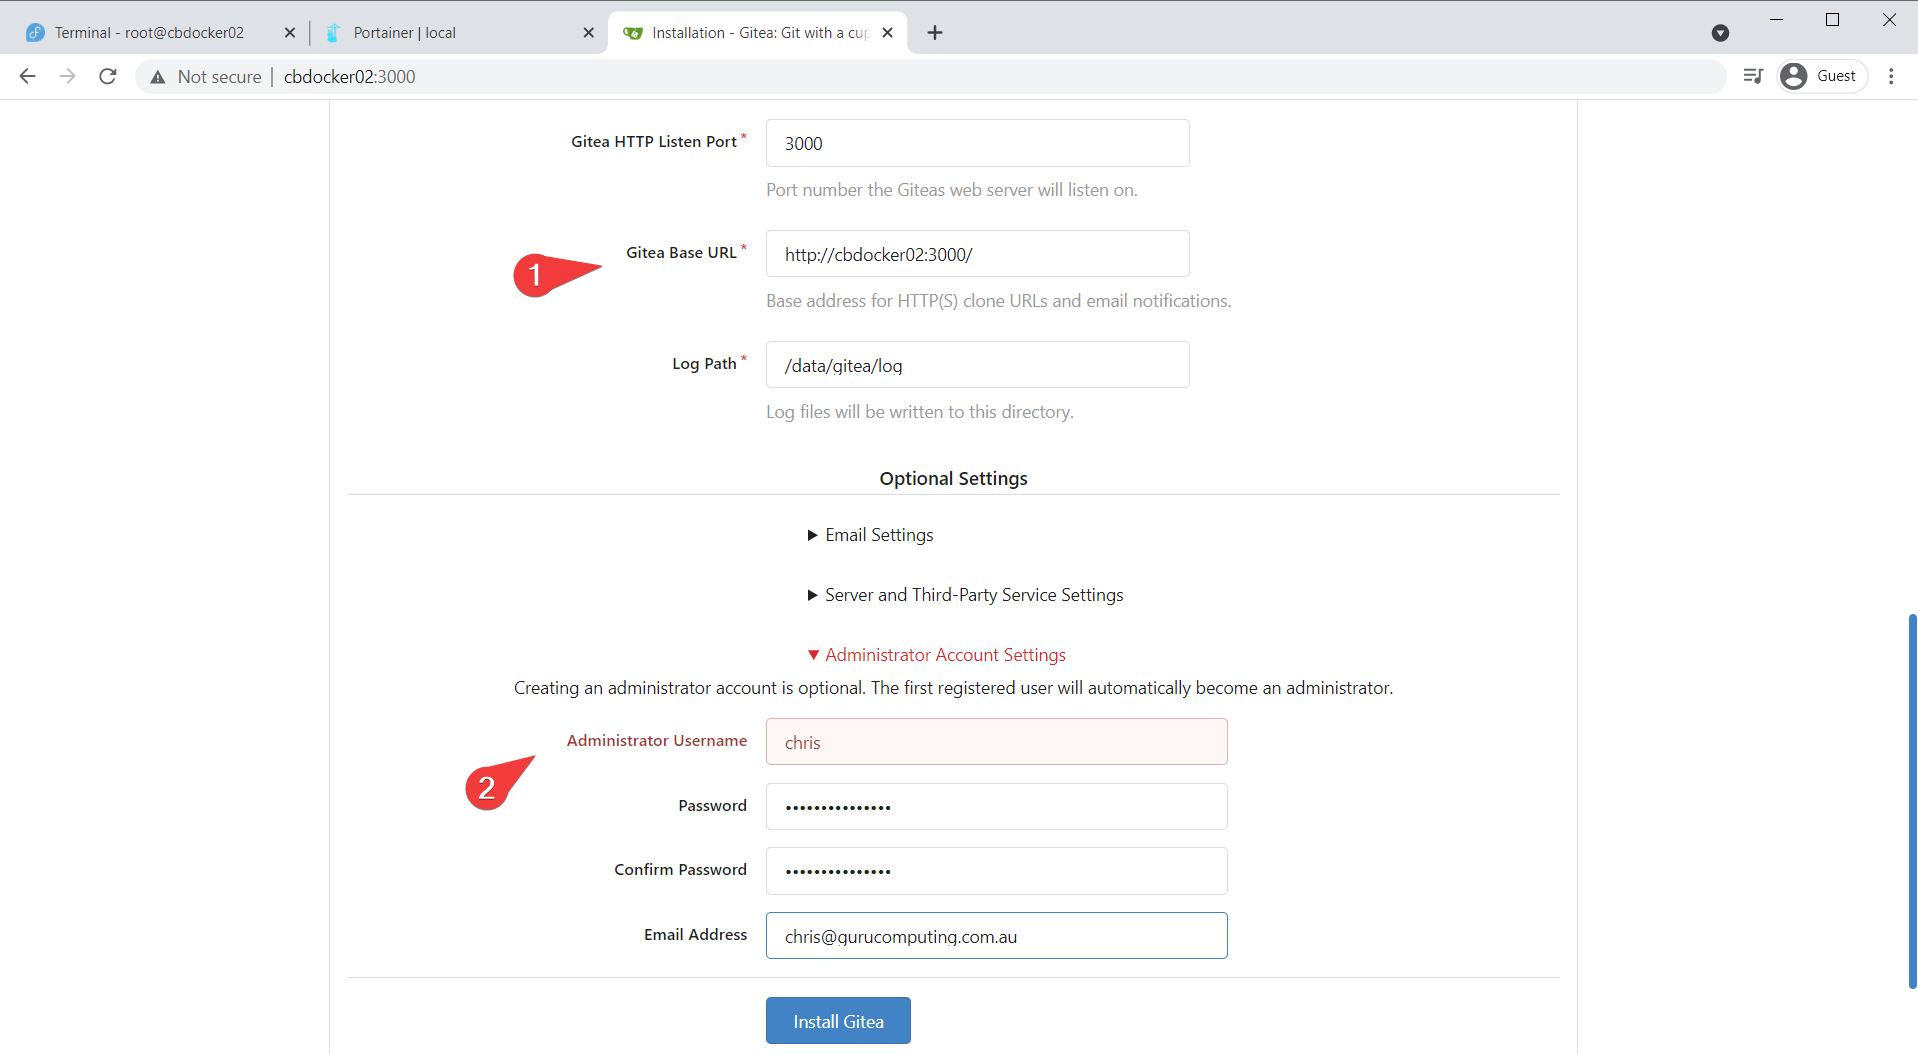
You can now access the web interface at http://(your-ip):3000. Let’s start with setting your base URL and admin account!
Using Source Control
RIghtio, so what was the point of that? The answer is to document your configuration. Like the configuration you just used for Gitea!
Let’s make an organization called homelab, with a project called docker-infrastructure and create a gitea docker-compose that we just used.
Info
Portainer will also track your config file, but won’t track versioning
- Create a new organization called
homelab
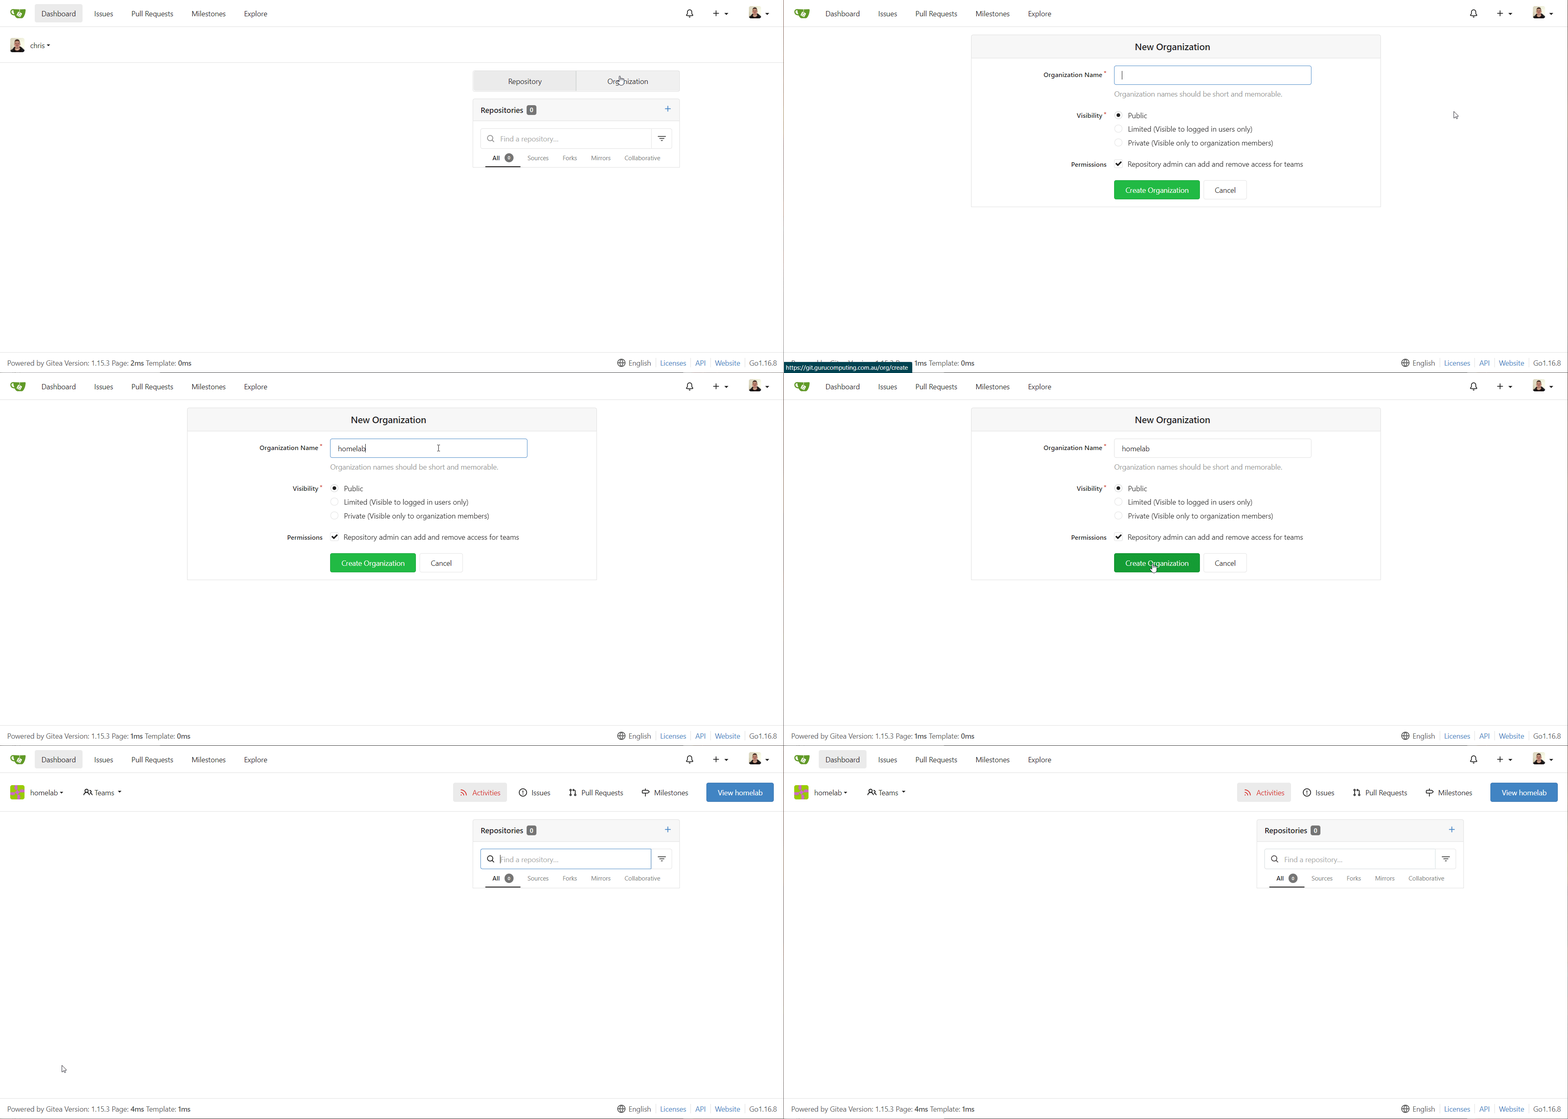
- create the
docker-infrastructurerepository under the homelab organization and Initialize:

- Create a new file called
gitea/docker-compose.yaml, paste your configuration, and commit.
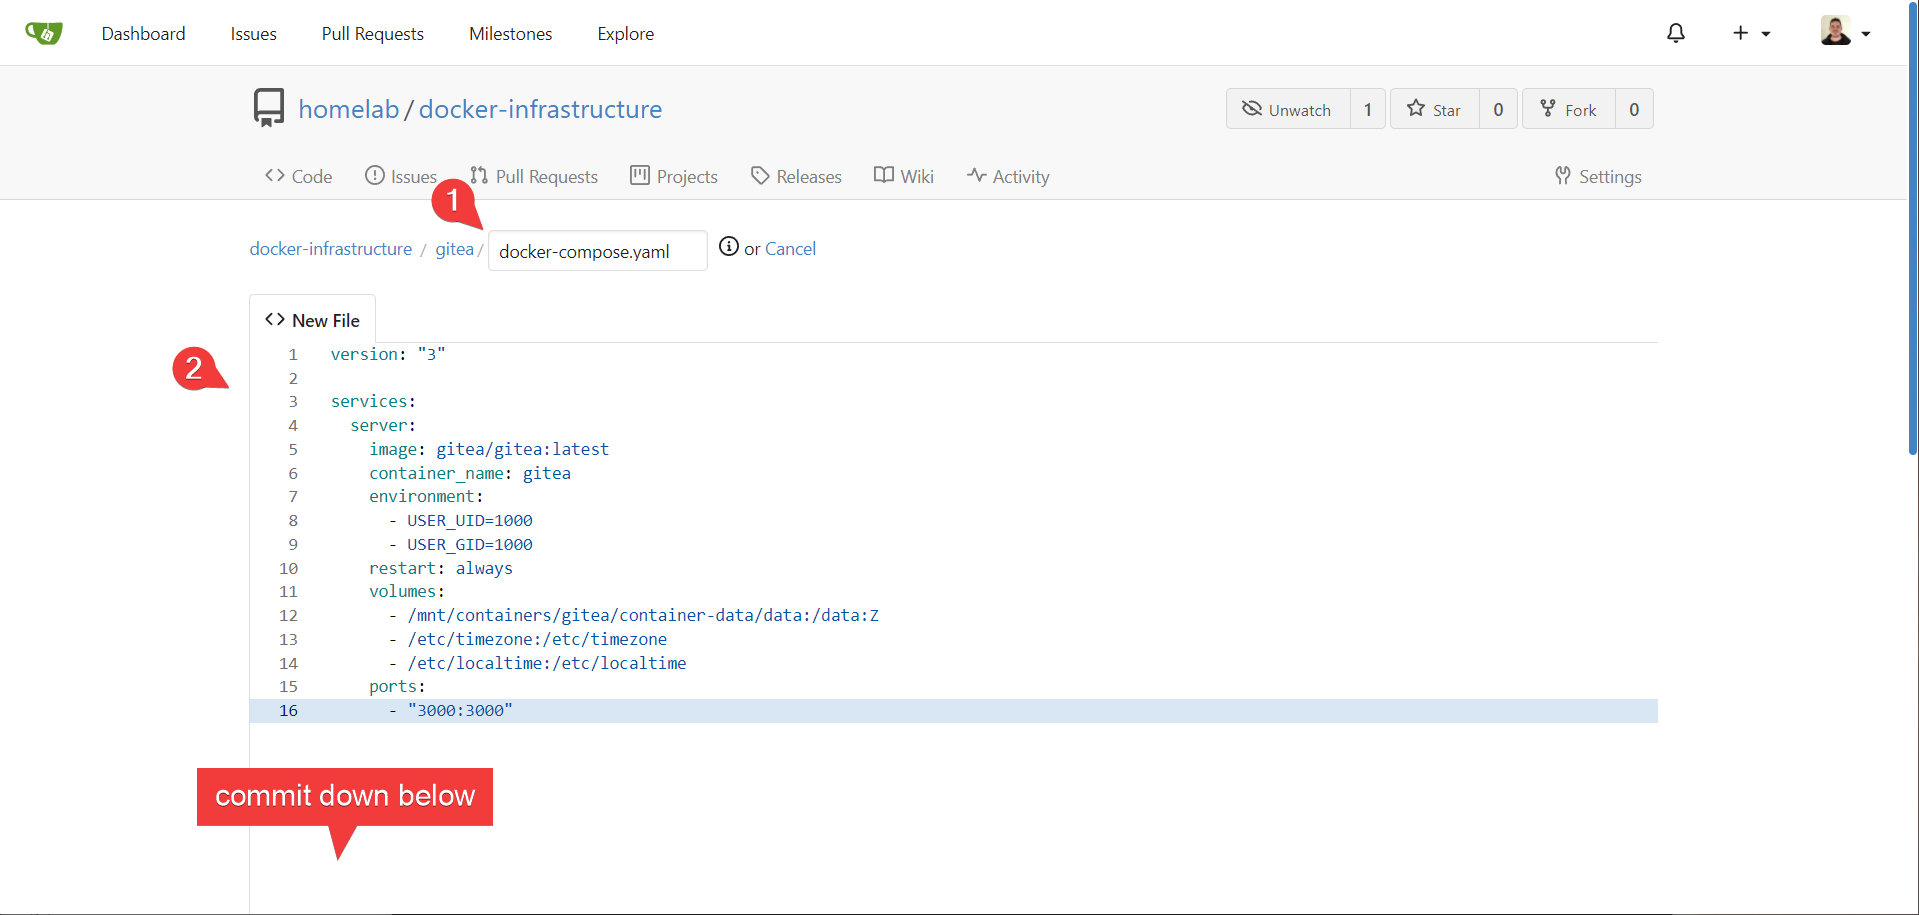
- We are now using source control with our infrastructure code!
Info
Note that it is not a good practice to document sensitive information (like passwords or API keys) in a git repository. You don’t exactly want temporary passwords tracked with versioning, for example. Typically you want to use a secret manager dedicated to that purpose (portainer will store secrets for you as well).
Documenting Portainer
Let’s also put portainer into gitea. Repeat those steps with the original portainer configuration (copied here for convenience):
services:
    portainer:
      image: portainer/portainer-ce:latest
      container_name: portainer
      restart: always
      privileged: true
      volumes:
        - /mnt/containers/portainer/container-data/data:/data:Z
        - /var/run/docker.sock:/var/run/docker.sock:Z
      ports:
        - 9443:9443
Fixing our Network Traffic
We still have some problems to solve. We are exposing all of these new services on different ports. Web traffic typically only traverses on port 80 and 443, not 3000 and 9443. Also, our portainer interface is giving a scary warning:

Even worse, our gitea traffic isn’t encrypted at all. Anyone intercepting our traffic can read our usernames and passwords in clear text! How do we fix this? Let’s find out in Reverse Proxies with Nginx Proxy Manager