Configuring the Docker Environment
Introduction
Alright, we have the pieces of the puzzles we need in place for an end to end solution:
- A dedicated storage appliance with the capability to create network storage
- A docker environment to run containerized applications
Now we just have to put them together
TL;DR
In this article, we will:
- Configure Visual Studio Code to manage the docker environment
- Set up a jellyfin container with an NFS export
- Configure a Reverse Proxy with Caddy for an end-to-end solution
Working Docker through Visual Studio Code
There’s a couple ways to smooth our docker hosting experience. I’ve written about two primary ways right in my blog:
There’s a couple other cool ways these days as well. Such as:
- Using Yacht (a portainer alternative)
- Lazy Docker (command line based docker UI)
- OpenVSCodeServer (Vscode in a browser, I’ll most likely write up a guide for this soon)
For this guide, I’m going to use Visual Studio Code with SSH and Docker extensions. Here’s me setting it up in an any% speed run (use the linked blog guide if you need to slow it down).
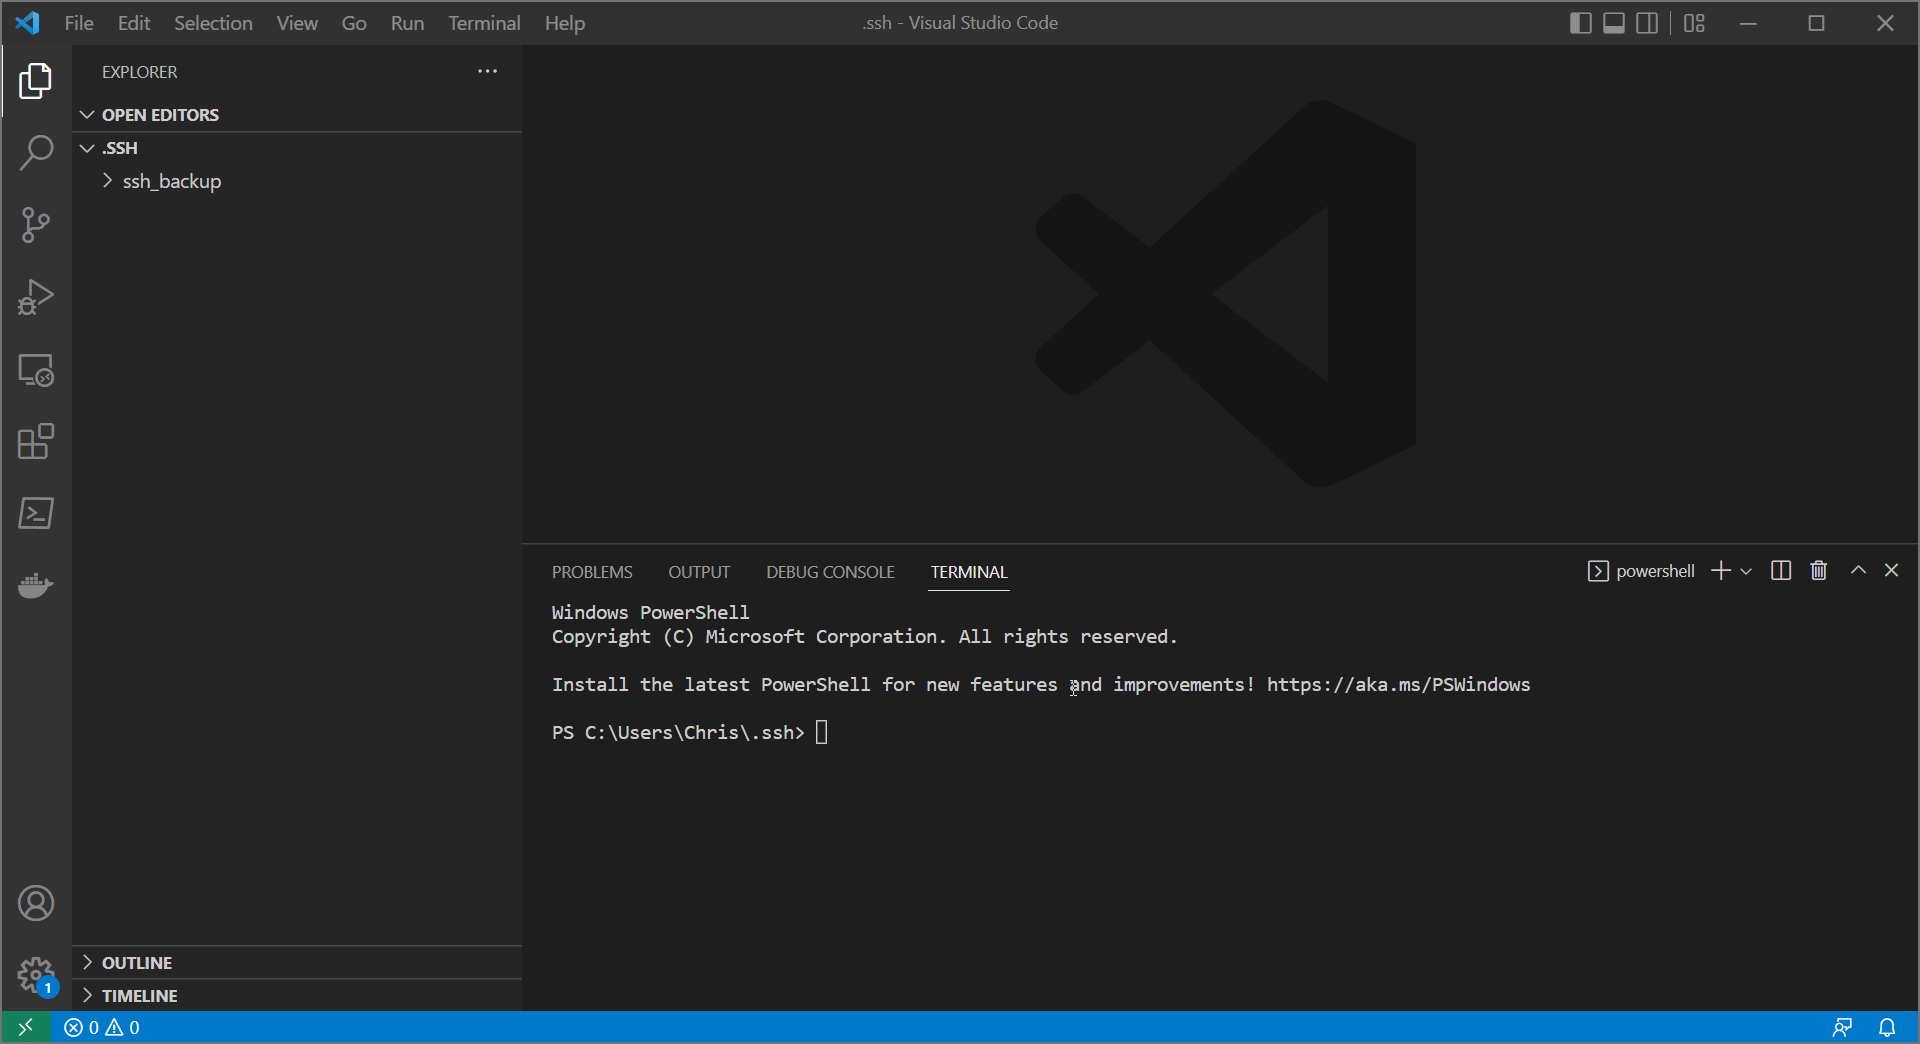
Alright! Fully managed docker environment!
Setting up an NFS Export
Now to simulate a full docker experience, we need to link our containers to permanent storage. For small amounts of data this can just be with a local bind mount. That’s fine, that works (as long as we don’t encroach on our Proxmox container’s storage limits). Chances are though, you’re gonna want to mount some large amounts of data. Data that your new NAS has on it. Let’s do an example with jellyfin!
- On your NAS, log in and create a new
/mnt/storage/container-datadirectory. Create ajellyfindata dir in there.

Info
If you’re planning to use non-root containers, you can also use this area to change permissions to match the UID and GID of your container
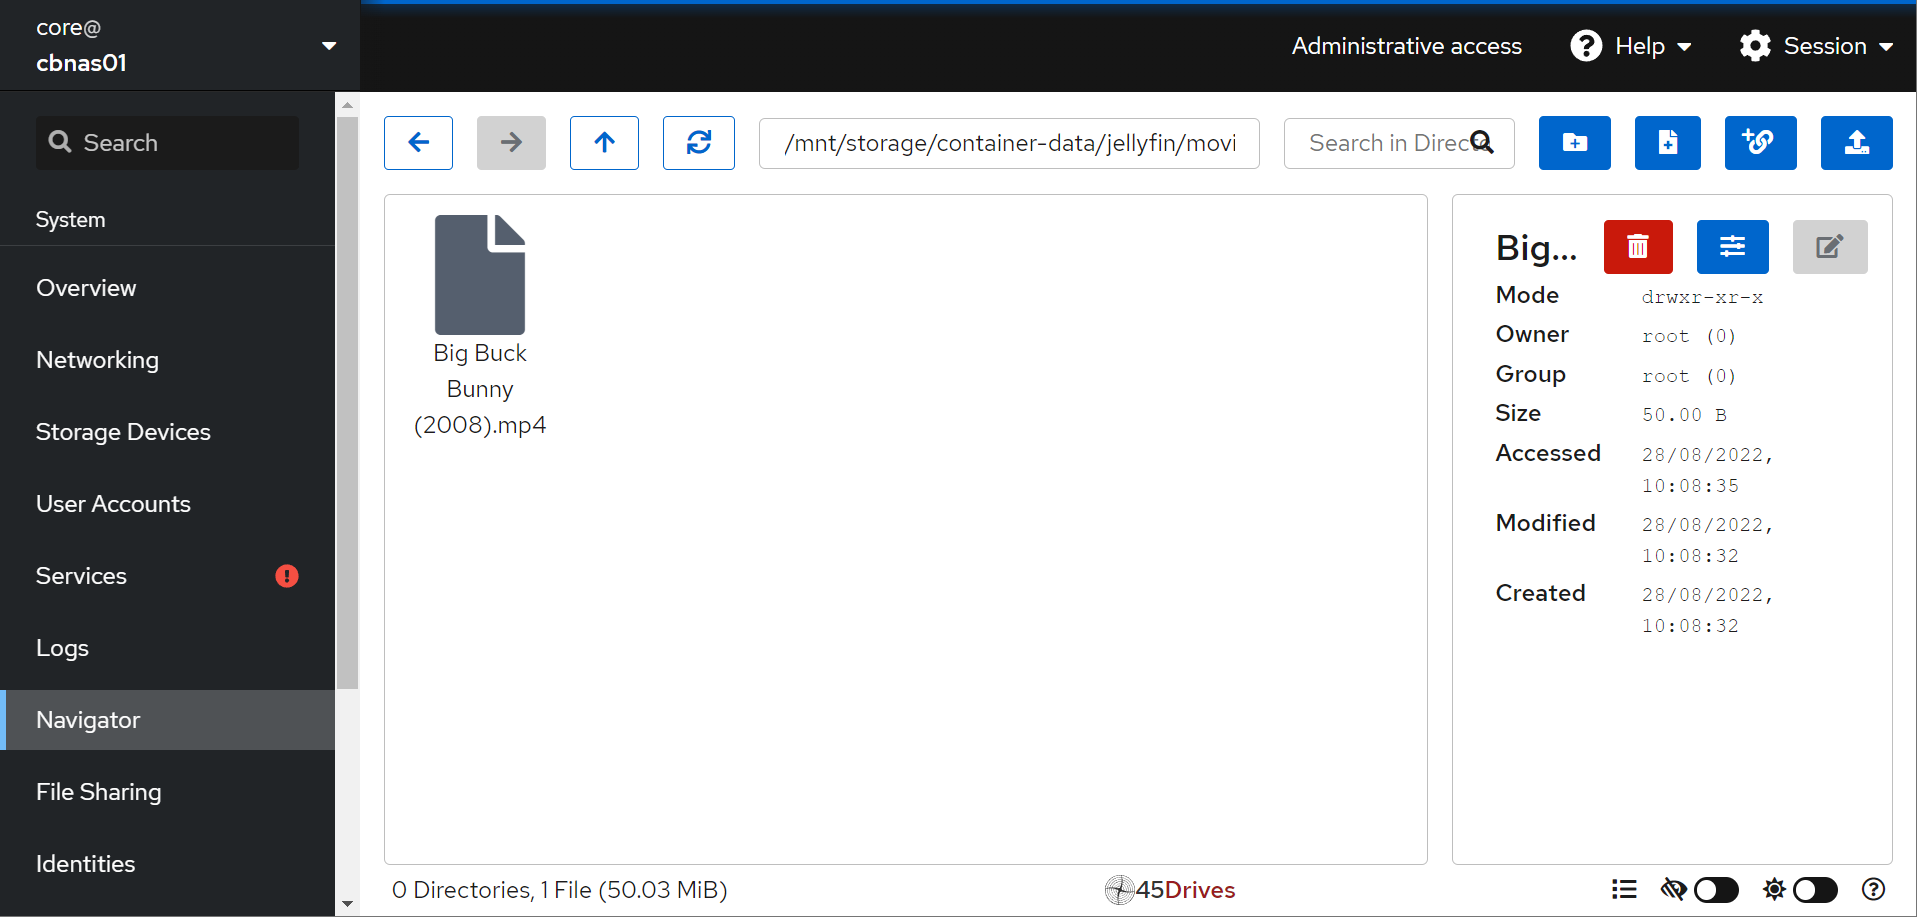
- I’m also gonna shove some sample data in there. I’ll make a movies folder and put our favourite bunny in there.
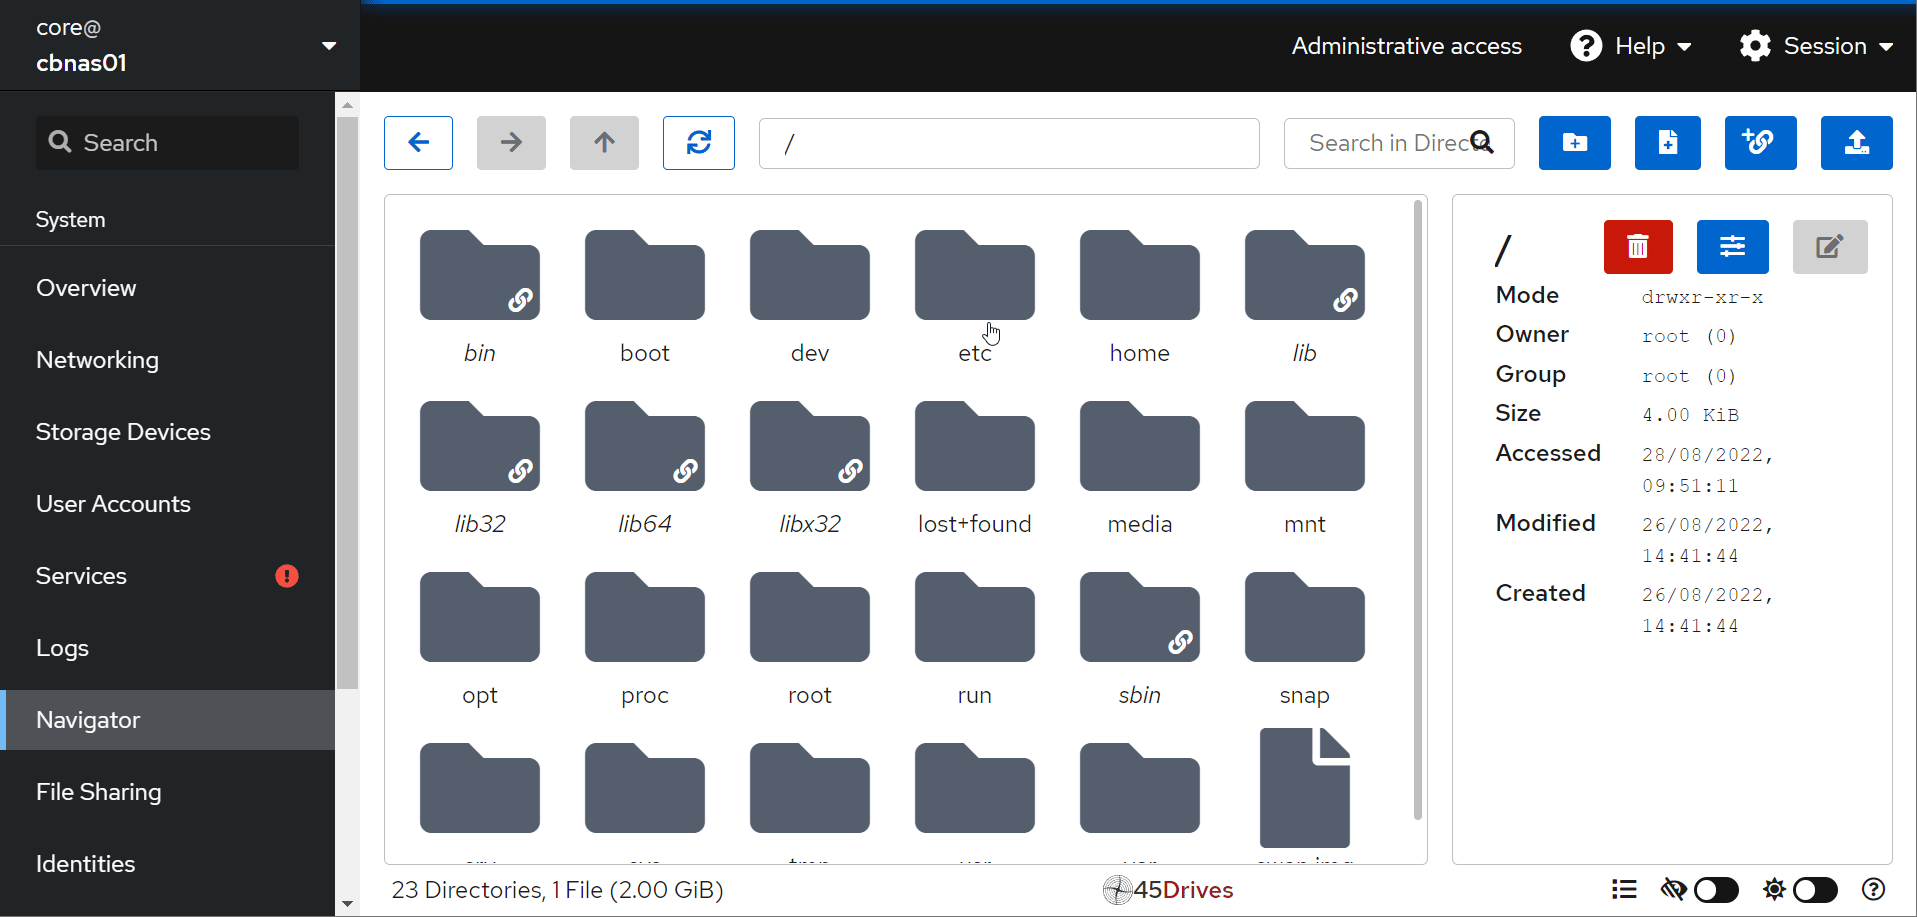
- Create an
/etc/exports.d/folder, as the nfs plugin will get sad without one
- head to the NFS Tab
Info
If there are no existing shares, you will get a sort error you can ignore.
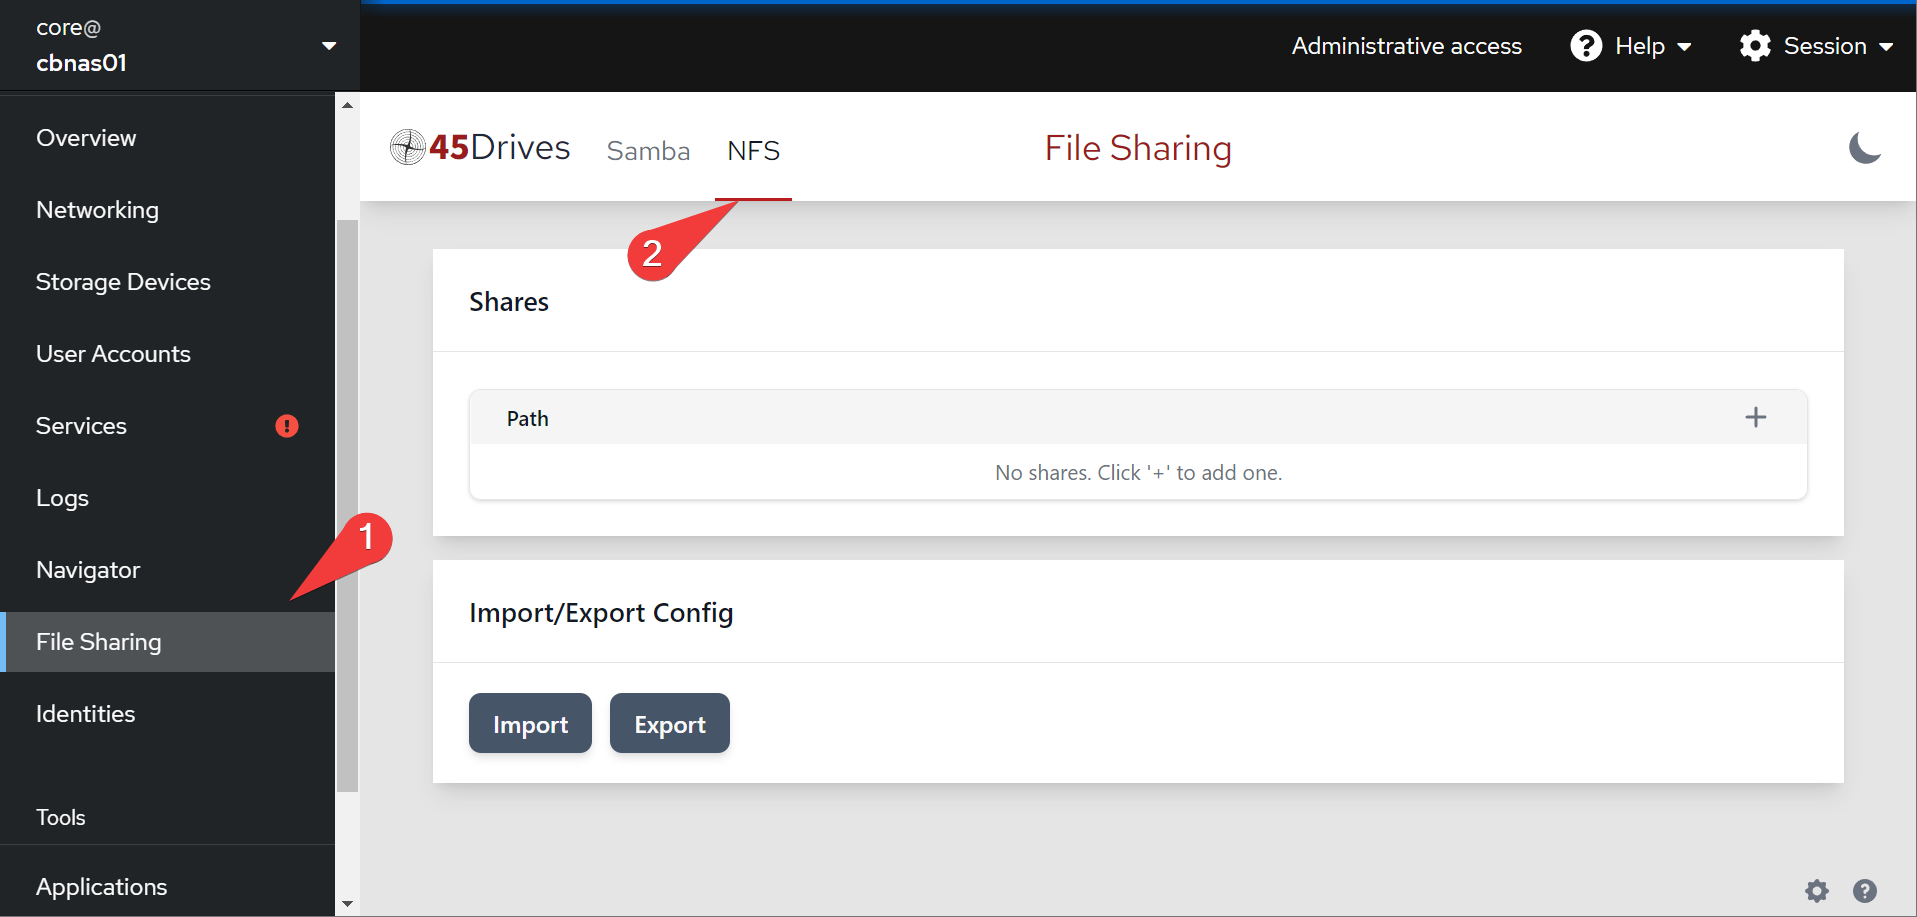
- Create a new export (linux term for a NFS fileshare) for your jellyfin container
Info
By default, nfs shares are protected by an ip whitelist.
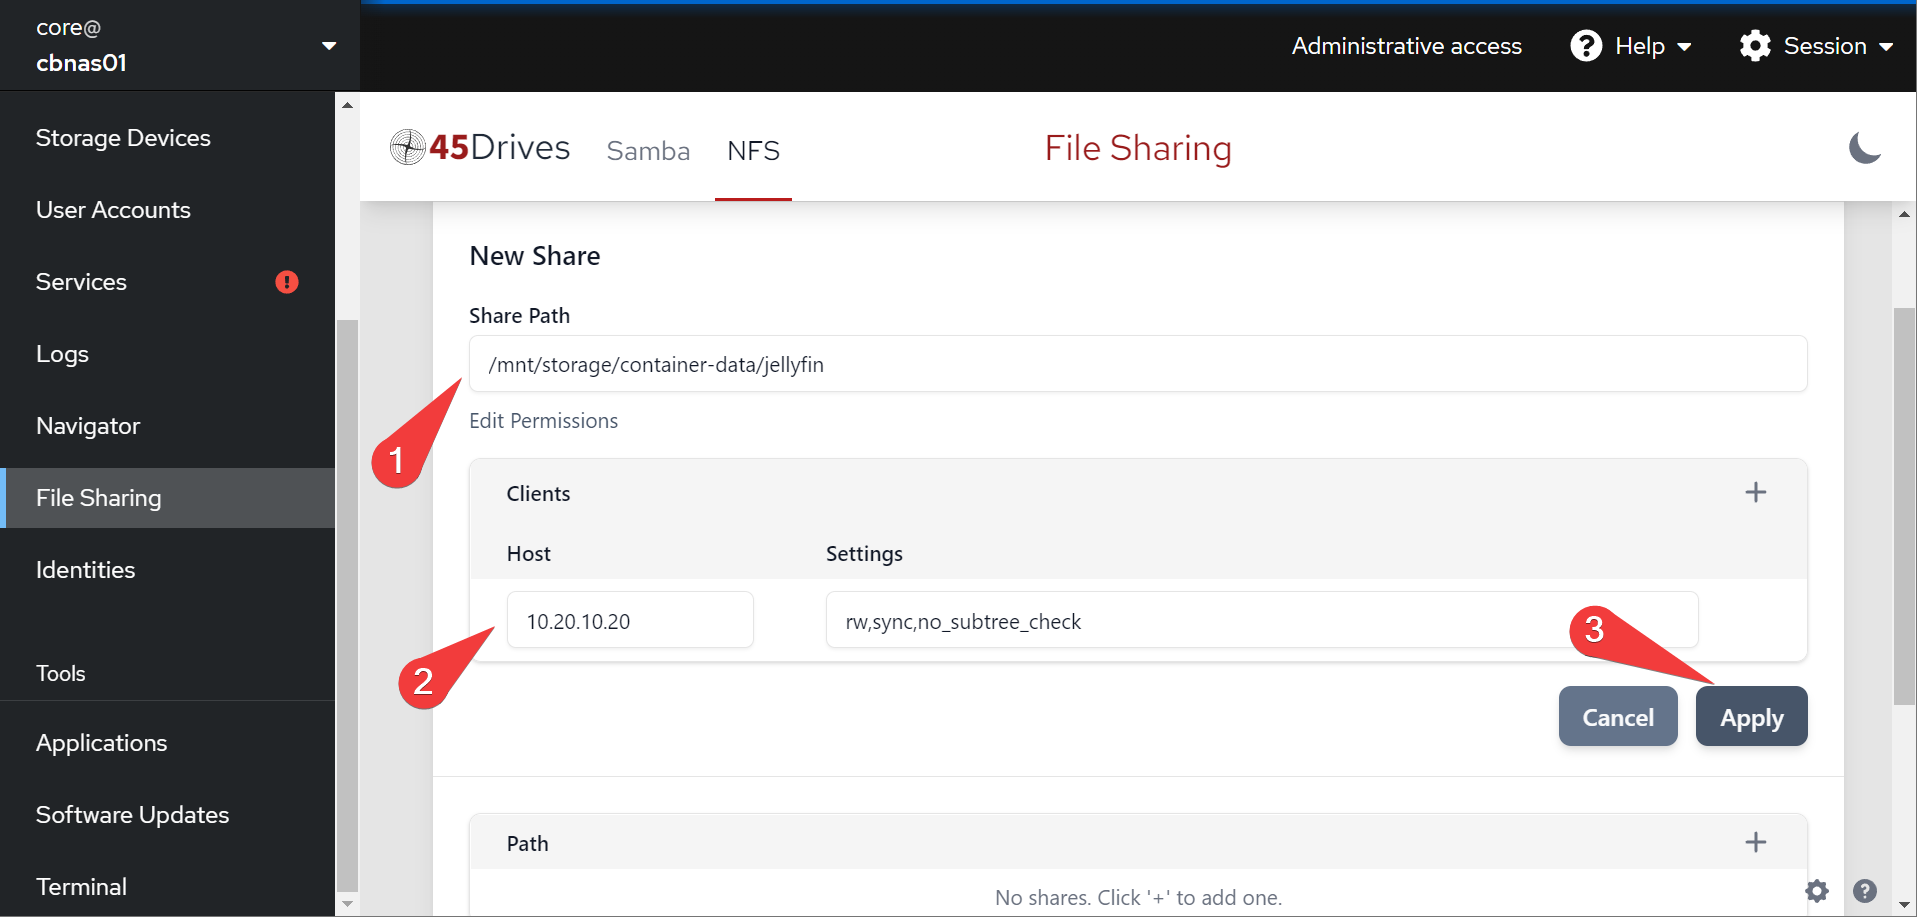
- That’s it! You now have a nfs share you can use with your new shiny docker container.
Setting up Jellyfin with NFS mounts
Alright, now for some of the real magic.
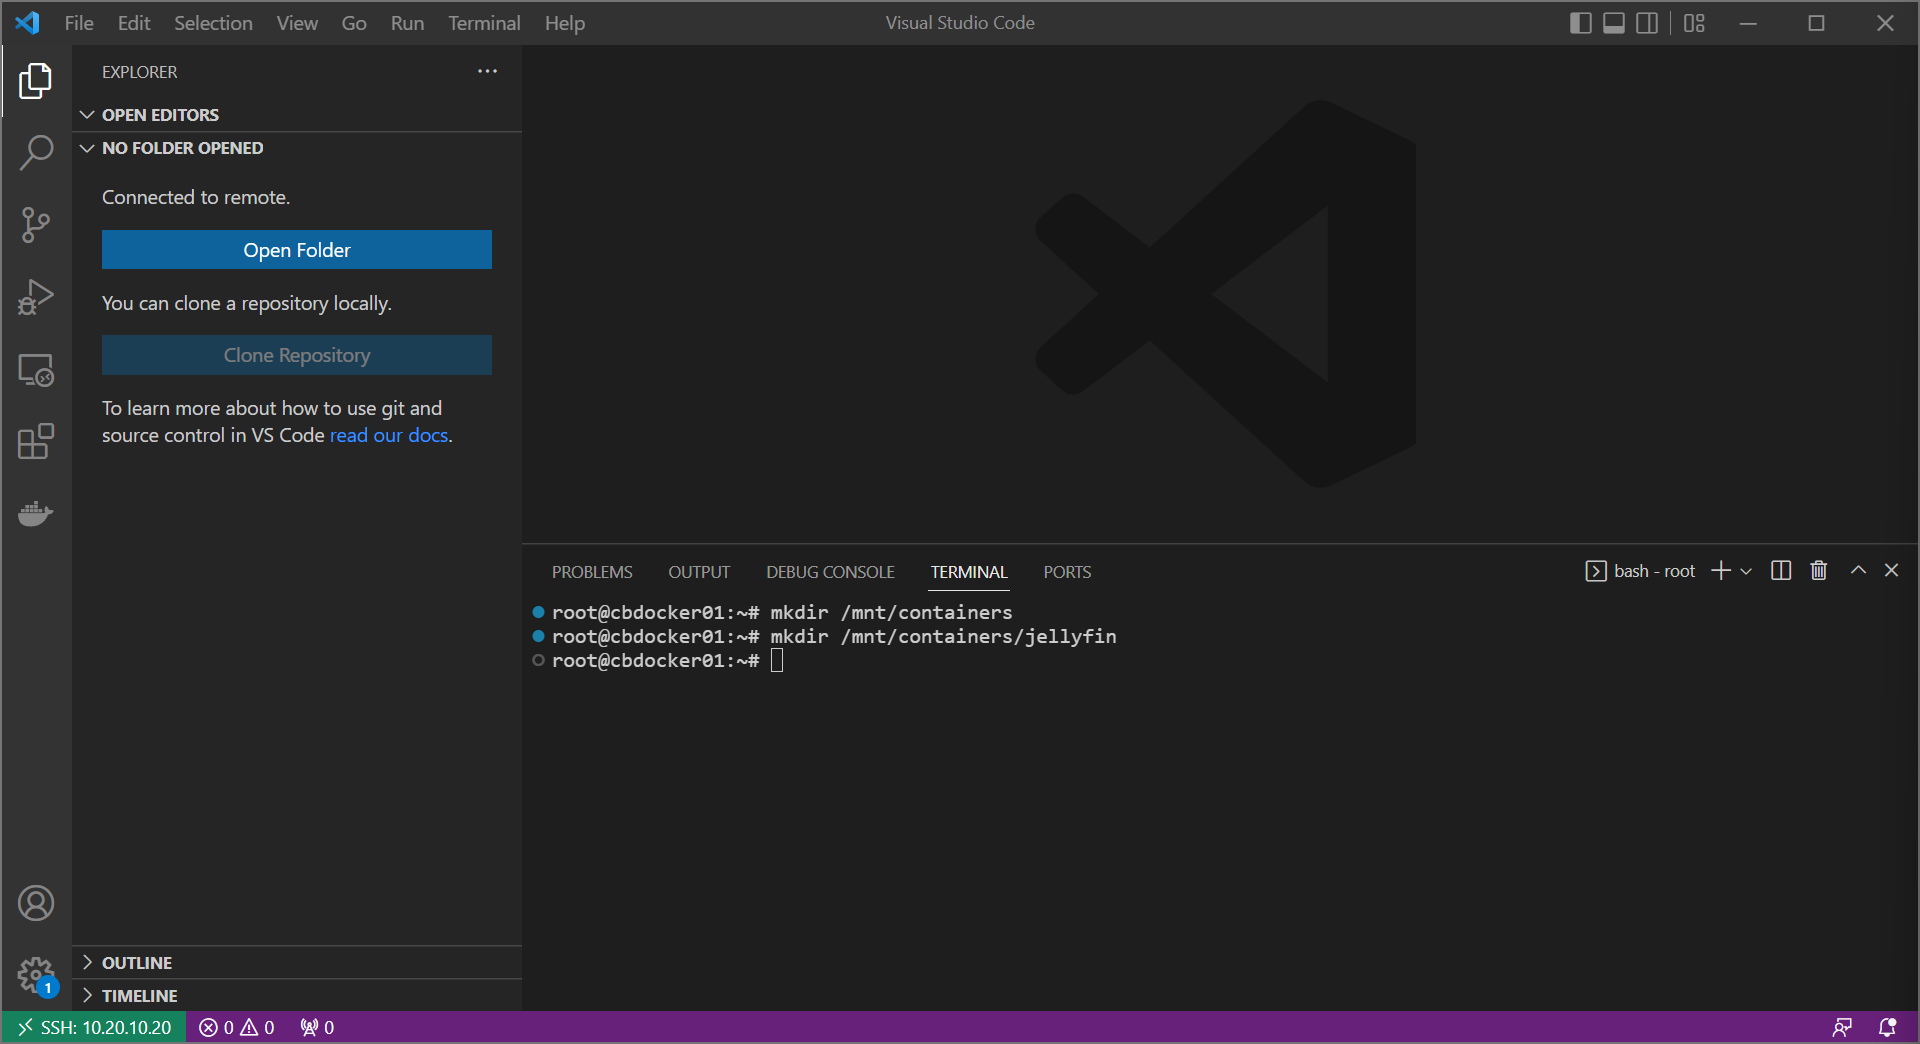
- Create a new folder in your docker host called
/mnt/containerswith a subfolder ofjellyfin
- Open up that folder on the navigator on the left as well, if you’re using VSCode. Create a new
docker-compose.yamlfile to define our container.

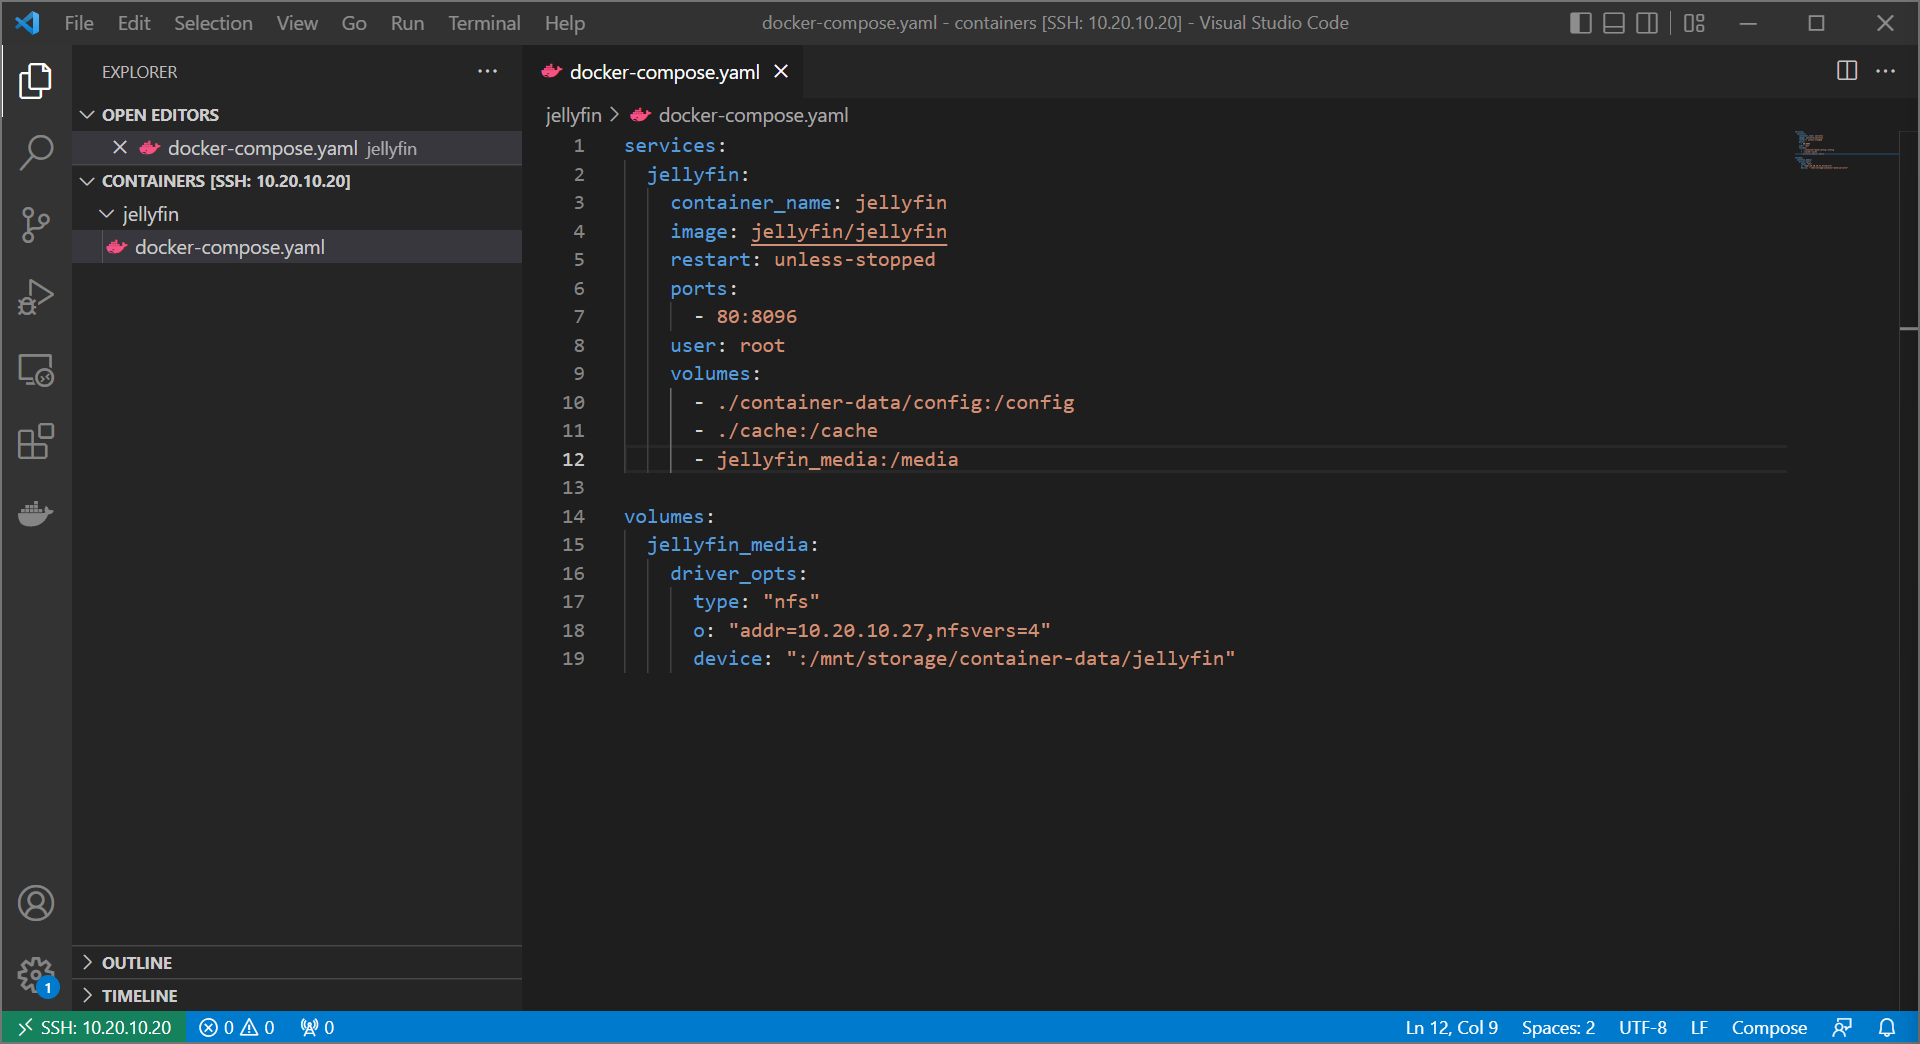
- Create a new
docker-compose.yamlfile with the following information (changing your NAS IP where appropriate)
services:
  jellyfin:
    container_name: jellyfin
    image: jellyfin/jellyfin
    restart: unless-stopped
    ports:
      - 80:8096
    user: root
    volumes:
      - ./container-data/config:/config
      - ./cache:/cache
      - jellyfin_media:/media

volumes:
  jellyfin_media:
    driver_opts:
      type: "nfs"
      o: "addr=10.20.10.27,nfsvers=4"
      device: ":/mnt/storage/container-data/jellyfin"
- Run with
docker compose up -din the jellyfin folder
Info
older versions of docker need a separate docker-compose package
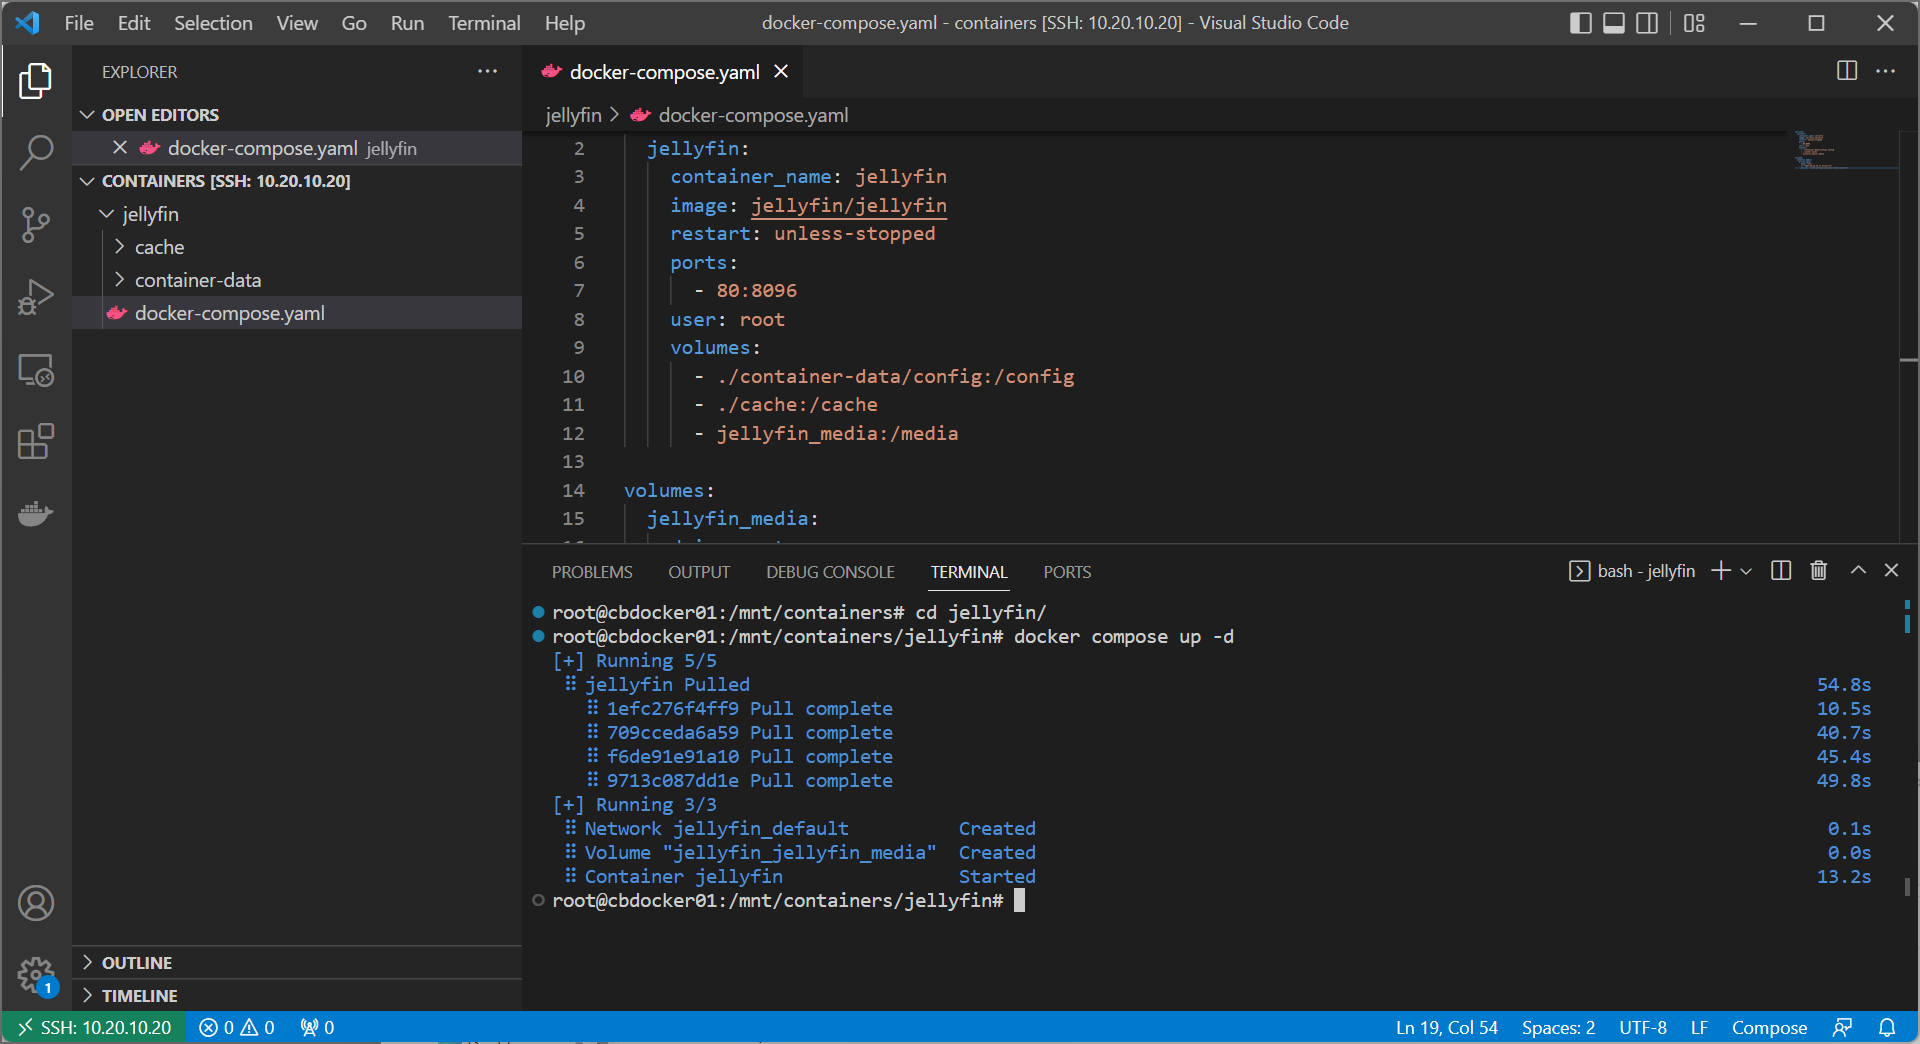
- let’s see if it all came together! Go to
http://<your-ip>and attempt to get big buck bunny going from the/mediafolder.
Warning
Note that we’re running jellyfin in HTTP at the moment, not HTTPs. It’s a good idea to use a reverse proxy like caddy or nginx proxy manager to fix that. That’s part of my other guide.

- woohoo!
Off to the Races
We now have a bit of a problem though. We need to guarantee that your NAS starts first so you don’t have your docker containers relying on nfs exports that haven’t started yet.
Info
In IT terms this is referred to as a race condition.
Easy enough to fix!
- back in proxmox, set your docker host to have a 60 second delay on boot.
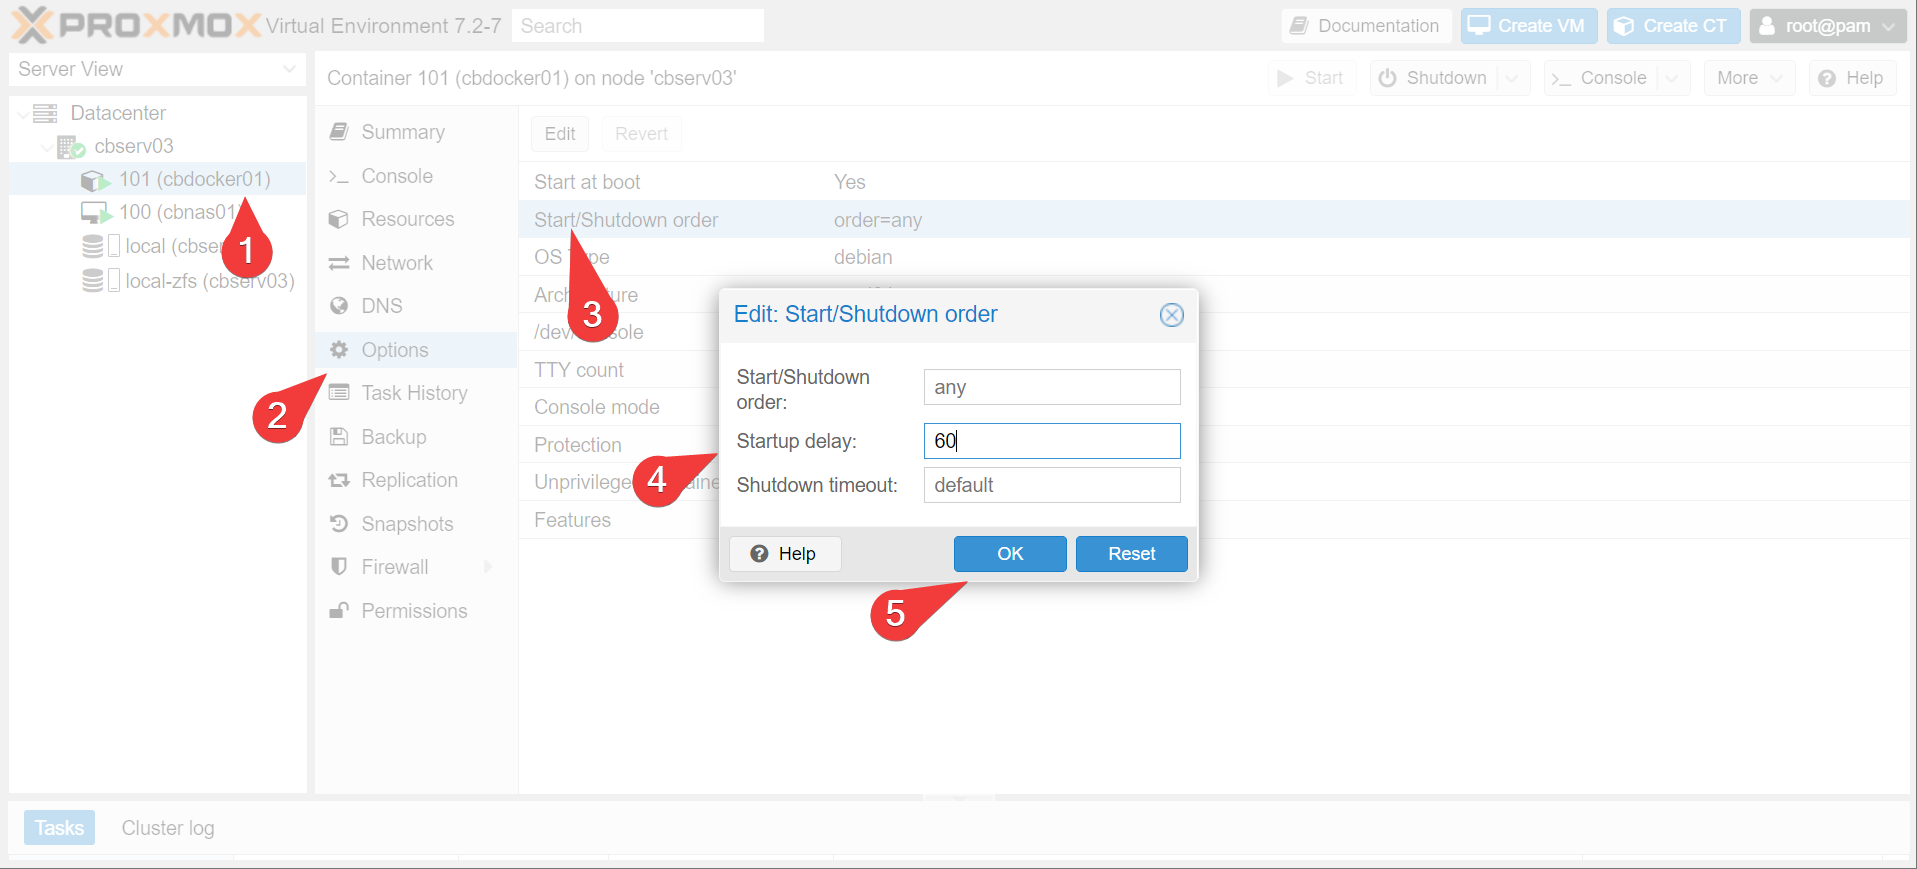
Info
Also in IT terms, this is referred to as the lazy way to fix race conditions. The proper way is to put some sort of health check precondition as opposed to a set delay, but if it works it works.
Moving On
Great success! You now have all the tools to set up a NAS, your docker environment, any other virtual machines you care to perform, and do it all in one machine. That’s great.
Wait. We’re forgetting something. We’re forgetting the most important thing. Backups! Let’s deal with that in Backing up Proxmox.