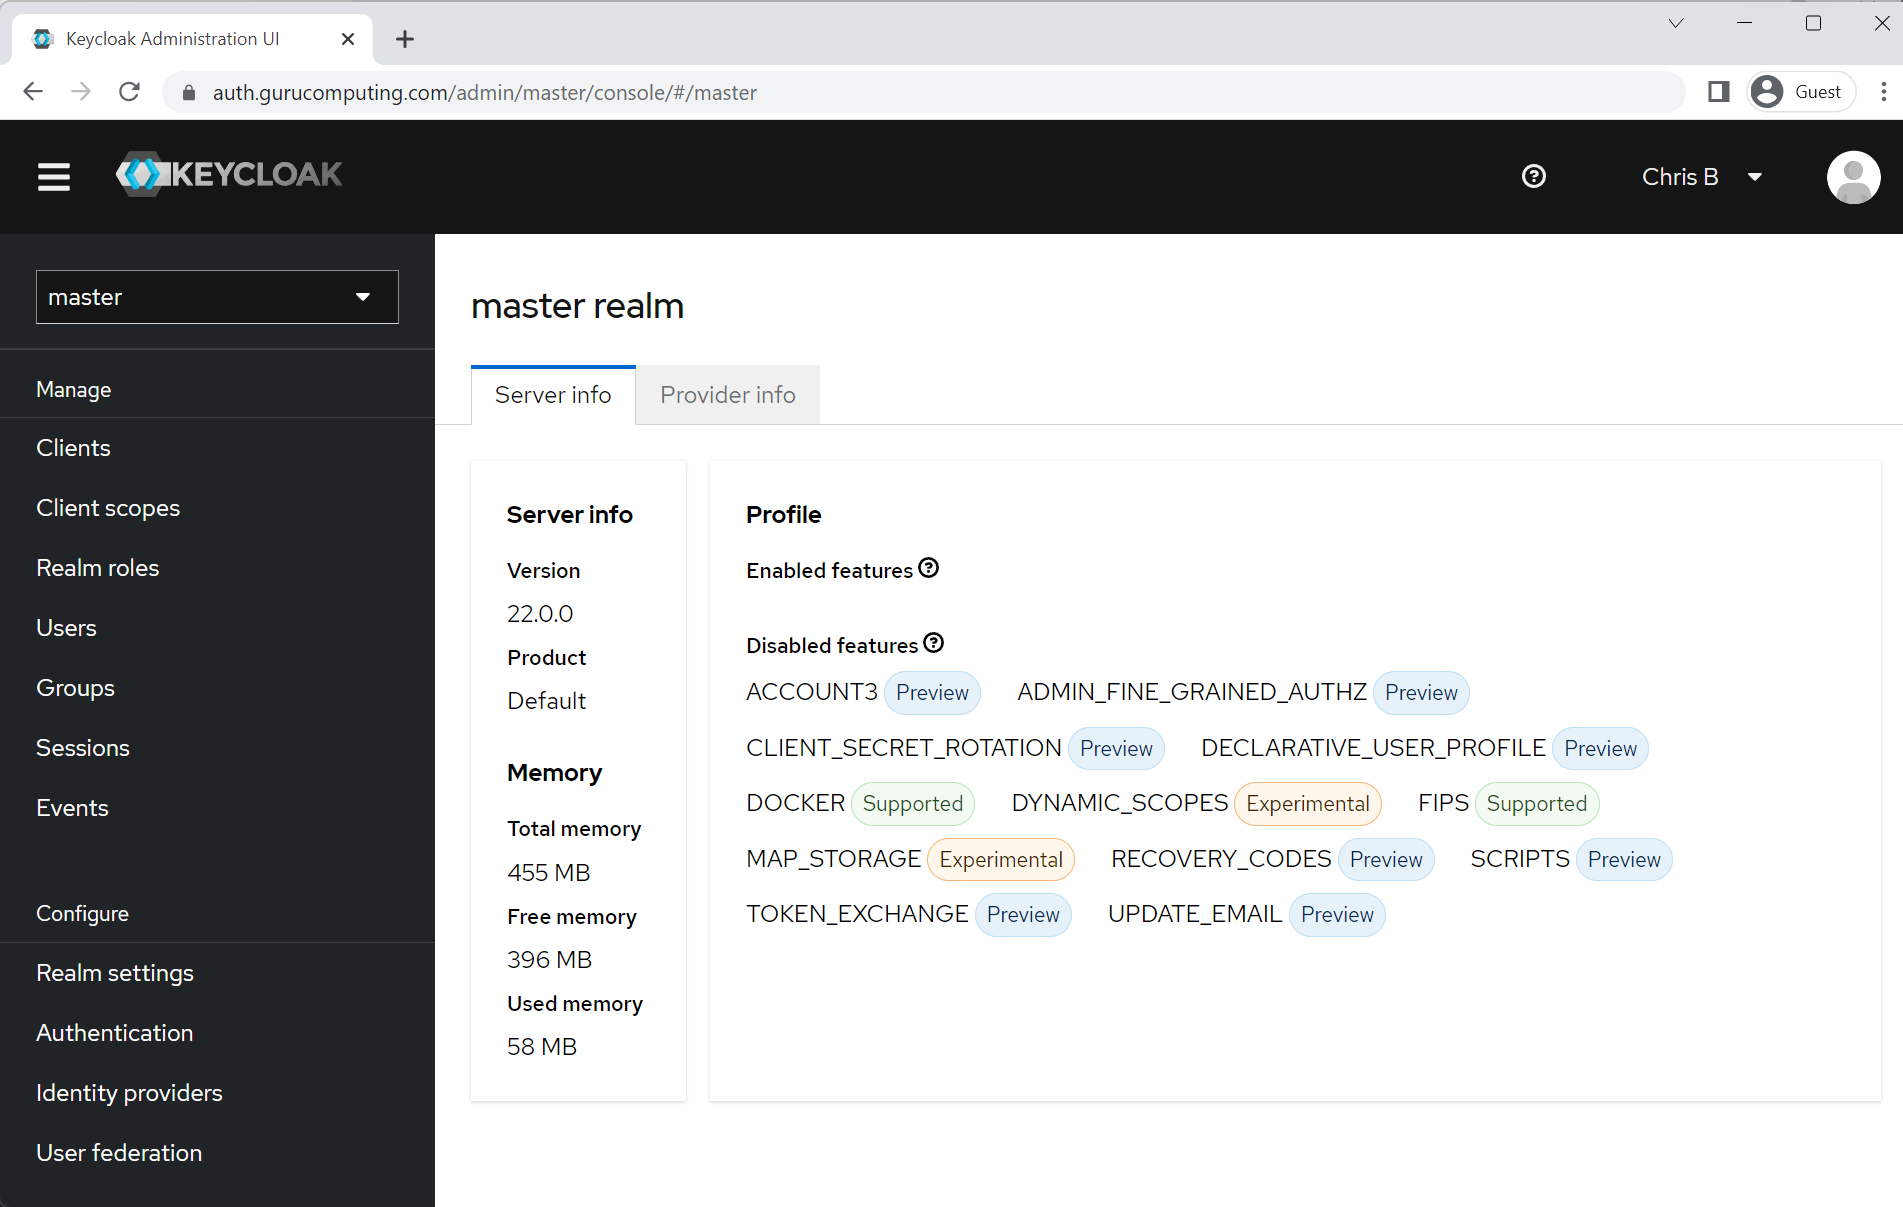
Installing Outline Knowledgebase
Just show me the configs
You can find the final configs for this guide at the blog github page
Pre-Requisites
Before we get going, Outline requires quite a few components. We need:
- A docker platform (we will be using Fedora 38, but any docker platform will do)
- A way to manage docker containers (we will be using vscode with the remote ssh extension)
- A reverse proxy to handle SSL termination (see my caddy guide or nginx proxy manager guide). This guide will be using caddy
- An external authentication source (see the Authentication with Keycloak article)
- A bit of patience
Alright, that’s quite a few pre-requisites! That’s because outline is a cloud native application. It doesn’t have local authentication, It uses s3 and postgres for storage, and expects to be deployed in a containerised setup.
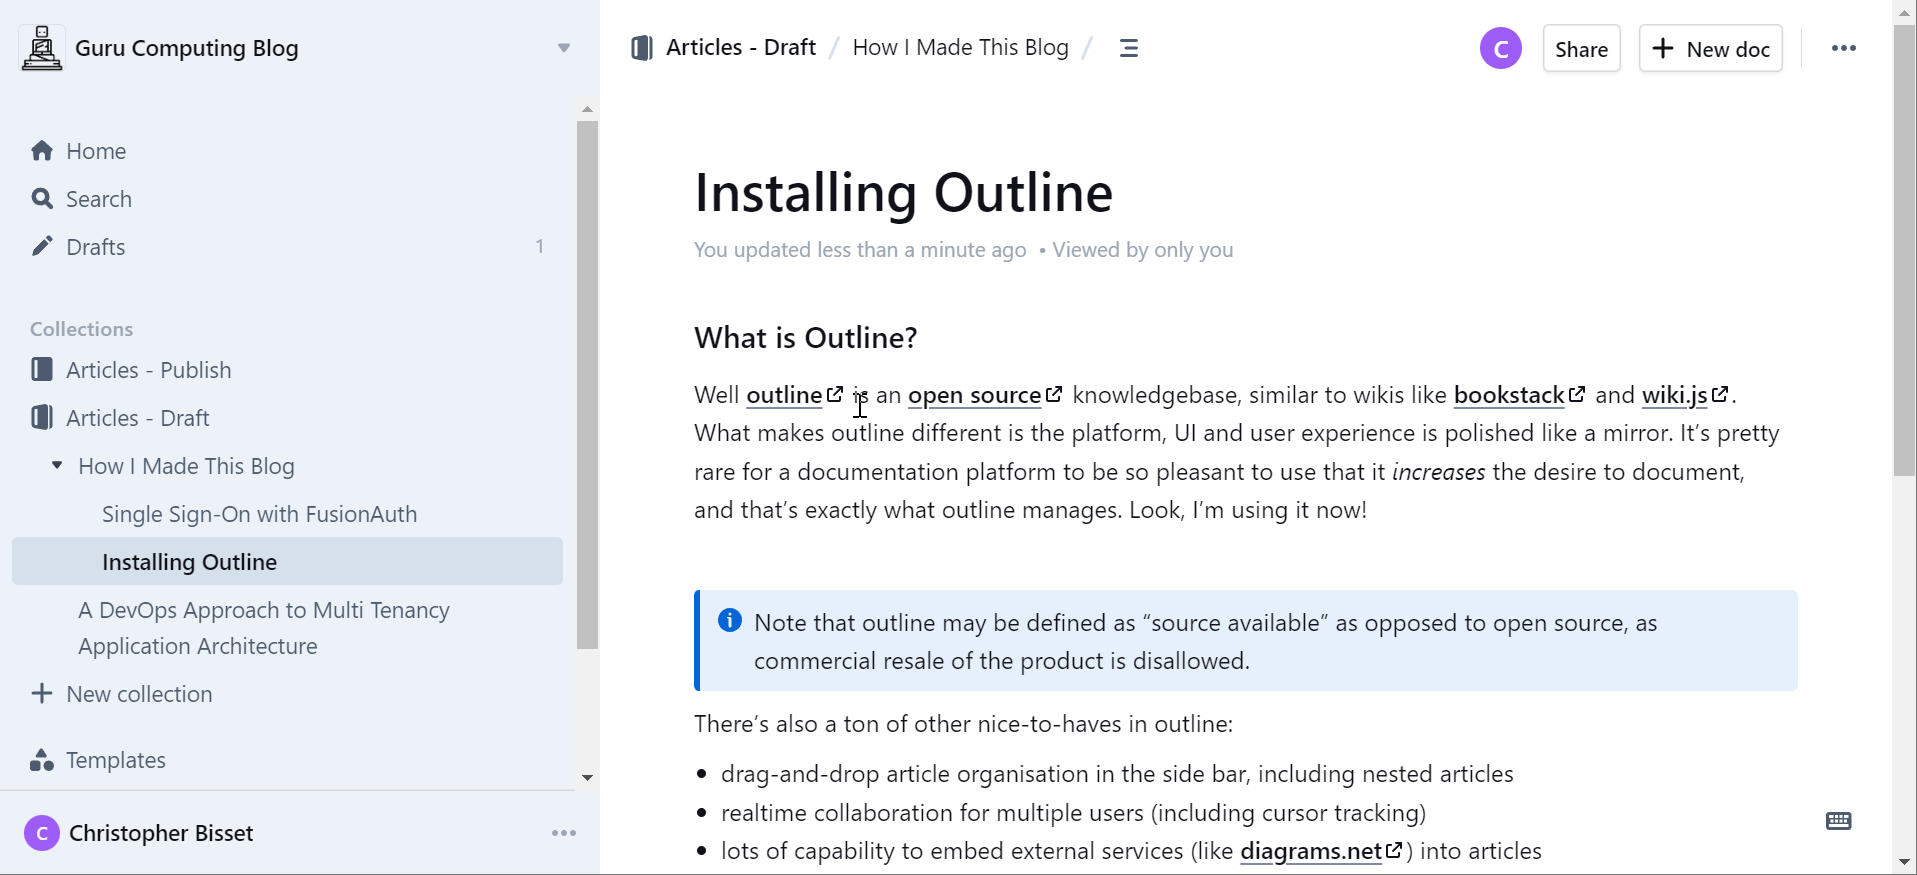
What is Outline?
Well outline is an open source knowledgebase, similar to wikis like bookstack and wiki.js. What makes outline different is the platform, UI and user experience is polished like a mirror. It’s pretty rare for a documentation platform to be so pleasant to use that it increases the desire to document, and that’s exactly what outline manages. Look, I’m using it now!
Info
Note that outline may be defined as “source available” as opposed to open source, as commercial resale of the product is disallowed.
There’s also a ton of other nice-to-haves in outline:
- drag-and-drop article organisation in the side bar, including nested articles
- realtime collaboration for multiple users (including cursor tracking)
- lots of capability to embed external services (like diagrams.net) into articles
- Probably the best copy-and-paste handler out there for moving data into outline quickly
- All files are stored as markdown and can be exported at will
Initial Environment
Let’s look at our initial environment. It leaves off where Authentication with Keycloak finished:
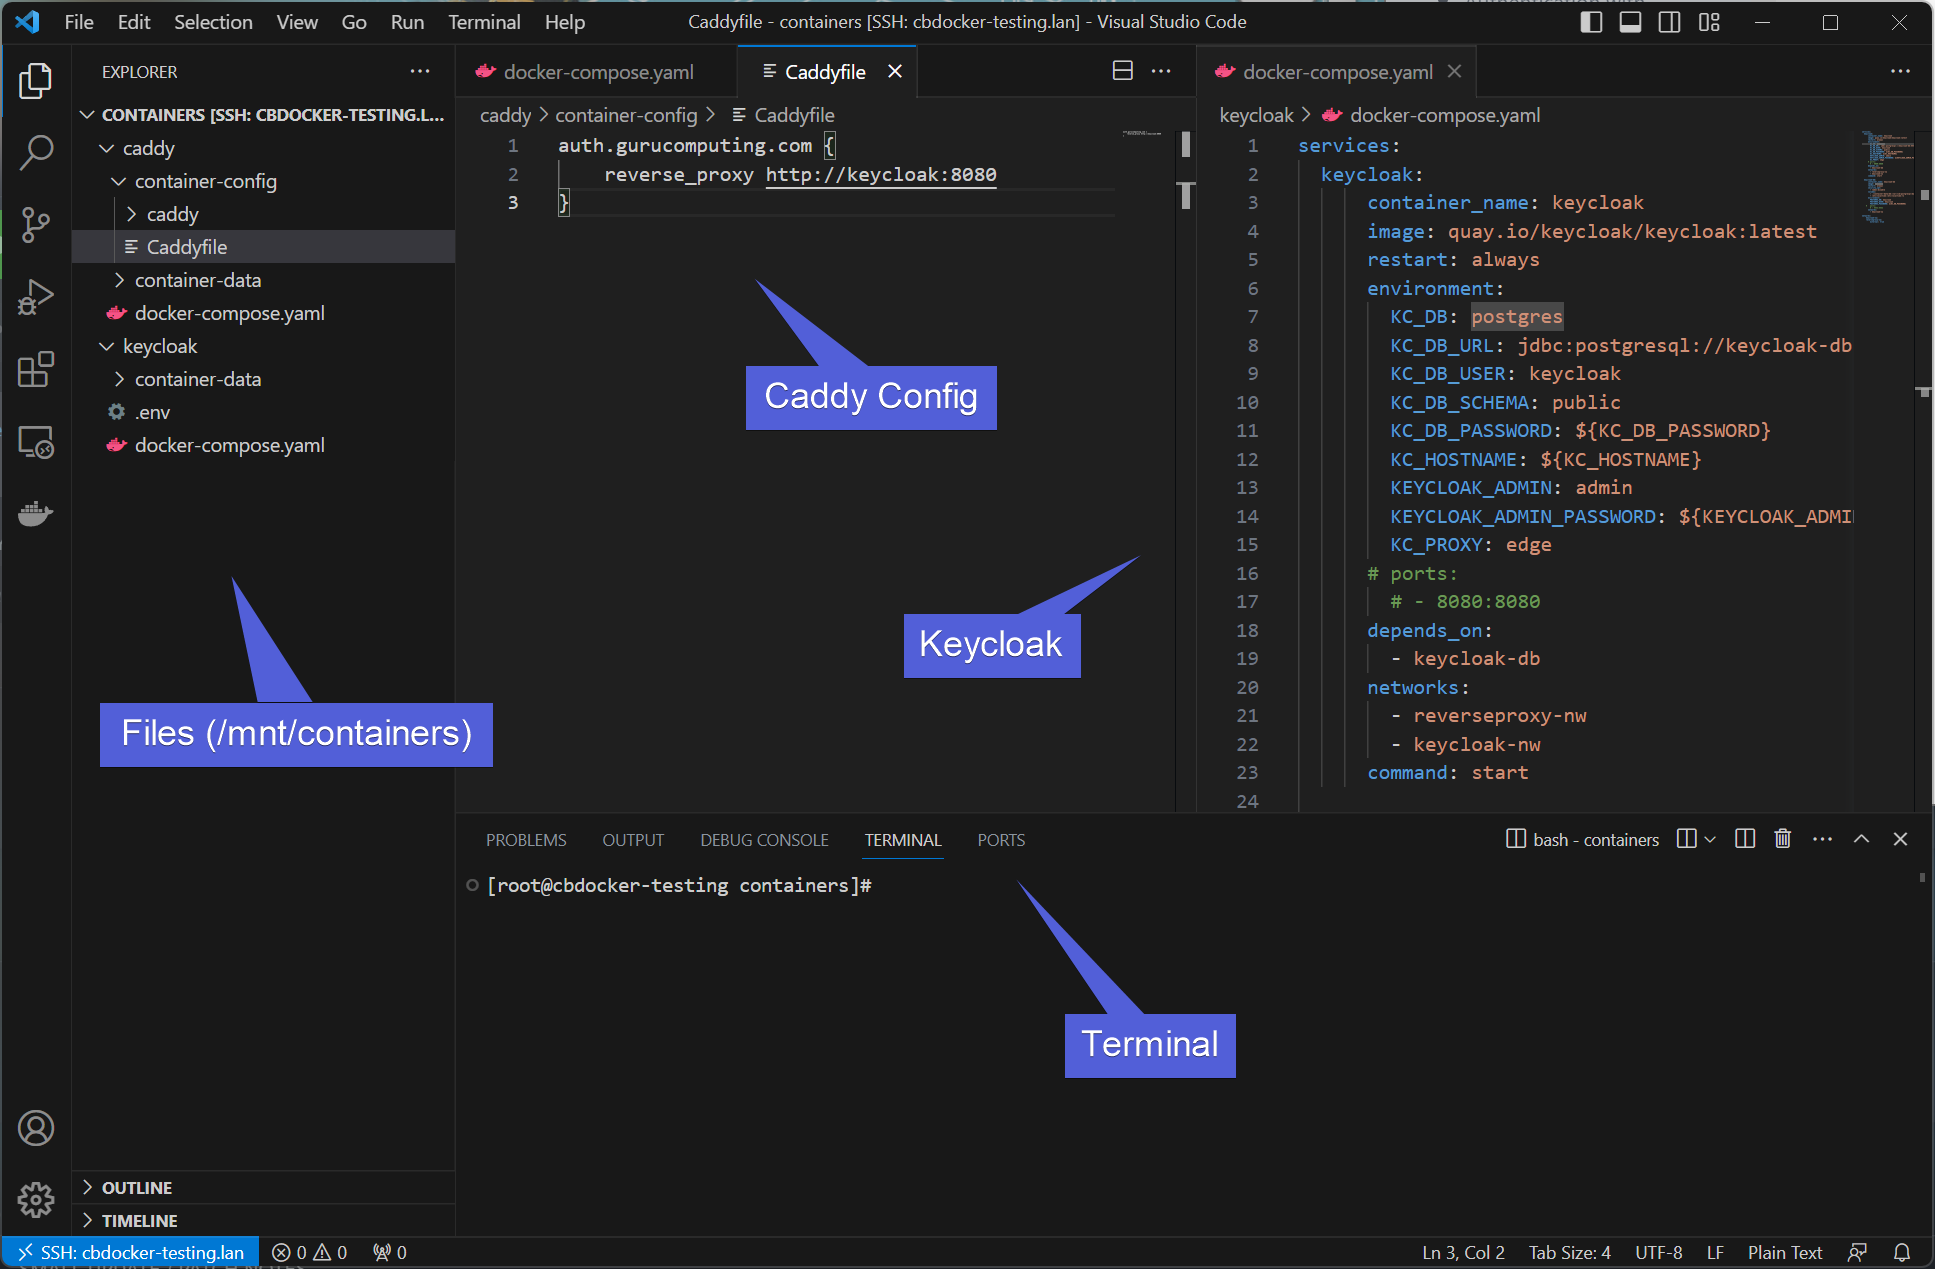
We have an SSO provider ready to go, and a reverse proxy.
Great! You don’t have to use Keycloak, but you do need an identity manager that supports SSO.
Configuring Caddy
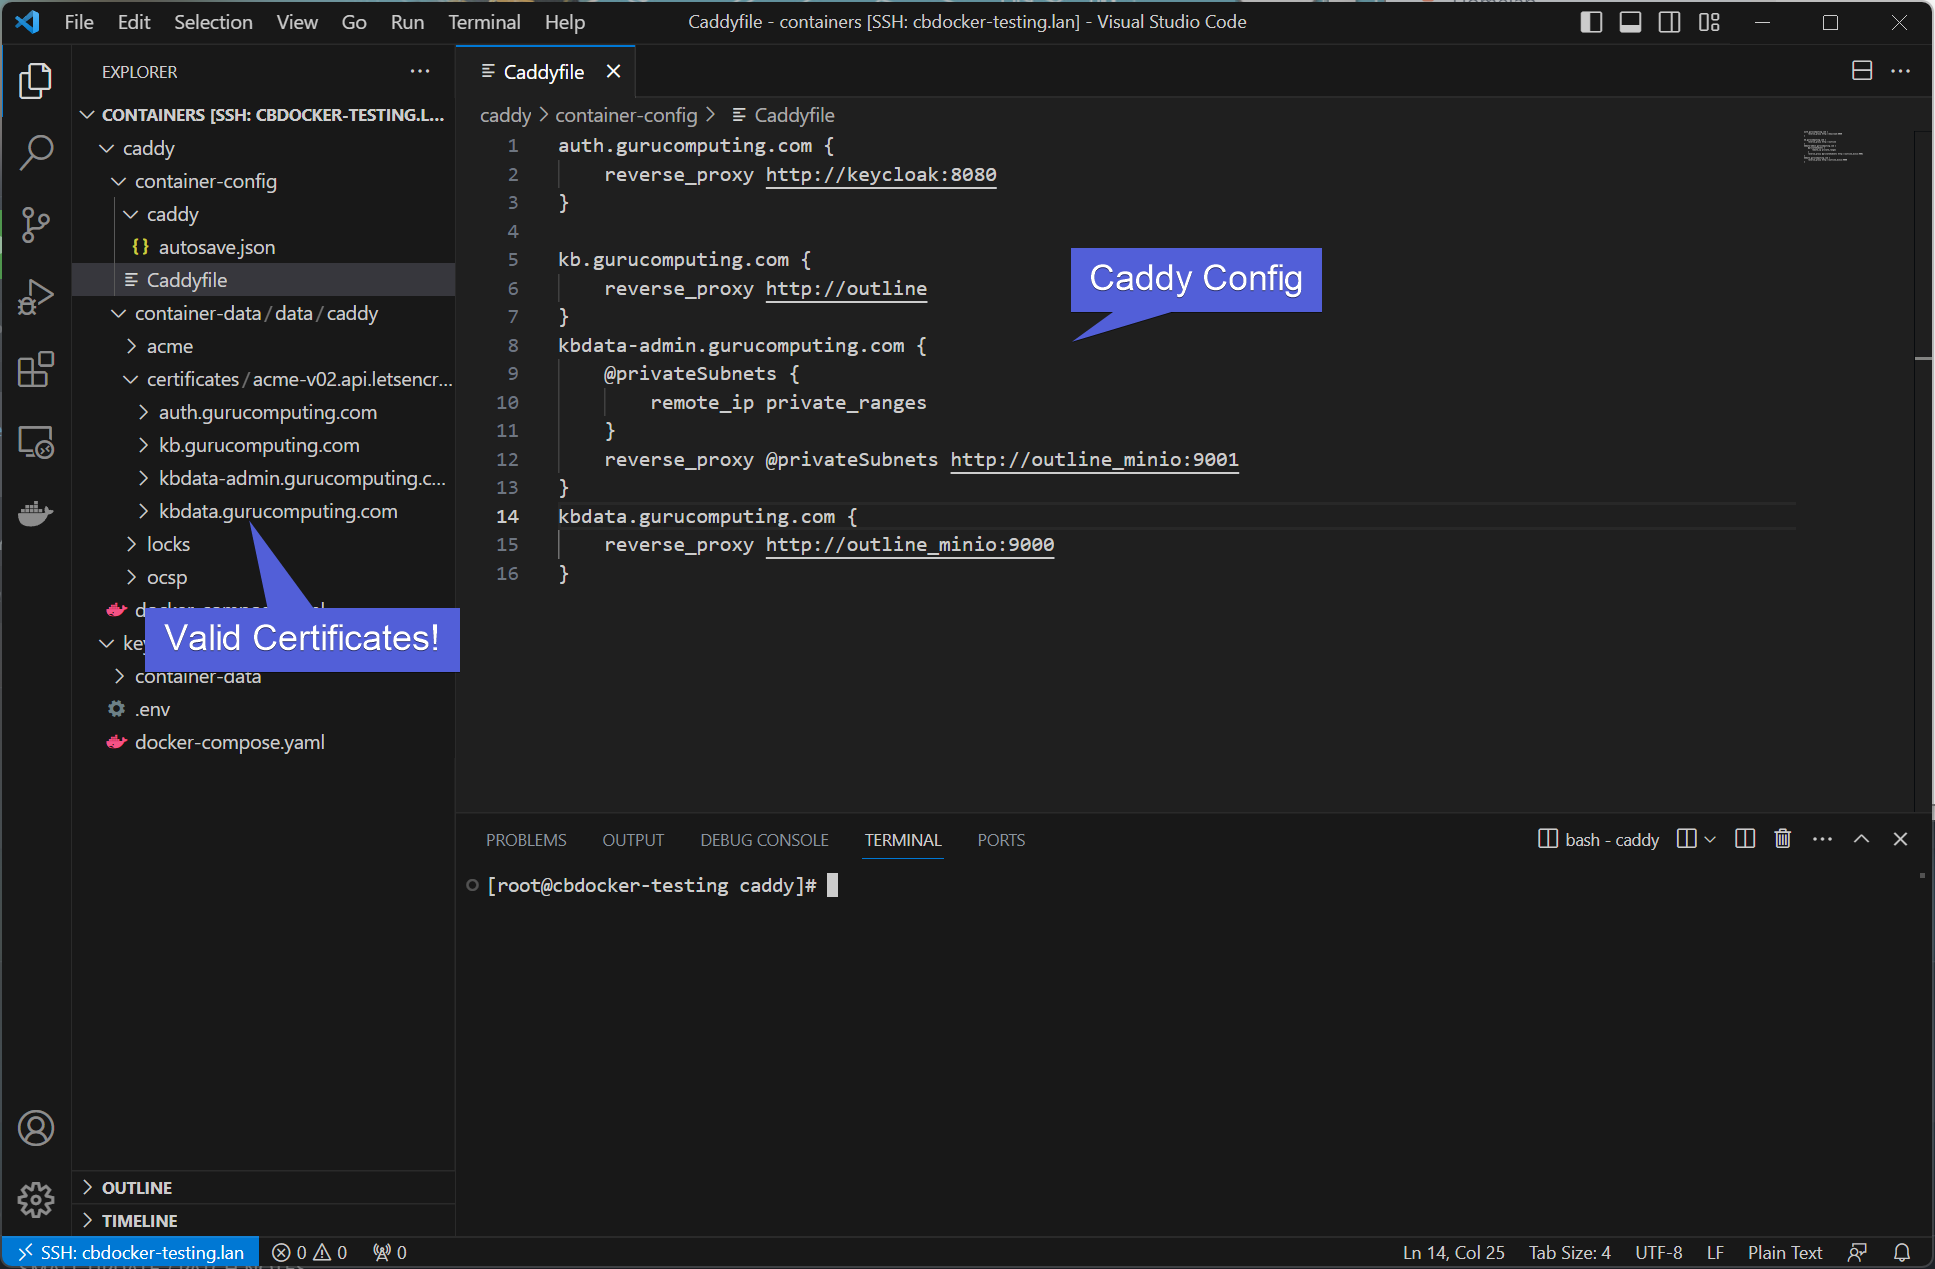
First step is to add the subdomains we need for outline to function. We need three of them! They are:
- For outline itself
- For the static file storage (emulating an s3 bucket)
- for the static file storage administration
We will be using the subdomains kb, kbdata, and kbdata-admin respectively.
- Update the
Caddyfileconfig with the following:
auth.<your-domain>.com {
    reverse_proxy http://fusionauth:9011 {
        header_up X-Forwarded-Port 443
    }
}
kb.<your-domain>.com {
    reverse_proxy http://outline
}
kbdata-admin.<your-domain>.com {
    @privateSubnets {
        remote_ip private_ranges
    }
    reverse_proxy @privateSubnets http://outline_minio:9001
}
kbdata.<your-domain>.com {
    reverse_proxy http://outline_minio:9000
}
- Reload (or hot-reload) your caddy file
Configuring Outline
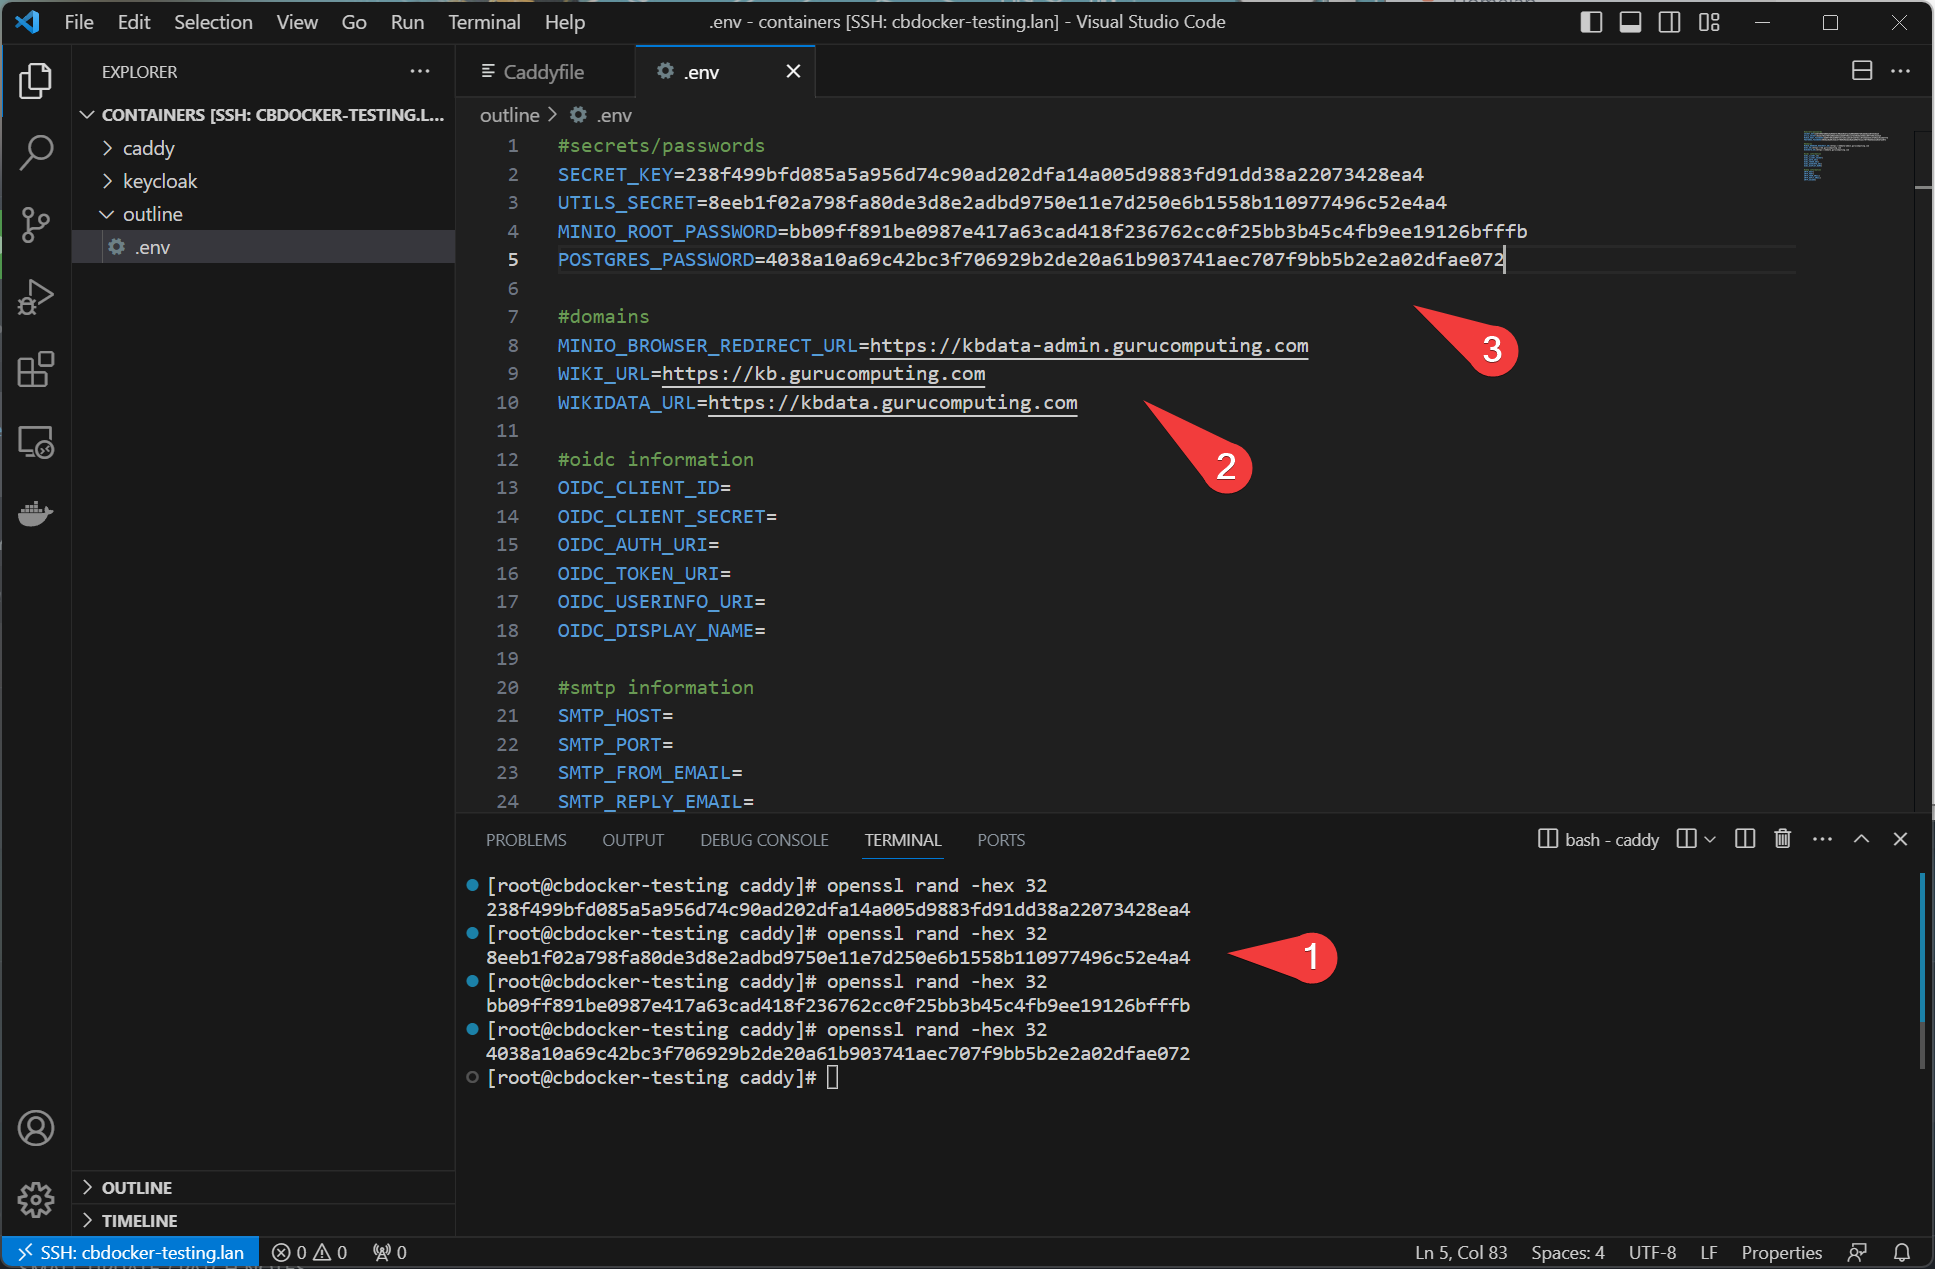
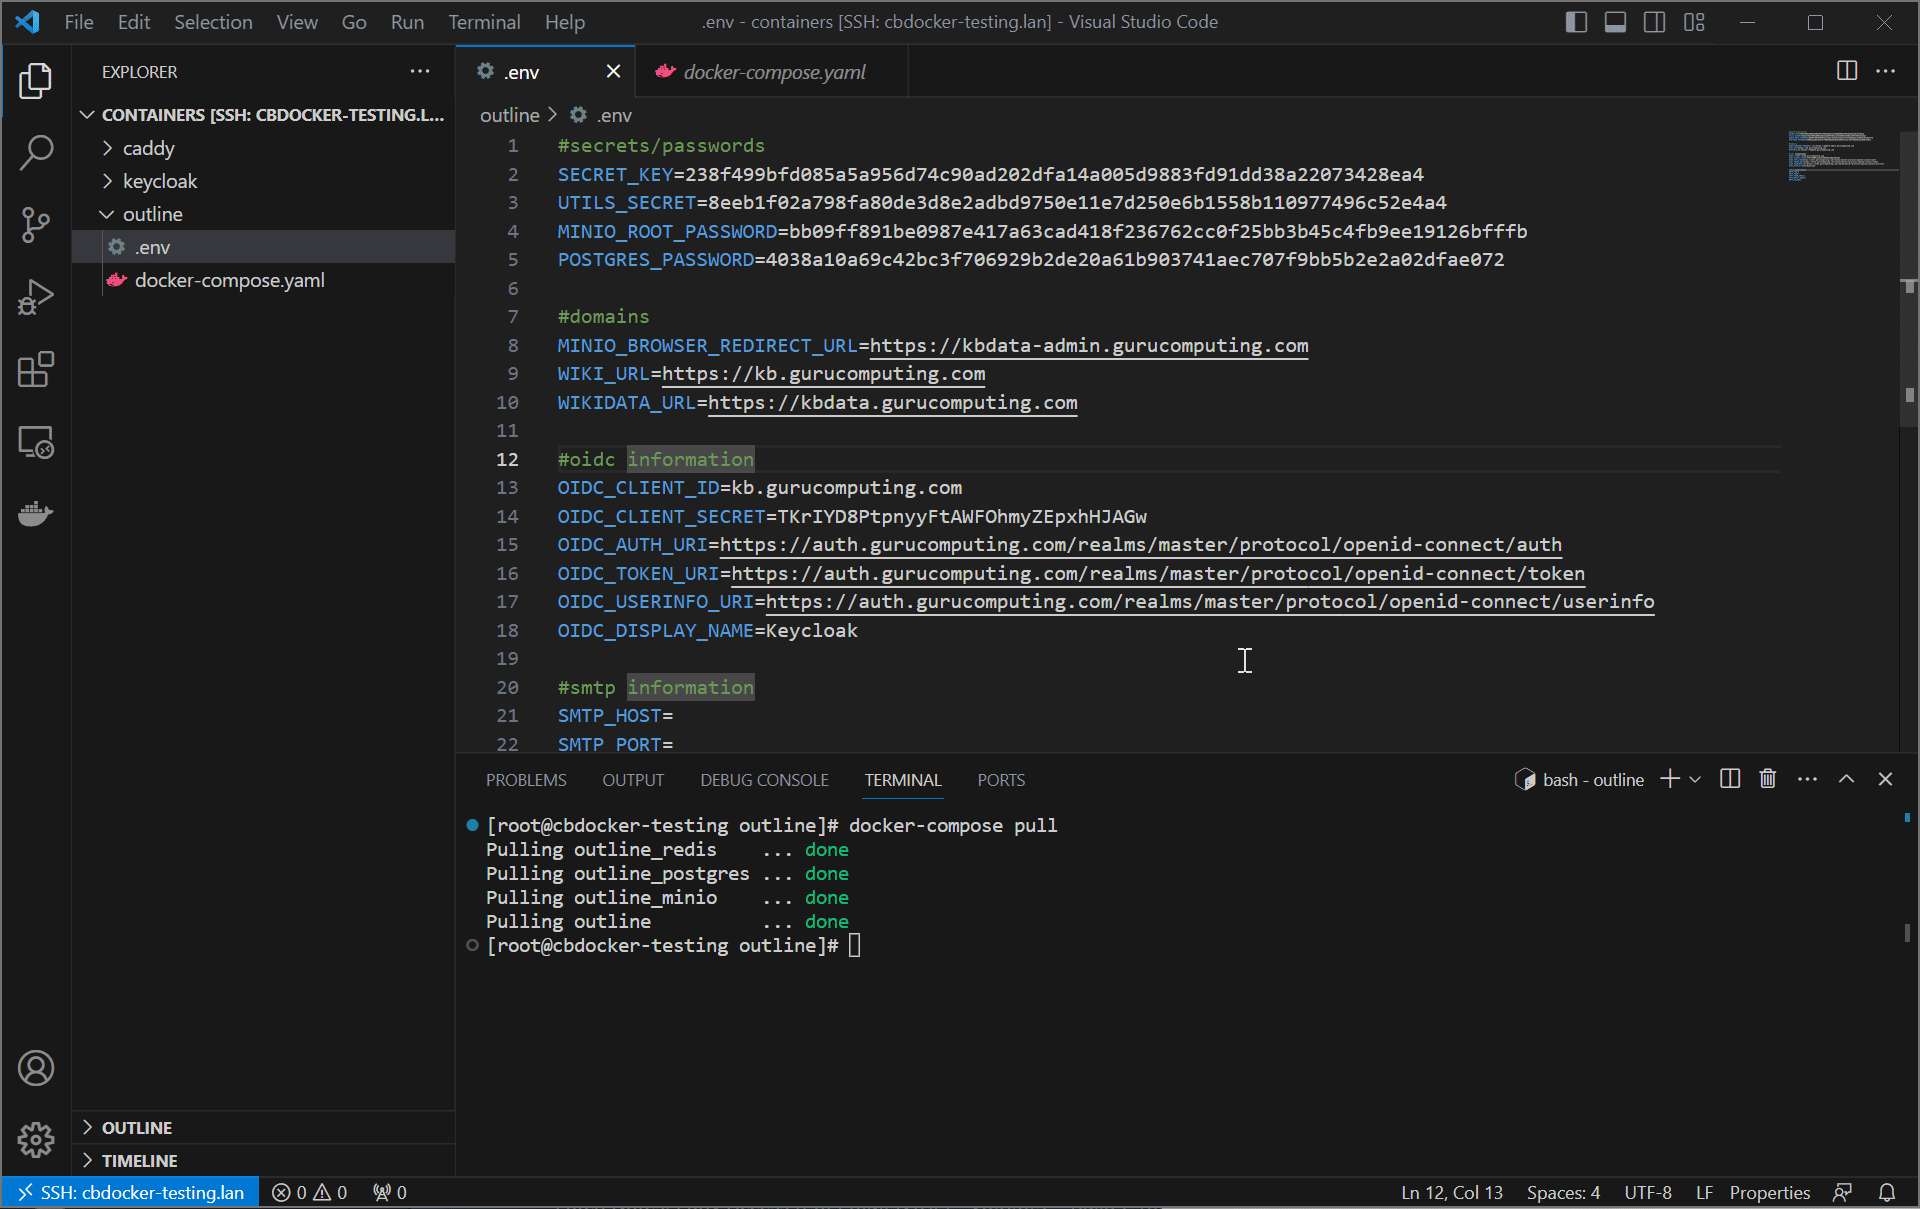
- Create an
outlinedirectory and place in the following.envfile.
#secrets/passwords
SECRET_KEY=
UTILS_SECRET=
MINIO_ROOT_PASSWORD=
POSTGRES_PASSWORD=

#domains
MINIO_BROWSER_REDIRECT_URL=https://kbdata-admin.<your-domain>.com
WIKI_URL=https://kb.<your-domain>.com
WIKIDATA_URL=https://kbdata.<your-domain>.com

#oidc information
OIDC_CLIENT_ID=
OIDC_CLIENT_SECRET=
OIDC_AUTH_URI=
OIDC_TOKEN_URI=
OIDC_USERINFO_URI=
OIDC_DISPLAY_NAME=

#smtp information
SMTP_HOST=
SMTP_PORT=
SMTP_FROM_EMAIL=
SMTP_REPLY_EMAIL=
SMTP_SECURE=
- Replace
<your-domain>with your domain. Generate thesecret-key,utils-secretand (may as well)minio-root-passwordandpostgres-passwordwith the following command four times:
- Add the following
docker-composefile (it’s another long one). Don’t start up just yet.
services:
  outline_redis:
    image: redis
    restart: always
    container_name: outline_redis
    networks:
      - outline-internal

  outline_postgres:
    image: postgres:15
    restart: always
    container_name: outline_postgres
    security_opt:
      - label:disable
    environment:
      - POSTGRES_PASSWORD=${POSTGRES_PASSWORD}
      - POSTGRES_USER=outline
      - POSTGRES_DB=outline
    networks:
      - outline-internal
    volumes:
      - ./container-data/db:/var/lib/postgresql/data
      - /etc/localtime:/etc/localtime:ro

  outline_minio:
    image: minio/minio
    restart: always
    container_name: outline_minio
    security_opt:
      - label:disable
    volumes:
      - ./container-data/data:/data
      - /etc/localtime:/etc/localtime:ro
    environment:
      - MINIO_ROOT_USER=minio
      - MINIO_ROOT_PASSWORD=${MINIO_ROOT_PASSWORD}
      - MINIO_BROWSER_REDIRECT_URL=${MINIO_BROWSER_REDIRECT_URL}
    # ports:
      # - 9000:9000
      # - 9001:9001
    networks:
      - reverseproxy-nw
    command: "server /data --console-address :9001"

  outline:
    image: outlinewiki/outline:latest
    user: root
    restart: always
    container_name: outline
    command: sh -c "yarn start --env=production-ssl-disabled"
    depends_on:
      - outline_postgres
      - outline_redis
      - outline_minio
    environment:
      - PGSSLMODE=disable
      - SECRET_KEY=${SECRET_KEY}
      - UTILS_SECRET=${UTILS_SECRET}
      - DATABASE_URL=postgres://outline:${POSTGRES_PASSWORD}@outline_postgres:5432/outline
      - REDIS_URL=redis://outline_redis:6379
      - URL=${WIKI_URL}
      - PORT=80
      - AWS_ACCESS_KEY_ID=minio
      - AWS_REGION=us-east-1
      - AWS_SECRET_ACCESS_KEY=${MINIO_ROOT_PASSWORD}
      - AWS_S3_UPLOAD_BUCKET_URL=${WIKIDATA_URL}
      - AWS_S3_UPLOAD_BUCKET_NAME=outline
      - AWS_S3_FORCE_PATH_STYLE=true
      - AWS_S3_ACL=private
      - SMTP_HOST=${SMTP_HOST}
      - SMTP_PORT=${SMTP_PORT}
      - SMTP_FROM_EMAIL=${SMTP_FROM_EMAIL}
      - SMTP_REPLY_EMAIL=${SMTP_REPLY_EMAIL}
      - SMTP_SECURE=${SMTP_SECURE}
      - OIDC_CLIENT_ID=${OIDC_CLIENT_ID}
      - OIDC_CLIENT_SECRET=${OIDC_CLIENT_SECRET}
      - OIDC_AUTH_URI=${OIDC_AUTH_URI}
      - OIDC_TOKEN_URI=${OIDC_TOKEN_URI}
      - OIDC_USERINFO_URI=${OIDC_USERINFO_URI}
      - OIDC_DISPLAY_NAME=${OIDC_DISPLAY_NAME}
      - OIDC_USERNAME_CLAIM=email
    # ports:
    #   443:443
    networks:
      - outline-internal
      - reverseproxy-nw
networks:
  outline-internal:
  reverseproxy-nw:
    external: true
Configuring OIDC
Now that we know our domain, we can configure the callback url.
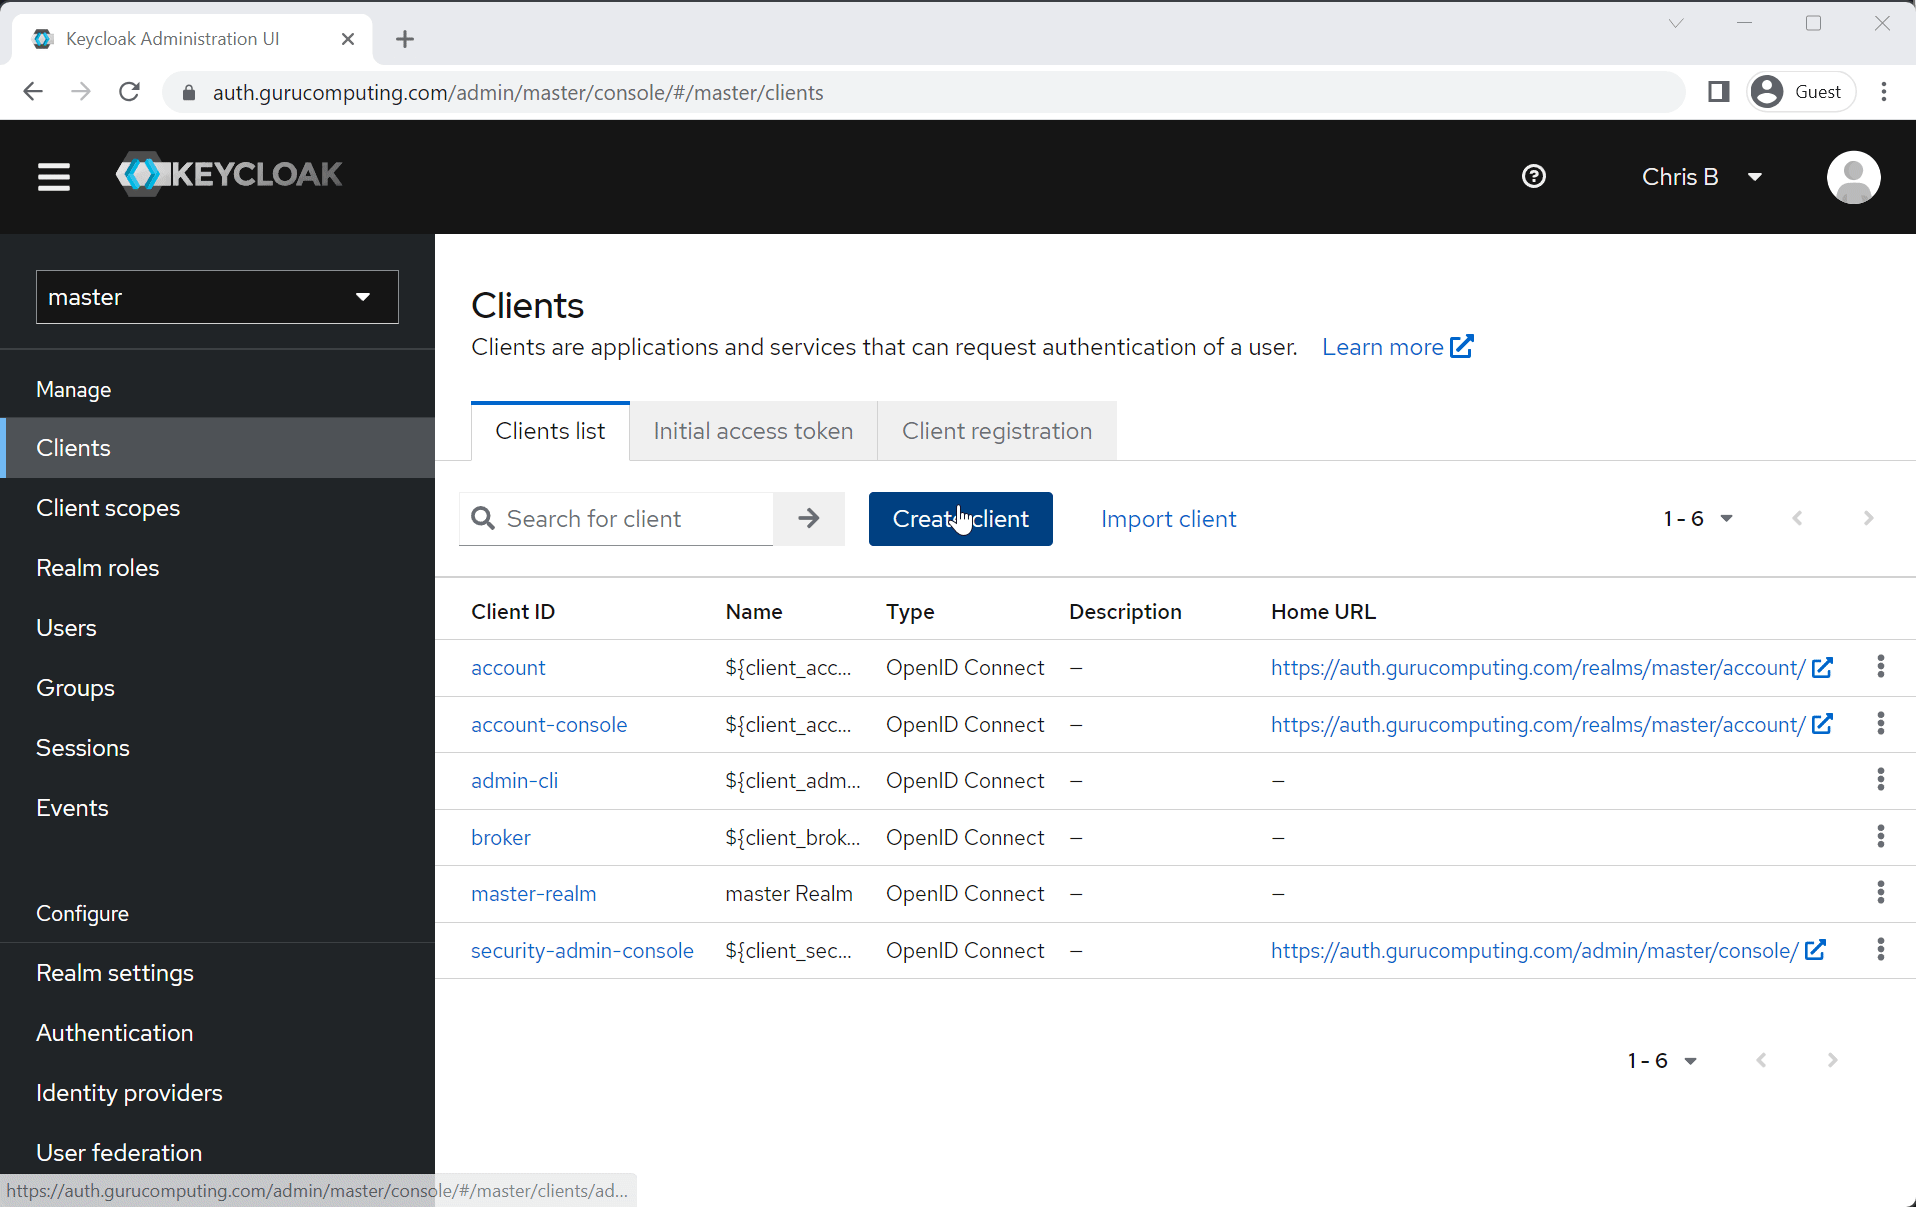
- In your keycloak portal, under clients, create a new oidc client for kb.
.com . Set the following values:
Client Auth: On
Client ID (can be whatever): kb.<your-domain>.com
Name (can be whatever): kb.<your-domain>.com
Root URL: https://kb.<your-domain>.com
Home URL: https://kb.<your-domain>.com
redirect URI: https://kb.<your-domain>.com/auth/oidc.callback
Info
If you don’t know what your redirect URI should be for other applications, you can always leave the allowed URIs blank and when you get an error on the first attempt it will be coded in the URL sent to FusionAuth
- Under credentials copy the client secret and paste it into the
OIDC_CLIENT_SECRETin your .env file. Fill out the client ID too.
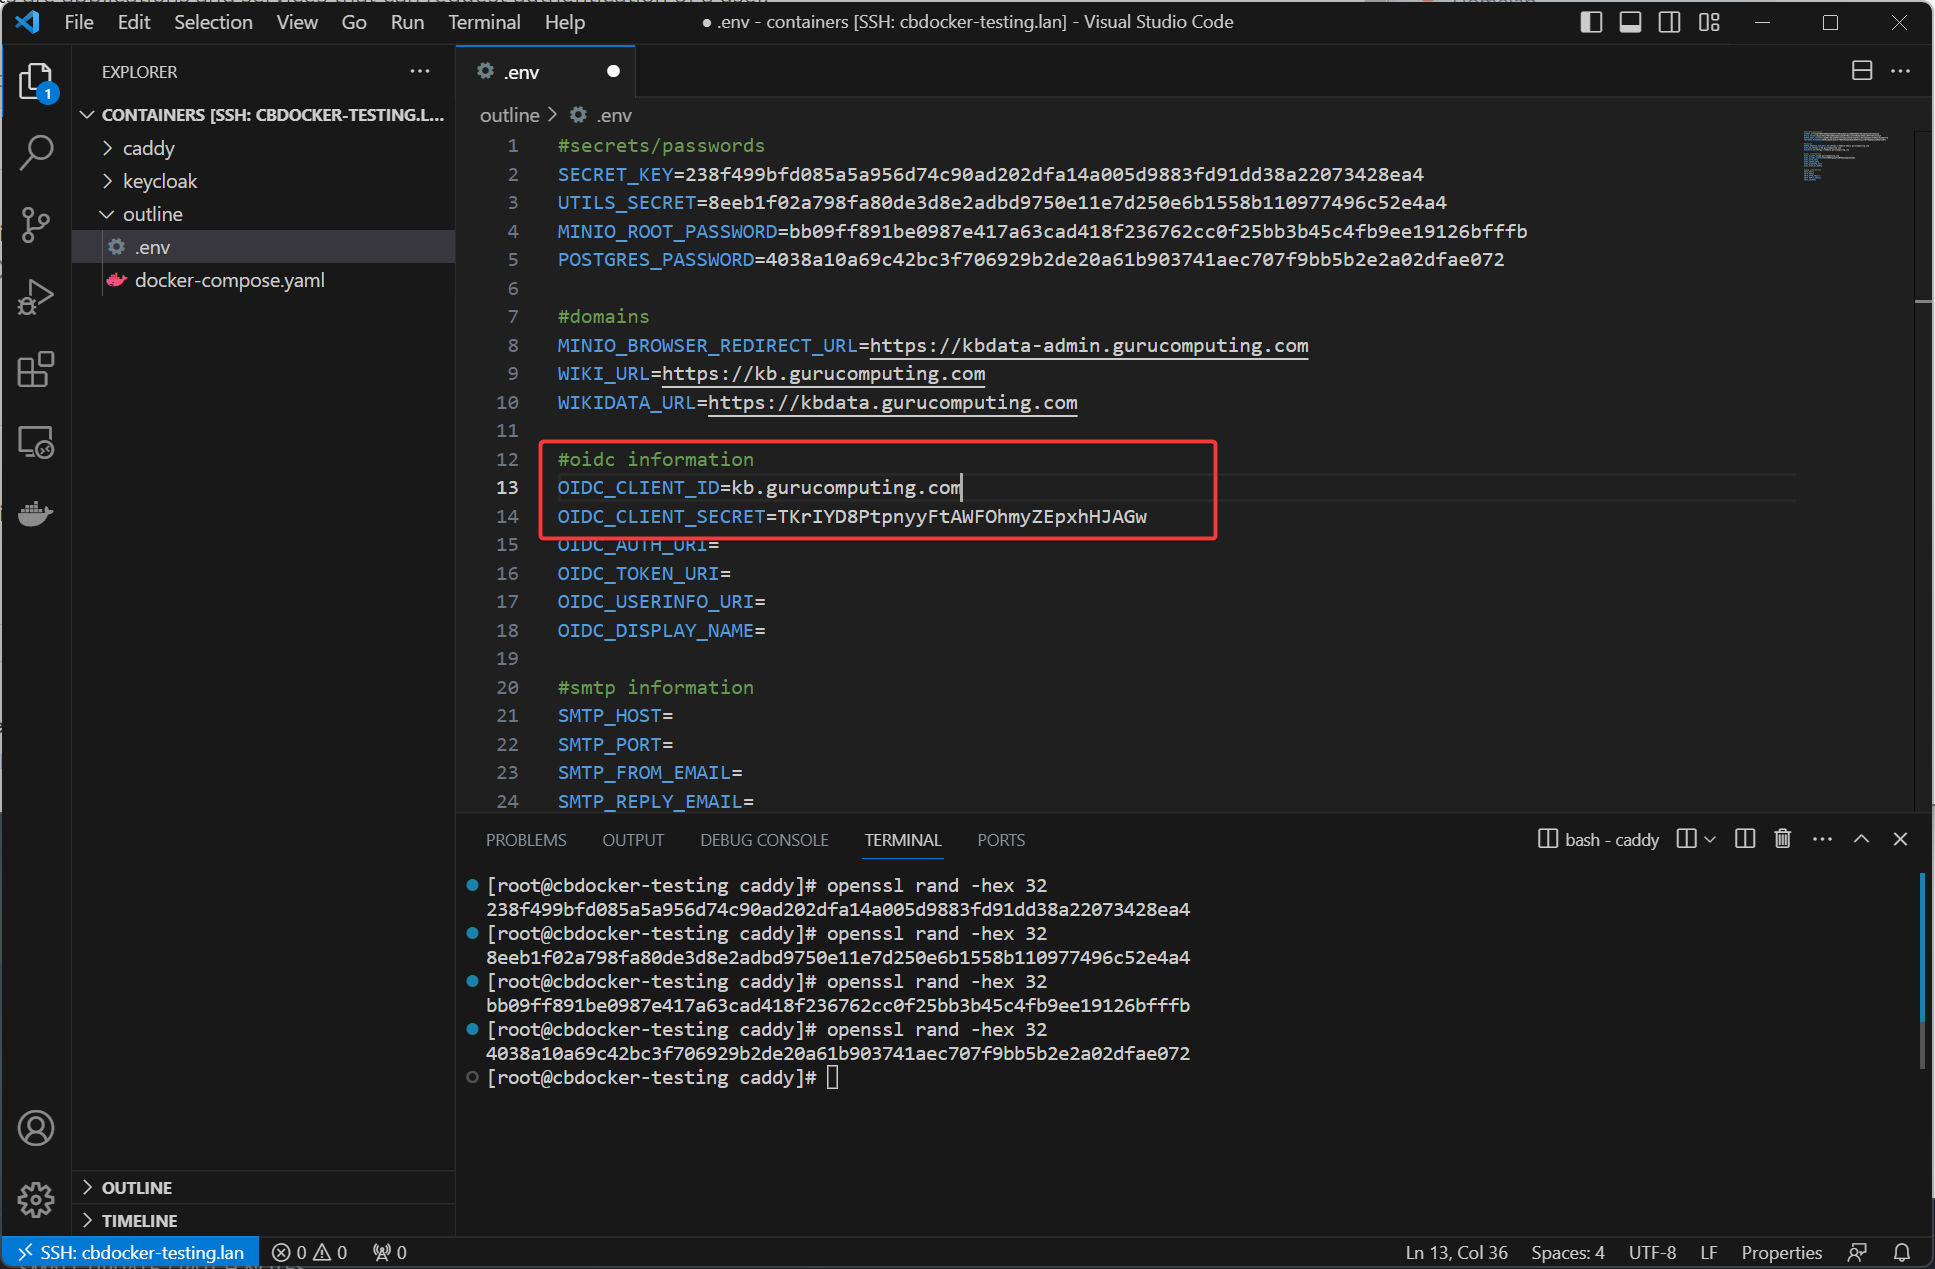
Warning
Obviously don’t use the exact secrets and information I’m putting in here. This is a non-exposed lab environment that gets erased on article creation.
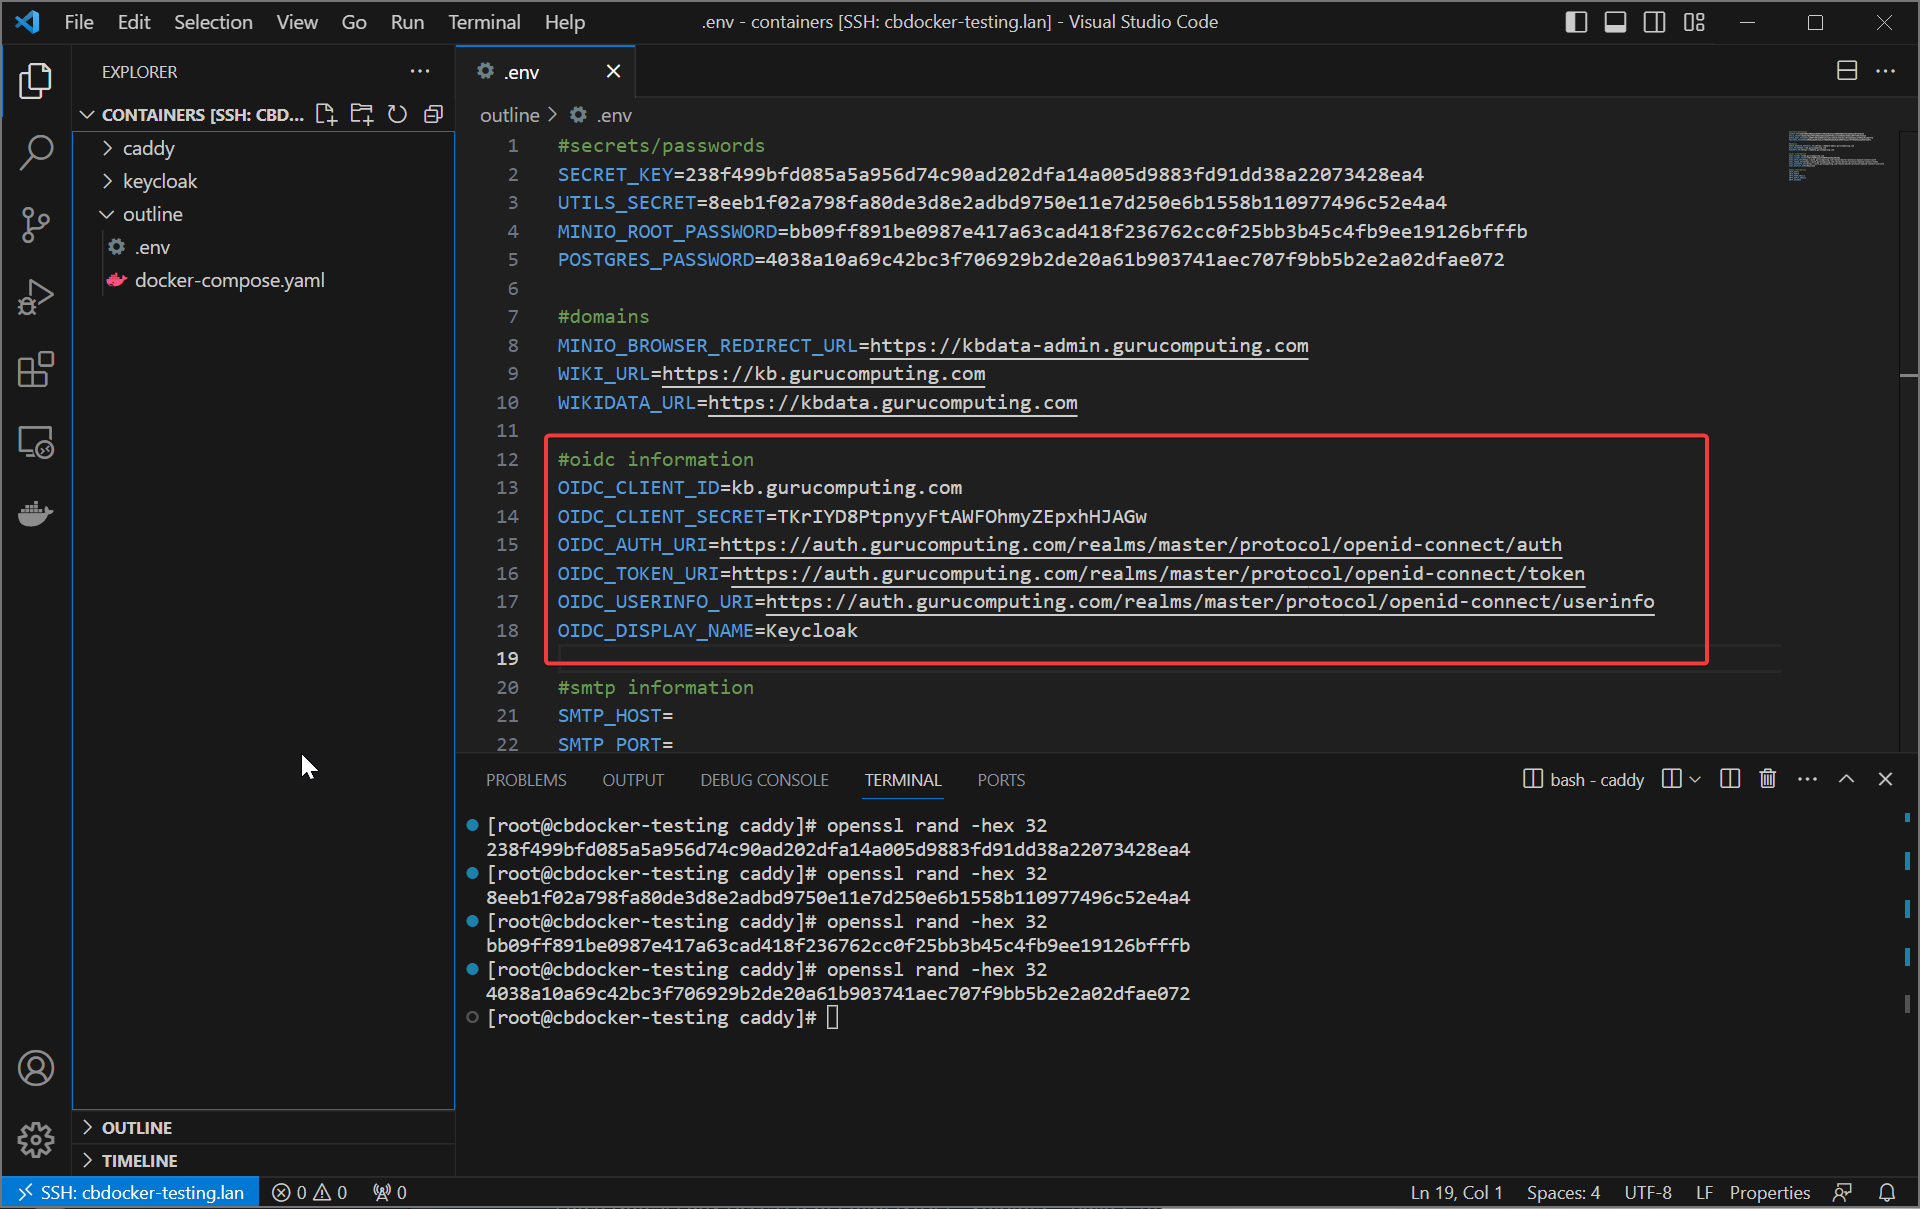
- For the remaining information, you can get it from
https://auth.<your-domain>.com/realms/<your-realm>/.well-known/openid-configuration(yes for some reason you’re just supposed to know this).
OIDC_AUTH_URI=https://auth.<your-domain>.com/realms/master/protocol/openid-connect/auth
OIDC_TOKEN_URI=https://auth.<your-domain>.com/realms/master/protocol/openid-connect/token
OIDC_USERINFO_URI=https://auth.<your-domain>.com/realms/master/protocol/openid-connect/userinfo
OIDC_DISPLAY_NAME=Keycloak
Drum Roll
Alright, let’s docker-compose up -d and see what happens! I’m going to even record this on the first attempt of writing and assume everything goes right.
Info
Spoiler alert: this did not end up being the first recording. Also note the login is using a FIDO2 security key, which is neato.
Configuring the S3 storage
Hold on, we’re not quite finished yet. Outline will load but you won’t be able to copy-paste pictures yet.
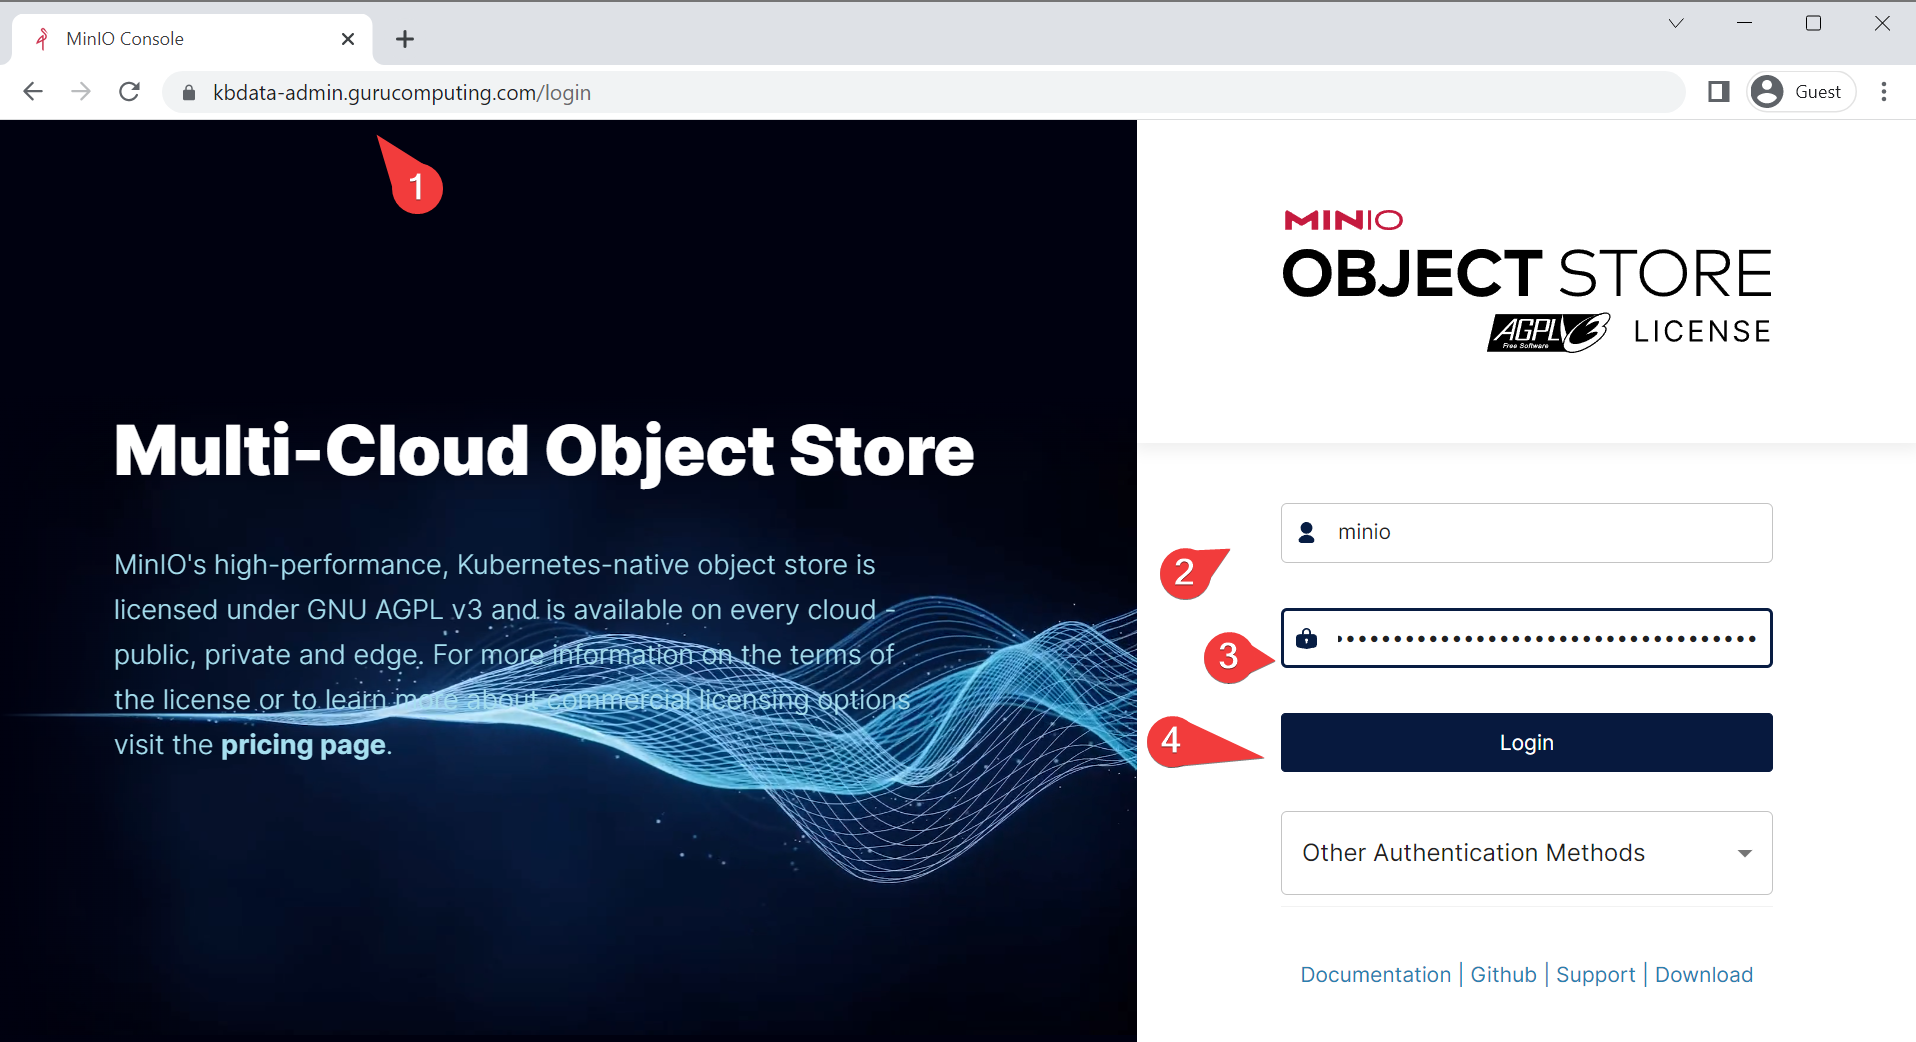
- go to
kbdata-admin.<your-domain>.comand log in withminioand the minio root password you placed in your.envfile.
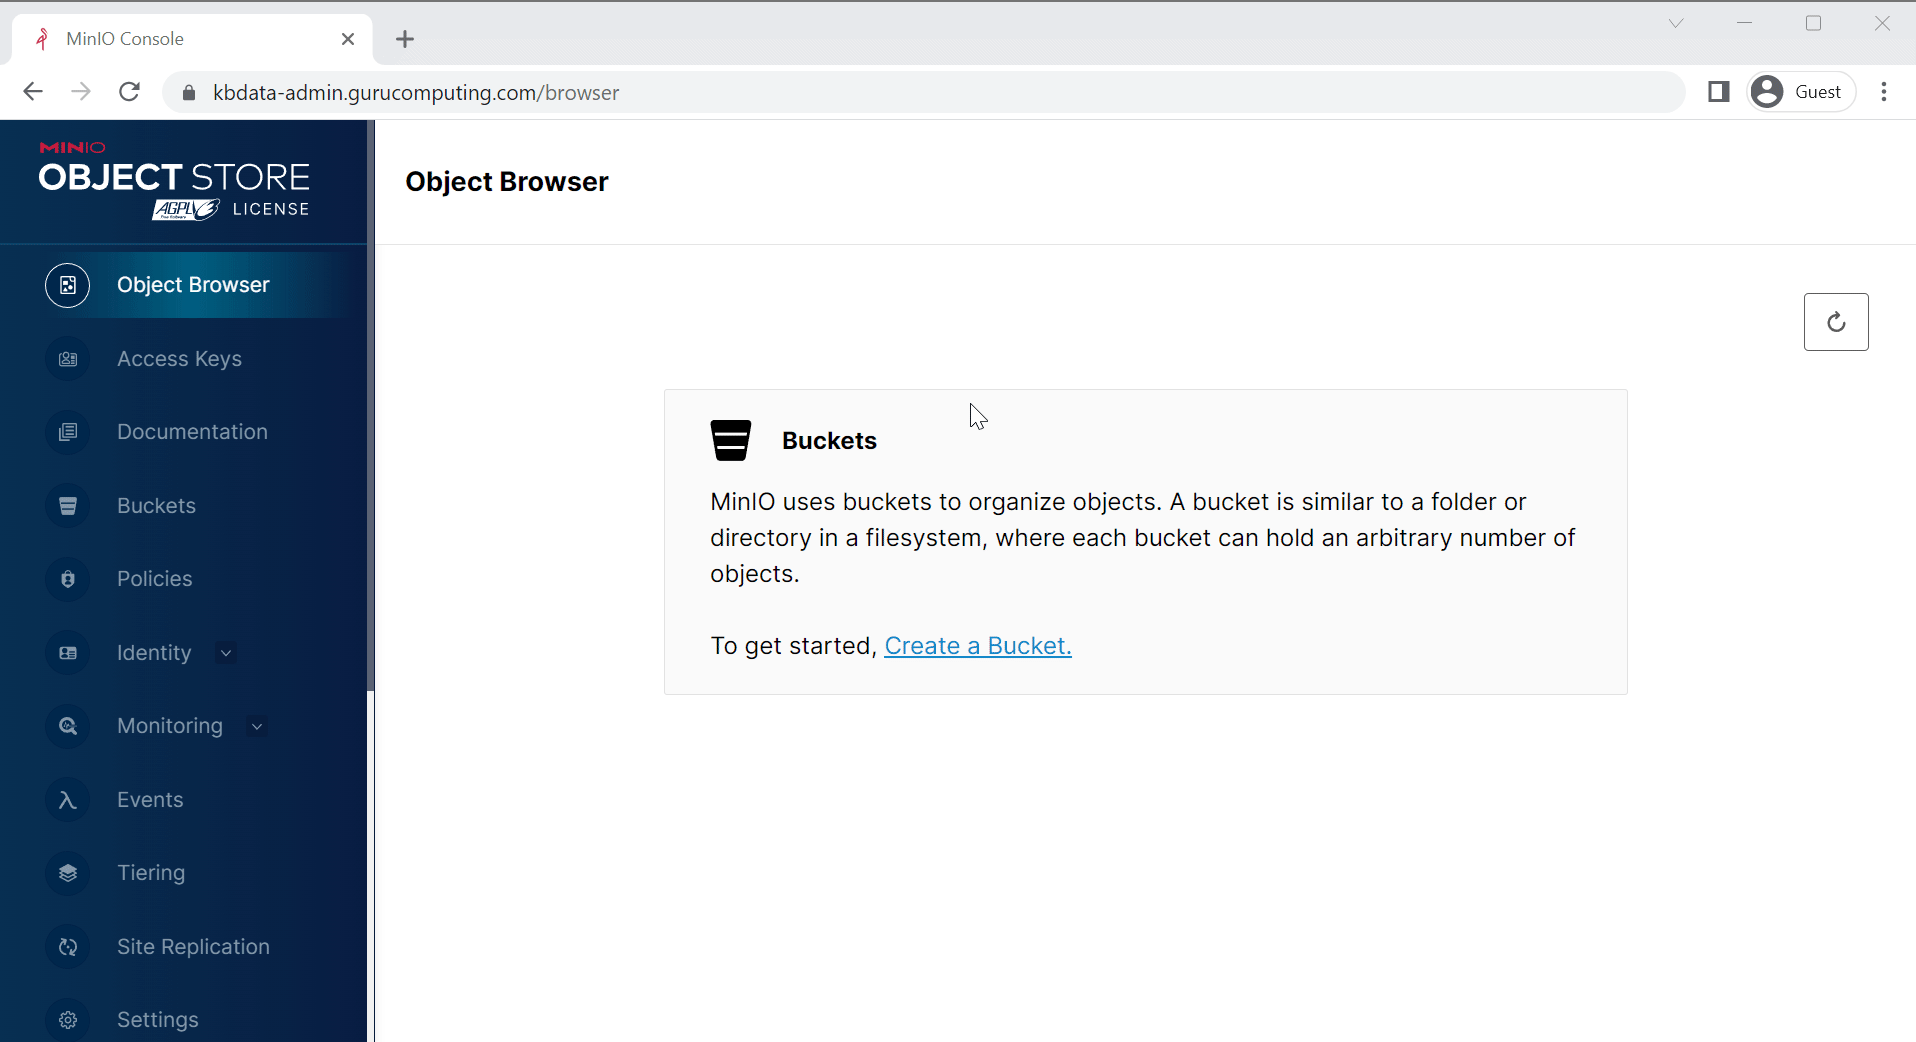
- Create a bucket called
outlineand leave the defaults. Under Anonymous in the bucket settings, addavatarsandpublicpaths.
Info
Note that S3 dislikes having a bucket called the same as the subdomain using it. If your subdomain for outline is outline.
- That’s it! You should now be able to use outline’s upload functionality.
Conclusion
We made it! We now have a fully functioning knowledgebase that has enterprise class features, single sign-on, and is incredibly clean to use. great!