Offsite Docker Backups with Kopia

Introduction
I like doing backups. In fact I’ve written about it a fair bit. I’ve created guides on backups with btrfs and btrbk, with proxmox, with restic and ZFS, and now I’m choosing another backup software. Why?
Well, why not? Kopia is the new kid on the block for backups and also comes with a GUI, which is great. It’s also reported to be quite performant. Let’s give it a go.
Pre-Requisites
To follow this guide, you will need the following:
- A docker host (this guide will be using fedora 37 server with a btrfs based filesystem)
- A reverse proxy to provide SSL termination for the Web UI
- A way to manage the docker host (this guide will be using Visual Studio Code with the docker plugin, written about here)
- An S3 target of some kind (you can use a self hosted option like minio or a free/paid hosted option like backblaze)
- Data to back up, of course! This guide will be backing up the local
/mnt/containerspath that has all of our container volumes.
Getting Started
Alright, let’s have a look at our environment:
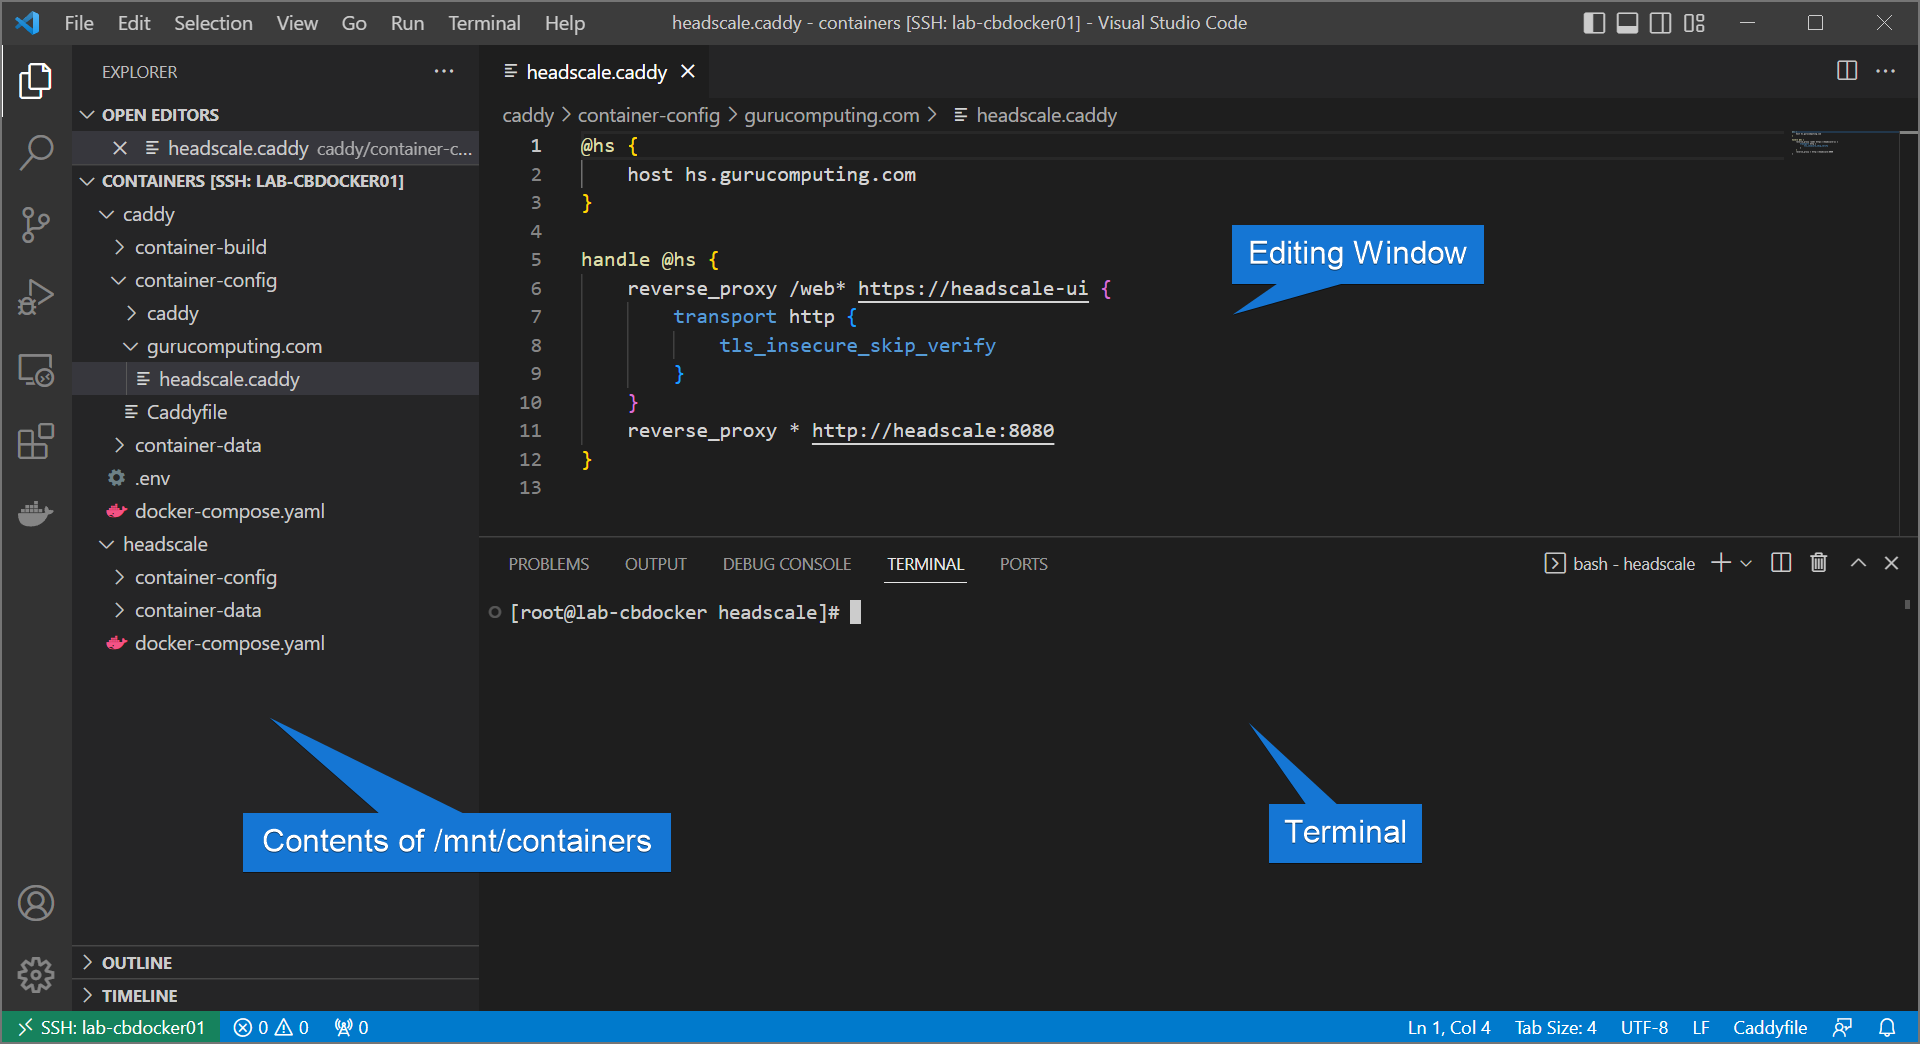
Currently this is showing a remote window into a fedora server, with a couple containers running (this setup was part of my headscale VPN guide). For the purposes of this guide it doesn’t matter what containers you are running. What is important is there is data in /mnt/containers that needs to be backed up, and backed up good.
Installing Kopia into the Docker Host
Kopia is easy enough to install. It depends on your flavour of docker host, but you can follow the instructions here
Info
Kopia also has a docker container that you can run, but we are going to install directly to the docker host. This is because some components of kopia will require root access on the host to execute (such as creating a filesystem snapshot).

Warning
Note that we are only installing the kopia binary, not kopiaUI (which is an electron based UI and requires a desktop environment)
Creating an Admin user
- Create a service account with the capability to make filing system snapshots and has access to the data. For this demonstration we will just continue to use the root user (filesystem snapshots is usually a root level task anyway).
- Let’s create a (hashed) password file for kopia to draw web users from (you can add multiple users).
Info
if you don’t have htpasswd it is included with httpd-tools

Running Kopia the First time
- Either generate self signed SSL certificates (you can do this on first run with adding the
--tls-generate-certargument to the below kopia command) or choose existing certificates. If you are on a host running cockpit, you can just use the same certificates cockpit uses at/etc/cockpit/ws-certs.d. - Let’s try a first run! Run this big long string:
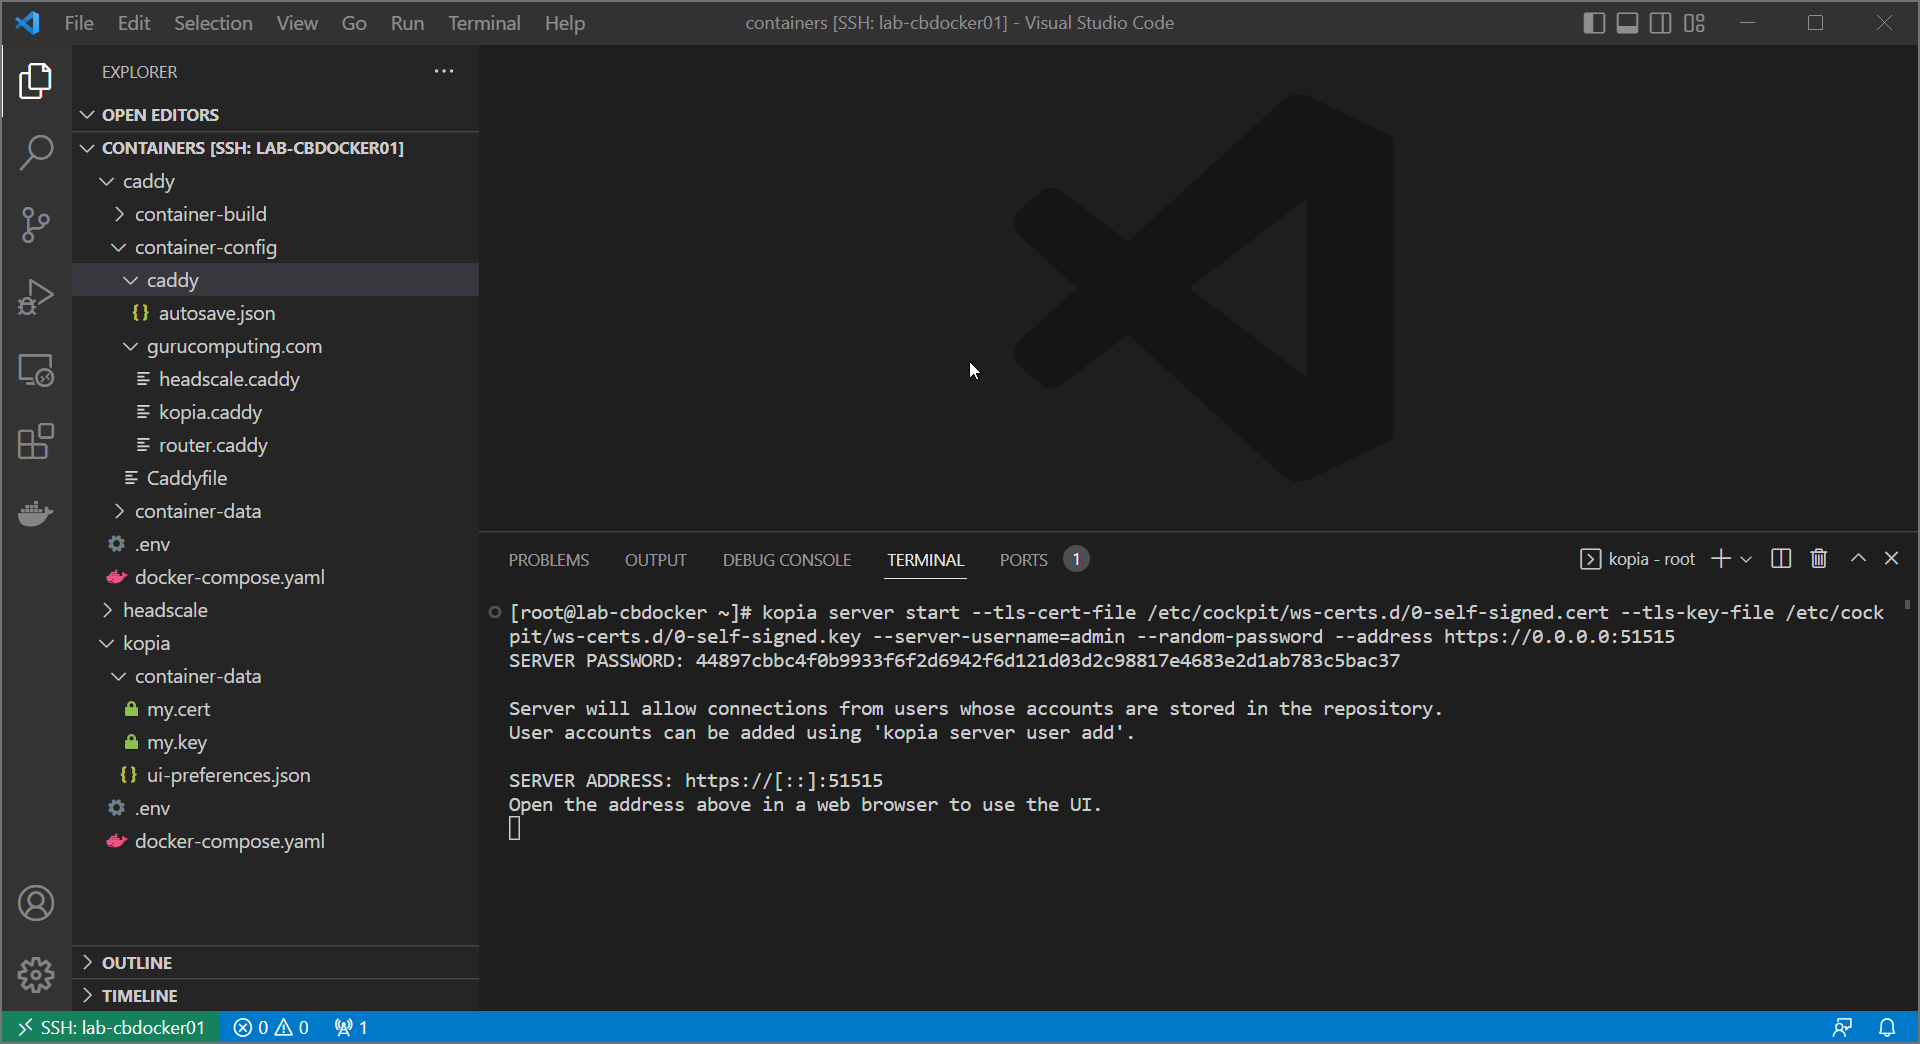
kopia server start --tls-cert-file /etc/cockpit/ws-certs.d/0-self-signed.cert --tls-key-file /etc/cockpit/ws-certs.d/0-self-signed.key --htpasswd-file /root/kopiap.txt --address https://0.0.0.0:51515
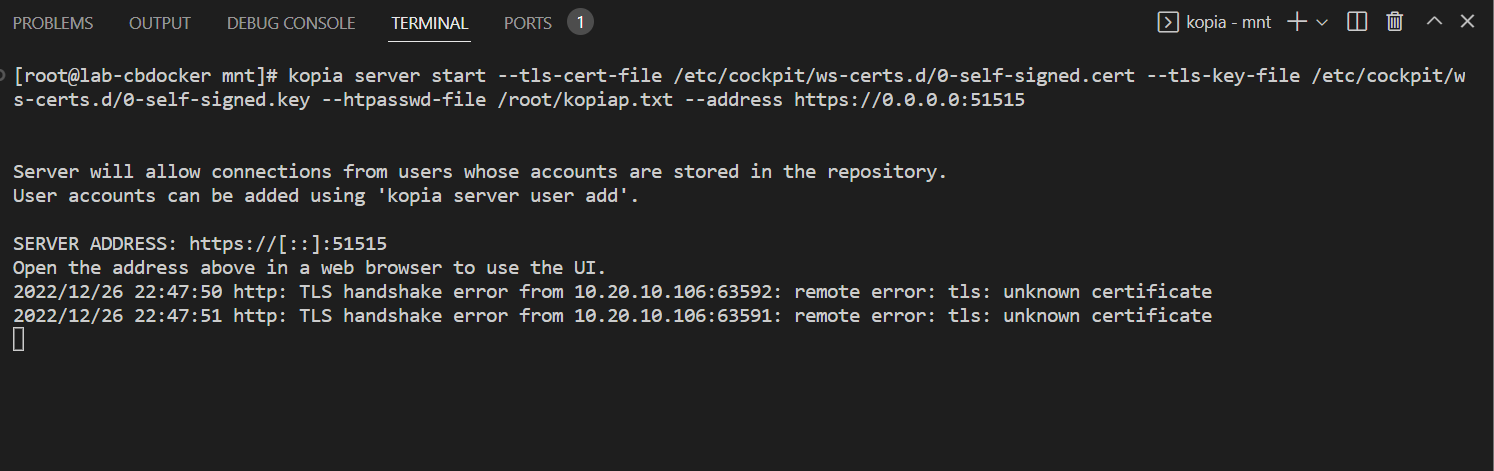
- And if you are running a firewall (fedora you are), make an exception for that port. You can do that in
cockpitby going tonetwork→firewalland adding a custom port (defaults to 51515)

- Finally, navigate to
https://<yourIP>:51515and you should see your shiny new interface! Put in your new password and username to access (usekopia/<your password>as opposed toadmin/<your password>, this was an early gif).
Setting up a Repository
Awesome, we now have an encrypted web portal with a randomized password to change our configuration. Cool!
Now we have to choose where the heck we are going to back up our data. This guide will use backblaze, but as you can tell there are lots of targets we can use to store our data.
Setting up your backblaze account
We’re gonna send our (encrypted) backups up to backblaze. Which means you need:
- A backblaze account
- A bucket
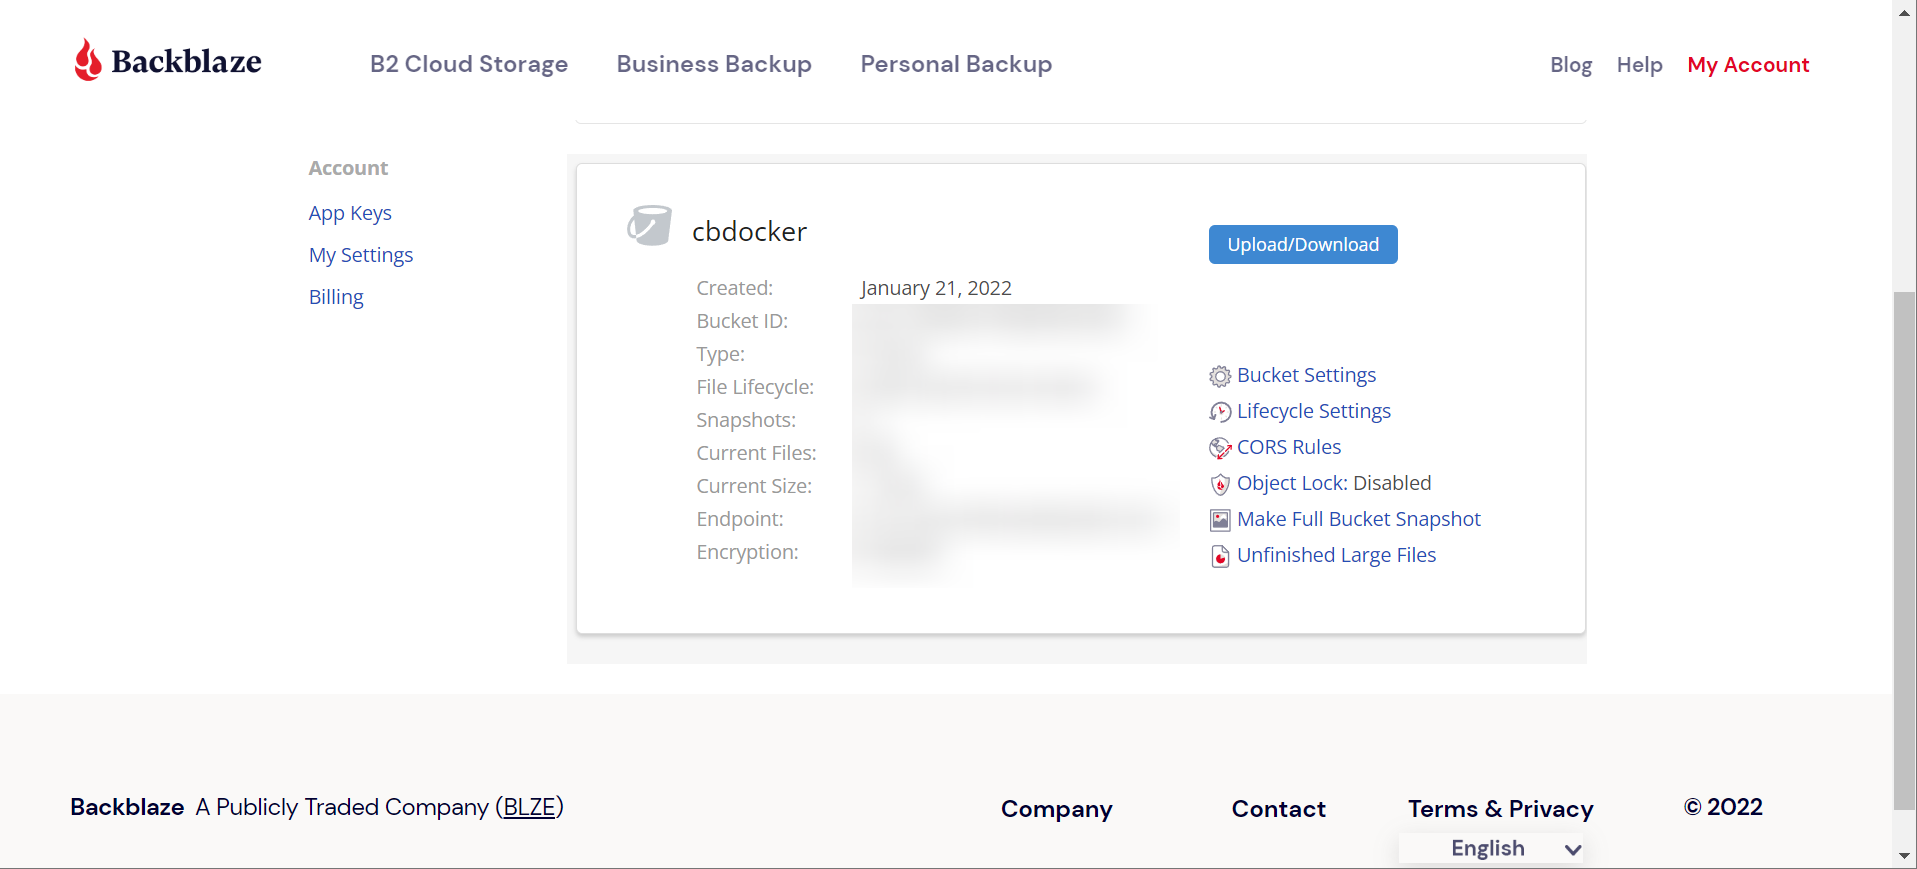
- A read/write app key for that bucket
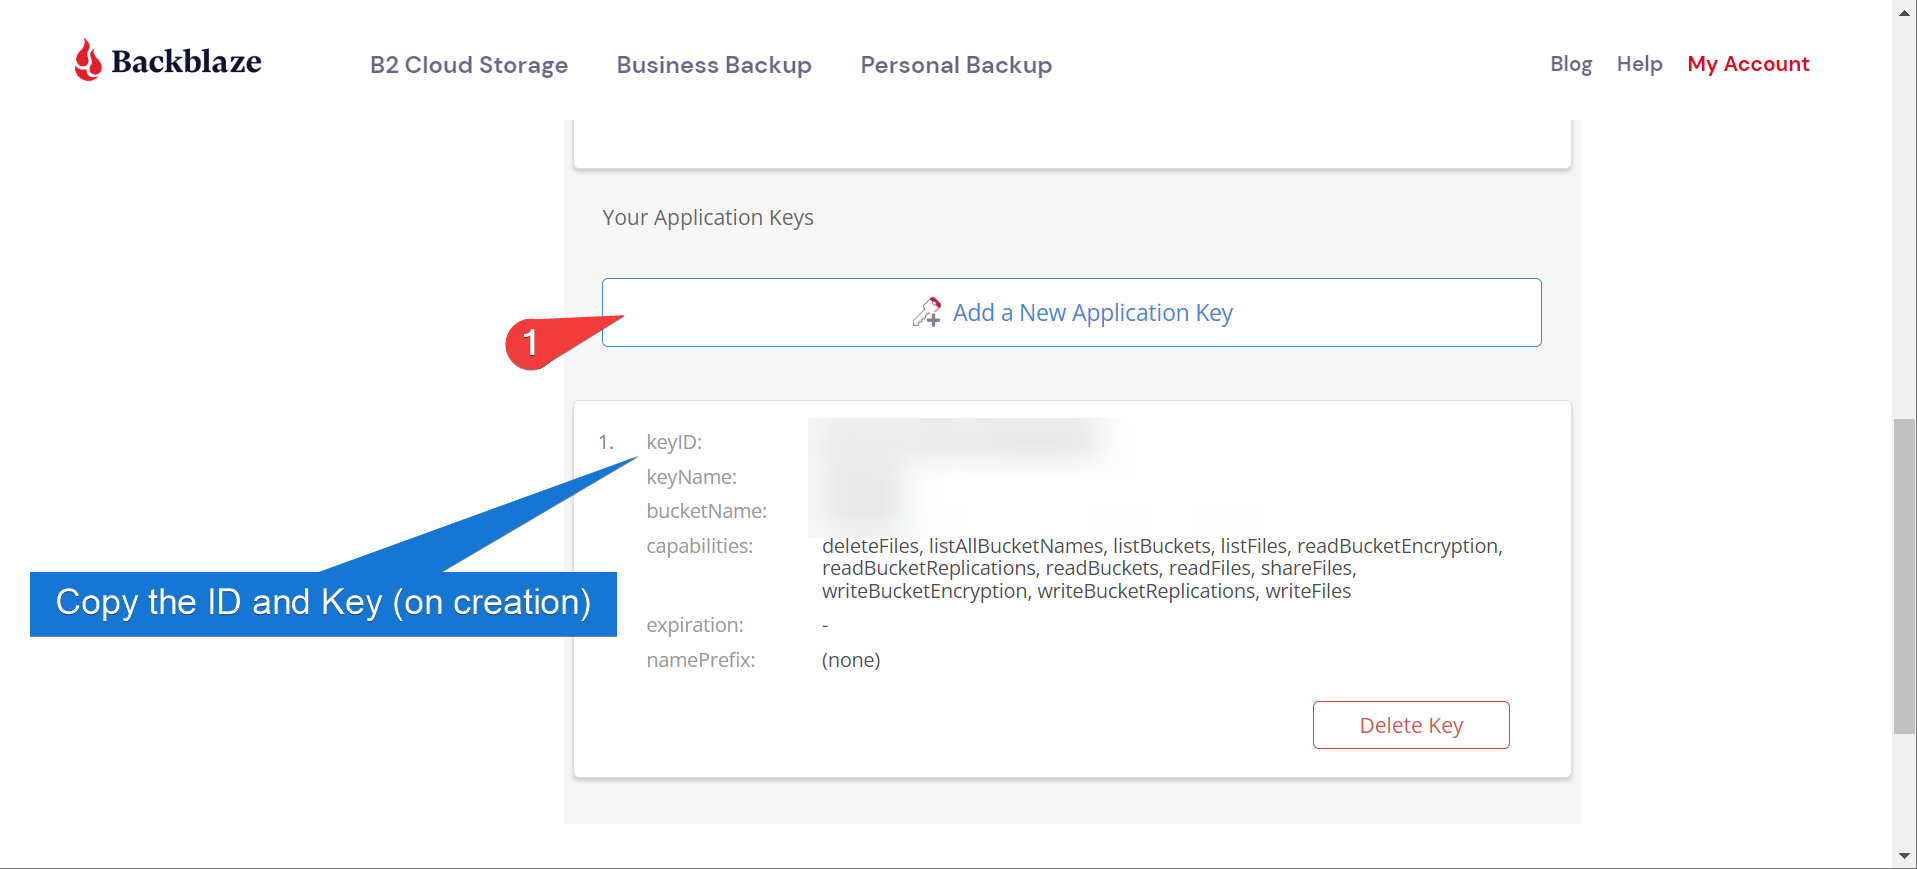
Good news is you can do all of this on the free tier, as long as you don’t go crazy with your backup sizes
Configuring the Repository
So with all that, you should have all the information you need to create a B2 bucket repository
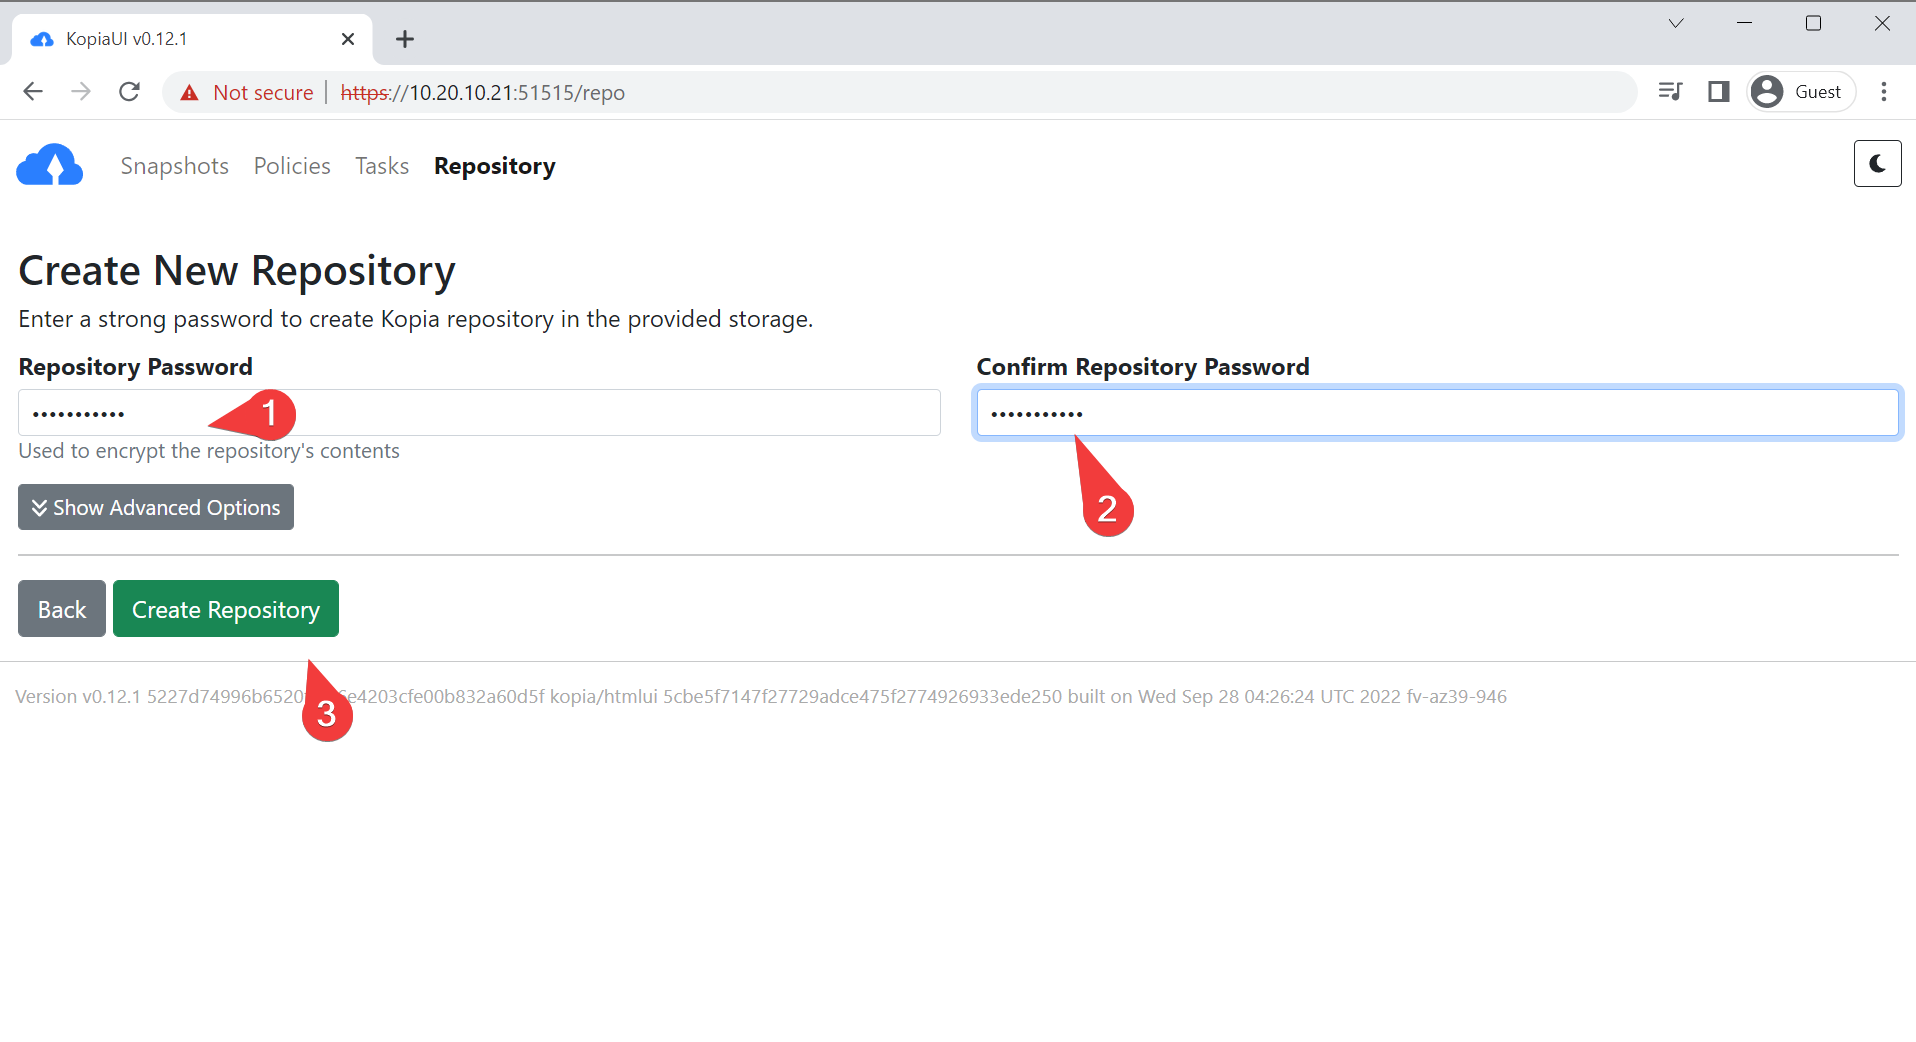
- Log into Kopia and create a new repository for Backblaze
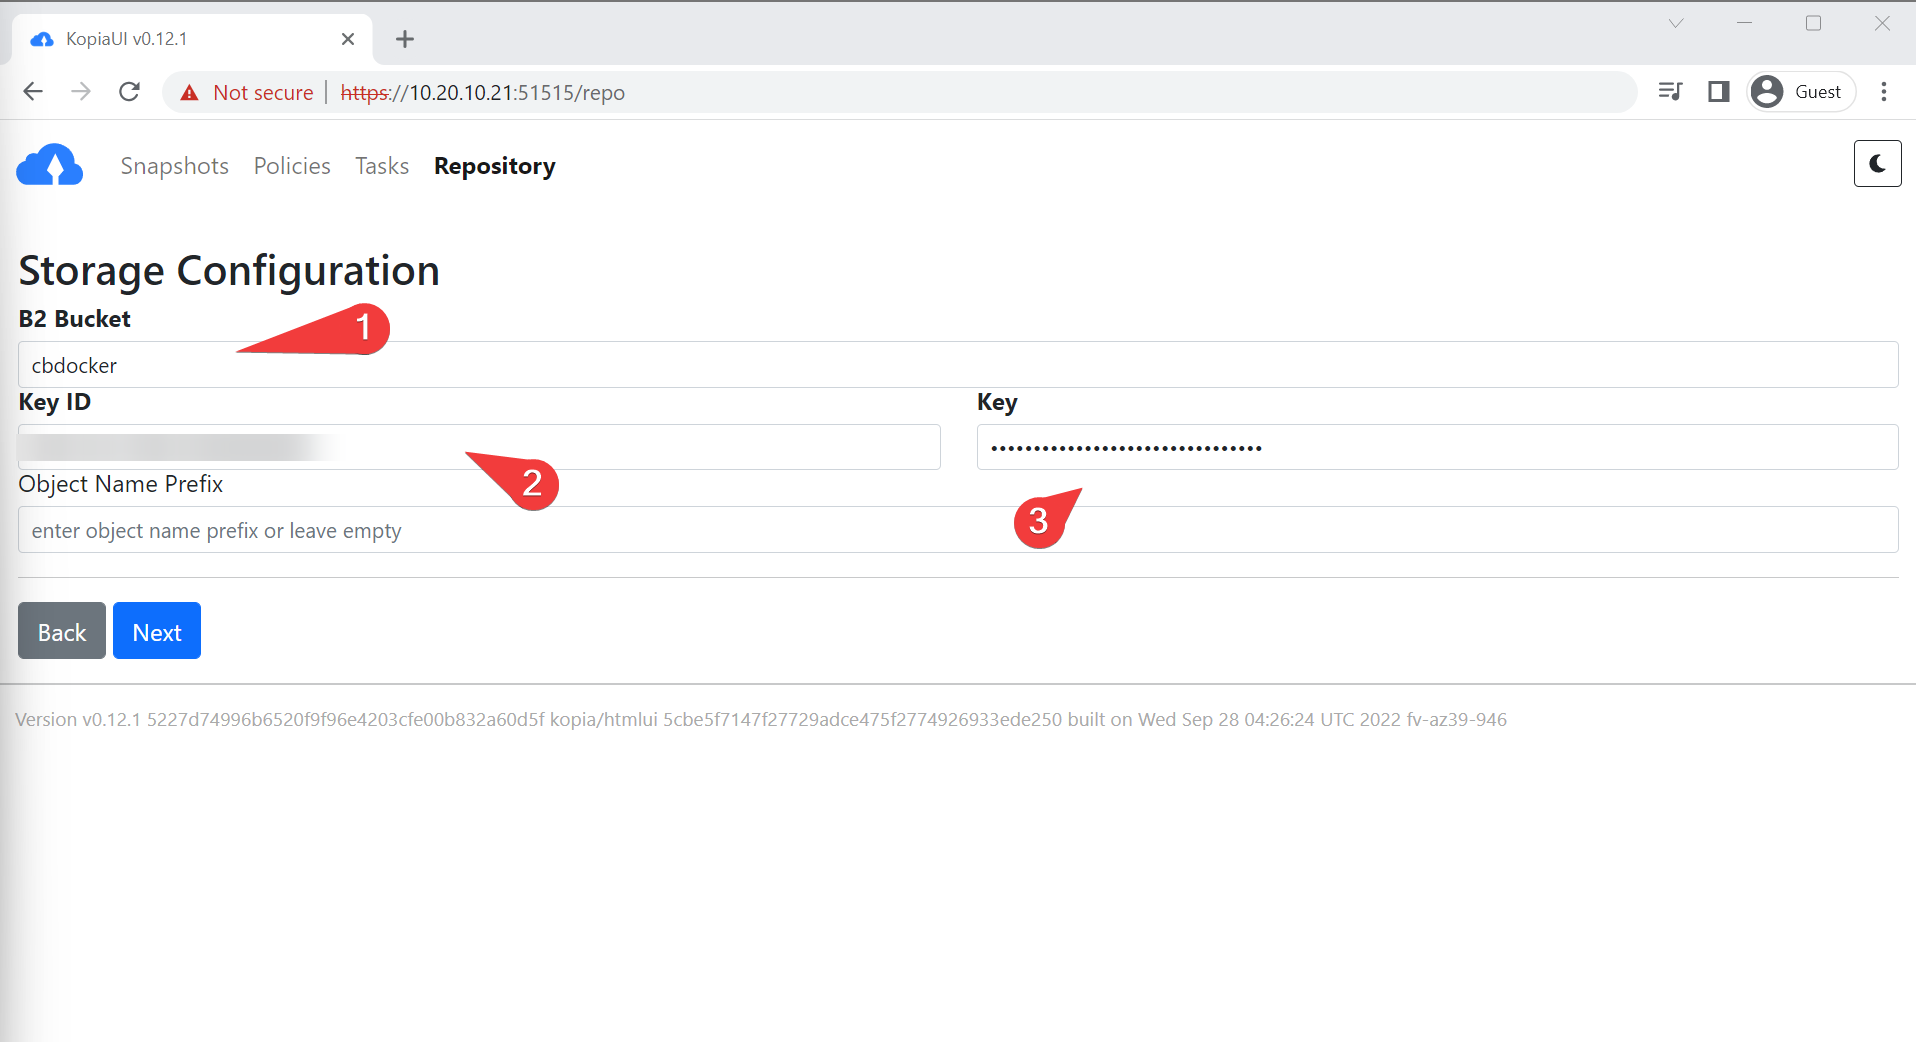
- Create an encryption password. This will encrypt your backup (and your backup LOSES ALL VALUE if you forget it, so keep it safe)
Info
This information gets cached in /root/.config/kopia by default (if using a root account), as well as getting backed up to the repository.
Configuring Policy
So far so good! We are nearly to the point where we can start setting up policies. Policies define stuff like retention and compression.
- Before starting, let’s create a backup folder for our content (under the assumption we will dump snapshots in there before backing them up). Run the following on the docker host:
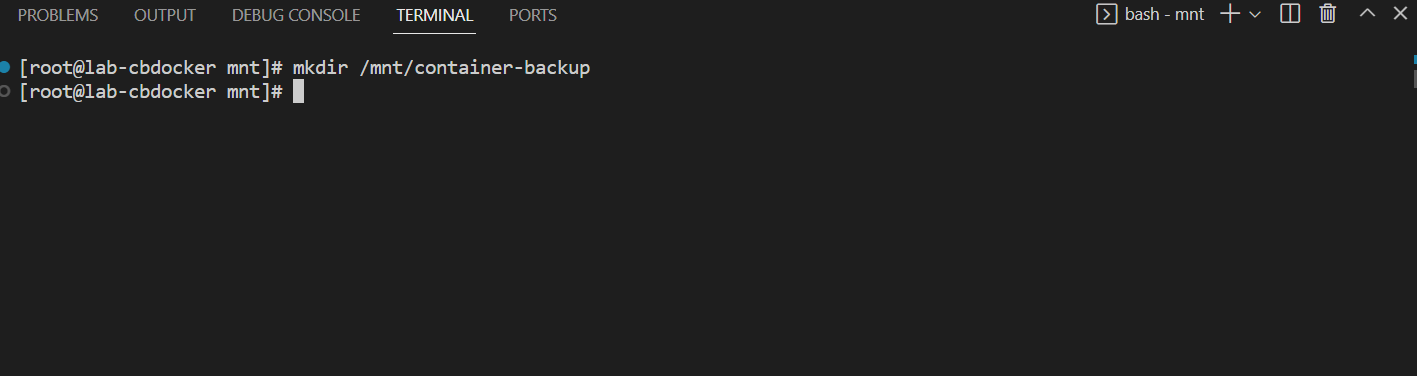
- Enter in the policy section of the UI and put in a directory. We are going to use the directory
/mnt/container-backupas this will be our eventual source post snapshot.
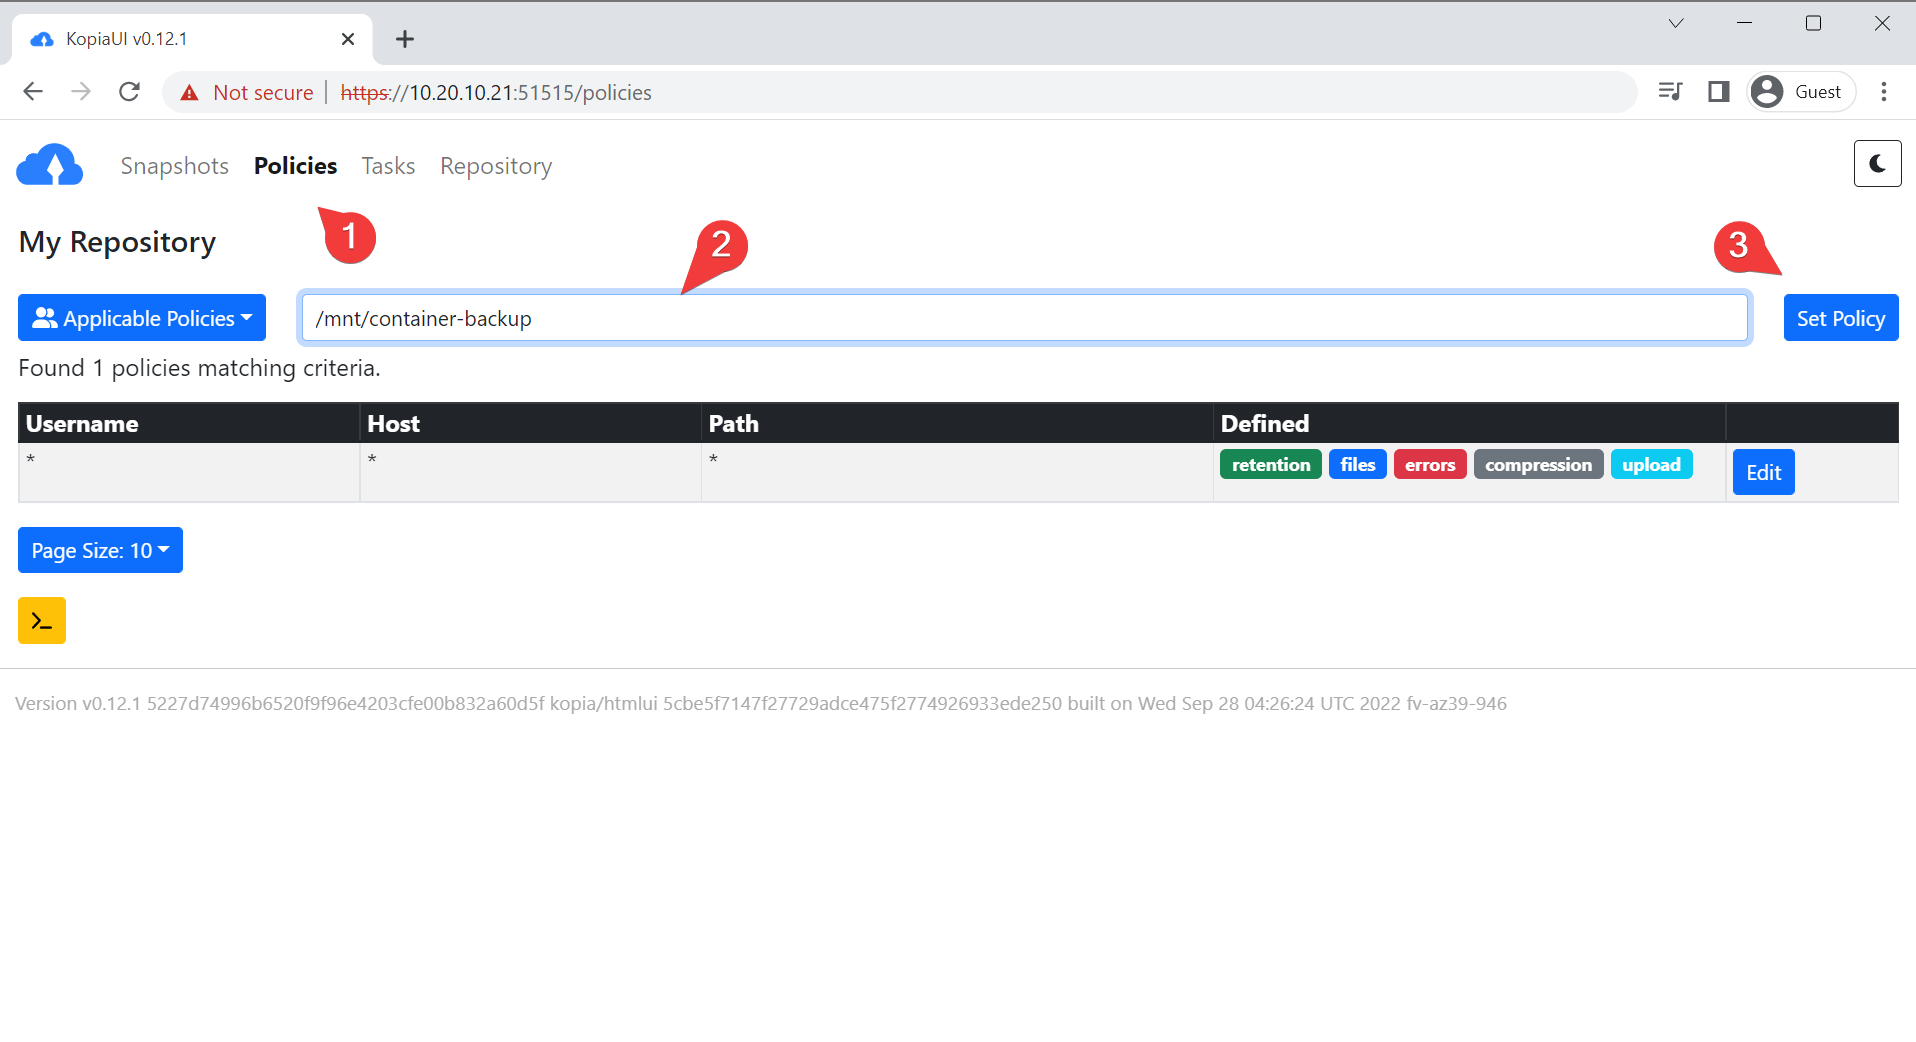
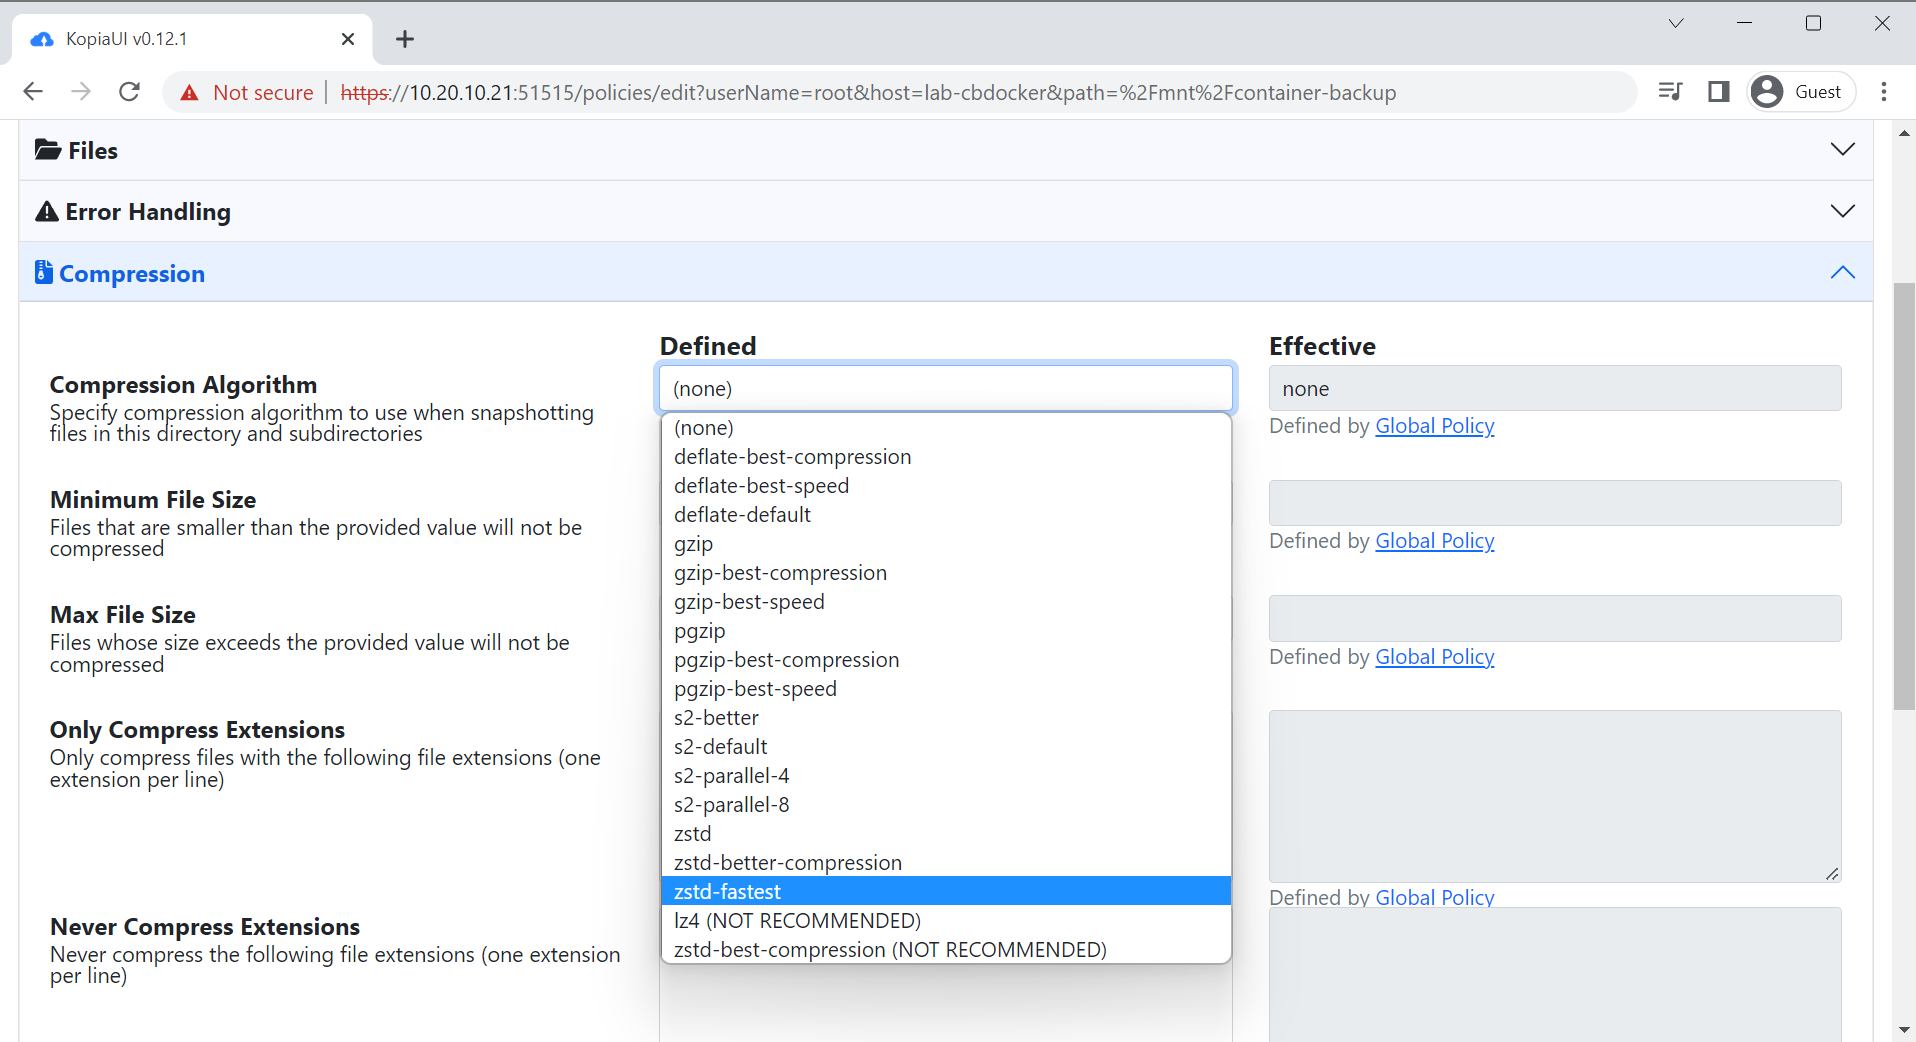
- There’s a lot of default options that you can change or modify as you wish (retention in particular you might want to play around in). I like to turn on zstd fastest compression:
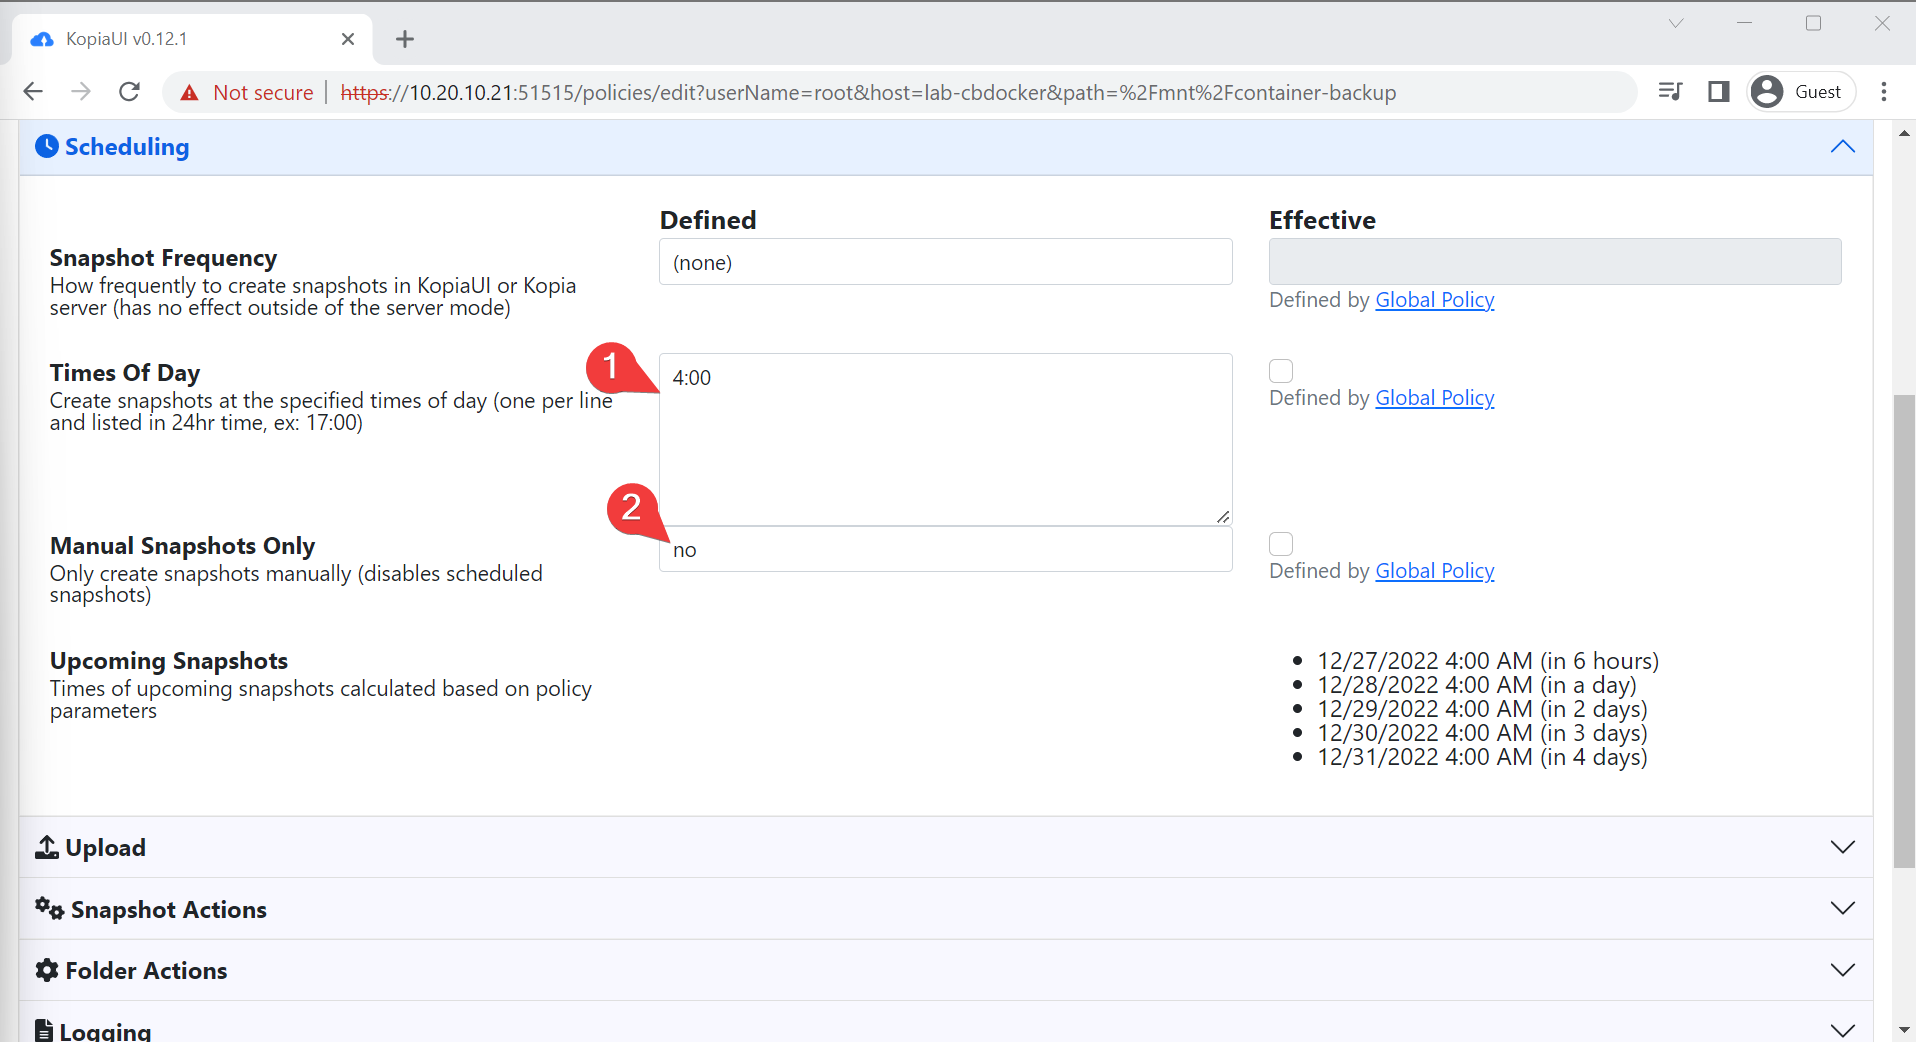
- Turn on a schedule, for offsites I stick to daily
Creating the before-and-after snapshot scripts
- Now comes an important bit. There’s an option for before snapshot and after snapshot actions. These are where we define how we generate our snapshot. If you are using a snapshot aware filesystem like BTRFS or ZFS, you can put in your command. If you aren’t using a snapshot aware filesystem, you should! But if not, you can manually turn off all docker containers before and start them again afterwards.
Info
This guide uses BTRFS so we will show btrfs snapshotting here.
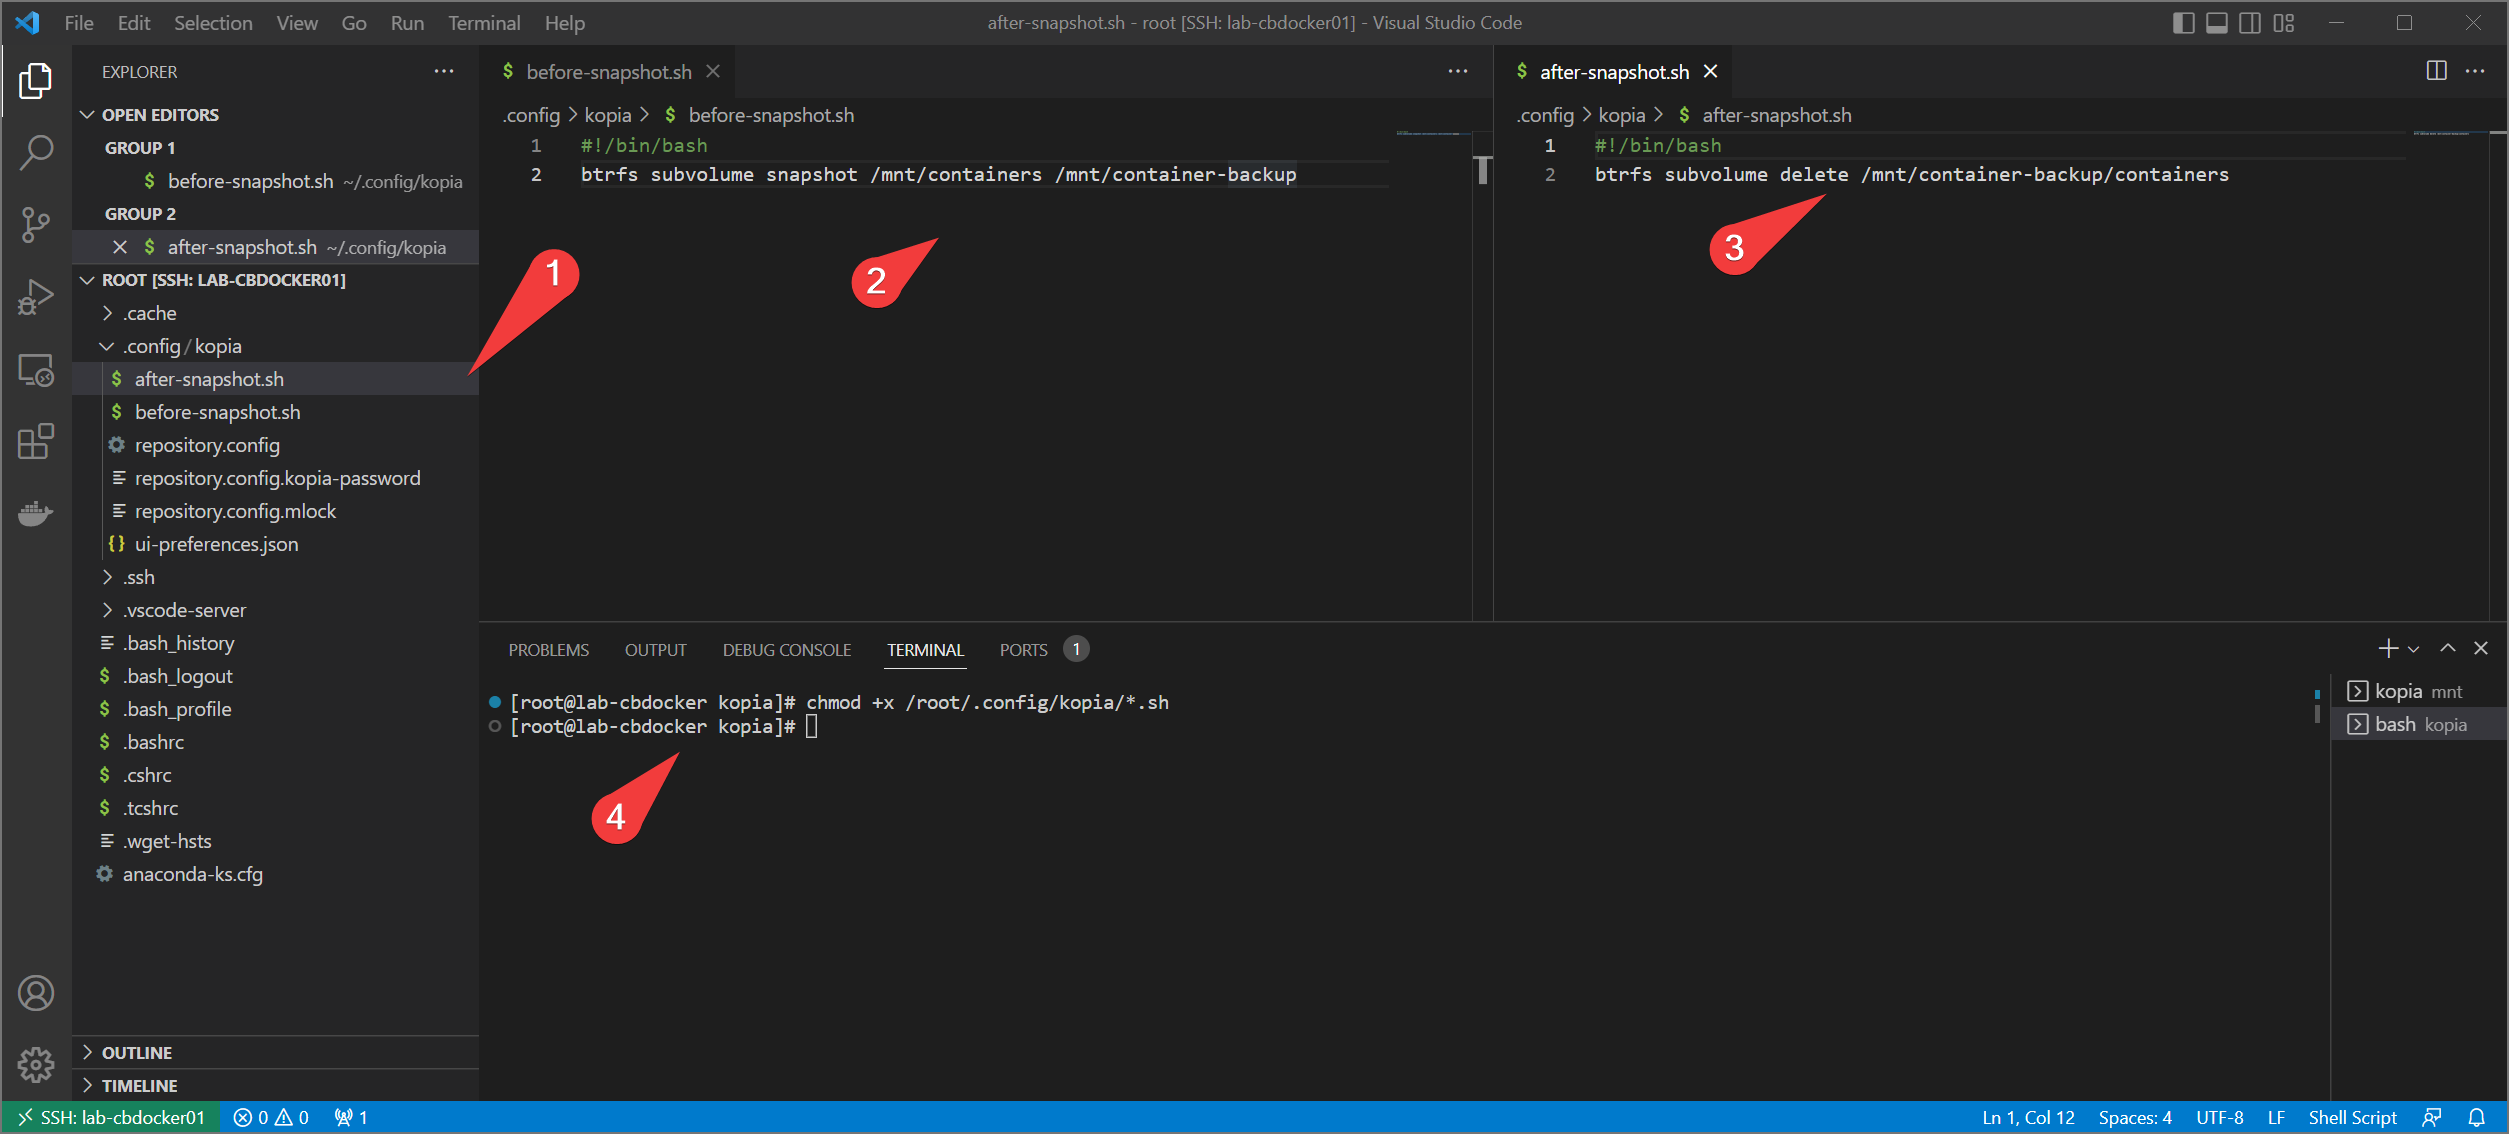
- These are defined as script locations, so create two new scripts in your backup home directory (
/rootfor the root account)./root/.config/kopia/before-snapshot.shand/root/.config/kopia/after-snapshot.sh. - For
before-snapshot.sh
- for
after-snapshot.sh
- Mark both afterwards as executable with
chmod +x /root/.config/kopia/before-snapshot.shandchmod +x /root/.config/kopia/after-snapshot.sh
Final Configuration
Alright, let’s finish up.
- Back in the web interface, set the before and after snapshot commands to those two scripts. Save the policy when done.

- We have to change the repository config to allow actions.. Modify
/root/.config/kopia/repository.configto enableActions fromfalsetotrue. Restart Kopia

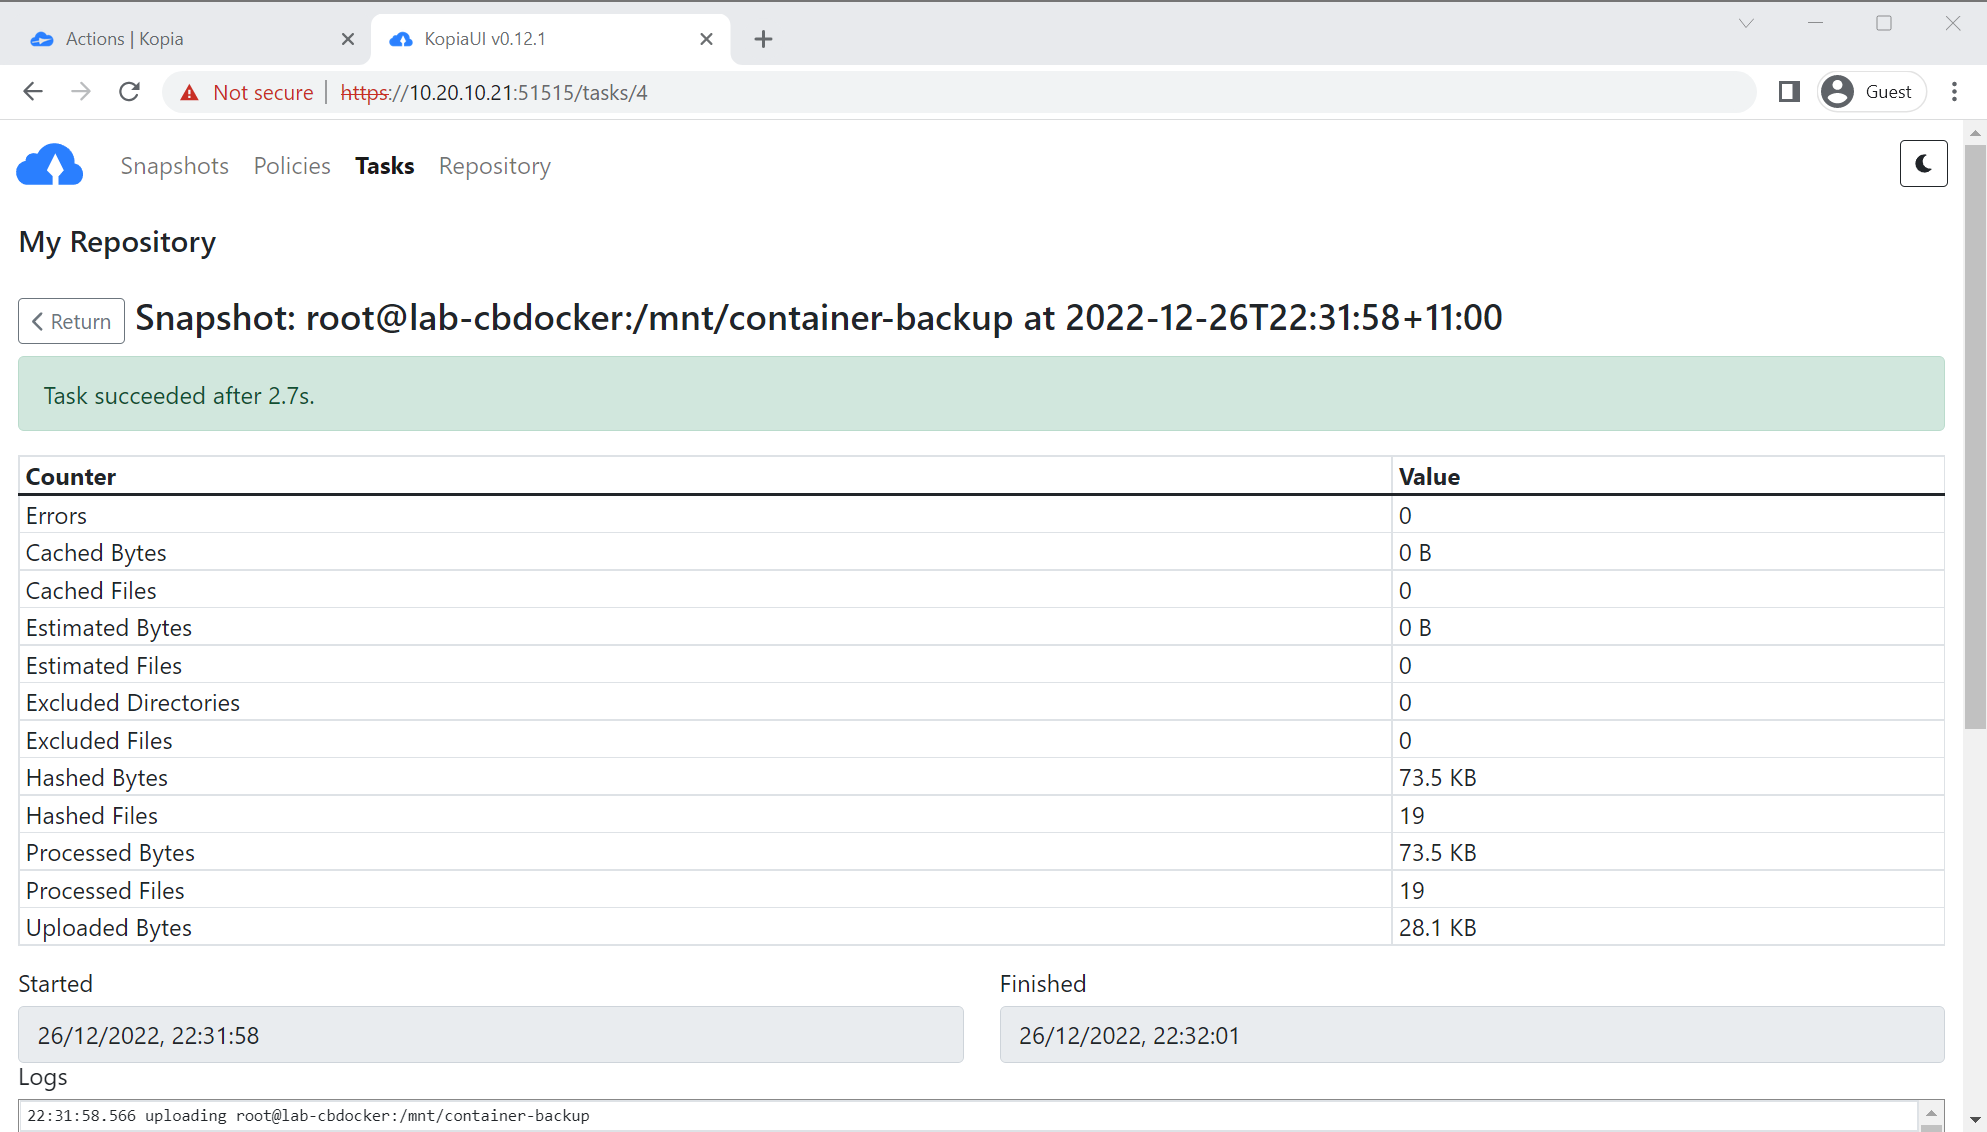
- Let’s give it a go!

- Success! Not much in my current lab environment so not much to back up.
Converting to a Service
So far we’re just running it manually, which isn’t ideal. Let’s set up the service.
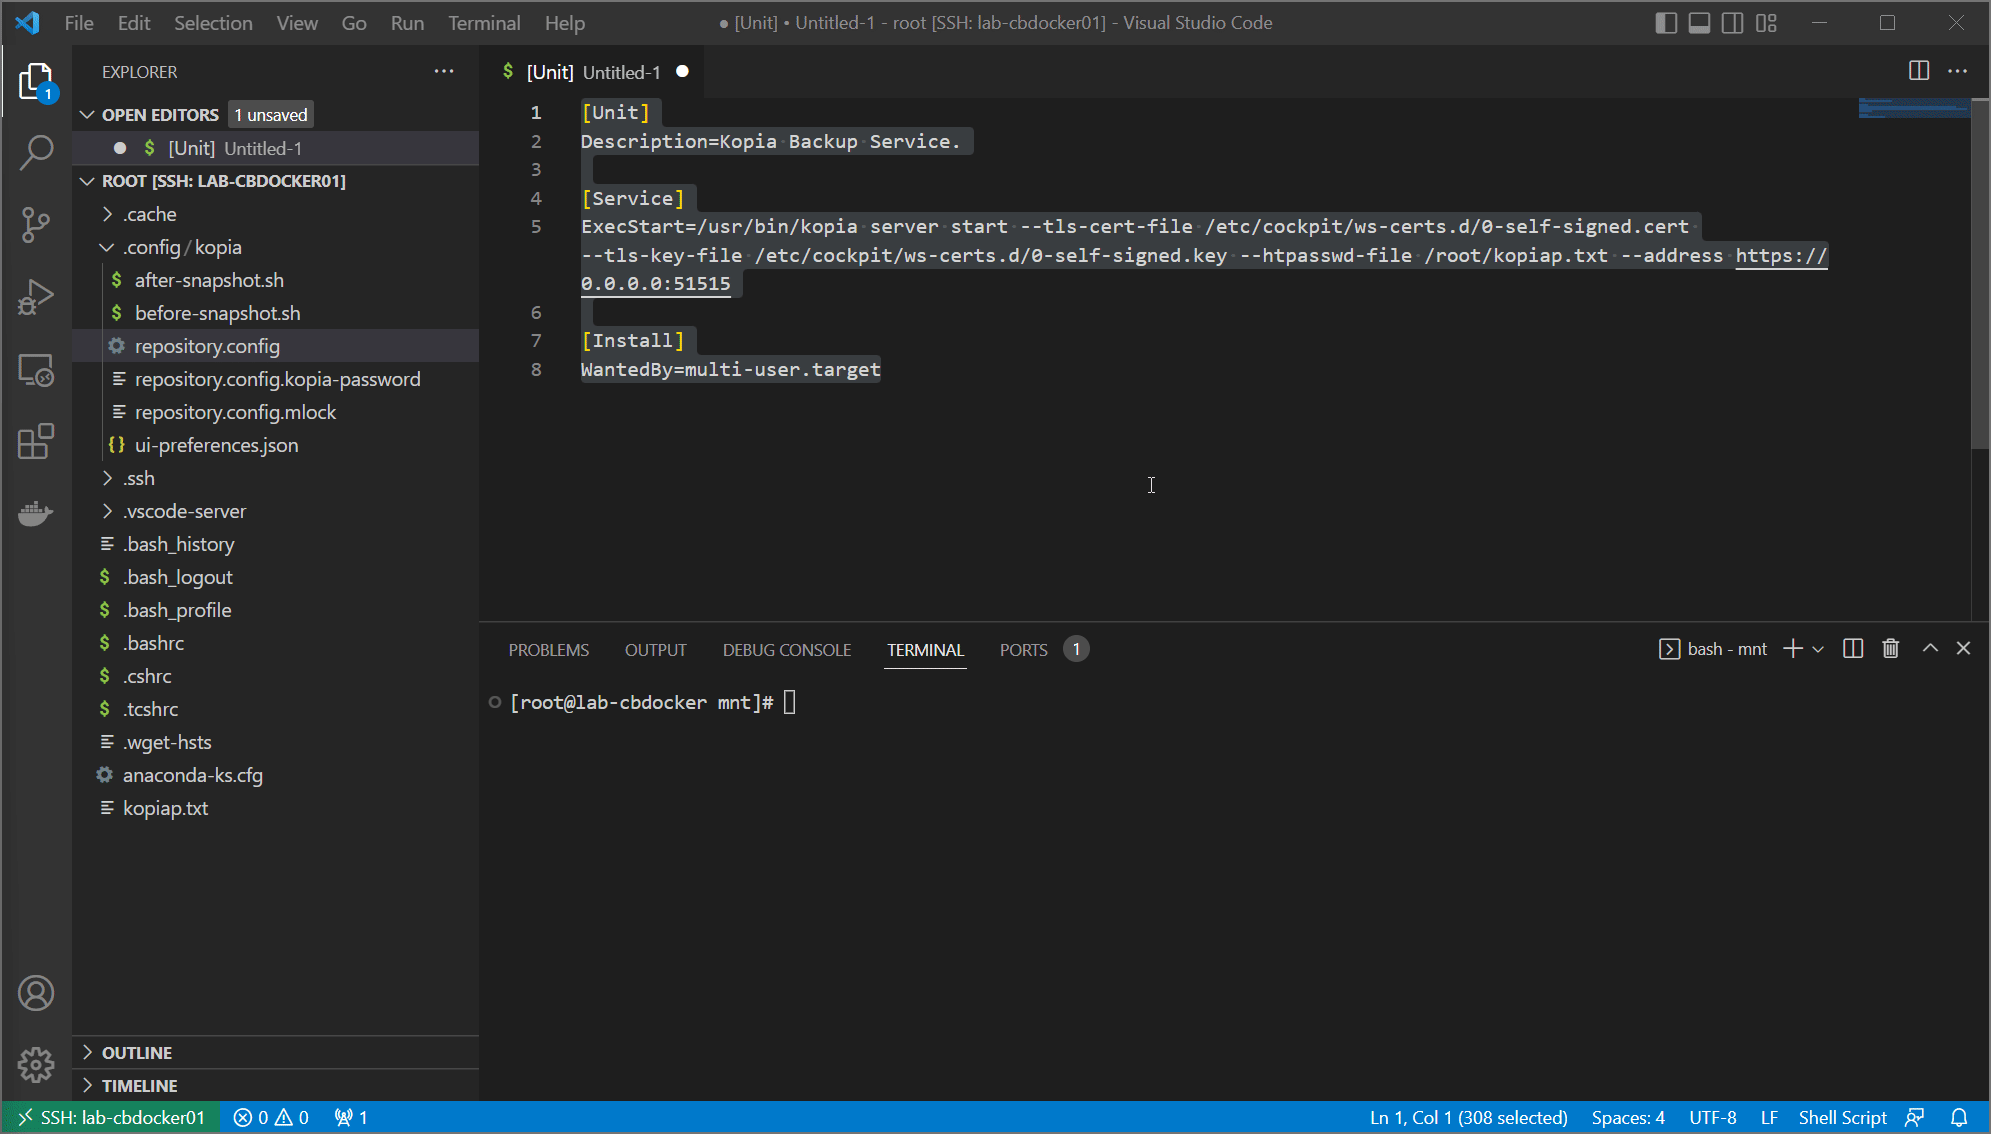
- Drop the following into
/etc/systemd/system/kopia.service
[Unit]
Description=Kopia Backup Service.

[Service]
ExecStart=/usr/bin/kopia server start --tls-cert-file /etc/cockpit/ws-certs.d/0-self-signed.cert --tls-key-file /etc/cockpit/ws-certs.d/0-self-signed.key --htpasswd-file /root/kopiap.txt --address https://0.0.0.0:51515
Environment=HOME=/root

[Install]
WantedBy=multi-user.target
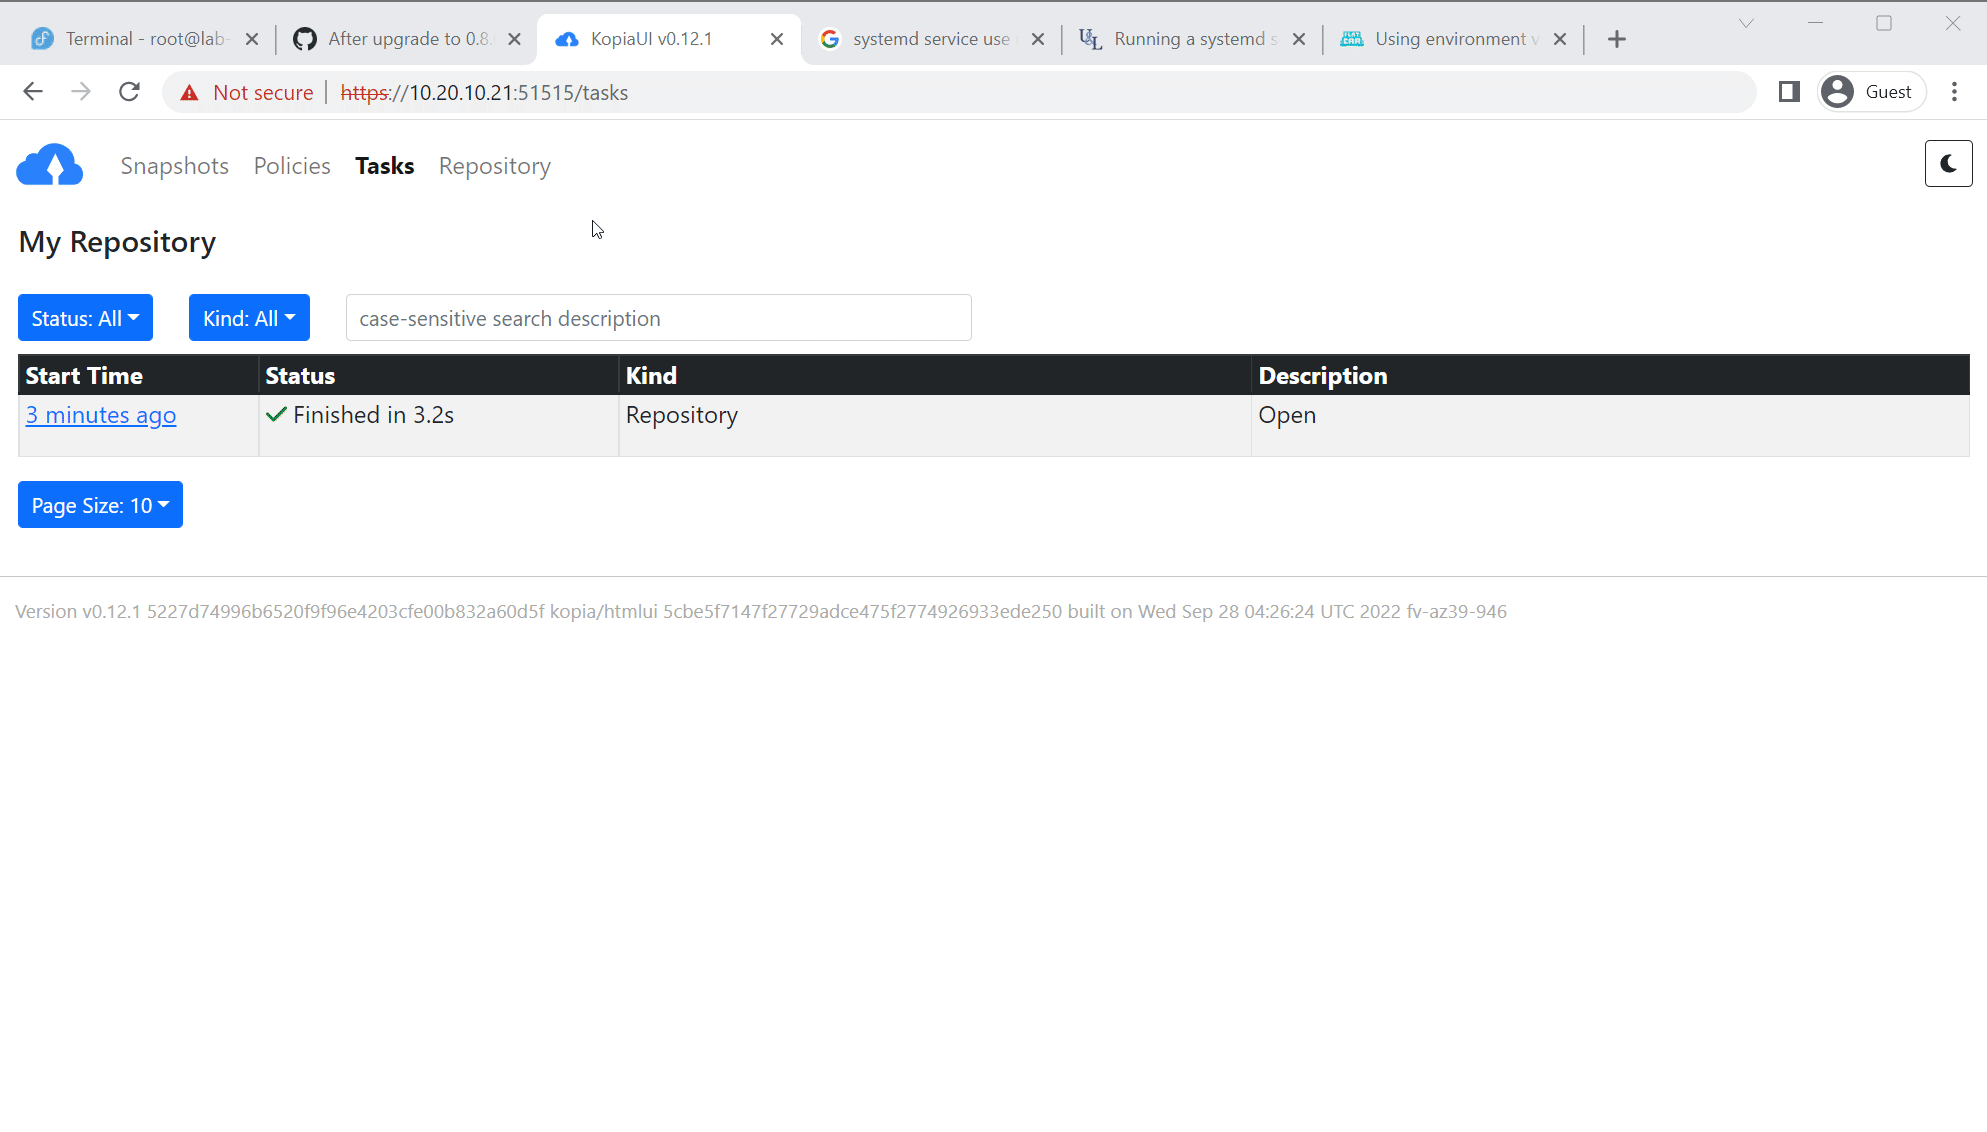
- restart systemd by running
systemctl daemon-reloadandsystemctl enable kopia.service. You can see me do all three in the following gif:
- Reboot and make sure your web interface comes back online!
Restores
A backup is pretty useless without a restore. Let’s show how easy it is.
- Navigate to snapshots in the UI, and you can just browse any backups you’ve done! Mounting them in the host filesystem is a click away.
Info
You can also click on individual files in the web UI to download them to your computer
Conclusion
Woof, that took a while. However, we’ve done a bunch of cool things now.
- We have a local web interface (with SSL no less) to manage our backups in a convenient way
- Those backups are: deduplicated, fast, compressed, and stored off site in a very flexible fashion
- We have a high degree of confidence in restores with resilient architecture and easy point-and-click restoring
- We are backing up snapshots (as opposed to the raw filing system) allowing us to back up running containers
Awesome!