Deploying Outline Wiki
Info
This guide has been since re-written by a standalone article for Installing Outline. This guide uses Nginx Proxy Manager and Keycloak, while the new guide uses Caddy and FusionAuth.
Introduction
If I haven’t hammered it in enough times during the course of this guide, documentation is important. Just as important as setting up the infrastructure in the first place. Having the insight to document your infrastructure in advance will save you hours down the track. In the business world, it may save your career.
Part of documentation is having a way to organize it, and in the tech world that is usually a wiki. Gitea actually has a wiki built in! However, it’s entirely markdown based (flat text files), and that usually scares people off.
Instead, we will deploy outline to be our wiki and knowledgebase.
Pre-Requisites
If you have been following the whole guide series, you have everything you need in place. If you are coming in just to learn how to deploy outline, this guide uses the following:
- A Keycloak deployment for authentication (see Authentication with Keycloak)
- A Reverse Proxy with valid SSL certificates (see Reverse Proxies with Nginx Proxy Manager or Reverse Proxies with Caddy)
Also optionally:
- Portainer for Secrets Management and docker-compose deployment (see Designing our Workspace)
- Gitea for source control (see Deploying Source Control with Gitea)
TL;DR
In this conclusive series of our guide, we will set up our final piece of infrastructure: The Outline Wiki
What is Outline?
Outline is a next generation wiki designed around ease of use. I’ve actually written about outline before: it’s an elegant piece of technology, and rivals big name SaaS knowledgebase companies like notion. In fact, I’m using it to draft these guides! Look!
However it’s hard to set up. Like, notoriously hard to set up. Lots of moving parts, some of which are AWS Based. The good news is that everything we’ve built so far contributes to an easy Outline deployment.
My previous setup guide is a bit outdated, and could use a refresh. Let’s set up outline with our new infrastructure.
Nginx Proxy Manager
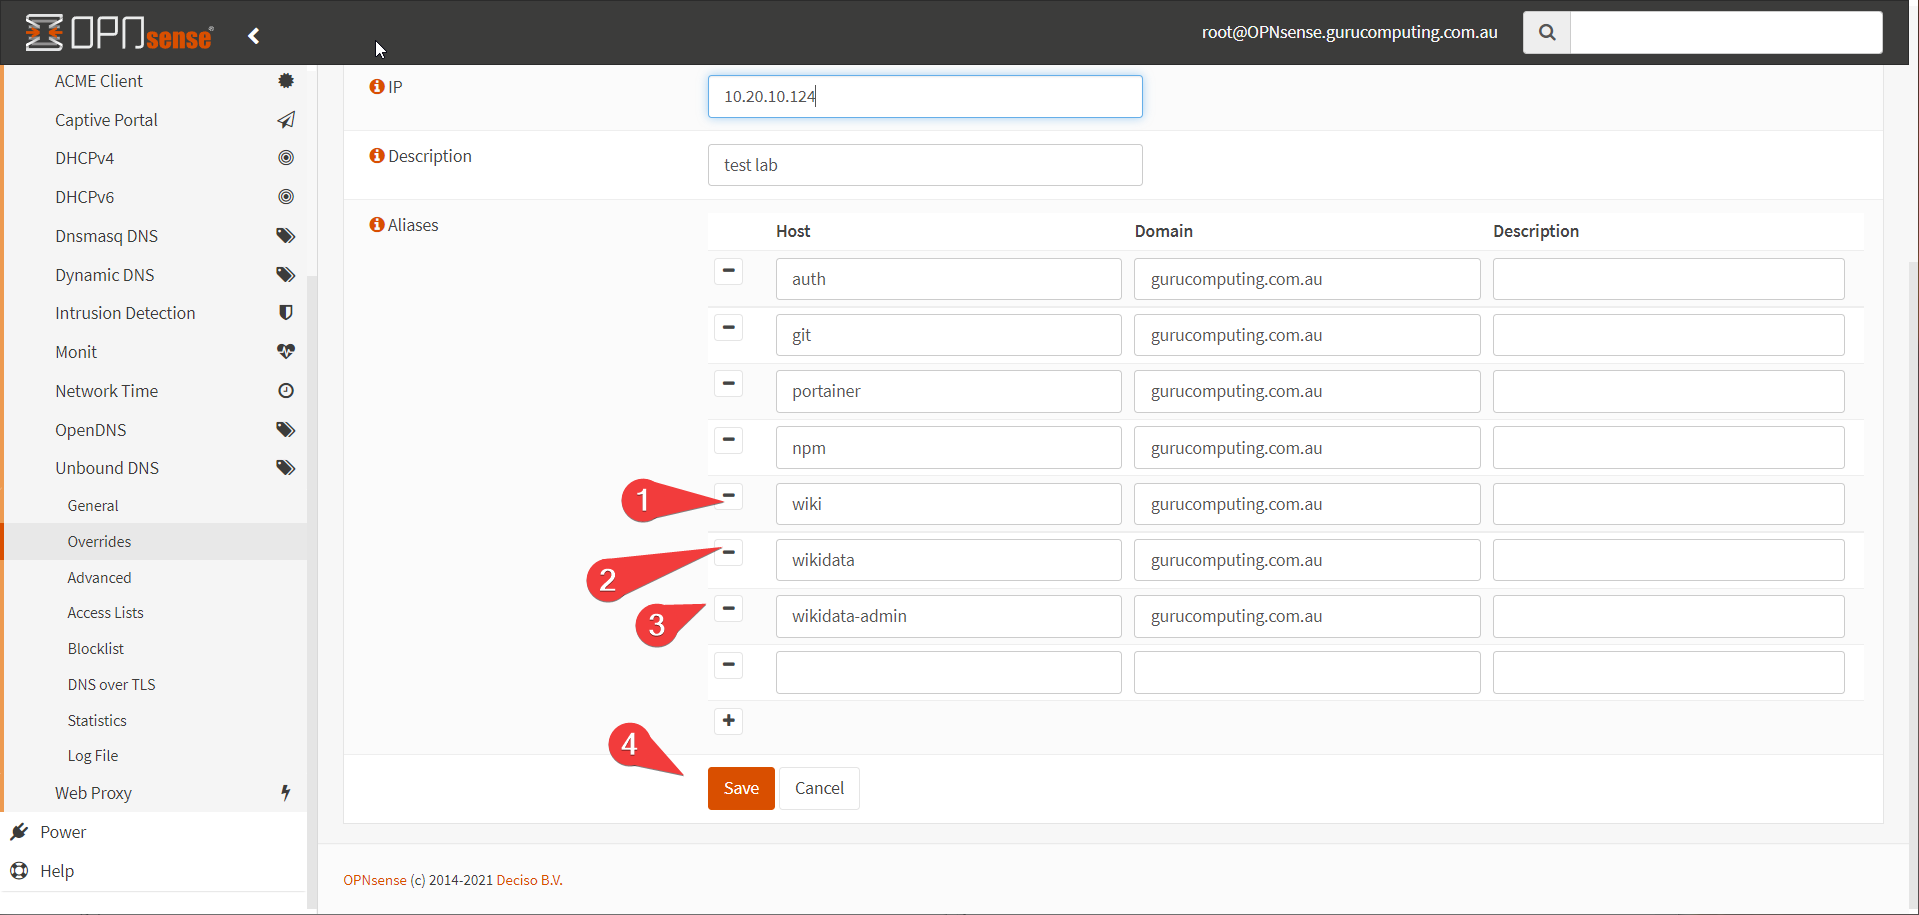
For Outline, we actually have to supply three subdomains. One will be used for accessing the wiki, one will be dedicated to storing assets and images (this is fairly normal for a cloud native app: we will emulating an s3 storage server), and the last will be for administrating the s3 server. We will use wiki.<my-domain>.<tld>, wikidata.<my-domain>.<tld> , and wikidata-admin.<my-domain>.<tld> respectively.
- Let’s set up the three subdomains in our DNS server:
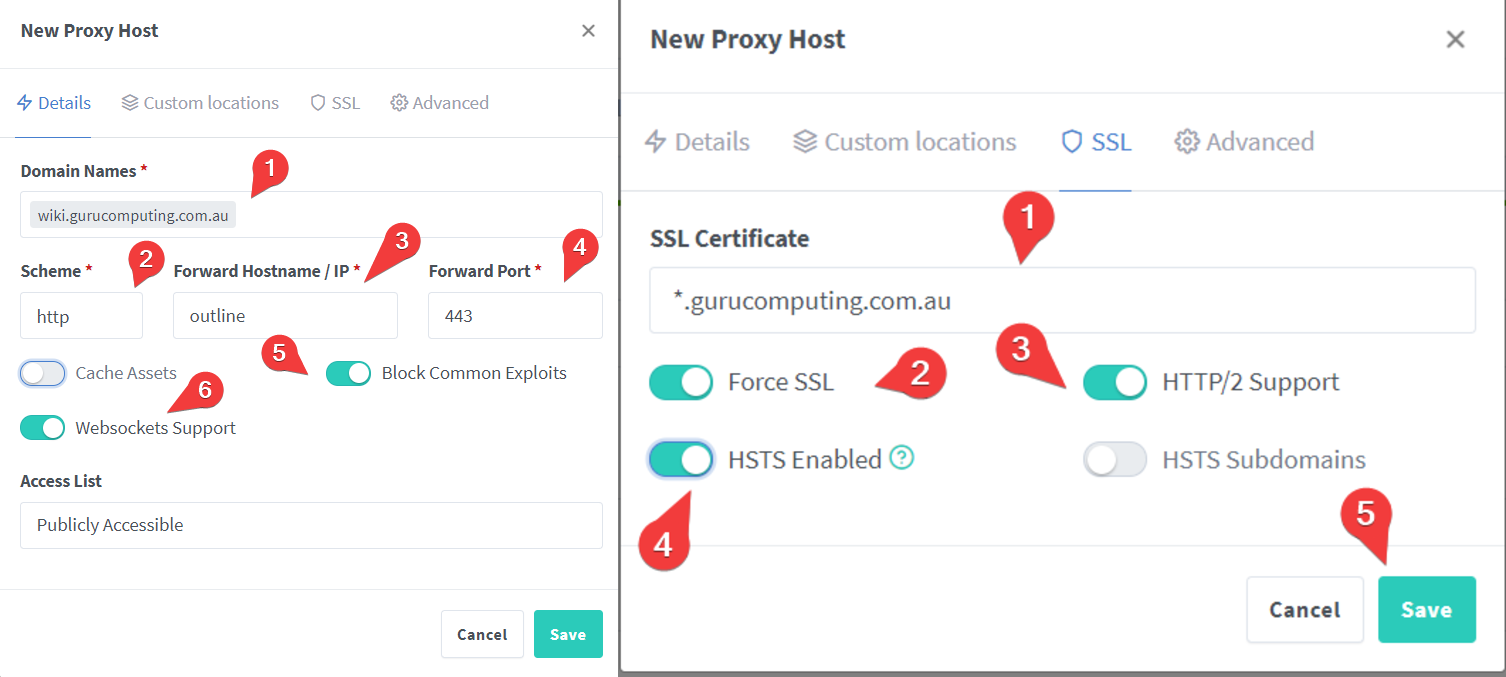
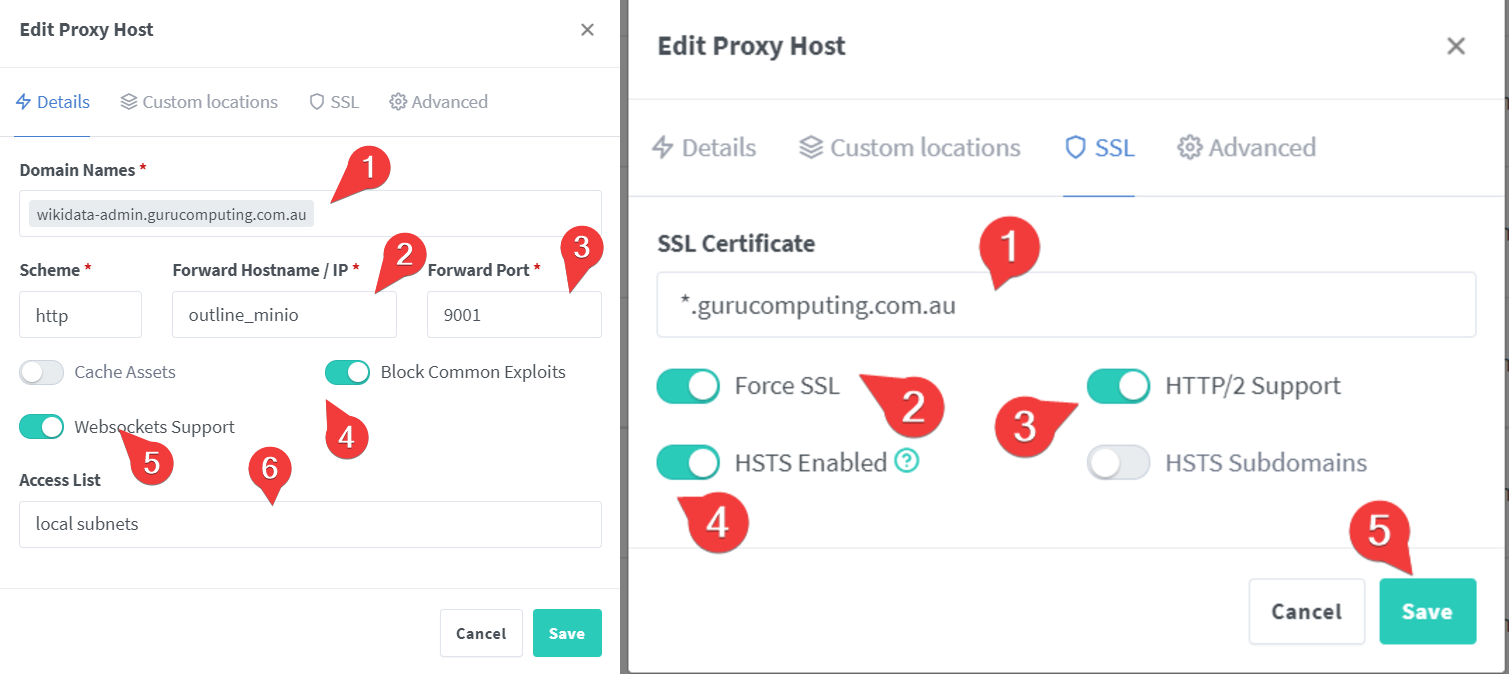
- And create three reverse proxy entries for these domains. First is for what will be our outline installation:
Info
note that even though we are using port 443, we are redirecting to an http backend. This is so outline doesn’t try to redirect to port 80 later on and we get in a loop.
- And now for our minio (our aws bucket emulation) installation:
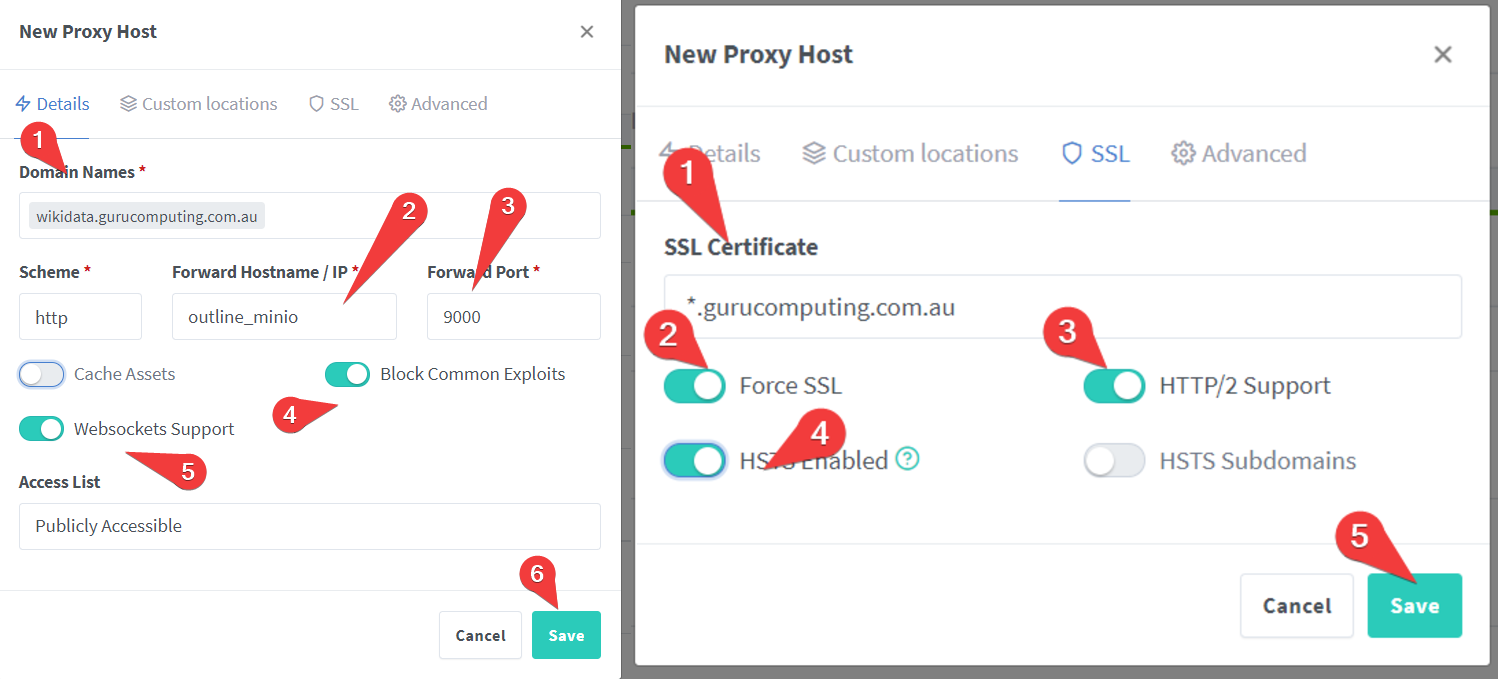
- and finally for our minio admin portal:
Info
Note that we restrict this portal to local subnets only
Setting up Keycloak
Now we have to set up Outline’s authentication. Specifically, dealing with the fact that outline doesn’t have local authentication. Outline has been built with the assumption that you will pair the wiki with an external authentication provider. Good thing we set up Keycloak earlier!
- In keycloak, create a new client called outline. Give it the URL to your wiki
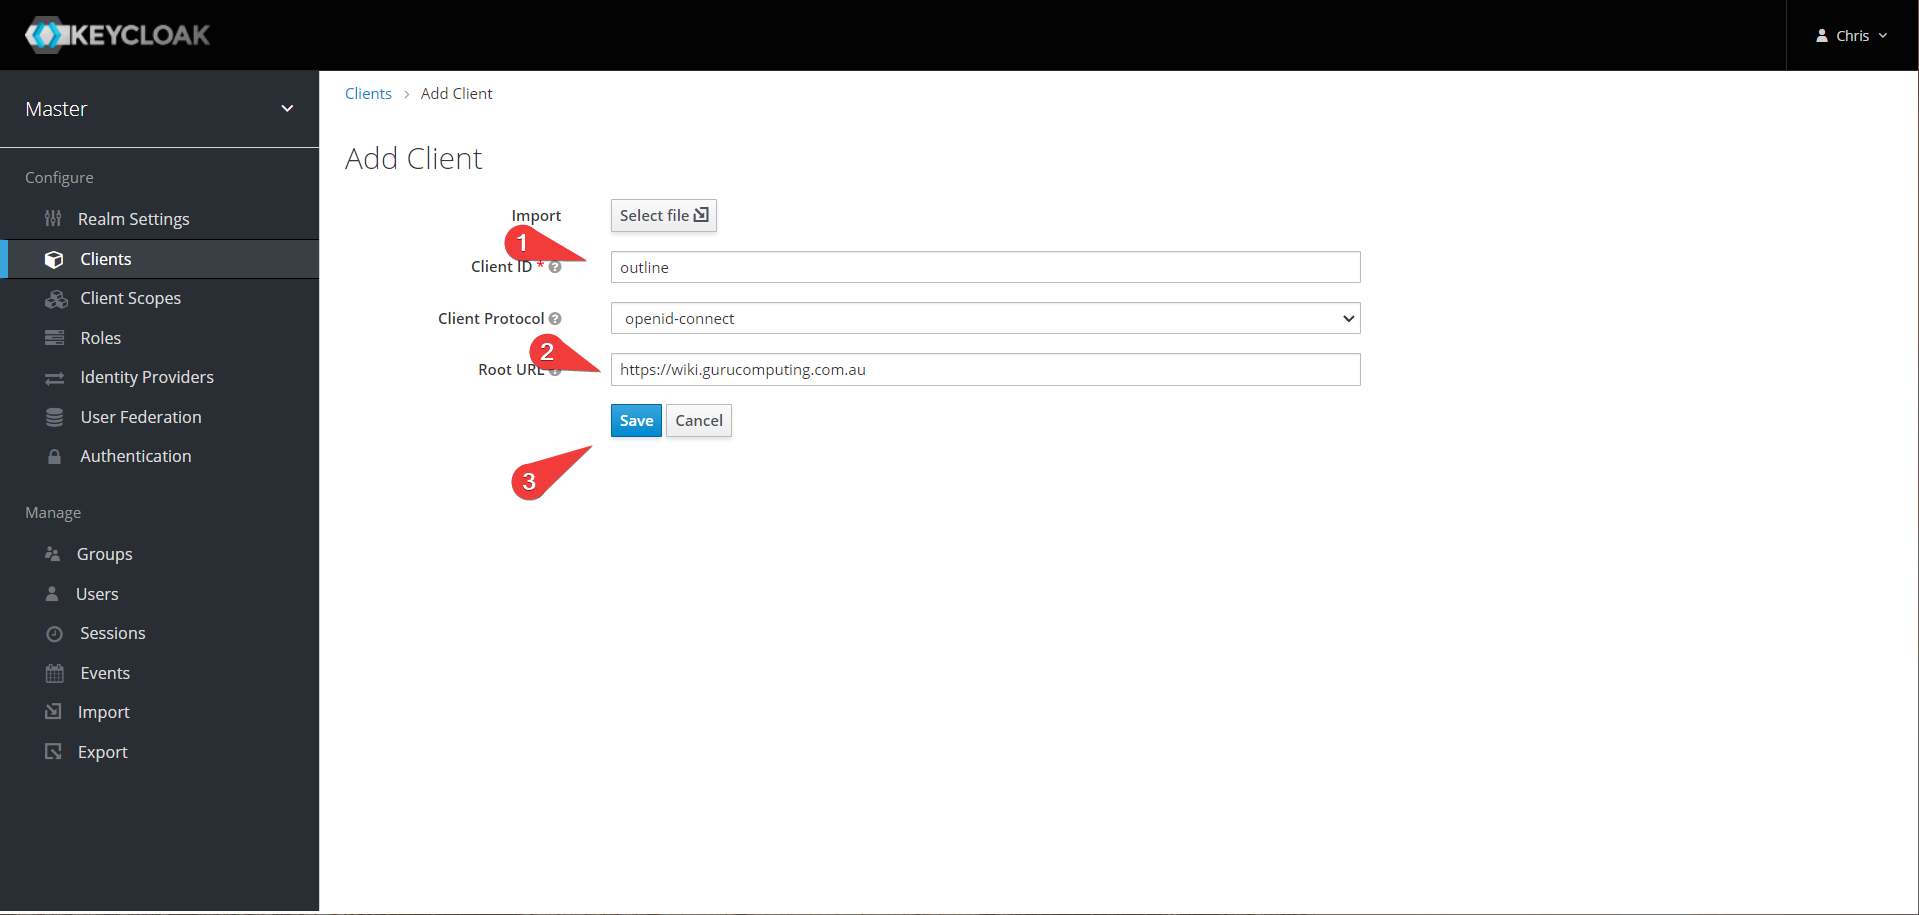
- Set the access type to confidential and save.
Crafting the Docker Compose
Alright, we got our pieces together. Let’s actually get the service stood up.
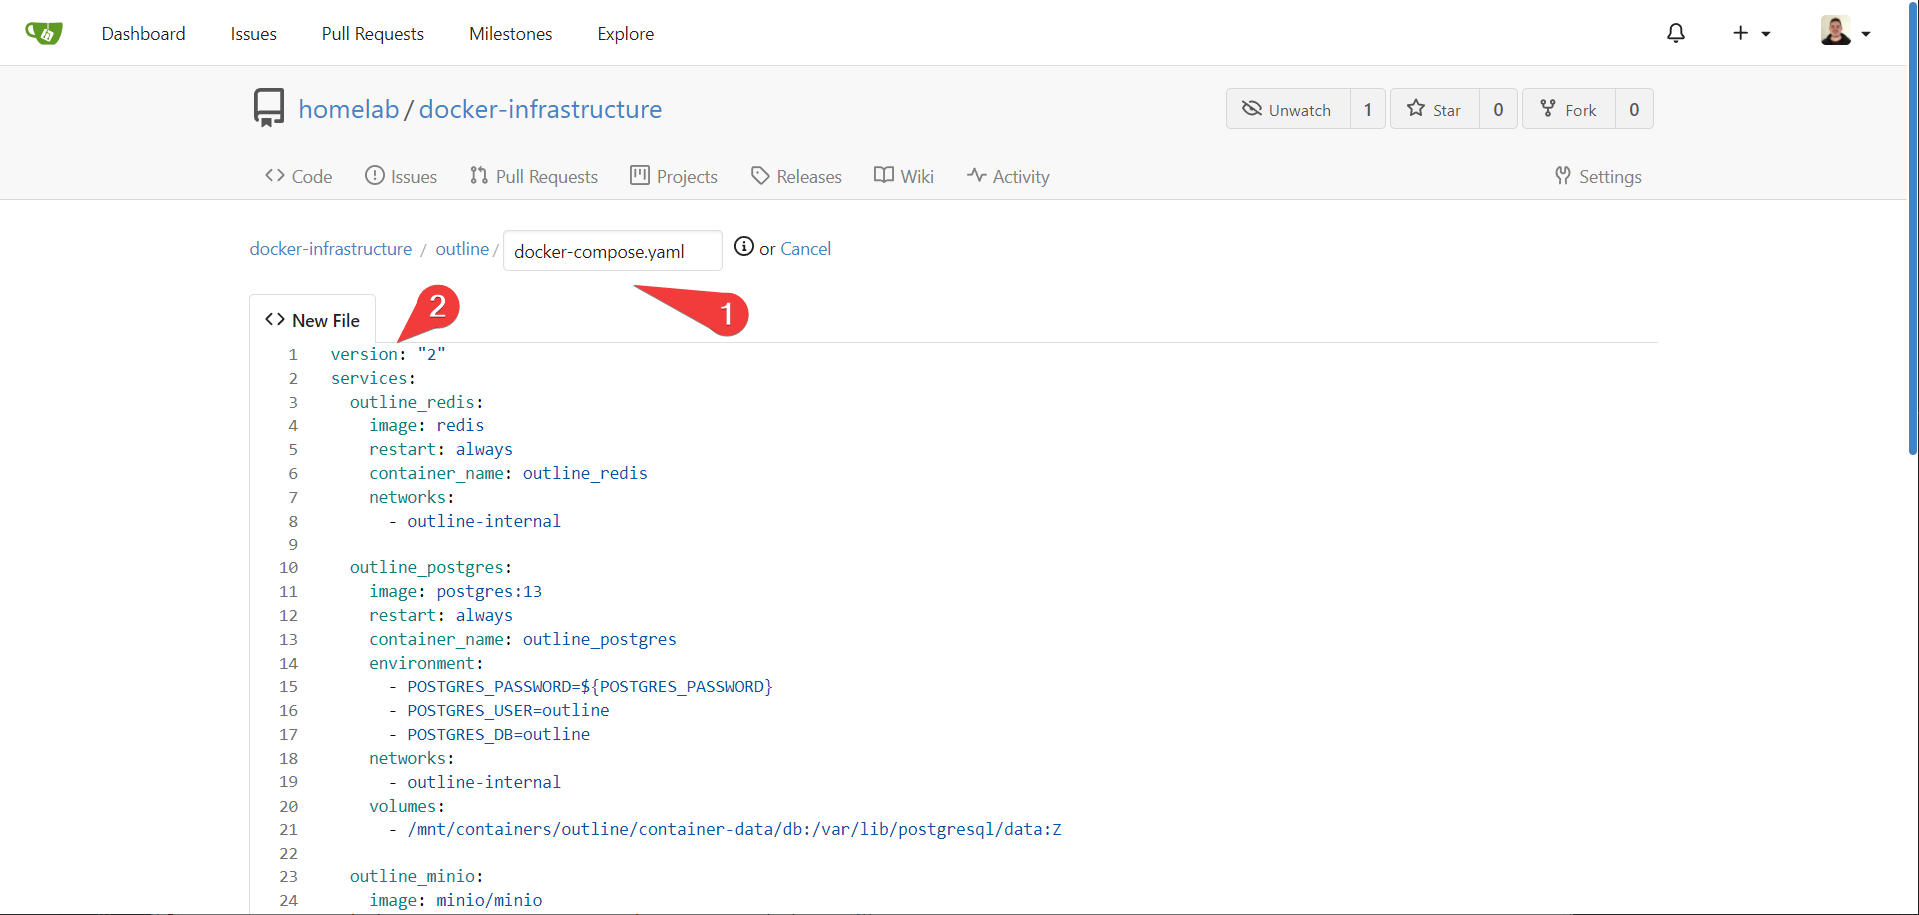
- Paste the following configuration into gitea. Hold onto your butts, this is a long config (by docker compose standards):
Info
You can find a more complete .env file with descriptions of the environment variables for outline here
version: "2"
services:
  outline_redis:
    image: redis
    restart: always
    container_name: outline_redis
    networks:
      - outline-internal

  outline_postgres:
    image: postgres:13
    restart: always
    container_name: outline_postgres
    environment:
      - POSTGRES_PASSWORD=\${POSTGRES_PASSWORD}
      - POSTGRES_USER=outline
      - POSTGRES_DB=outline
    networks:
      - outline-internal
    volumes:
      - /mnt/containers/outline/container-data/db:/var/lib/postgresql/data:Z

  outline_minio:
    image: minio/minio
    restart: always
    container_name: outline_minio
    volumes:
      - /mnt/containers/outline/container-data/data:/data:Z
    environment:
      - MINIO_ROOT_USER=minio
      - MINIO_ROOT_PASSWORD=\${MINIO_ROOT_PASSWORD}
      - MINIO_BROWSER_REDIRECT_URL=\${MINIO_BROWSER_REDIRECT_URL}
    # ports:
      # - 9000:9000
      # - 9001:9001
    networks:
      - reverseproxy-nw
    command: "server /data --console-address :9001"

  outline:
    image: outlinewiki/outline
    user: root
    restart: always
    container_name: outline
    command: sh -c "yarn sequelize:migrate --env=production-ssl-disabled && yarn start --env=production-ssl-disabled"
    depends_on:
      - outline_postgres
      - outline_redis
      - outline_minio
    environment:
      - PGSSLMODE=disable
      - SECRET_KEY=\${SECRET_KEY}
      - UTILS_SECRET=\${UTILS_SECRET}
      - DATABASE_URL=postgres://outline:\${POSTGRES_PASSWORD}@outline_postgres:5432/outline
      - REDIS_URL=redis://outline_redis:6379
      - URL=\${WIKI_URL}
      - PORT=443
      - AWS_ACCESS_KEY_ID=minio
      - AWS_REGION=us-east-1
      - AWS_SECRET_ACCESS_KEY=\${MINIO_ROOT_PASSWORD}
      - AWS_S3_UPLOAD_BUCKET_URL=\${WIKIDATA_URL}
      - AWS_S3_UPLOAD_BUCKET_NAME=outline
      - AWS_S3_UPLOAD_MAX_SIZE=26214400
      - AWS_S3_FORCE_PATH_STYLE=true
      - AWS_S3_ACL=private
      - OIDC_CLIENT_ID=outline
      - OIDC_CLIENT_SECRET=\${AUTH_CLIENT_SECRET}
      - OIDC_AUTH_URI=\${AUTH_URL}/auth/realms/master/protocol/openid-connect/auth
      - OIDC_TOKEN_URI=\${AUTH_URL}/auth/realms/master/protocol/openid-connect/token
      - OIDC_USERINFO_URI=\${AUTH_URL}/auth/realms/master/protocol/openid-connect/userinfo
      - OIDC_USERNAME_CLAIM=email
      - OIDC_DISPLAY_NAME=Keycloak
      - OIDC_SCOPES=email
    # ports:
    #   443:443
    networks:
      - outline-internal
      - reverseproxy-nw

networks:
  outline-internal:
  reverseproxy-nw:
    external: true
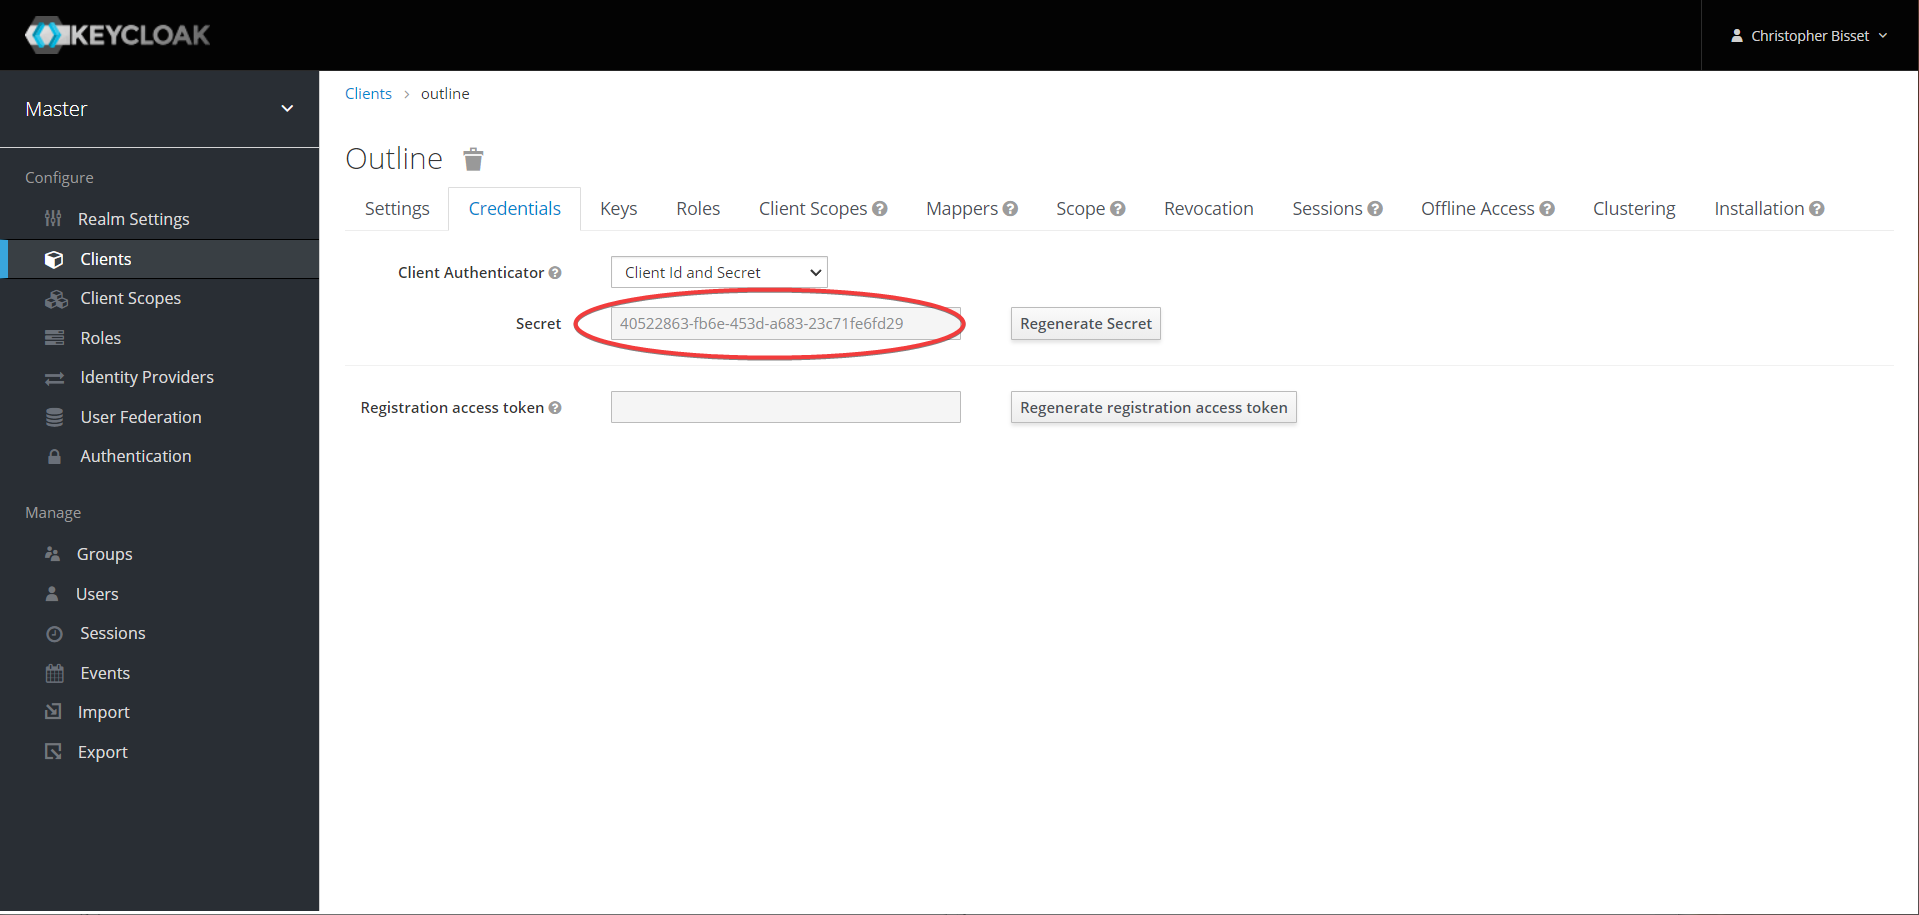
- Now we need to gather three separate secrets. Back in keycloak, get the secret from the client
credentials page.
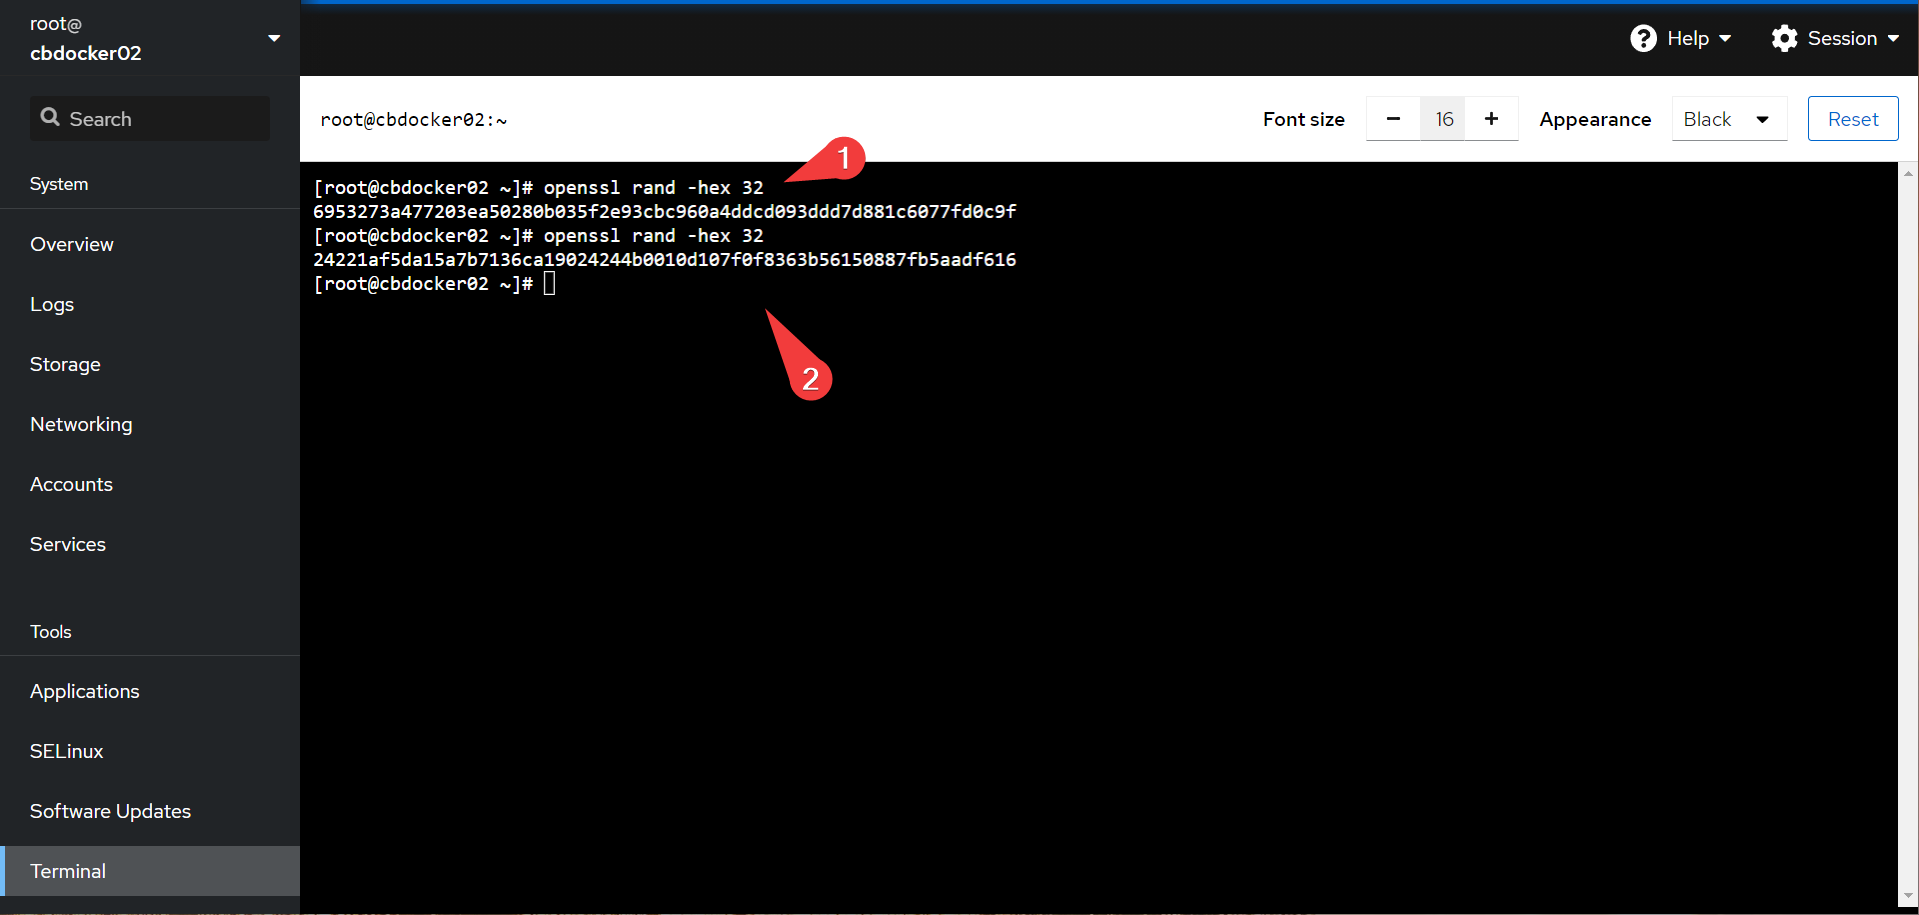
- In cockpit generate two separate random strings using the following:
- In portainer, point a new
outlinestack at your git repository
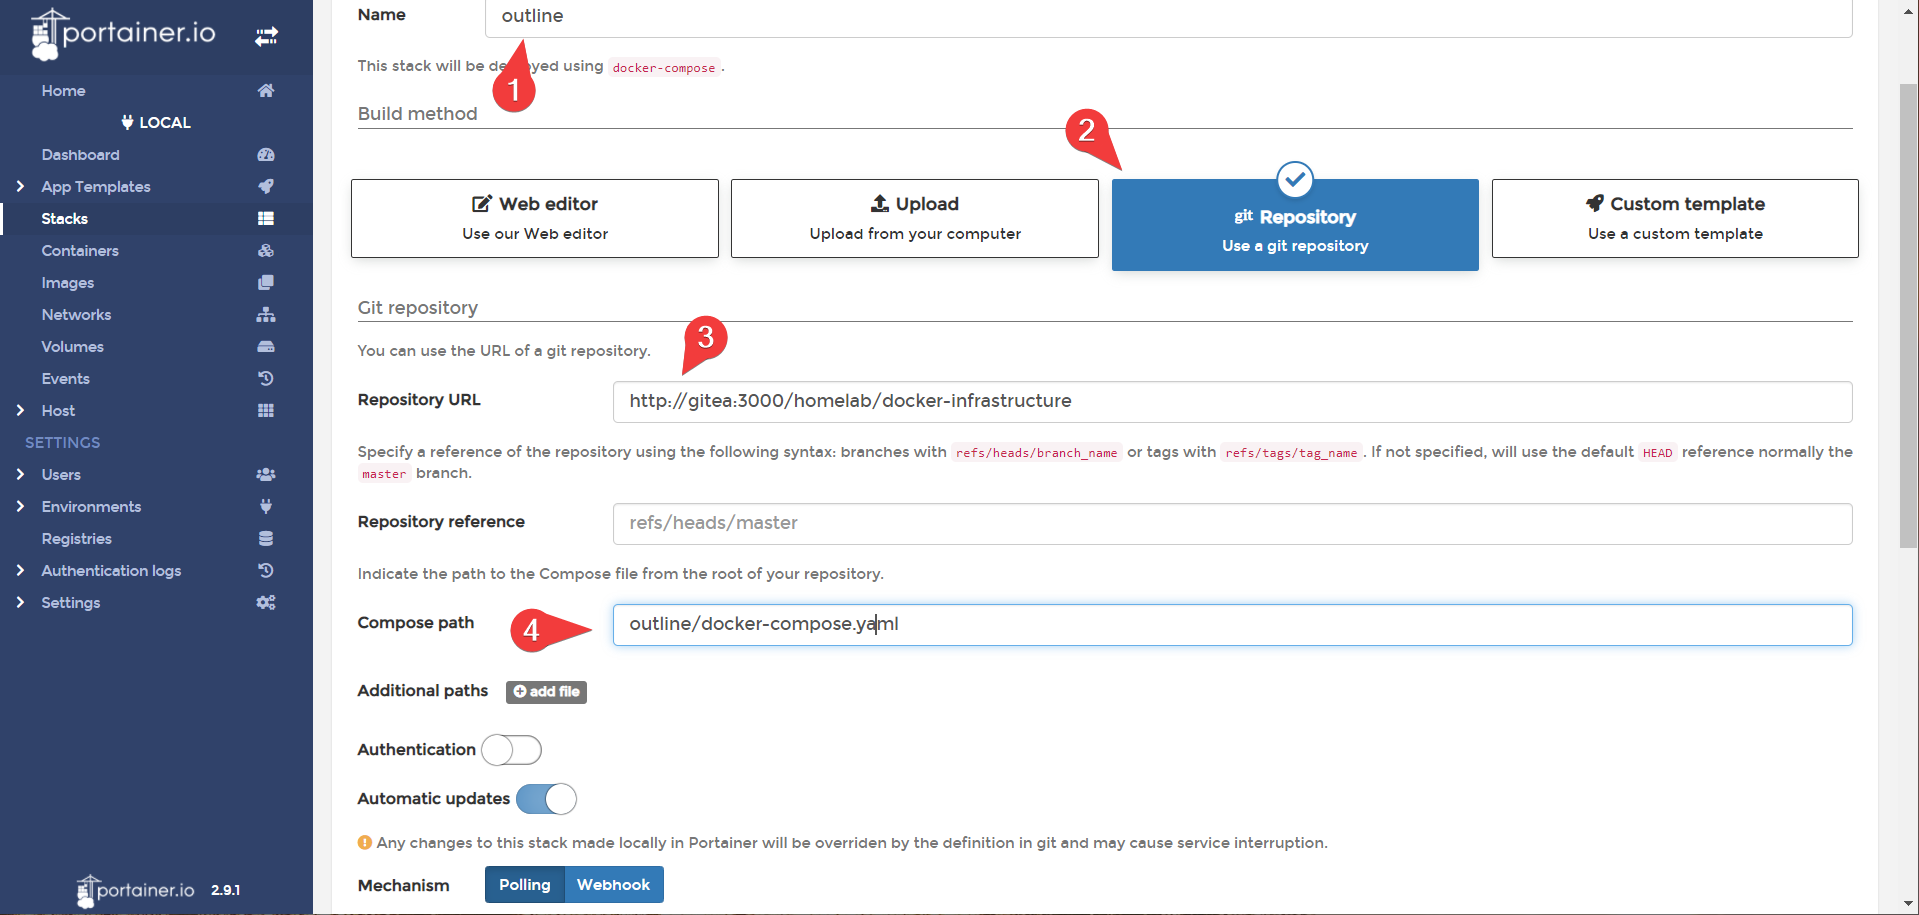
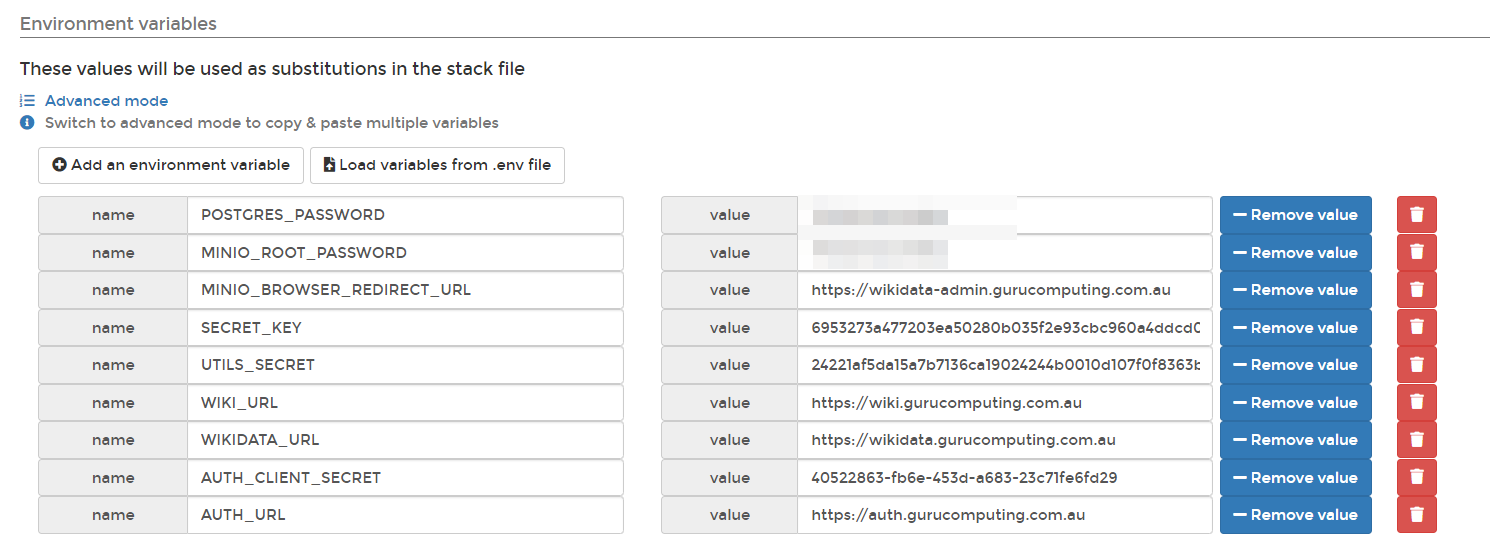
- and fill out the following for environment variables:
POSTGRES_PASSWORD=<a randomly generated password>
MINIO_ROOT_PASSWORD=<a randomly generated password>
MINIO_BROWSER_REDIRECT_URL=https://wikidata-admin.<your-domain>.<tld>
SECRET_KEY=<the first hex key you generated>
UTILS_SECRET=<the second hex key you generated>
WIKI_URL=https://wiki.<your-domain>.<tld>
WIKIDATA_URL=https://wikidata.<your-domain>.<tld>
AUTH_CLIENT_SECRET=<your keycloak client secret>
AUTH_URL=https://auth.<your-domain>.<tld>
Info
If you are not using portainer, you can perform this same secrets assignment by creating a .env file in the same location as docker-compose.yaml with the content above.
- Deploy! (and cross your fingers)
Success! (Almost)
If all goes well, you can access outline at wiki.<your-domain>.<tld>!
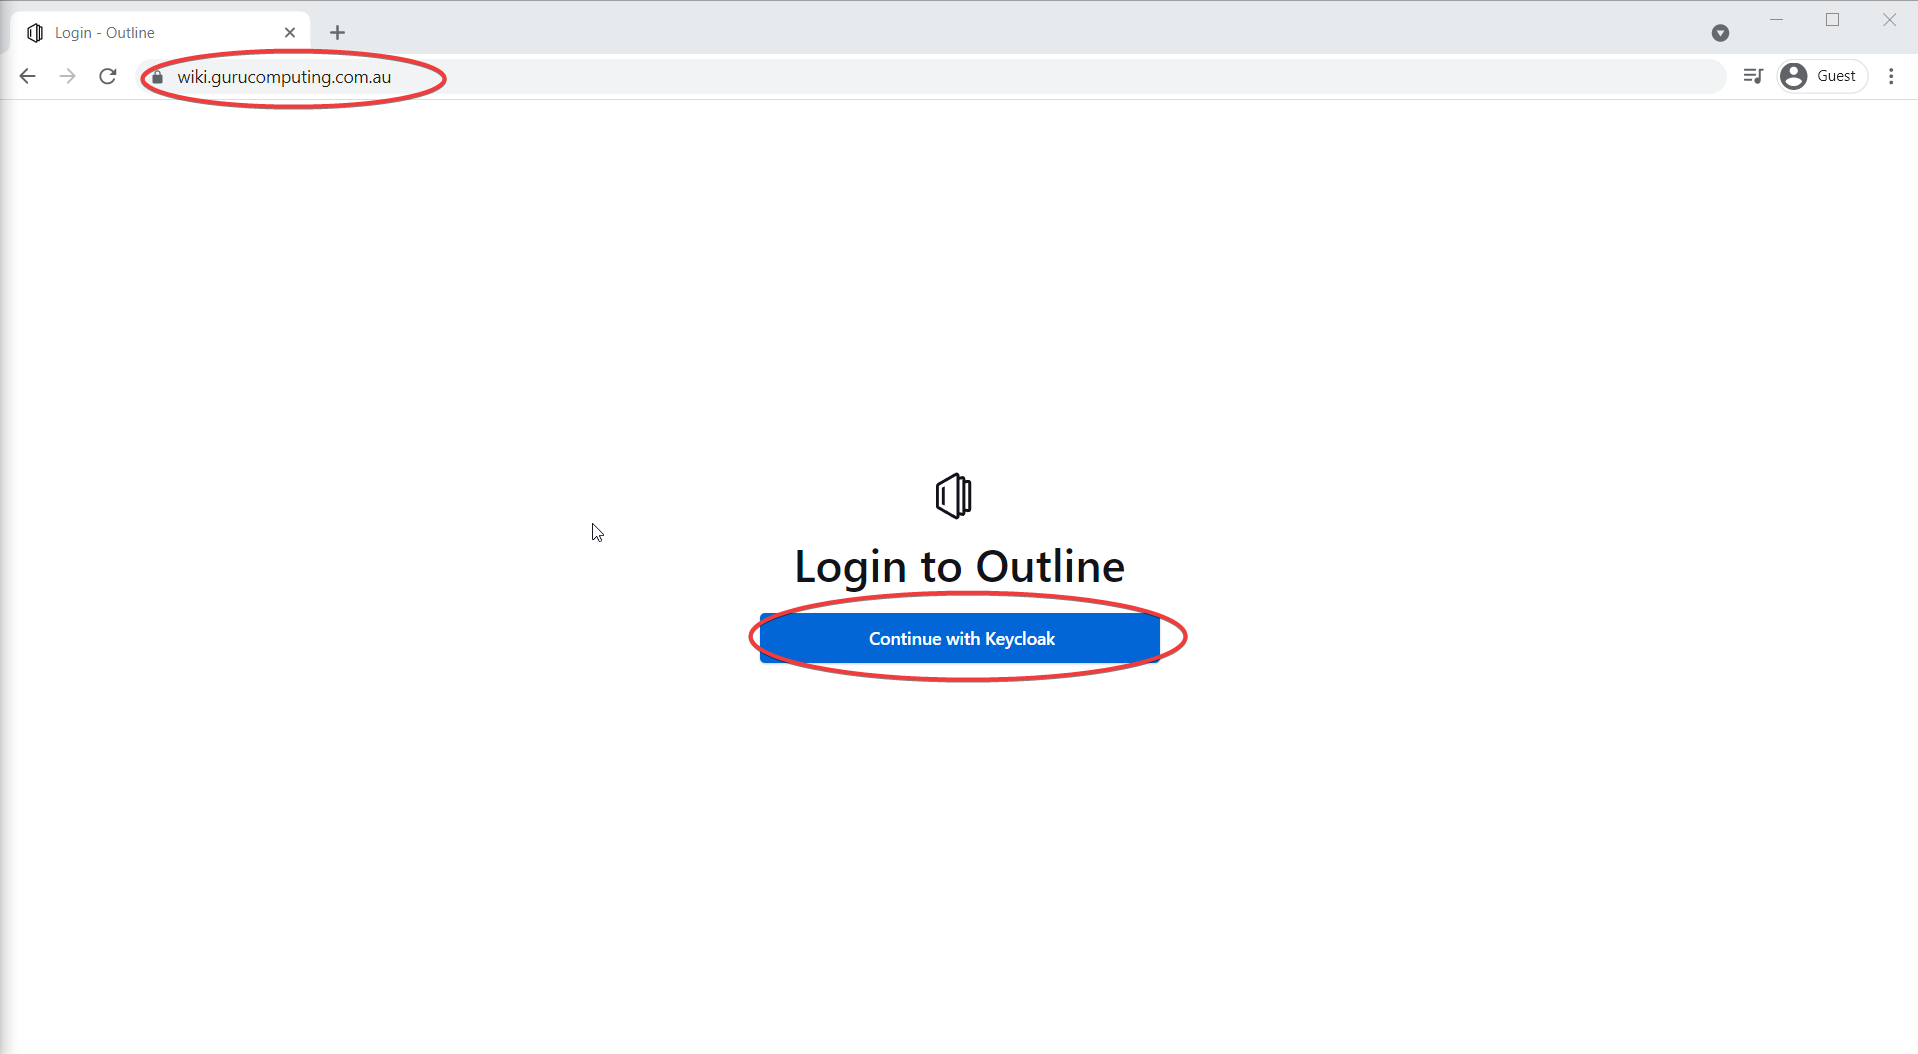
try to Continue with Keycloak, and (fingers crossed) you can log into your functioning wiki!
Well, almost functioning. If you try to paste an image, outline gets unhappy with you:
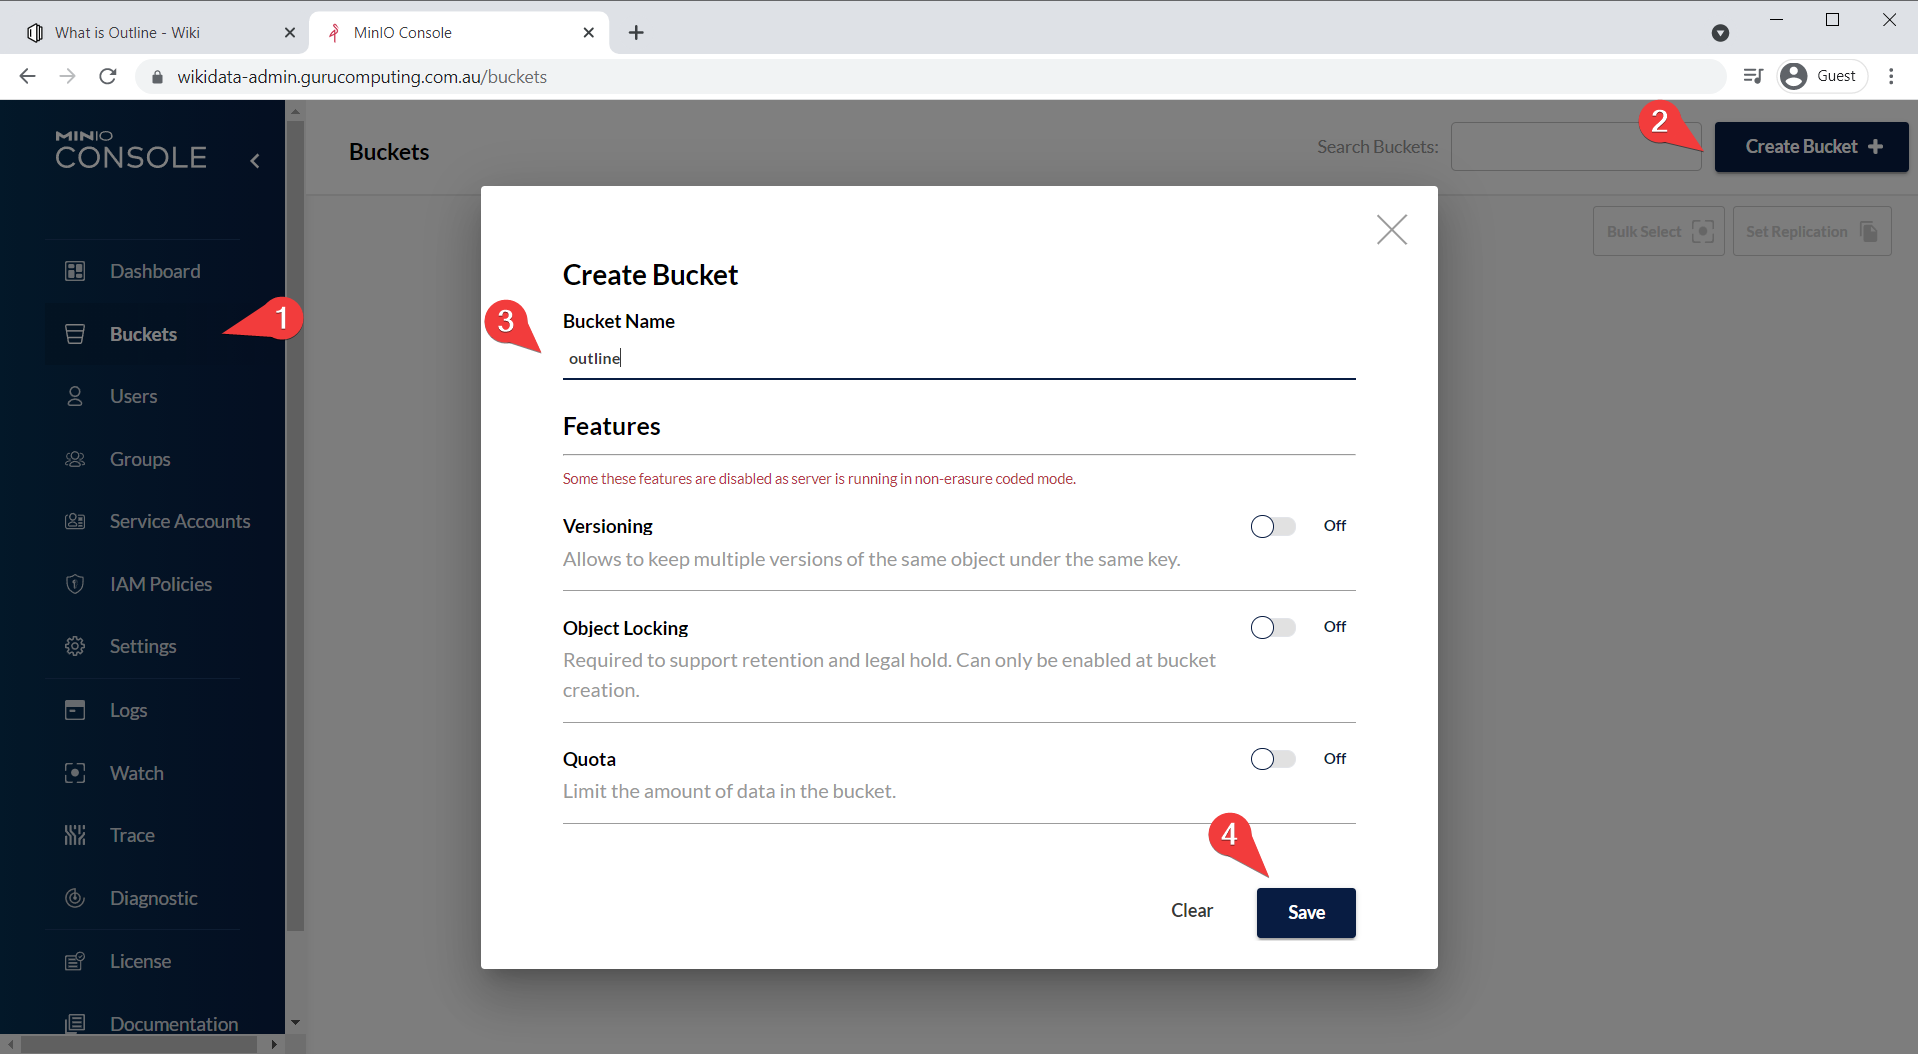
Creating the Bucket
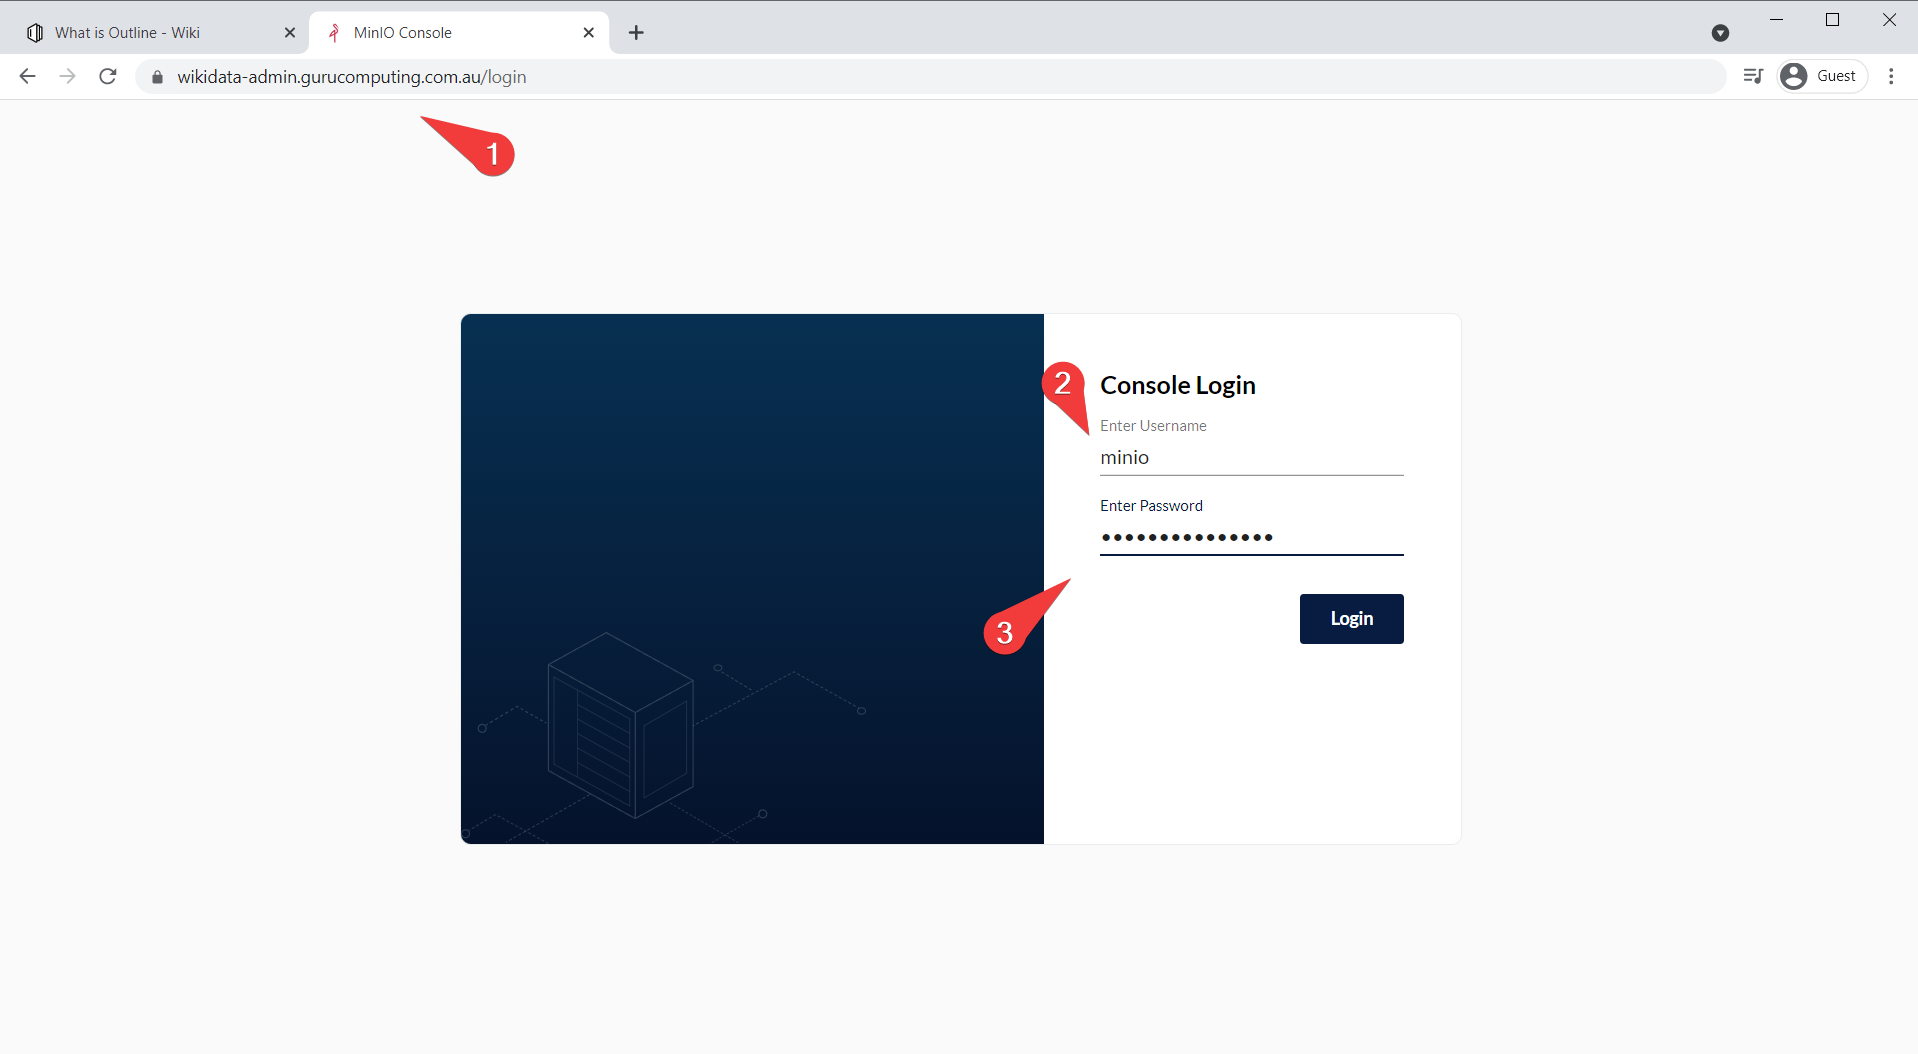
- Navigate to
https://wikidata-admin.<your-domain>.<tld>and log in with the userminio, and theMINIO_ROOT_PASSWORDyou set.
- Under buckets, create a bucket named outline and save.
Info
Minio has a bug where your bucket name cannot be part of your domain or subdomain. So, for example, if you had outline.<your-domain>.<tld> as you wiki address, you would have to name your bucket something else (and update the environment variable in the stack deployment).
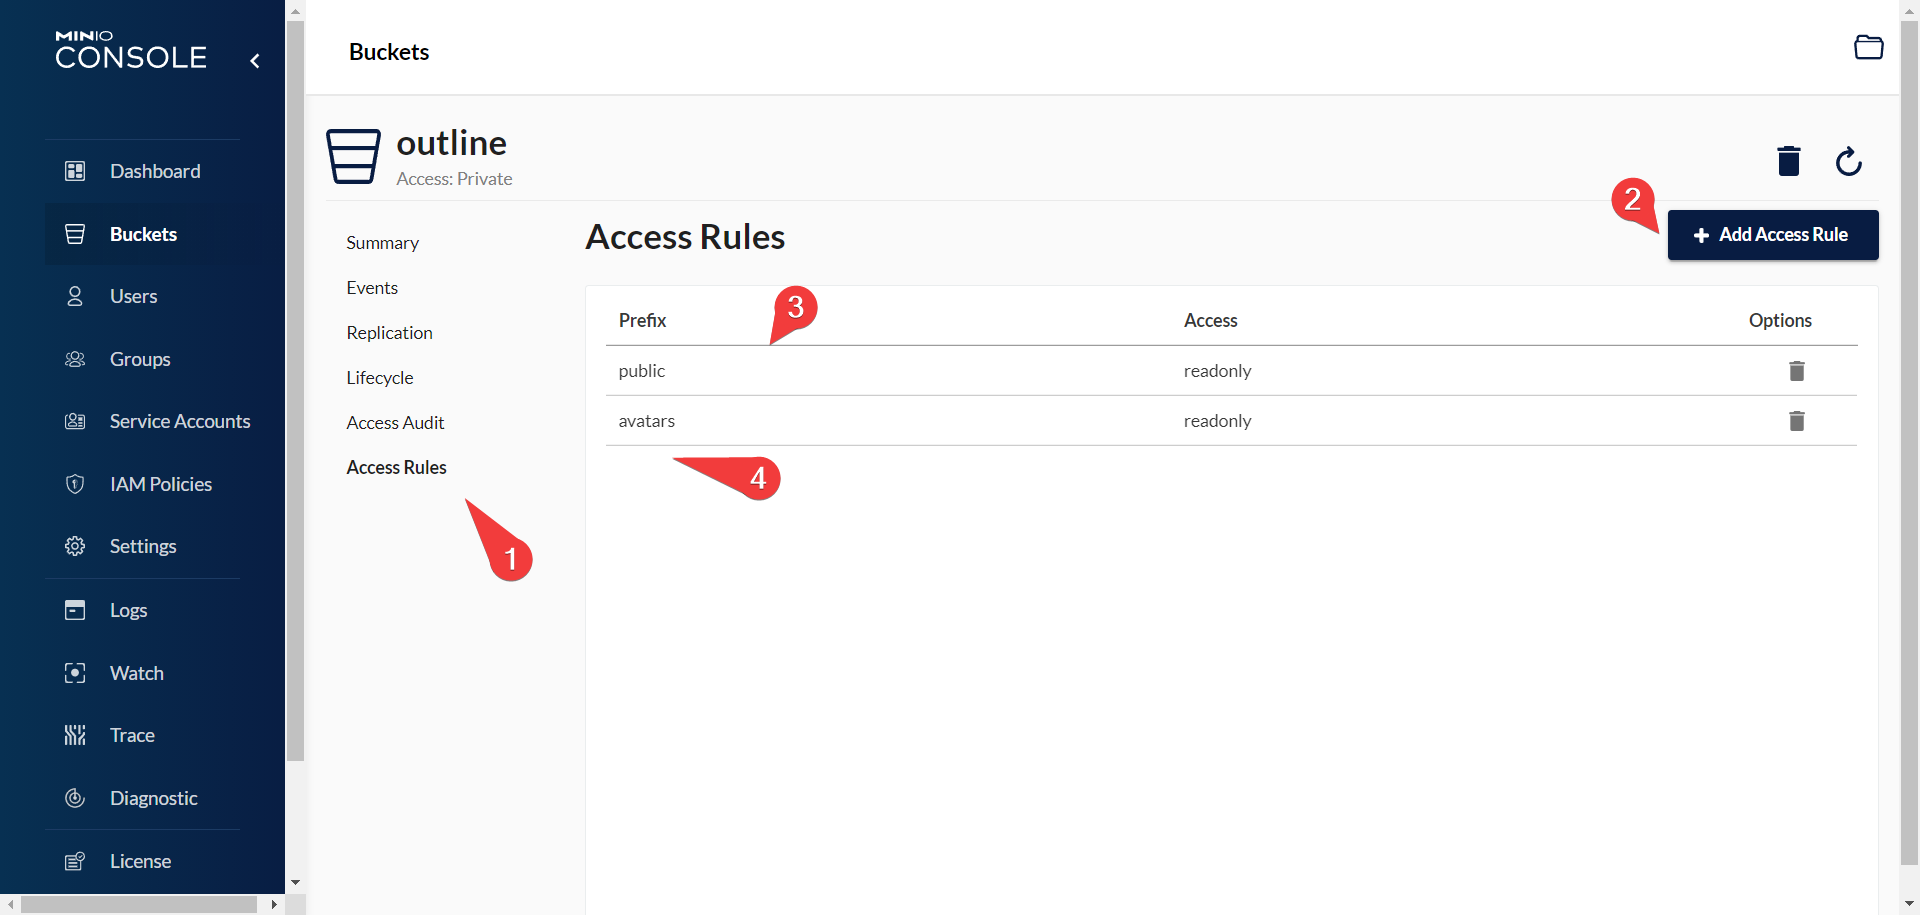
- Also set up some policies so we can allow public access to the
avatarsandpublicfolders respectively:
Success (for real!)
- Back to outline, let’s try that image pasting once more.
Hooray!
Conclusion
With that deployment, we have accomplished our goal. We have the structure needed for a robust docker environment:
- A web management platform for our docker host and our docker deployments
- A source control platform for versioning
- A reverse proxy for IP whitelisting and SSL termination
- Robust backups of our container data
- Single sign on for multiple services
- A powerful wiki for documentation
- A (primitive) CD (Continuous Delivery) pipeline with Portainer and Gitea
Outline is probably the most complex docker container you will deploy, and we’ve managed to do so without much fuss: We had everything we needed in place to make it mostly painless.
Now that you have all the infrastructure in place, go nuts! Linuxserver has a laundry list of interesting and useful docker services for home use (I recommend jellyfin) and you can now use docker confident in having a secure and protected environment.