Reverse Proxies with Nginx Proxy Manager
Info
This part of the guide has been updated as a standalone article here
Introduction
In the previous article, we pointed out some problems with our deployments:
- Each deployment is being served on a separate, non-standard web port
- Some of our deployments are throwing browser warnings for using self-signed certs
- Some of our deployments are not getting encrypted (!)
The way we fix these problems is with a reverse proxy. A reverse proxy is a web server that sits in front of other webservers, acting like a bouncer. It will encrypt outgoing traffic, it can set additional security features, and it can even redirect traffic based on the domain you want to access. … You know, like how bouncers do.
For this purpose, we will be installing the very excellent nginx proxy manager.
TL;DR
In this article, we will:
- Deploy Nginx Proxy Manager as a reverse proxy manager
- Show how to reverse proxy docker services, as well as use security features such as IP whitelisting
Installing Nginx Proxy Manager
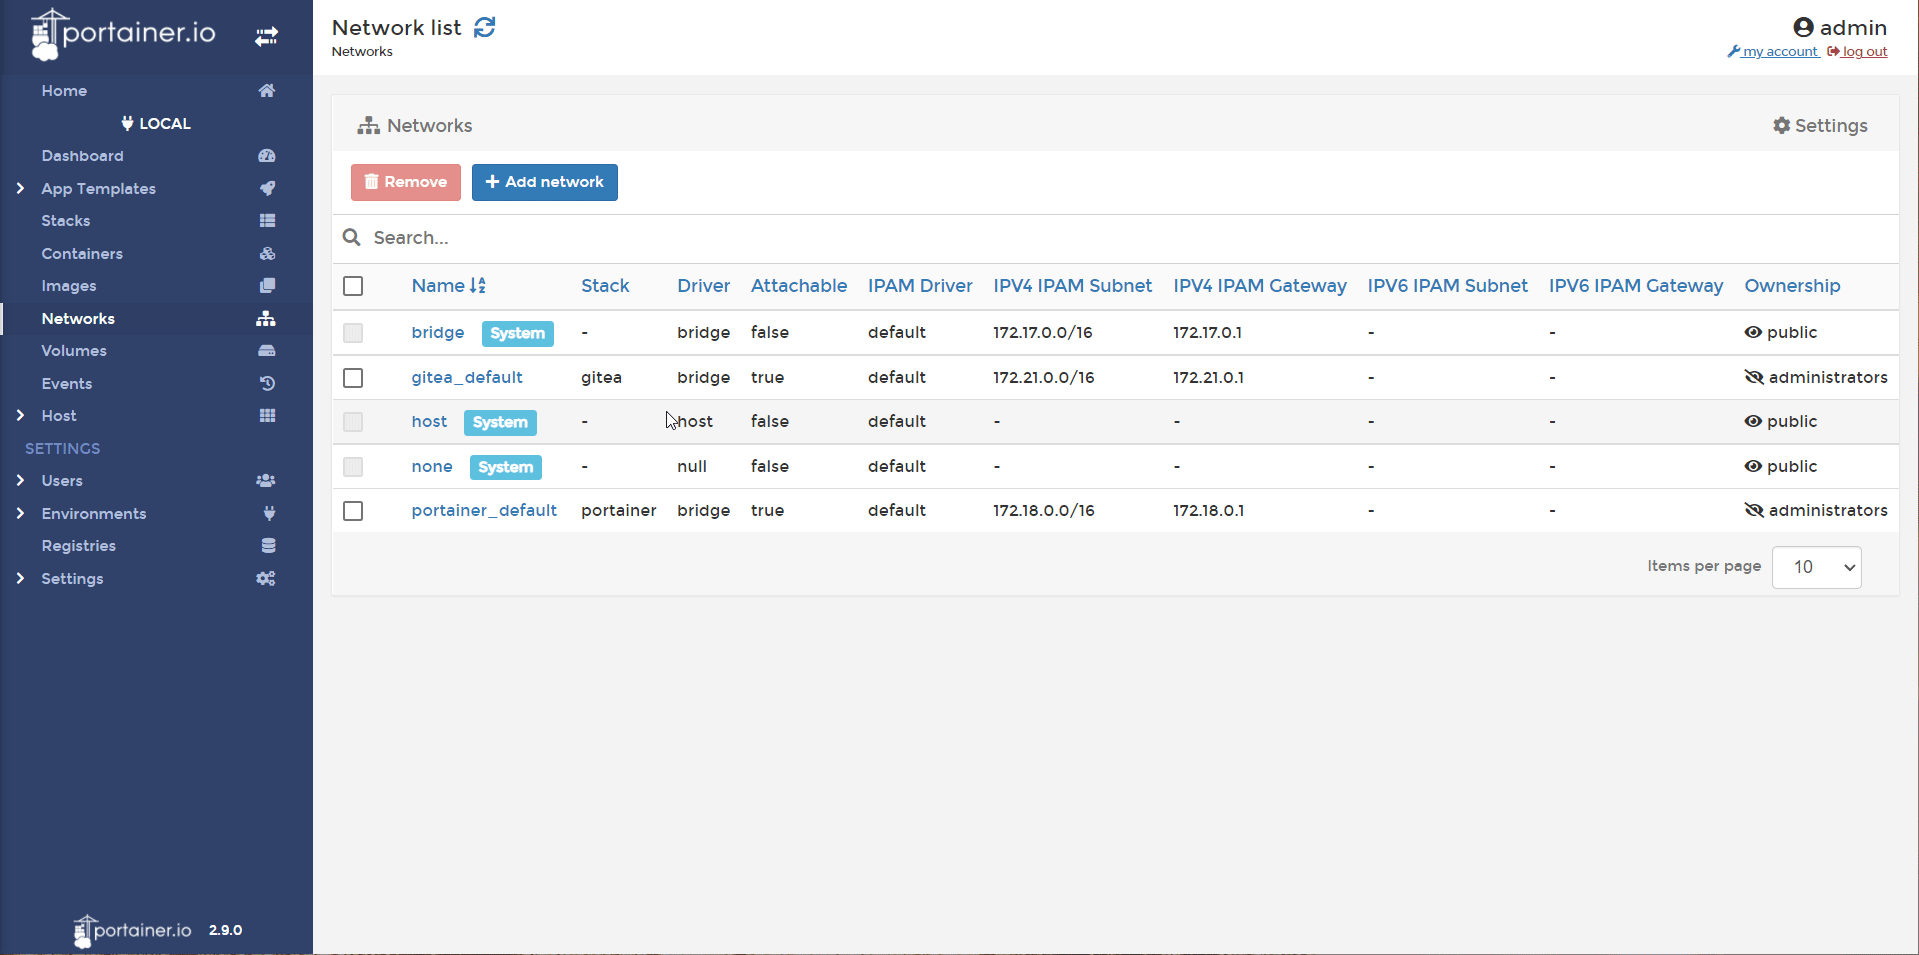
To start with we need an extra network for the proxy to sit on.
- In Portainer, head to networks and Add Network. Create a network named reverseproxy-nw. Create.
Info
If you are not using portainer, you can do the same with docker network create reverseproxy-nw
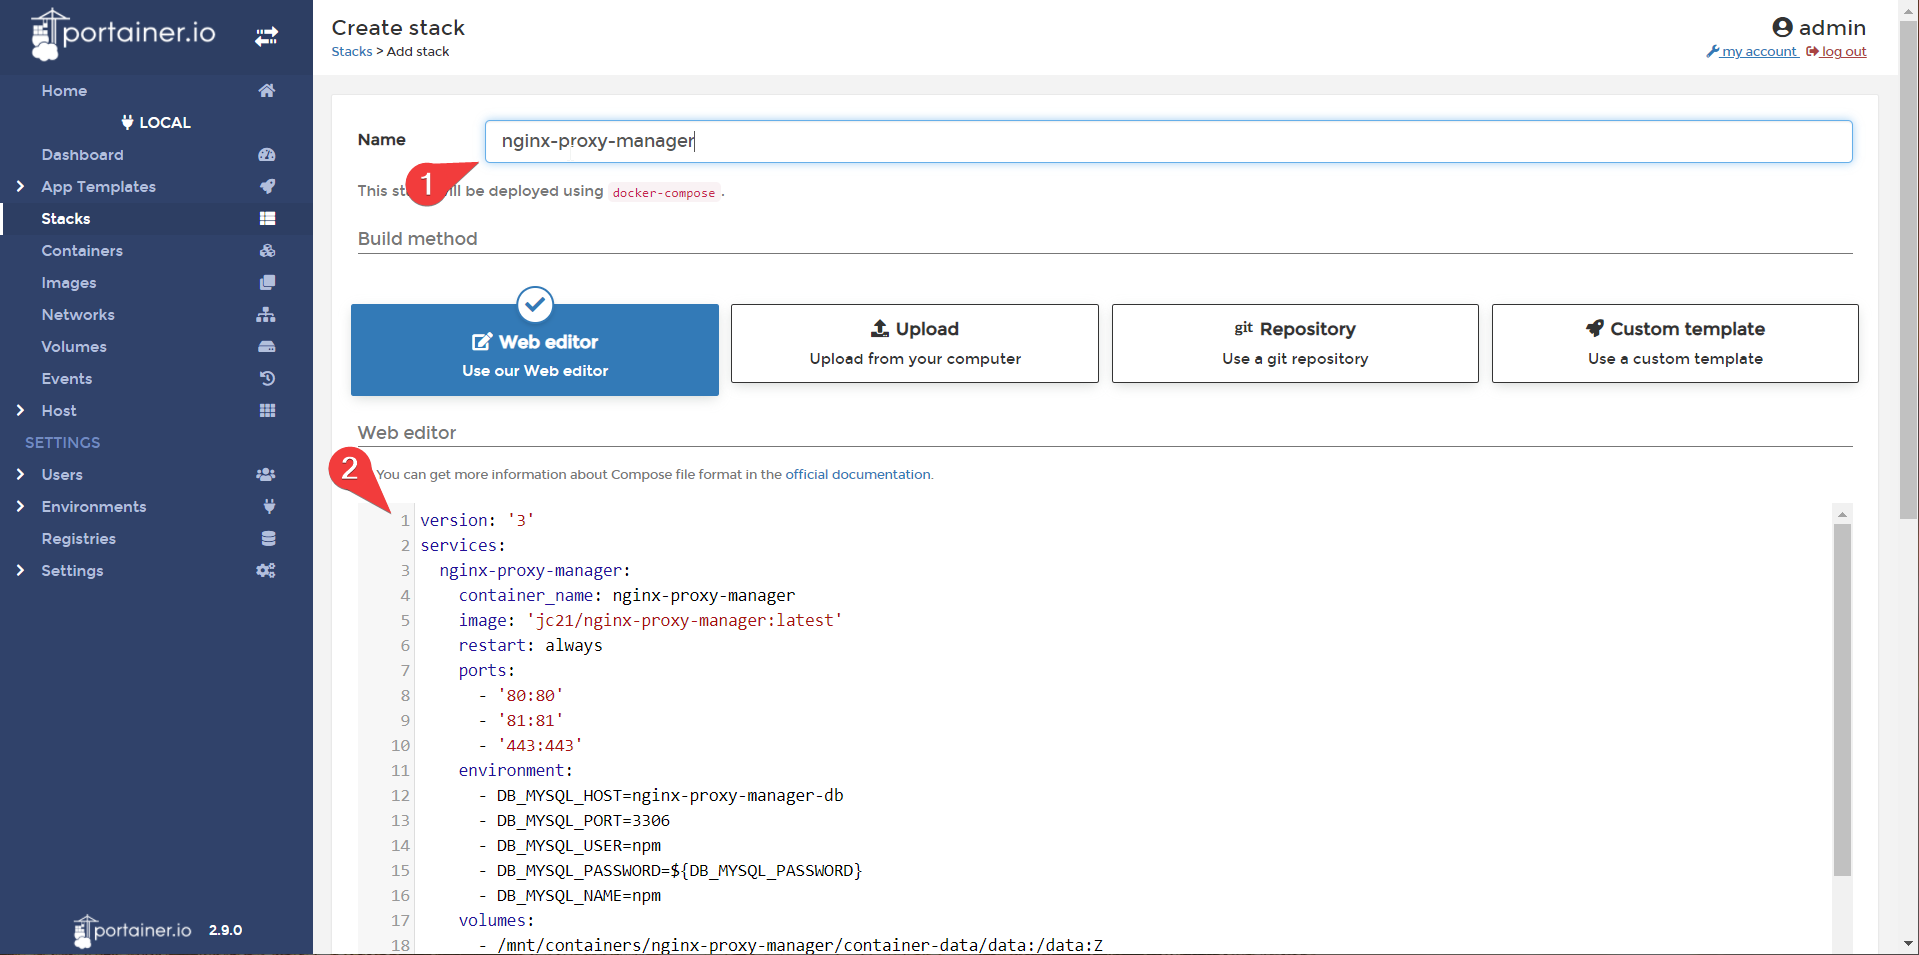
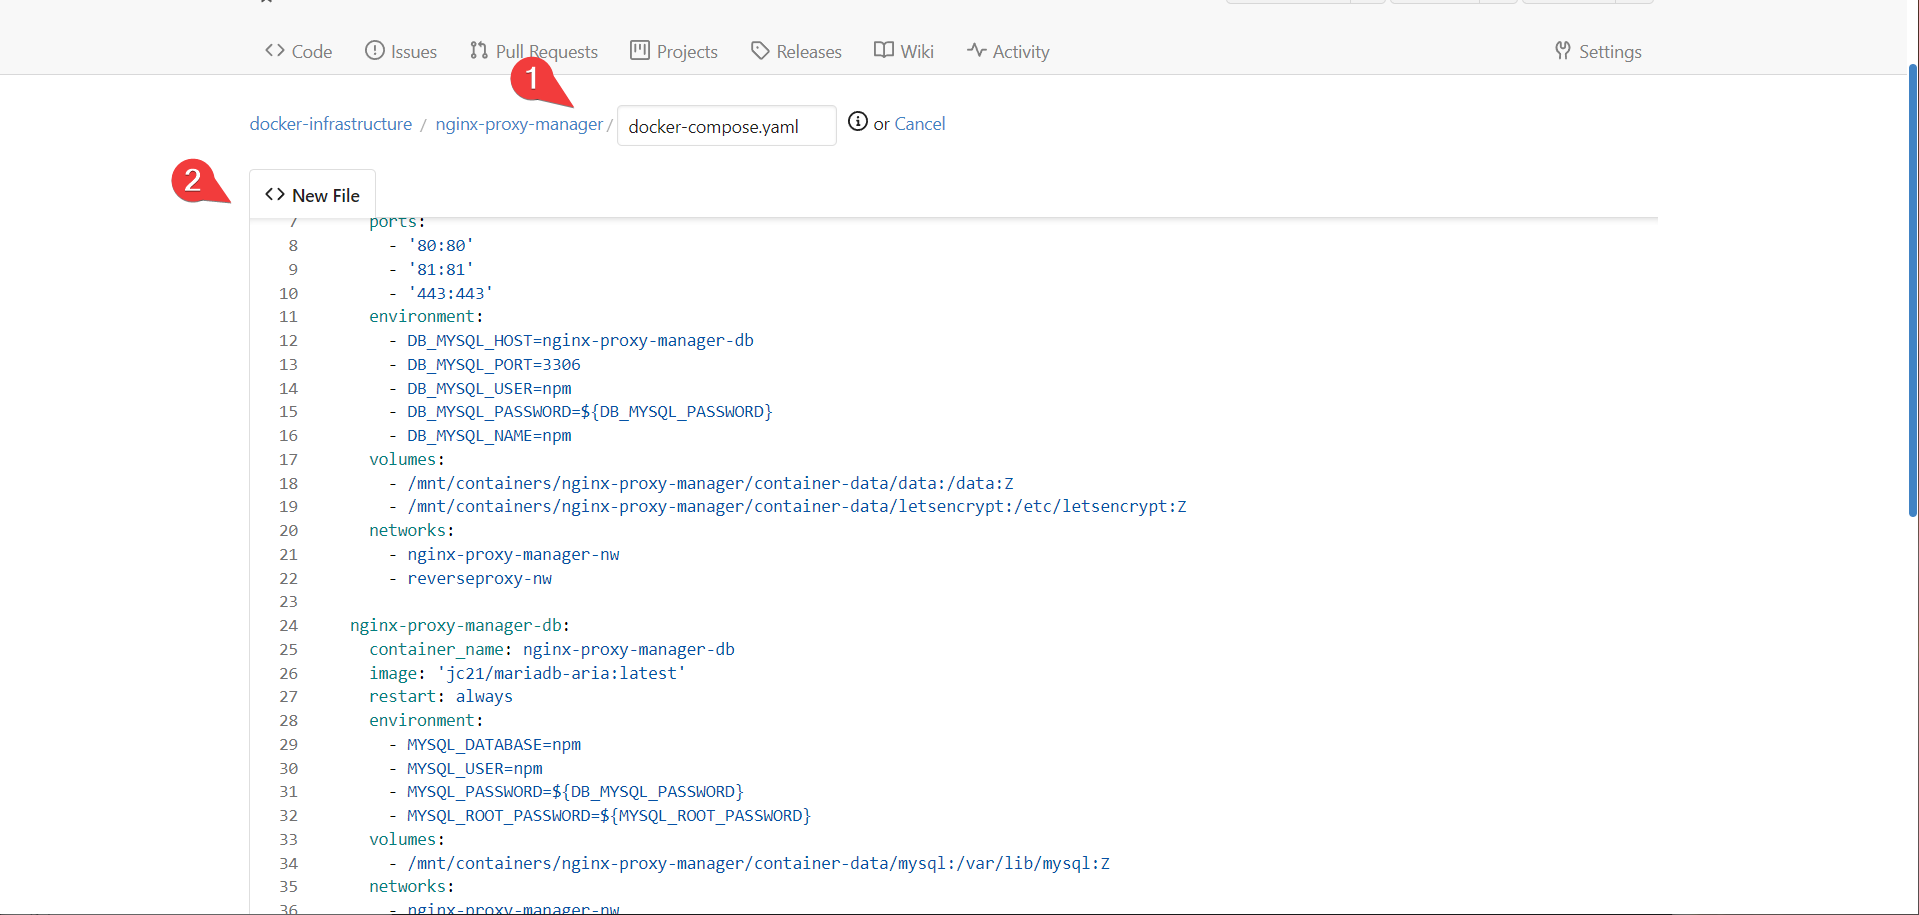
- under stacks create a new stack named nginx-proxy-manager and paste the following (dont’ create yet):
version: '3'
services:
  nginx-proxy-manager:
    container_name: nginx-proxy-manager
    image: 'jc21/nginx-proxy-manager:latest'
    restart: always
    ports:
      - '80:80'
      - '81:81'
      - '443:443'
    environment:
      - DB_MYSQL_HOST=nginx-proxy-manager-db
      - DB_MYSQL_PORT=3306
      - DB_MYSQL_USER=npm
      - DB_MYSQL_PASSWORD=\${DB_MYSQL_PASSWORD}
      - DB_MYSQL_NAME=npm
    volumes:
      - /mnt/containers/nginx-proxy-manager/container-data/data:/data:Z
      - /mnt/containers/nginx-proxy-manager/container-data/letsencrypt:/etc/letsencrypt:Z
    networks:
      - nginx-proxy-manager-nw
      - reverseproxy-nw

  nginx-proxy-manager-db:
    container_name: nginx-proxy-manager-db
    image: 'jc21/mariadb-aria:latest'
    restart: always
    environment:
      - MYSQL_DATABASE=npm
      - MYSQL_USER=npm
      - MYSQL_PASSWORD=\${DB_MYSQL_PASSWORD}
      - MYSQL_ROOT_PASSWORD=\${MYSQL_ROOT_PASSWORD}
    volumes:
      - /mnt/containers/nginx-proxy-manager/container-data/mysql:/var/lib/mysql:Z
    networks:
      - nginx-proxy-manager-nw

networks:
  nginx-proxy-manager-nw:
  reverseproxy-nw:
    external: true
Info
Note that we are actually specifying two networks: A private one that nginx-proxy-manager shares with it’s database, and a shared one to communicate with other services
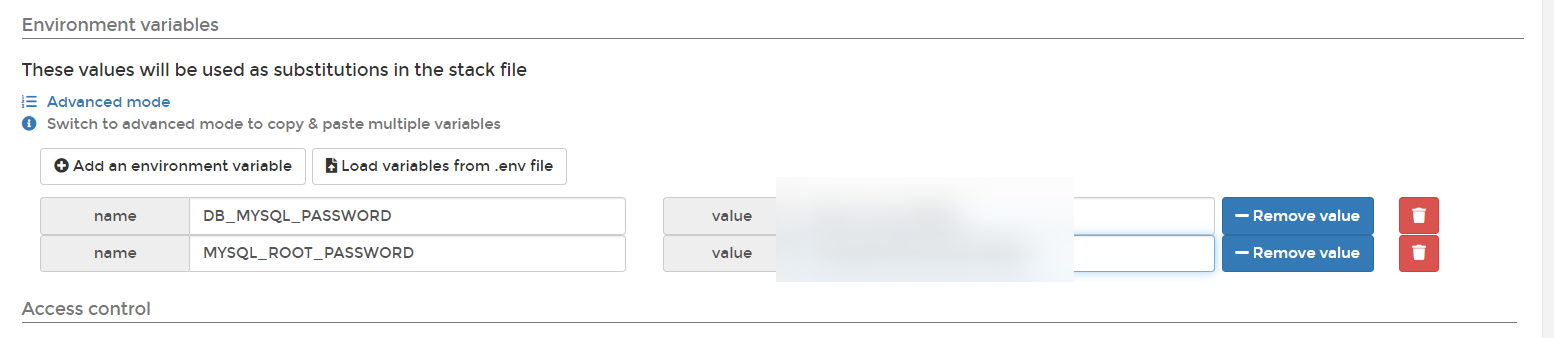
Portainer also allows us to set secrets in the environment variables. Let’s set the DB_MYSQL_PASSWORD and MYSQL_ROOT_PASSWORD variables with randomly generated passwords.
Deploy after that. if all’s gone well, you can access the nginx proxy manager portal on https://(your-ip):81. You can log in with admin@example.com/changeme
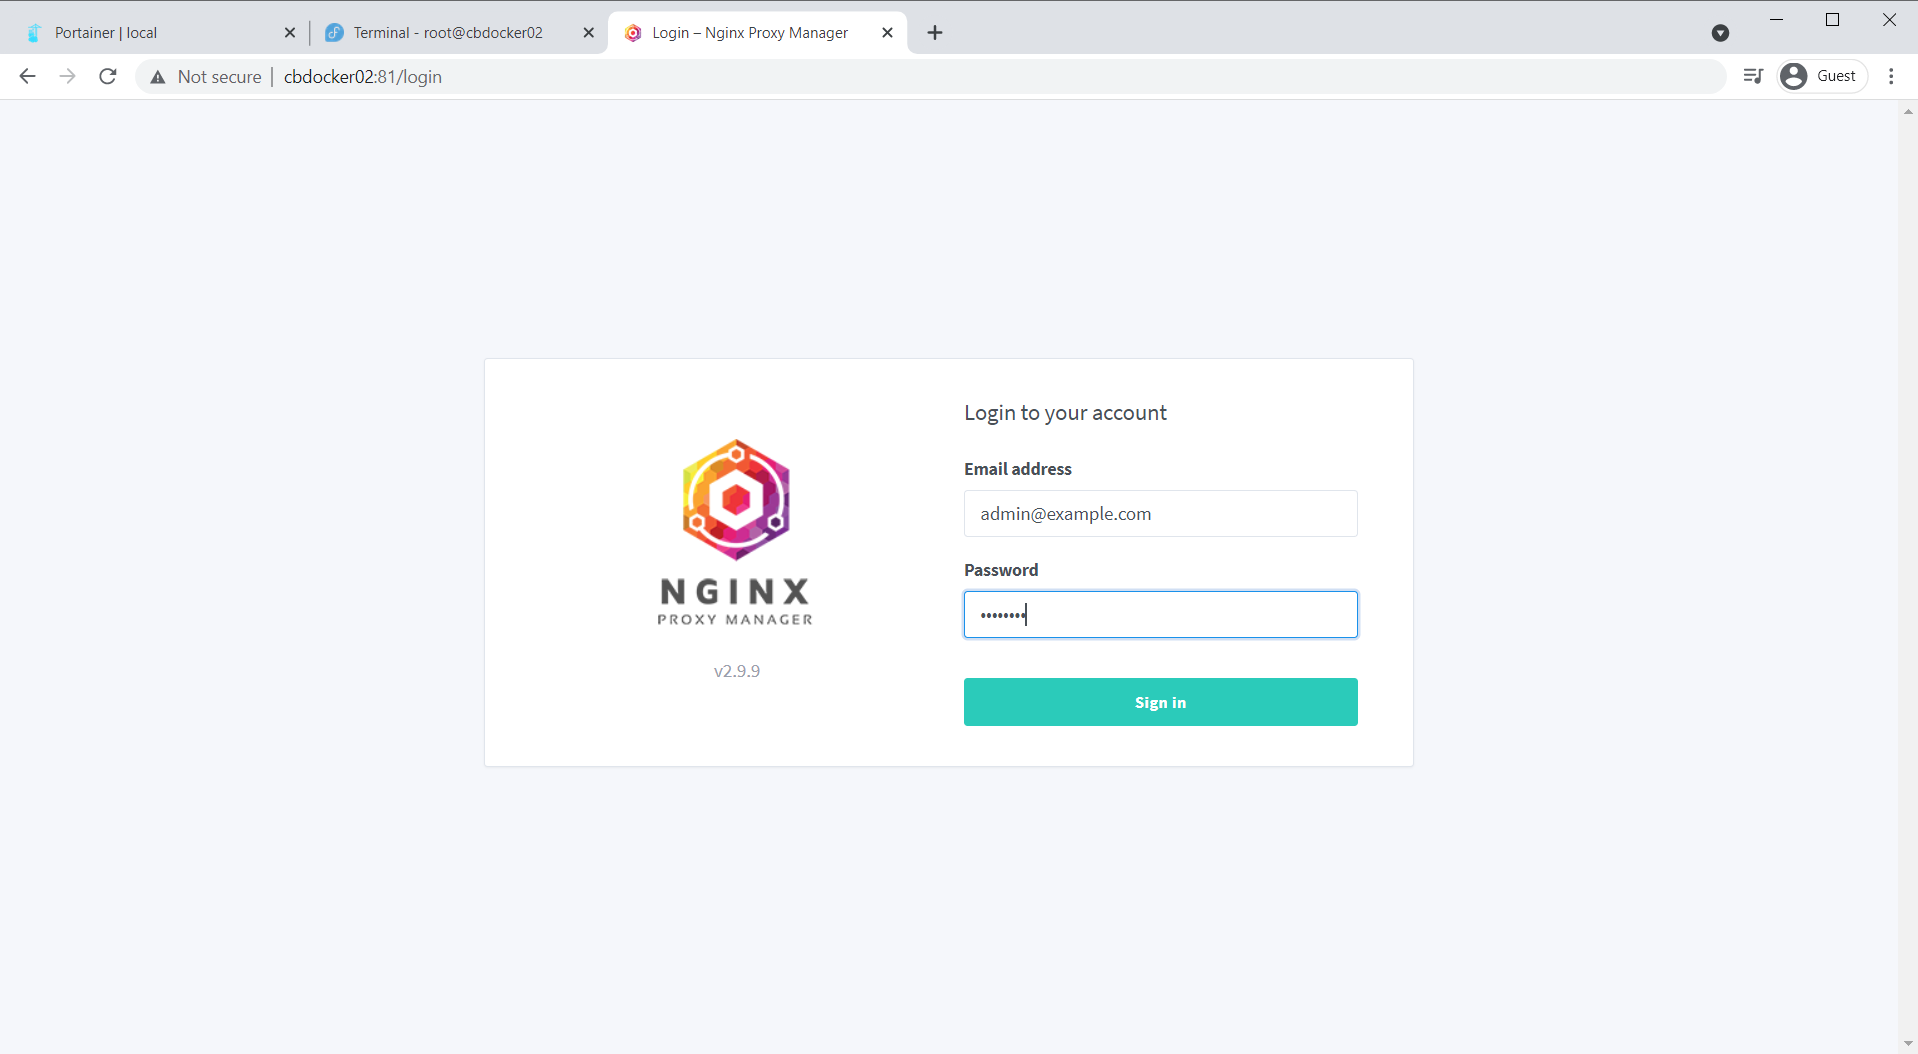
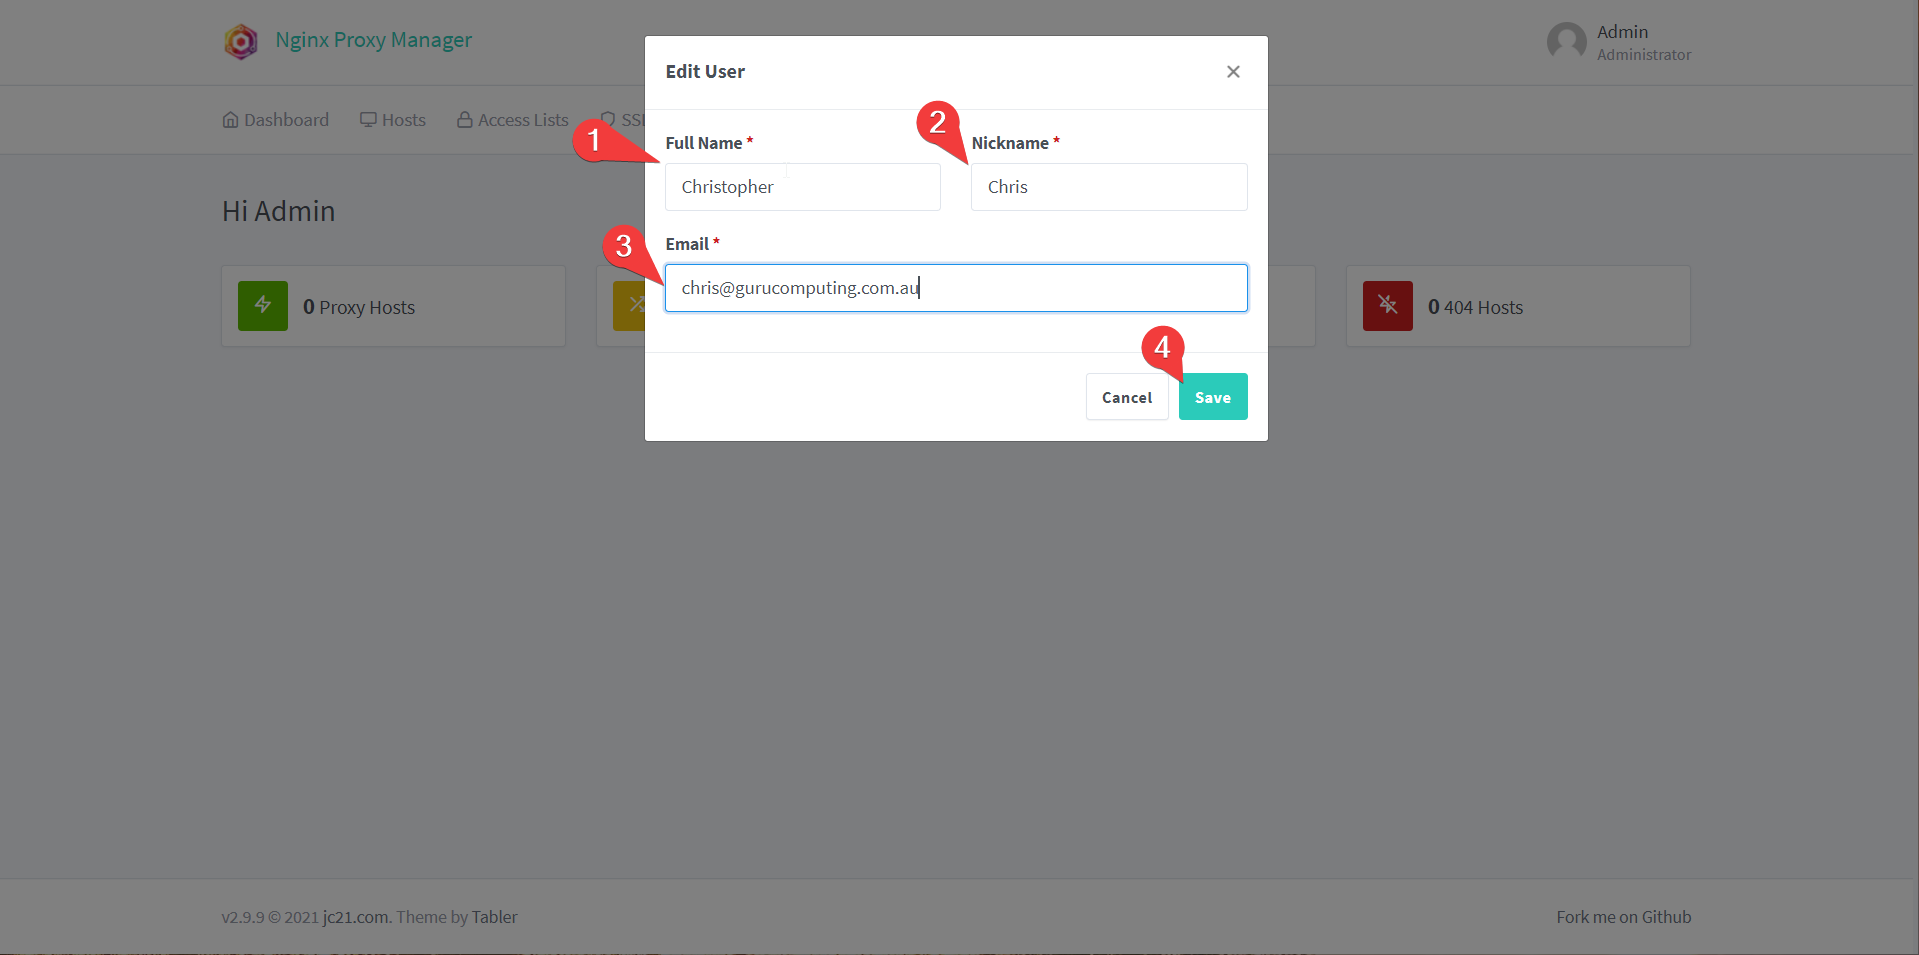
Set your name, nickname, and Email, set a new password on the next page, and we got another dashboard! Success!
Proxying your Content
Alright, so we have a web interface on port 81. Now what? To do anything useful with a reverse proxy, you need to stop using IP addresses and start using DNS names. Which means you need to declare your DNS names somewhere. That can be:
- In your hosts file on your computer (bleh)
- On your router/DNS server (preferred)
- At your public DNS register pointed to your public IP with port forwarding
Warning
If you do want to forward ports, do so with extreme caution. Your web services get exposed to the big scary internet! You do not have to for this guide.
Setting a DNS entry for Gitea
My router is not your router, but let’s show how to set some DNS entries using OPNSense. Let’s do Gitea first
- In the web interface, navigate to services→unbound DNS→Overrides and press the plus under Host Overrides
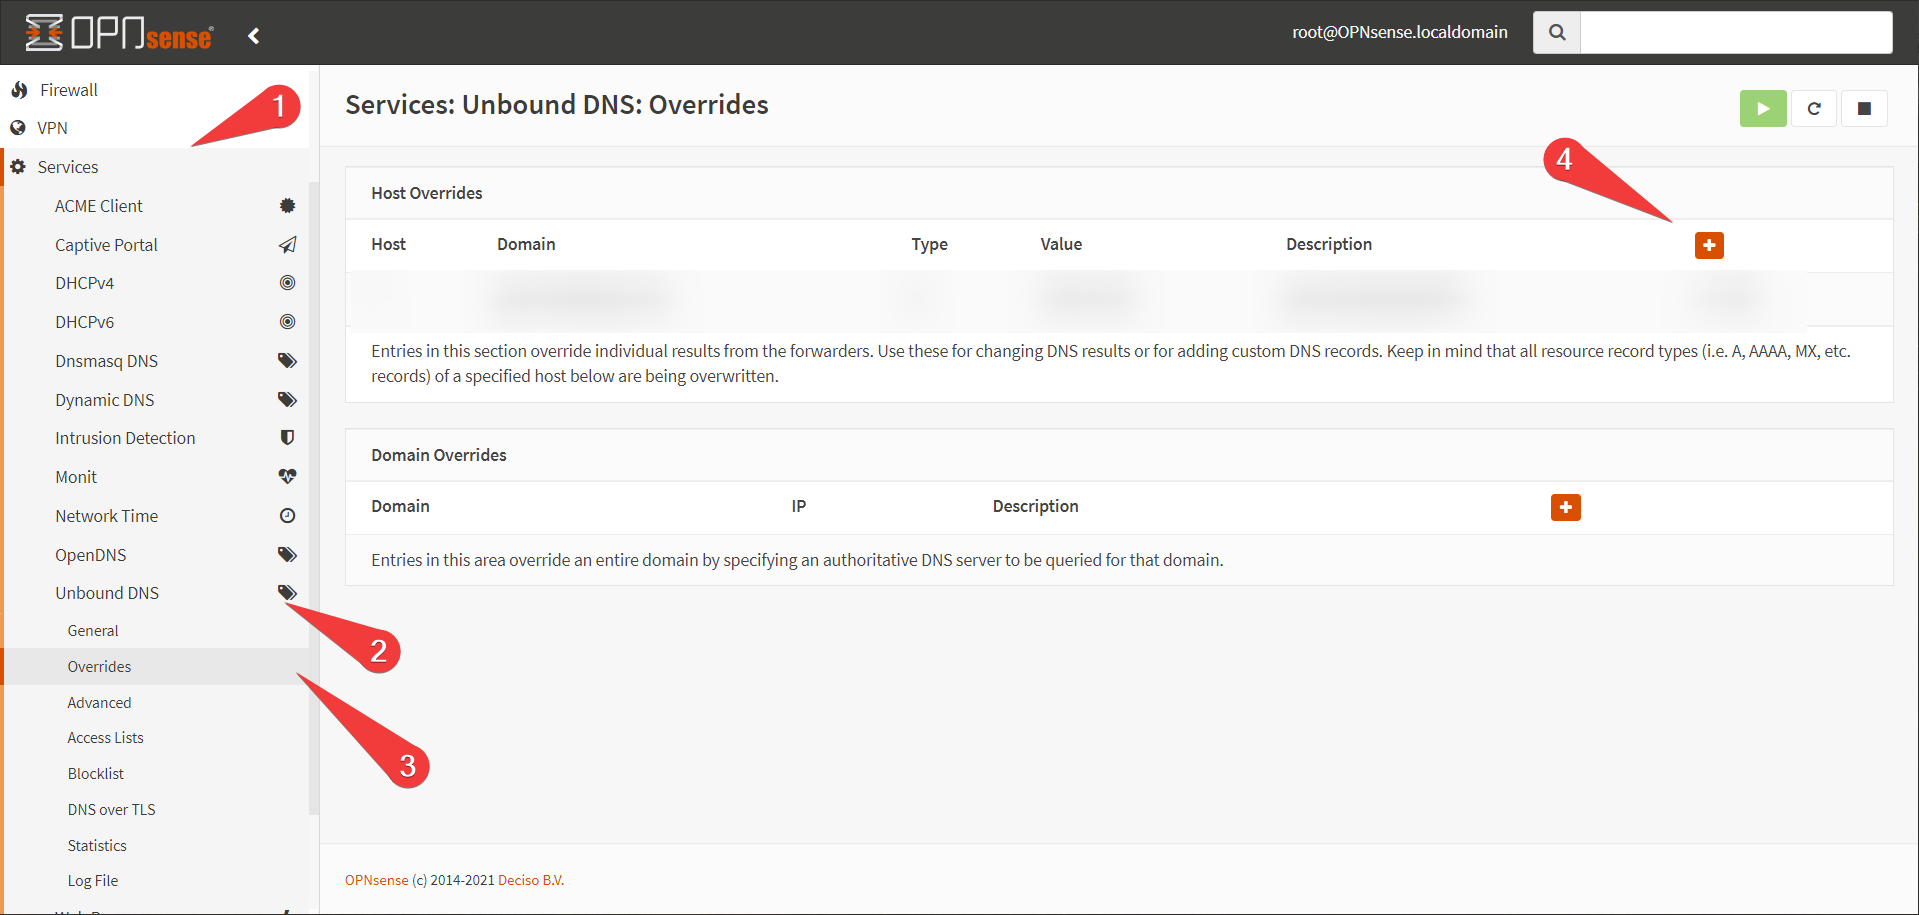
- Create an entry for
git.<yourdomain>.<tld>. This guide will usegit.gurucomputing.com.au. You will have to do this for every service you want to proxy (unless you use a wildcard, like*.gurucomputing.com.au). Point it at the IP of your docker host.
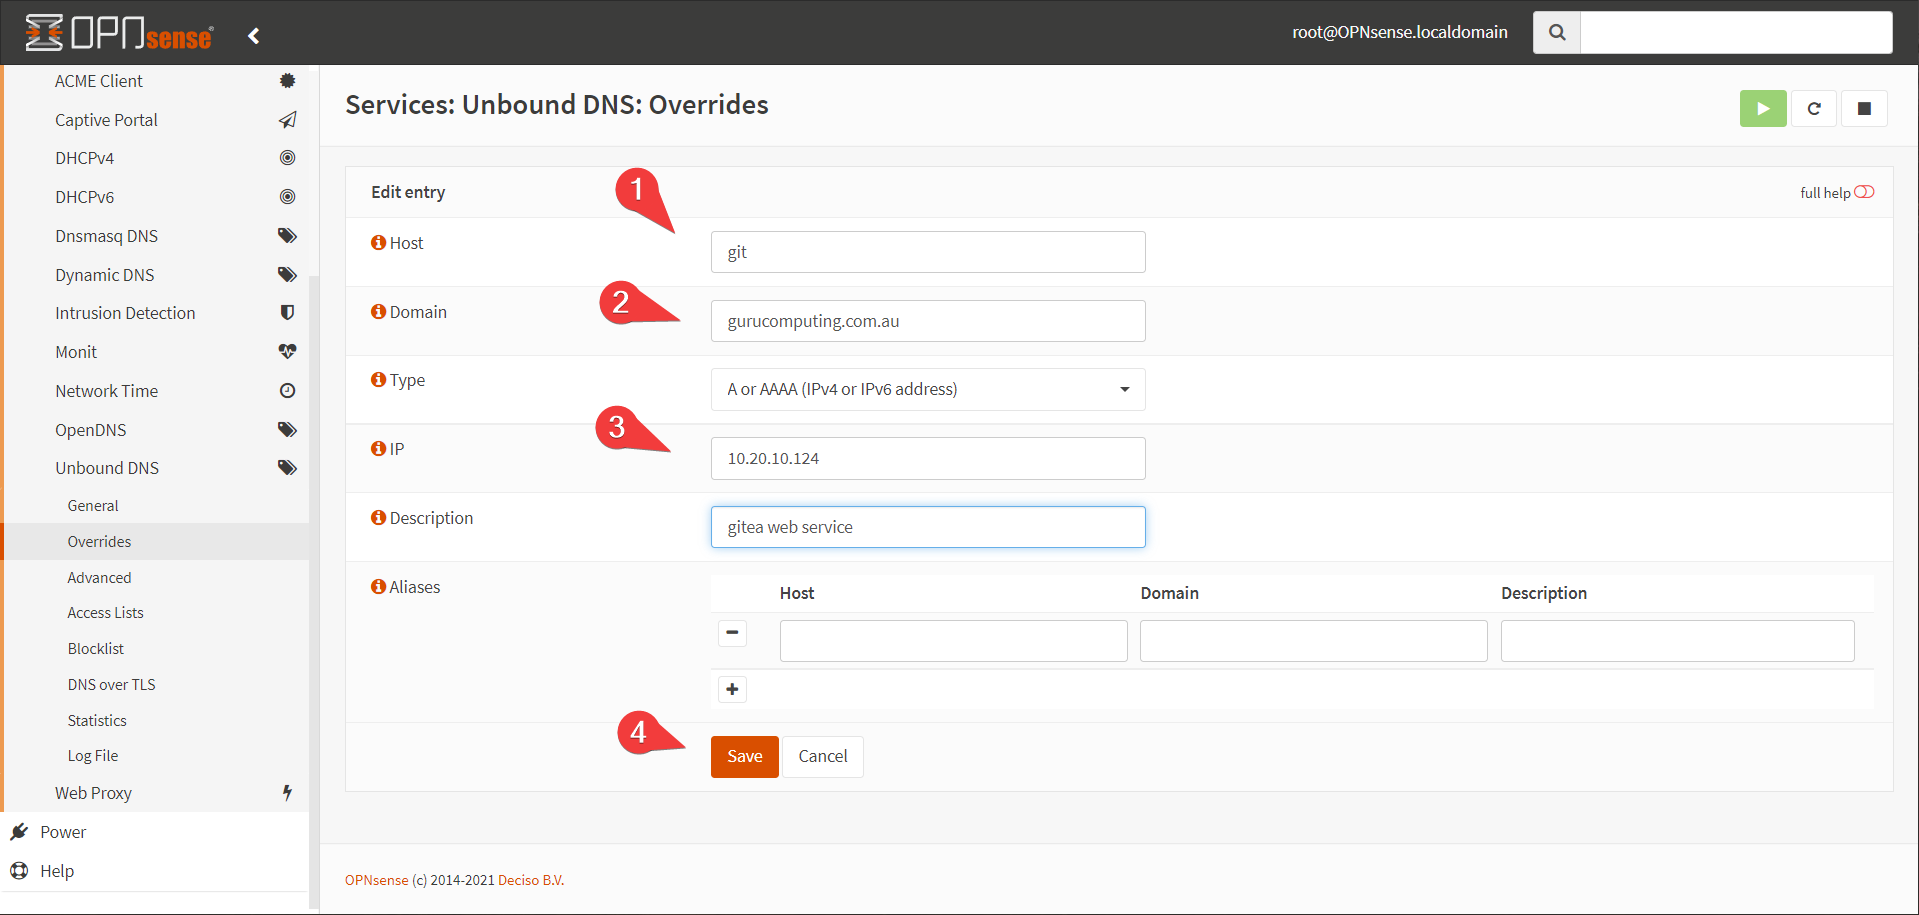
That’s it!
Proxying Gitea
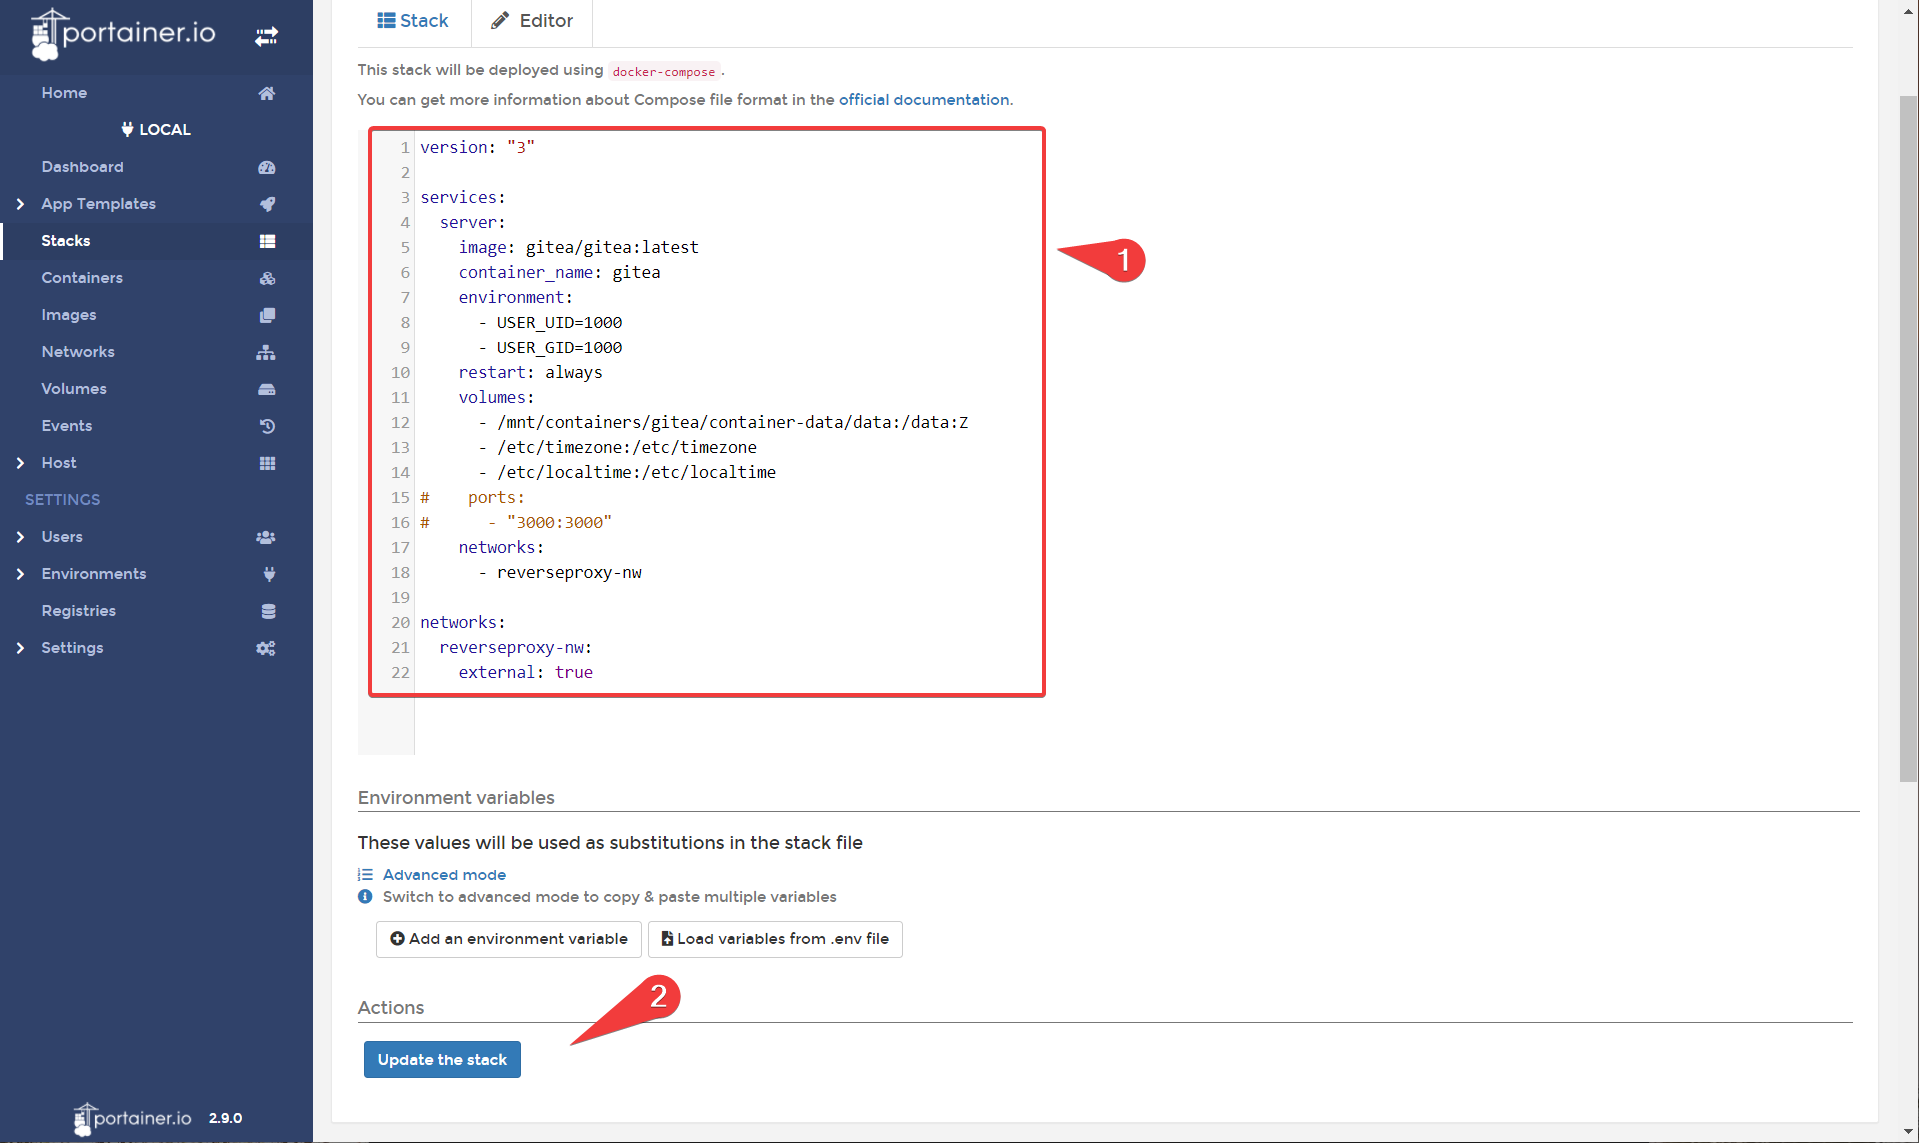
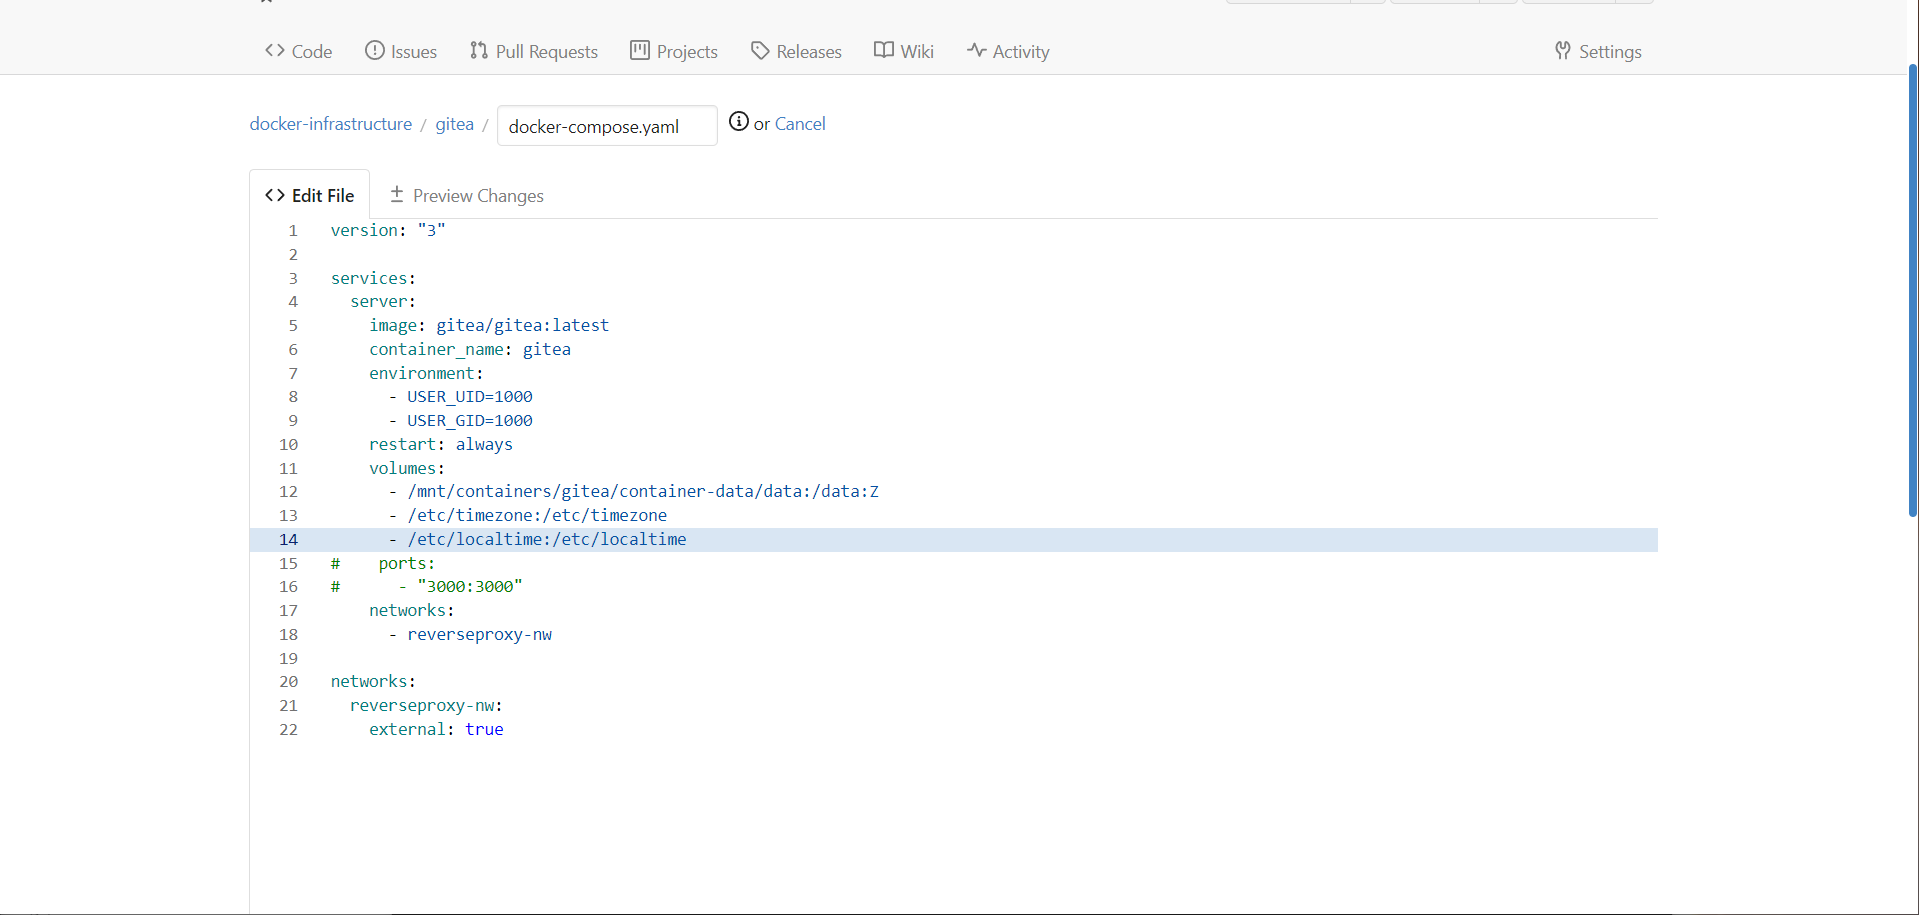
Alright, now how do we proxy Gitea? Well first we need to add Gitea to the proxy network.
- In Portainer, head to the stacks category and choose the gitea stack.
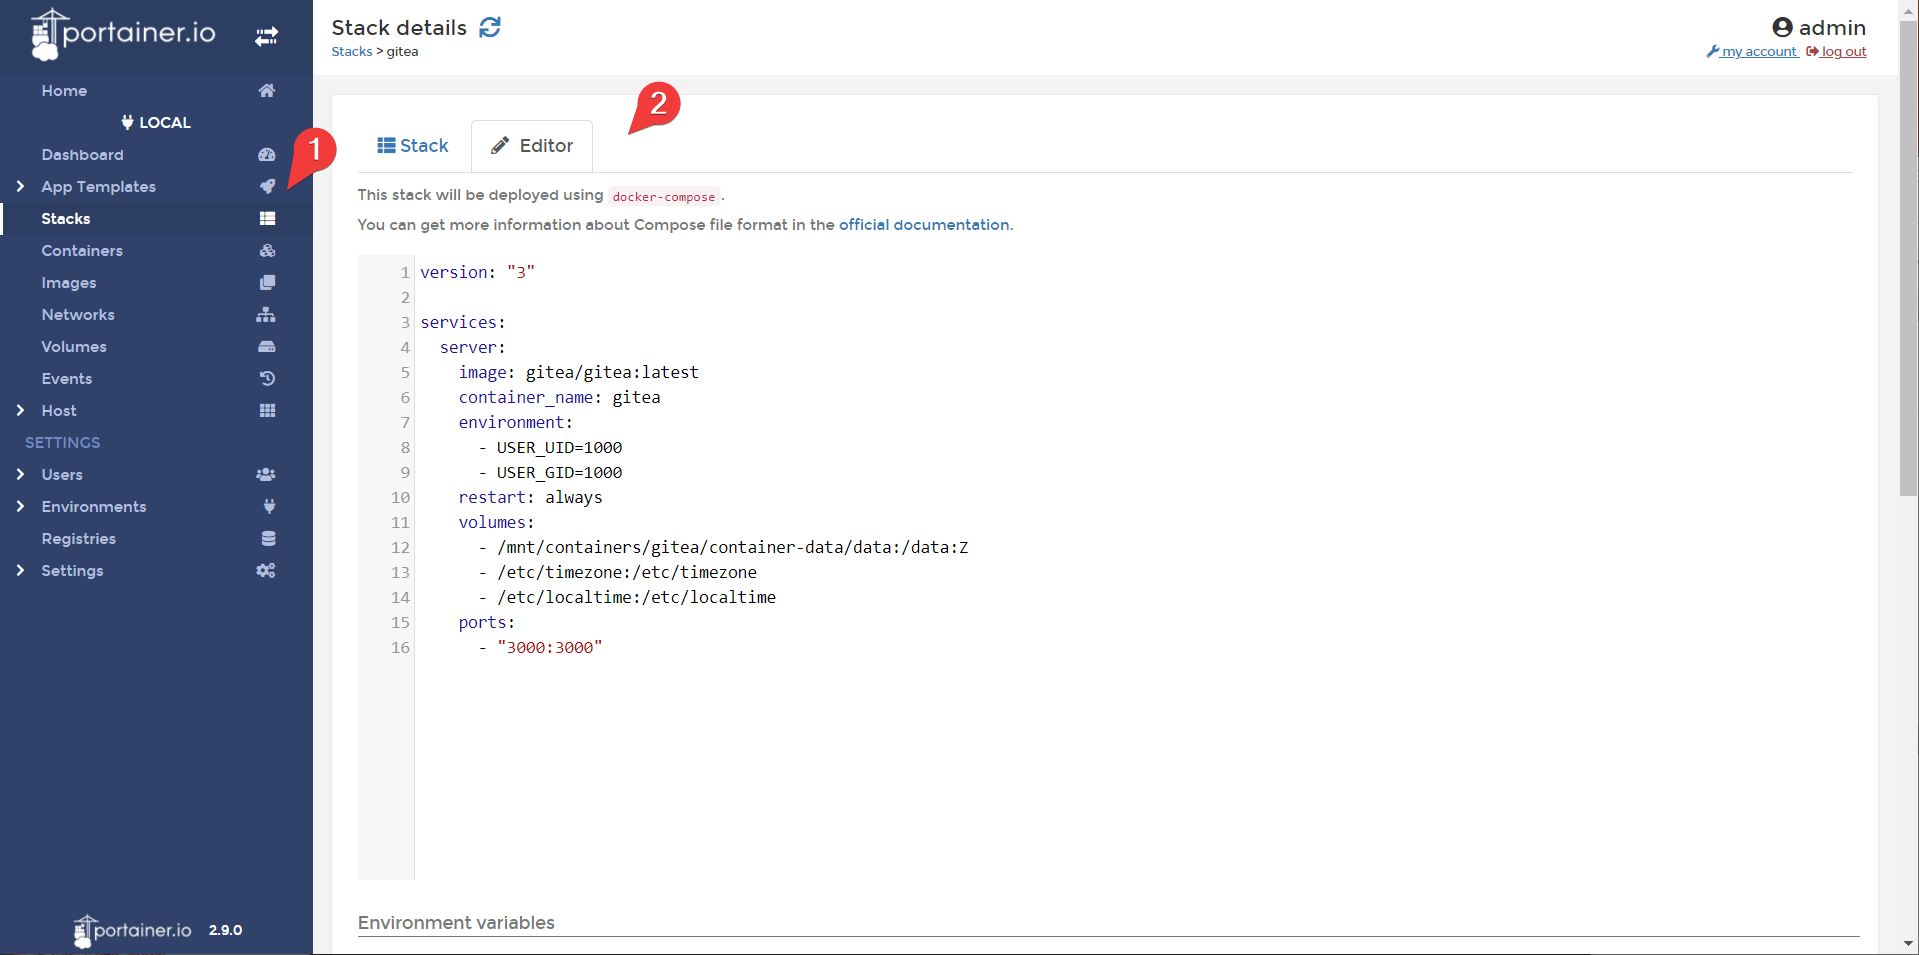
- Edit your stack to include the following, and update the stack.
Info
We are commenting out the ports so gitea is no longer exposed on port 3000. We are also adding gitea to the reverse proxy network.
version: "3"

services:
  server:
    image: gitea/gitea:latest
    container_name: gitea
    environment:
      - USER_UID=1000
      - USER_GID=1000
    restart: always
    volumes:
      - /mnt/containers/gitea/container-data/data:/data:Z
      - /etc/timezone:/etc/timezone
      - /etc/localtime:/etc/localtime
#    ports:
#      - "3000:3000"
    networks:
      - reverseproxy-nw

networks:
  reverseproxy-nw:
    external: true
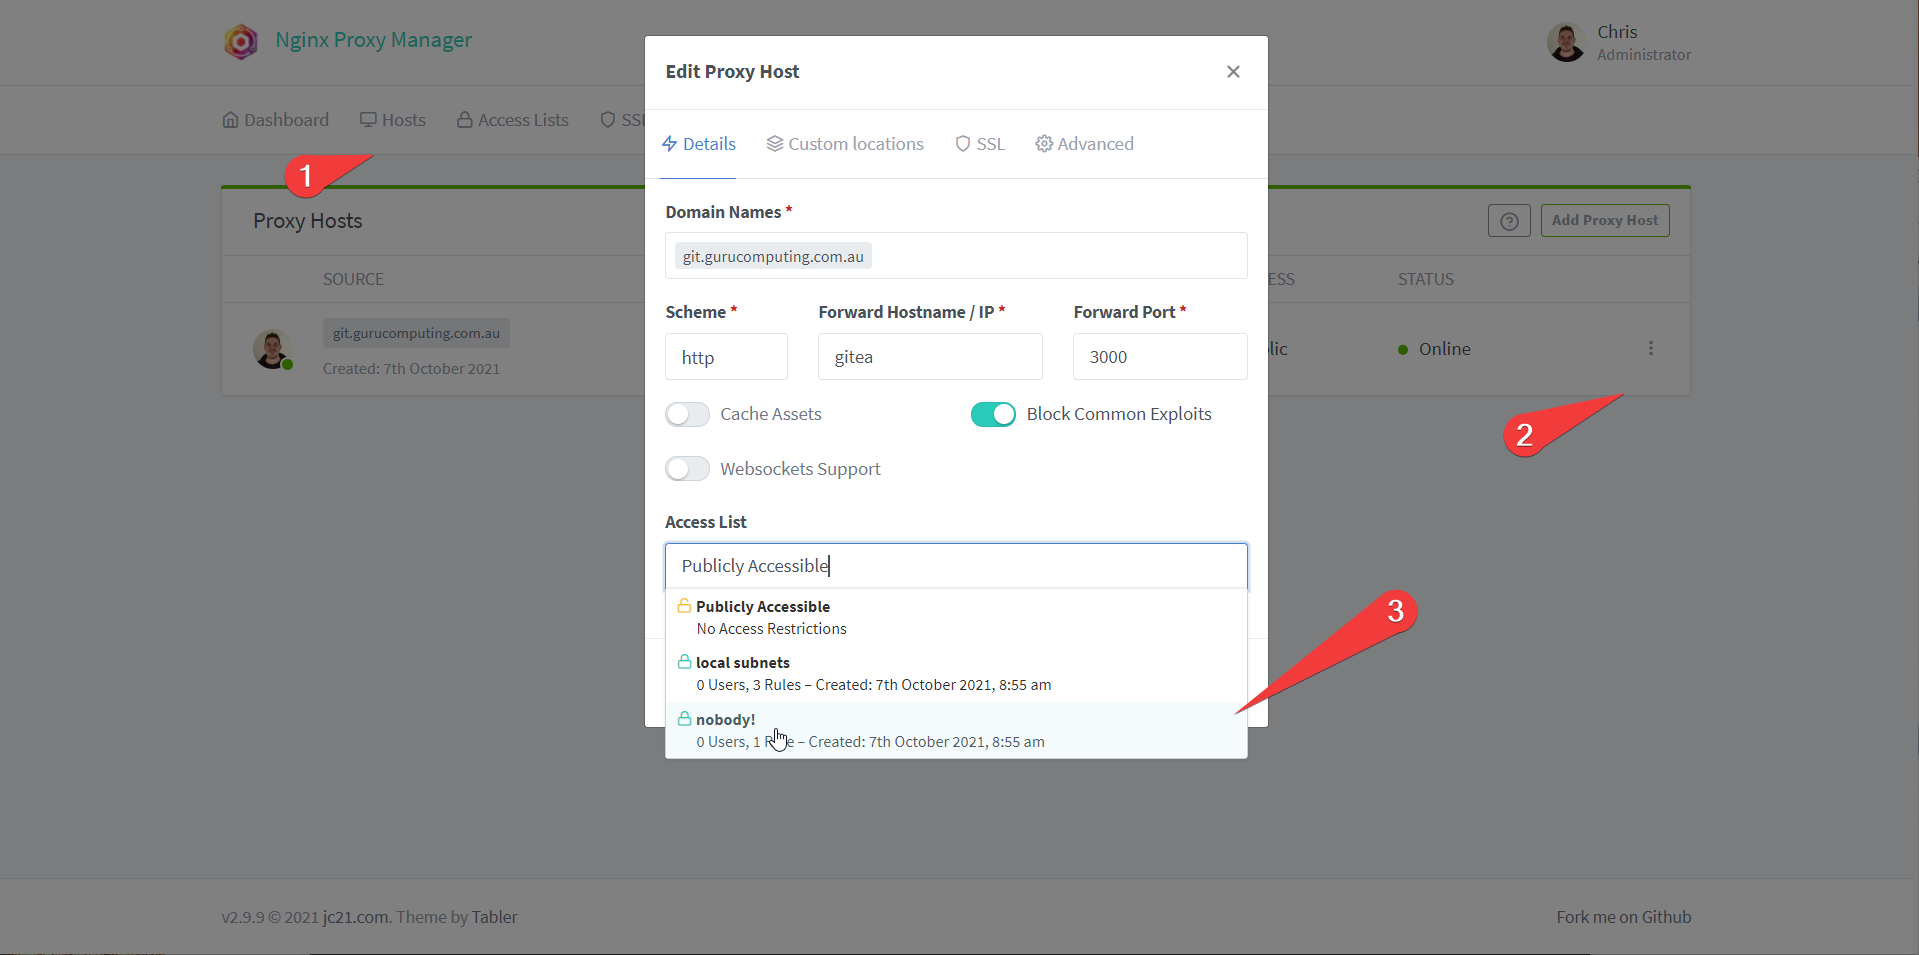
- In Nginx Proxy Manager head to proxy hosts
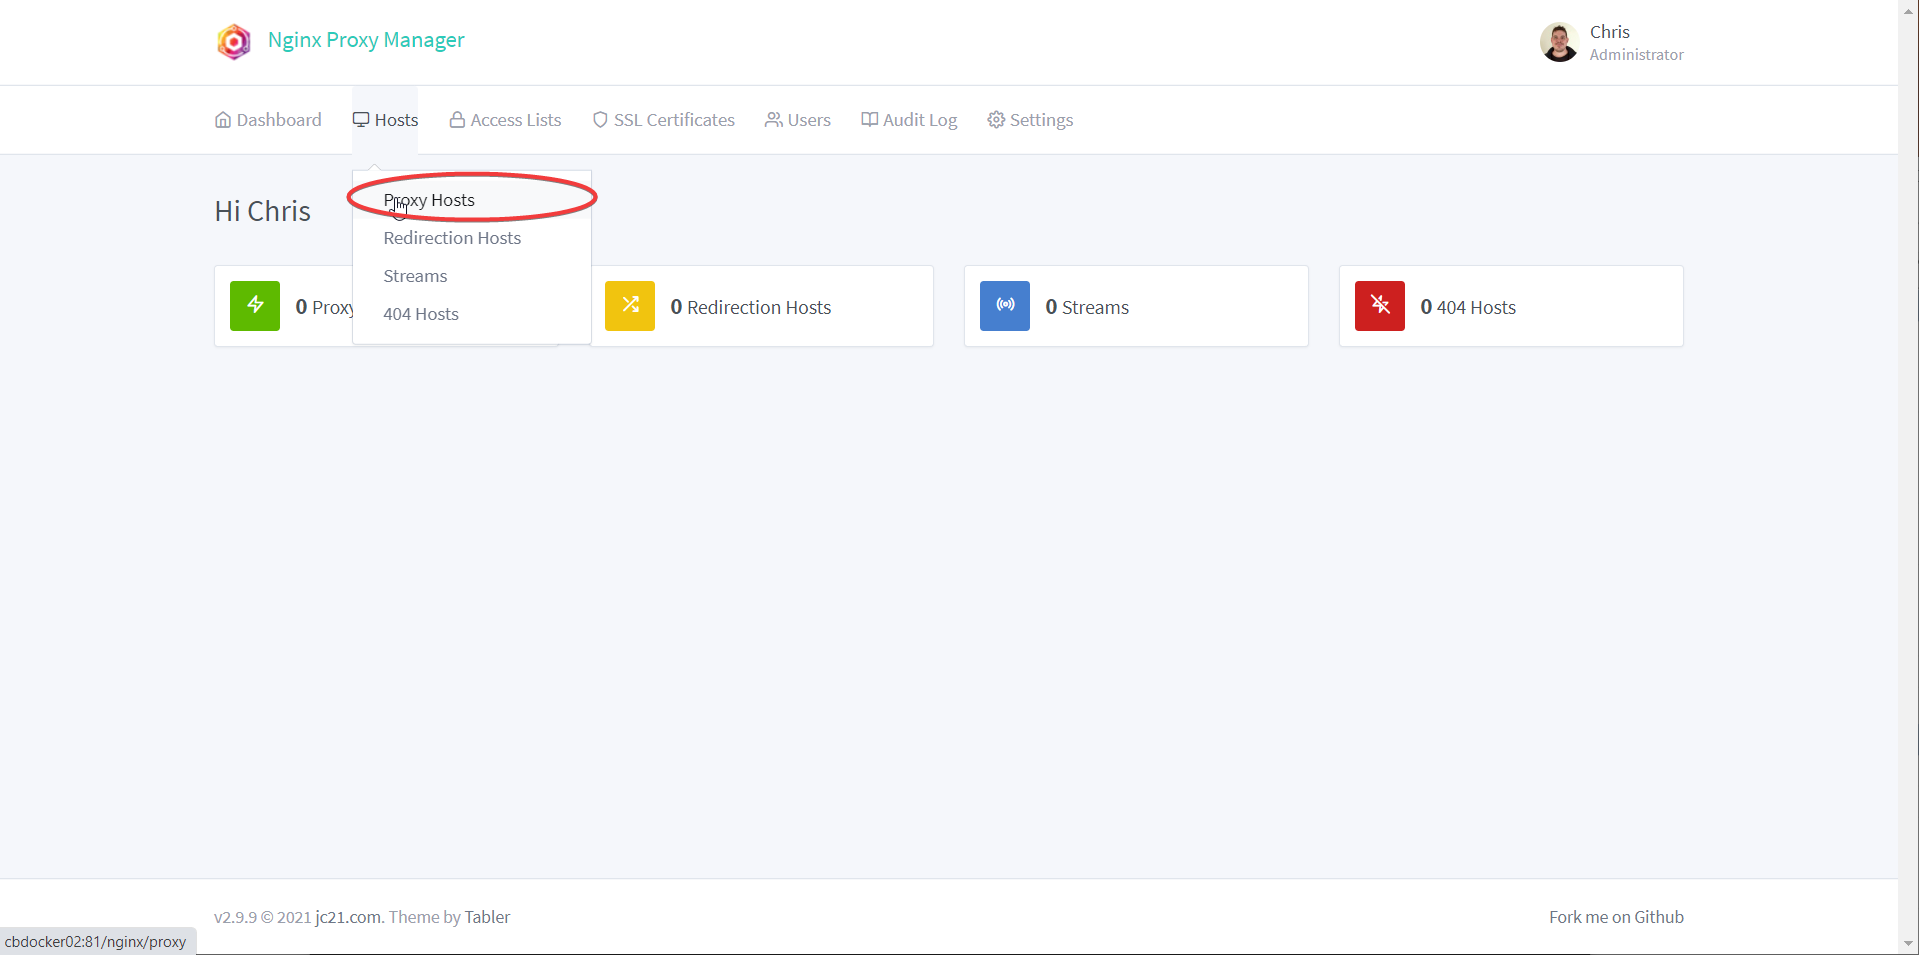
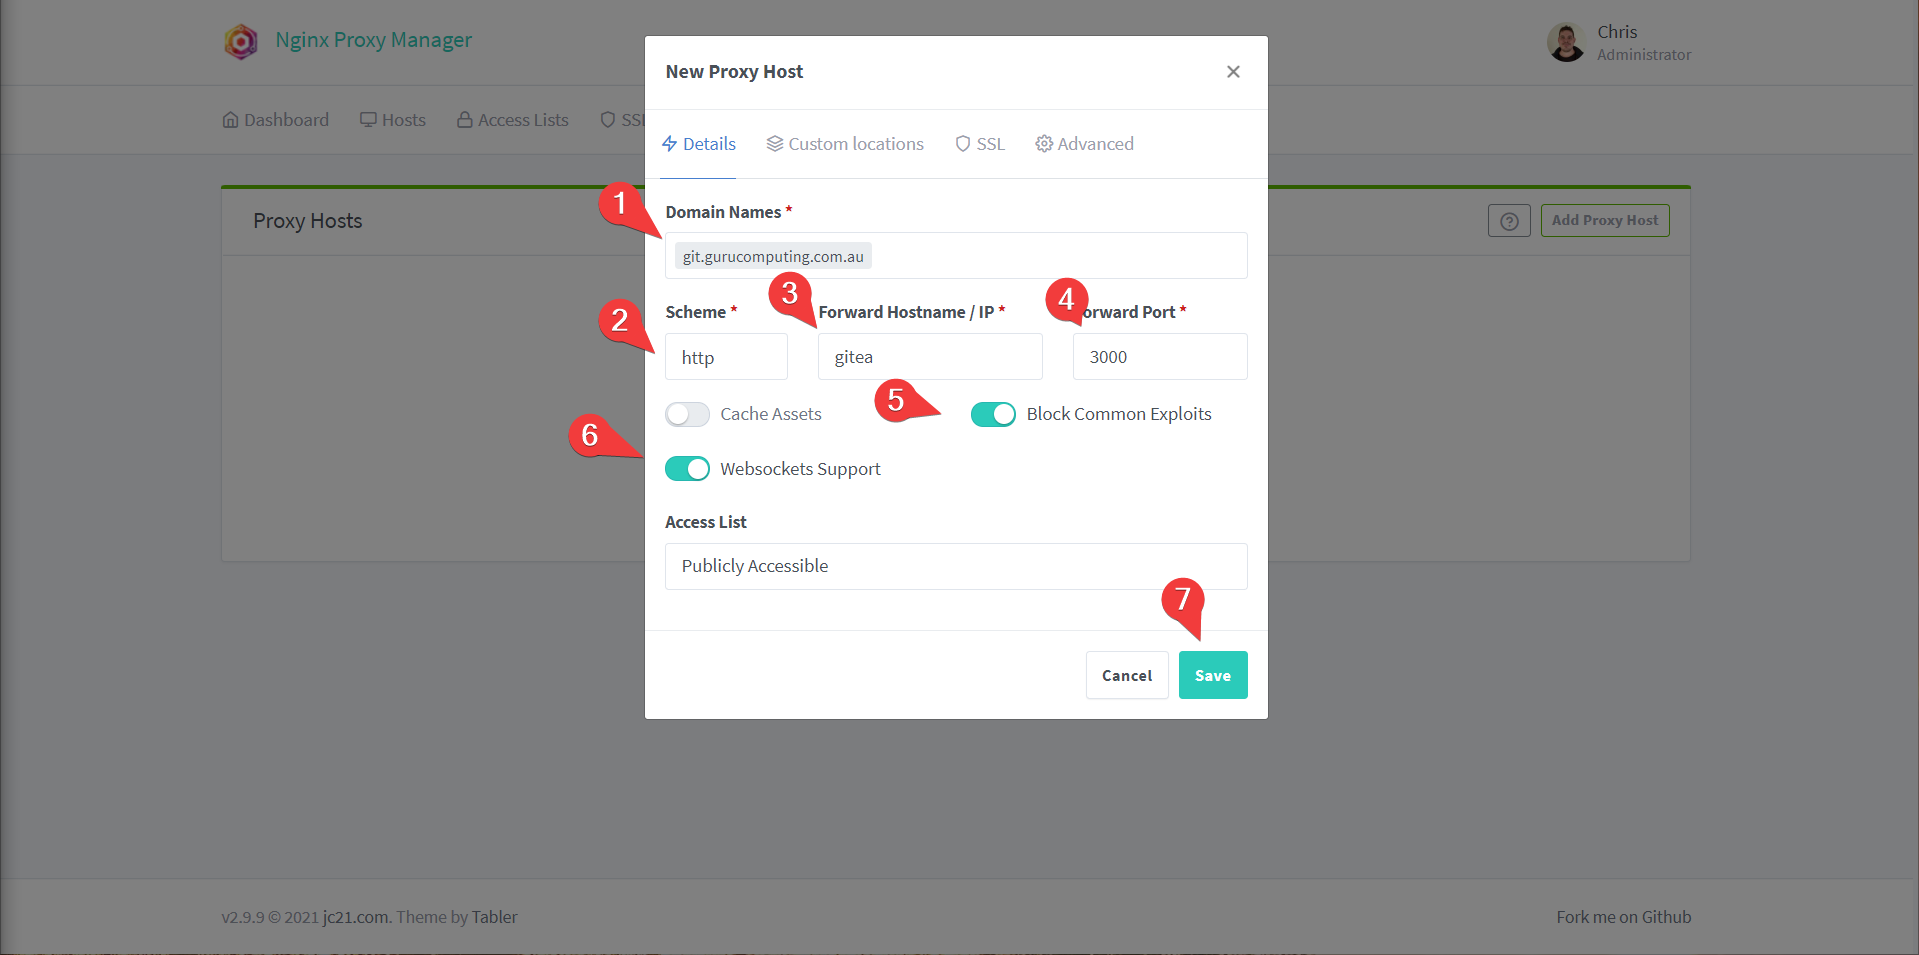
- Add a proxy host and set the following:
- Domain Names to
git.<yourdomain>.<tld> - The hostname to
gitea(docker will automatically route containers on the same network to their container name) - Port to
3000 - Turn on
block common exploitsandwebsockets support(may as well, even if some services don’t use websockets) - Save
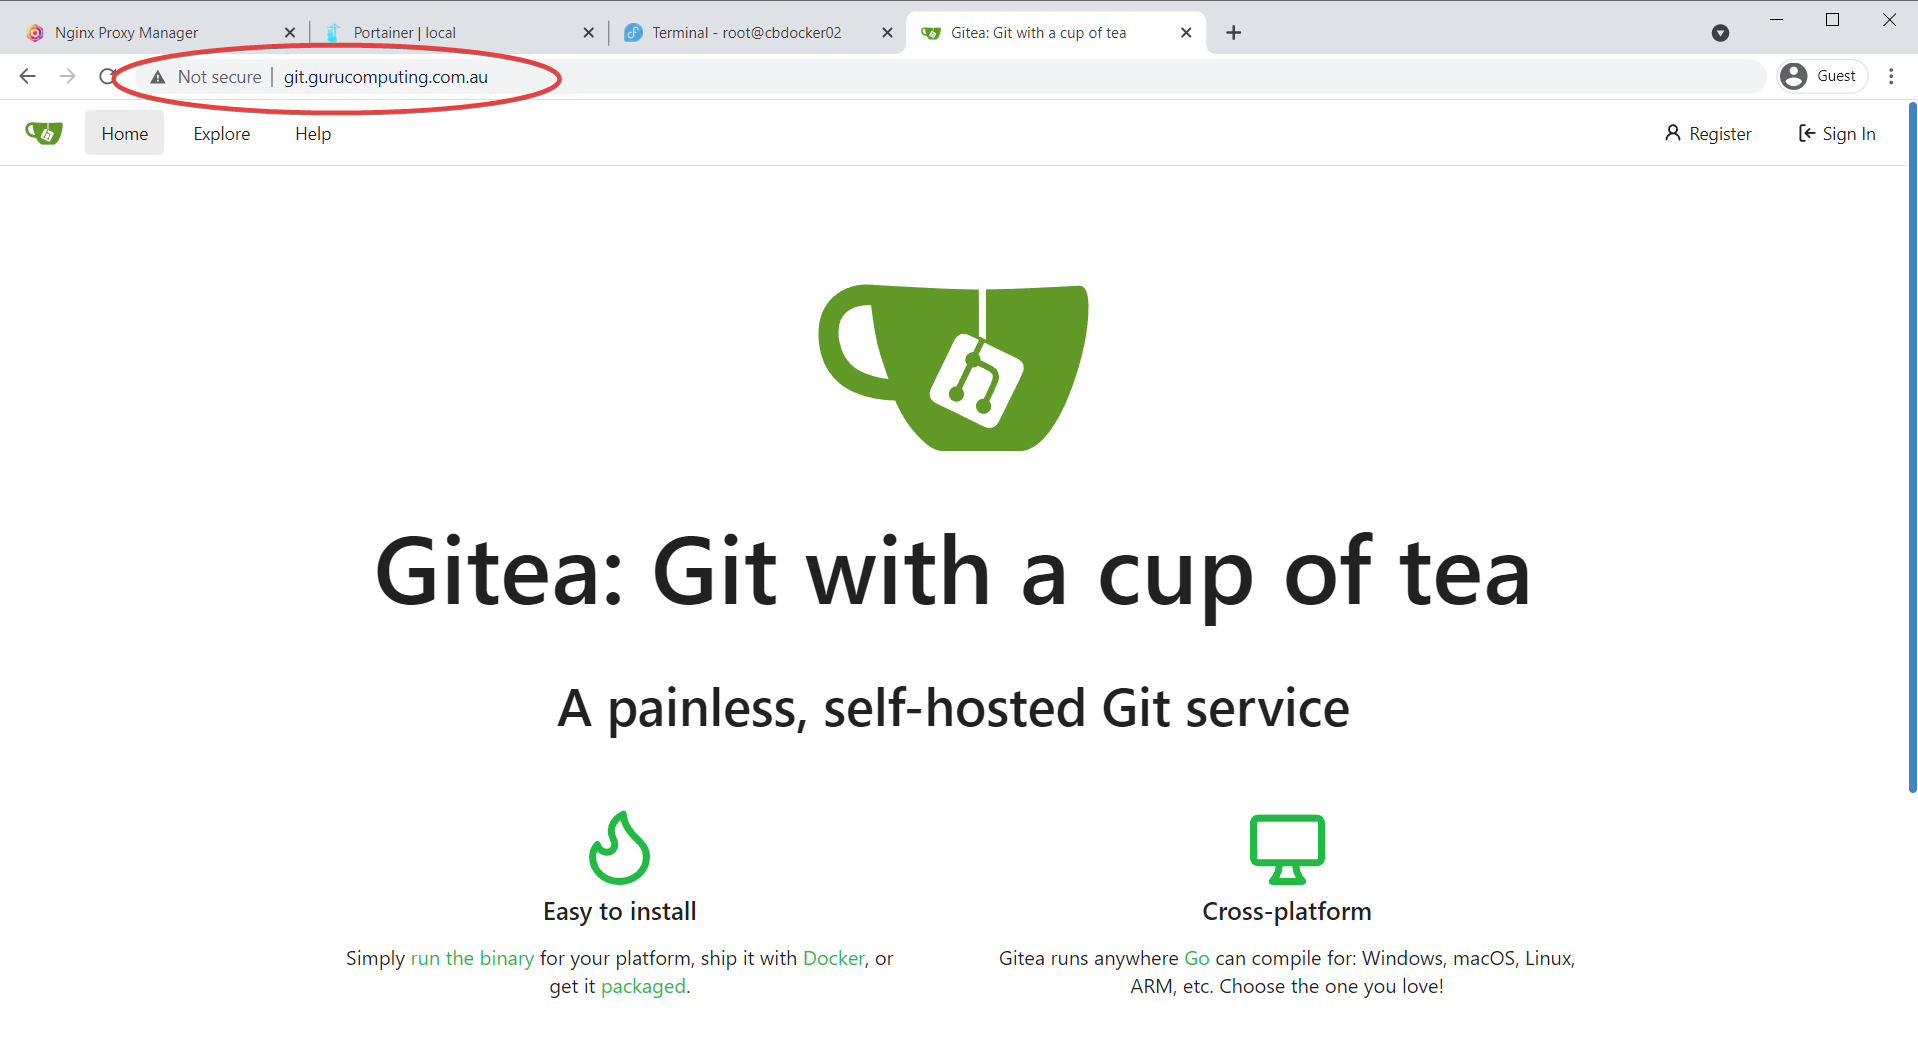
And just like that, if you navigate to http://git.<yourdomain>.<tld> you should be able to access gitea!
Before you forget
edit your gitea config in gitea and update it! Always document as you go, and always make sure that your documentation does not deviate from the reality (that way lies madness).
Same for your nginx proxy manager configuration:
IP Whitelisting
Alright! So how does this help us? Well it means we can now serve multiple web services on standard ports just by using the right DNS address. Cool! But that’s really only one of the benefits of a reverse proxy. We can also secure our content.
Let’s say we are exposing our docker host to the web (we’re not, and don’t necessarily need to). We want to restrict who can access sensitive services (like your git).
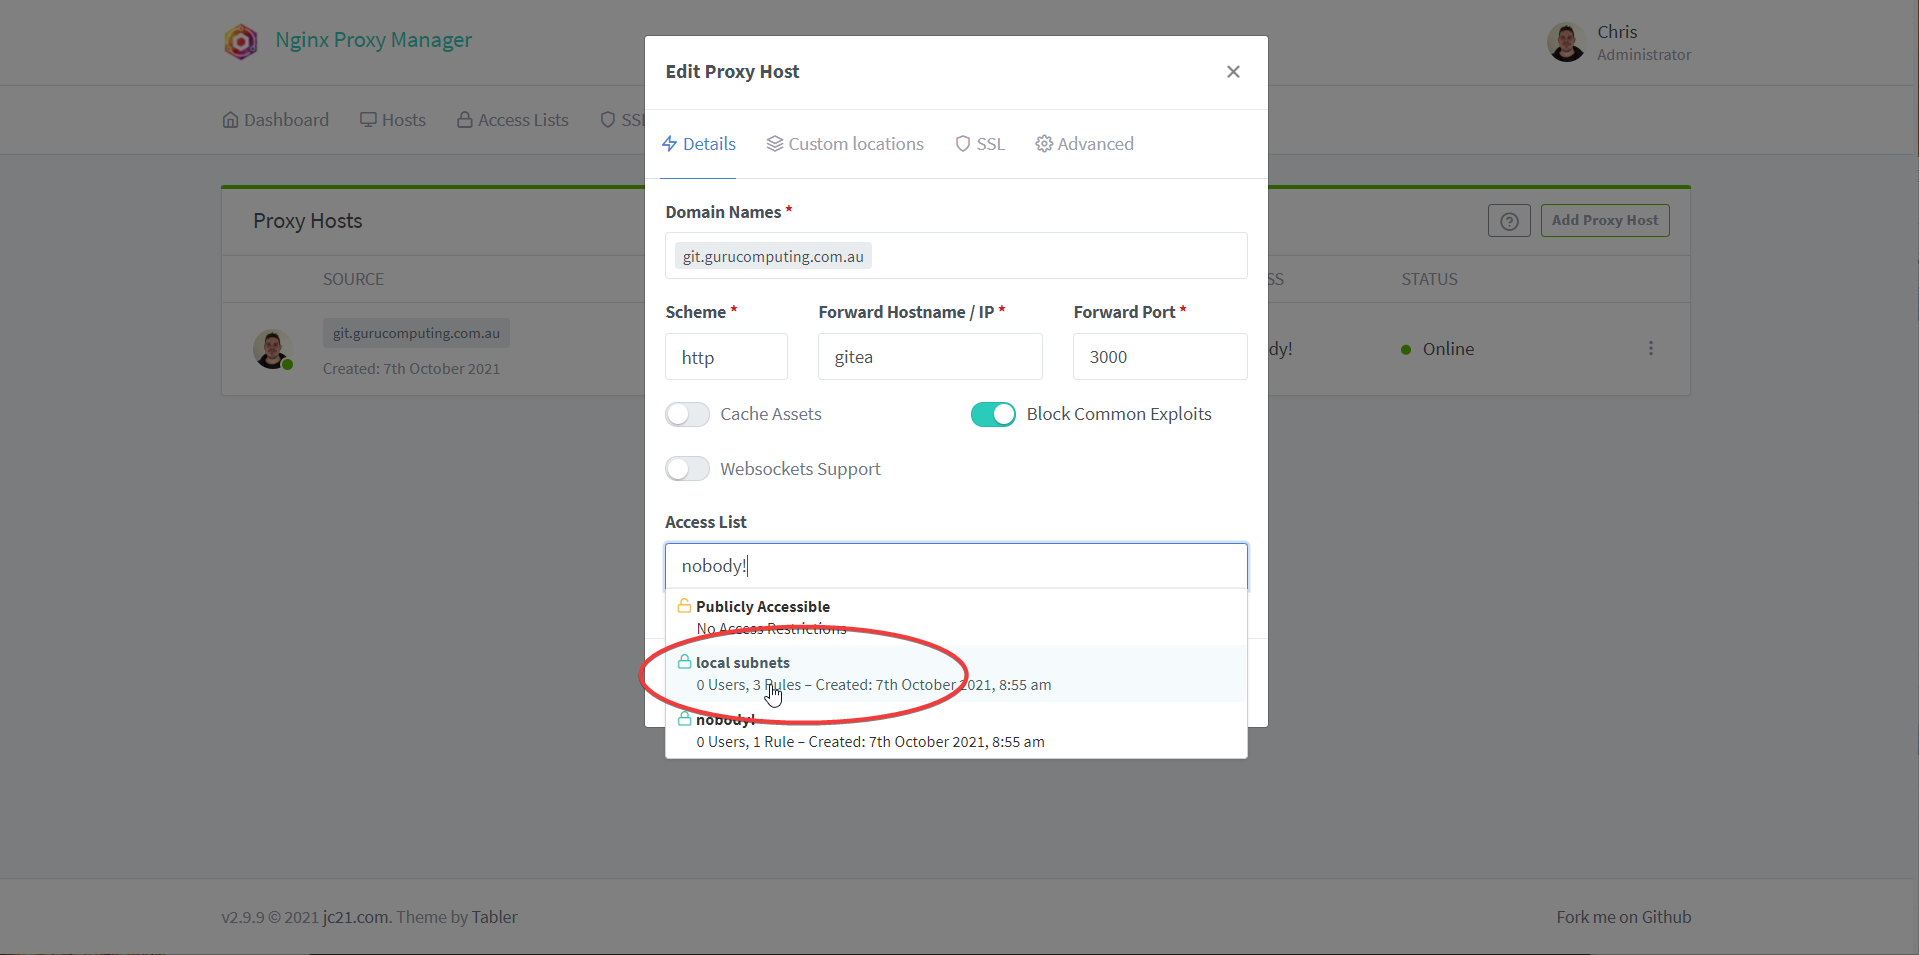
- In the Nginx Proxy Manager, let’s set two Access Lists. One called nobody! and one called local subnets. Set nobody! to allow 127.0.0.1 and local subnets to
10.0.0.0/8,192.168.0.0/16, and172.16.0.0/12. You can see me do this below:

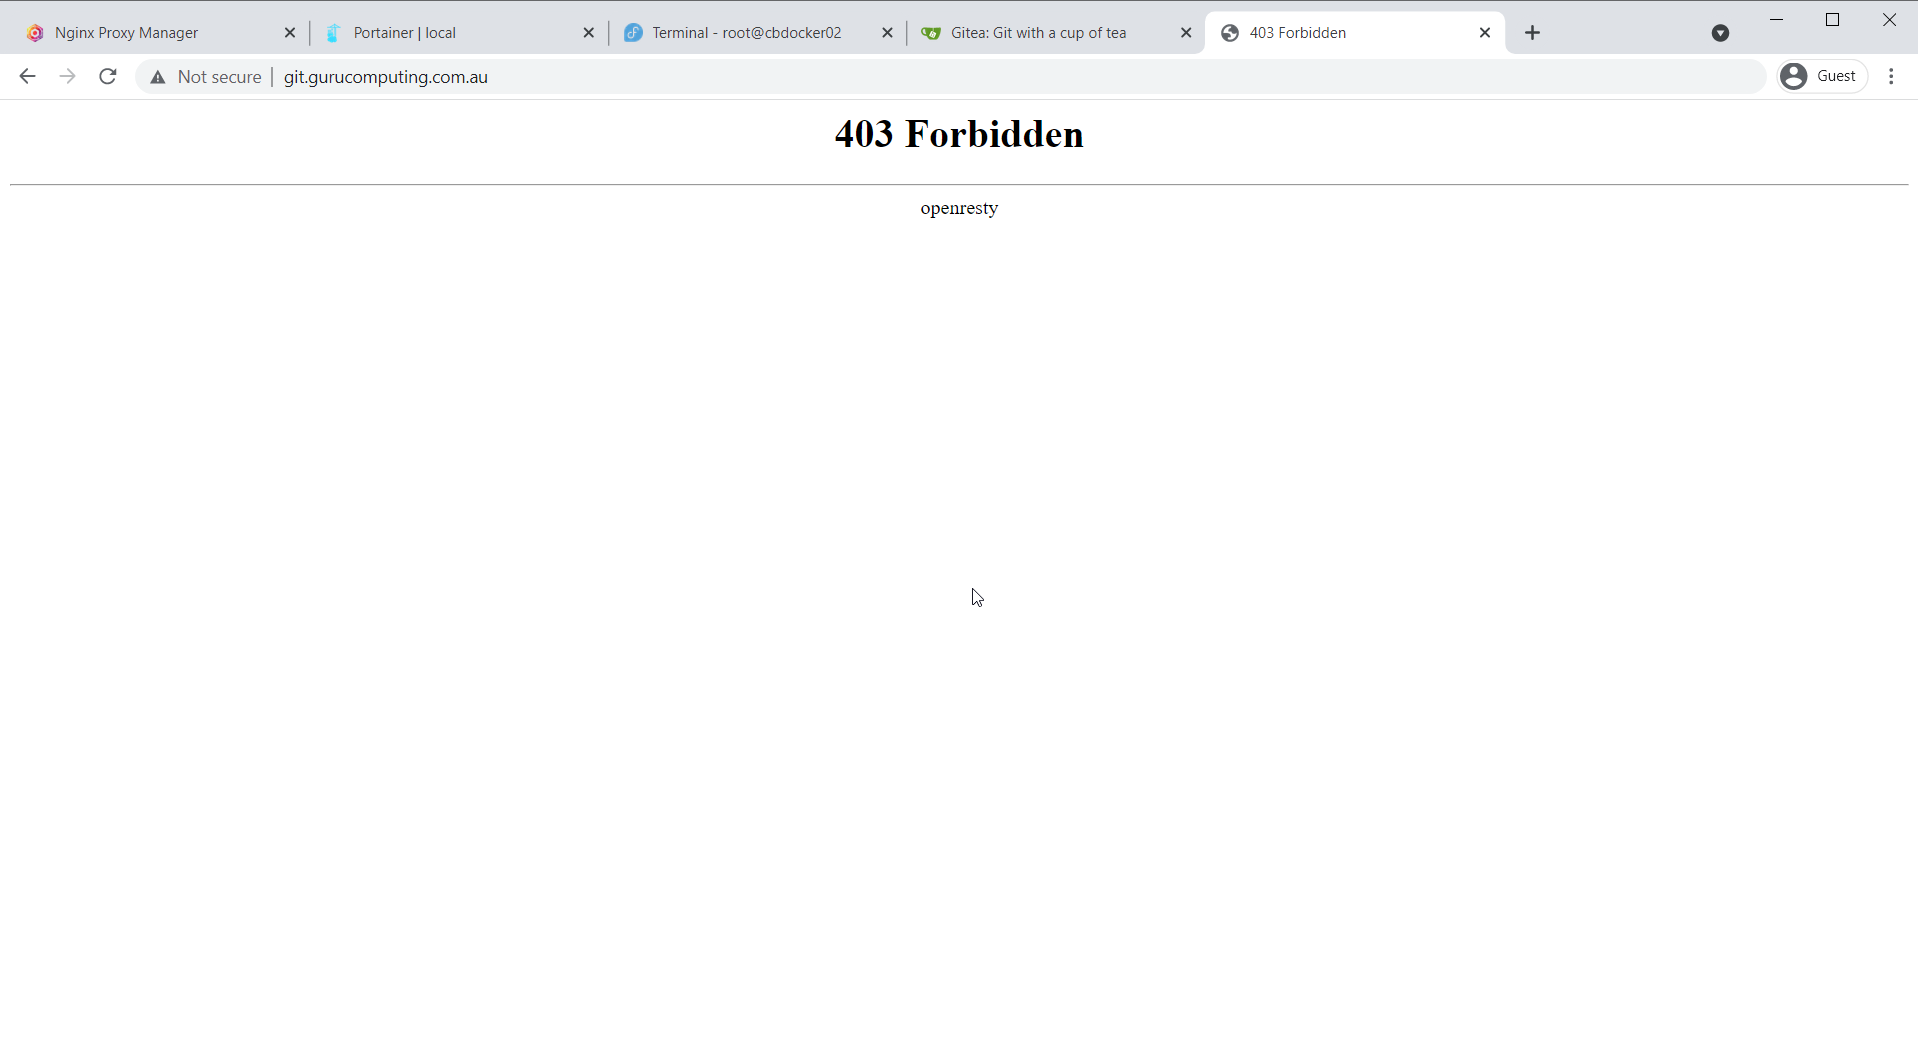
- Under Proxy Hosts, edit your git host and change the access list to nobody!.
- Verify that you’re now denied access to
git.<yourdomain>.tld
- Change your access list to something more sane, like local subnets. Now if someone tries to access your site externally, they will get denied, but internal addresses can access your content.
Encryption
We haven’t solved the biggest problem yet: How do we encrypt our traffic, without getting scary warnings about self signed certificates? We’ll cover that next in Let’s Encrypt Certificates.