Docker Offsite Backups
Introduction
So we have a proxmox backup server setup and we’re backing up to it. Awesome! But we’re only fulfilling 2 out of our 3-2-1 strategy. How are we going to back up off site?
Well, the obvious and preferred option is a second Proxmox Backup Server! Proxmox can set up multiple backup servers and daisy chain backups (and even encrypt them) as required. Buuuut, that means you need to be hosting a backup server somewhere. You can’t take advantage of SaaS backup offerings like backblaze.
So we’re gonna (again) go a bit more manual with our offsite backups.
TL;DR
In this section, we will:
- Demonstrate ZFS Snapshotting Capabilities
- Set up a script taking advantage of restic
- Create an offsite backup of our container data
- Set up a re-occuring schedule
ZFS is Cool (like BTRFS)
So if you remember, we set up our proxmox installation on a ZFS drive. This let’s us do lots of cool things, such as easy replication between proxmox servers. But the coolest part is how we can snapshot running operating systems.
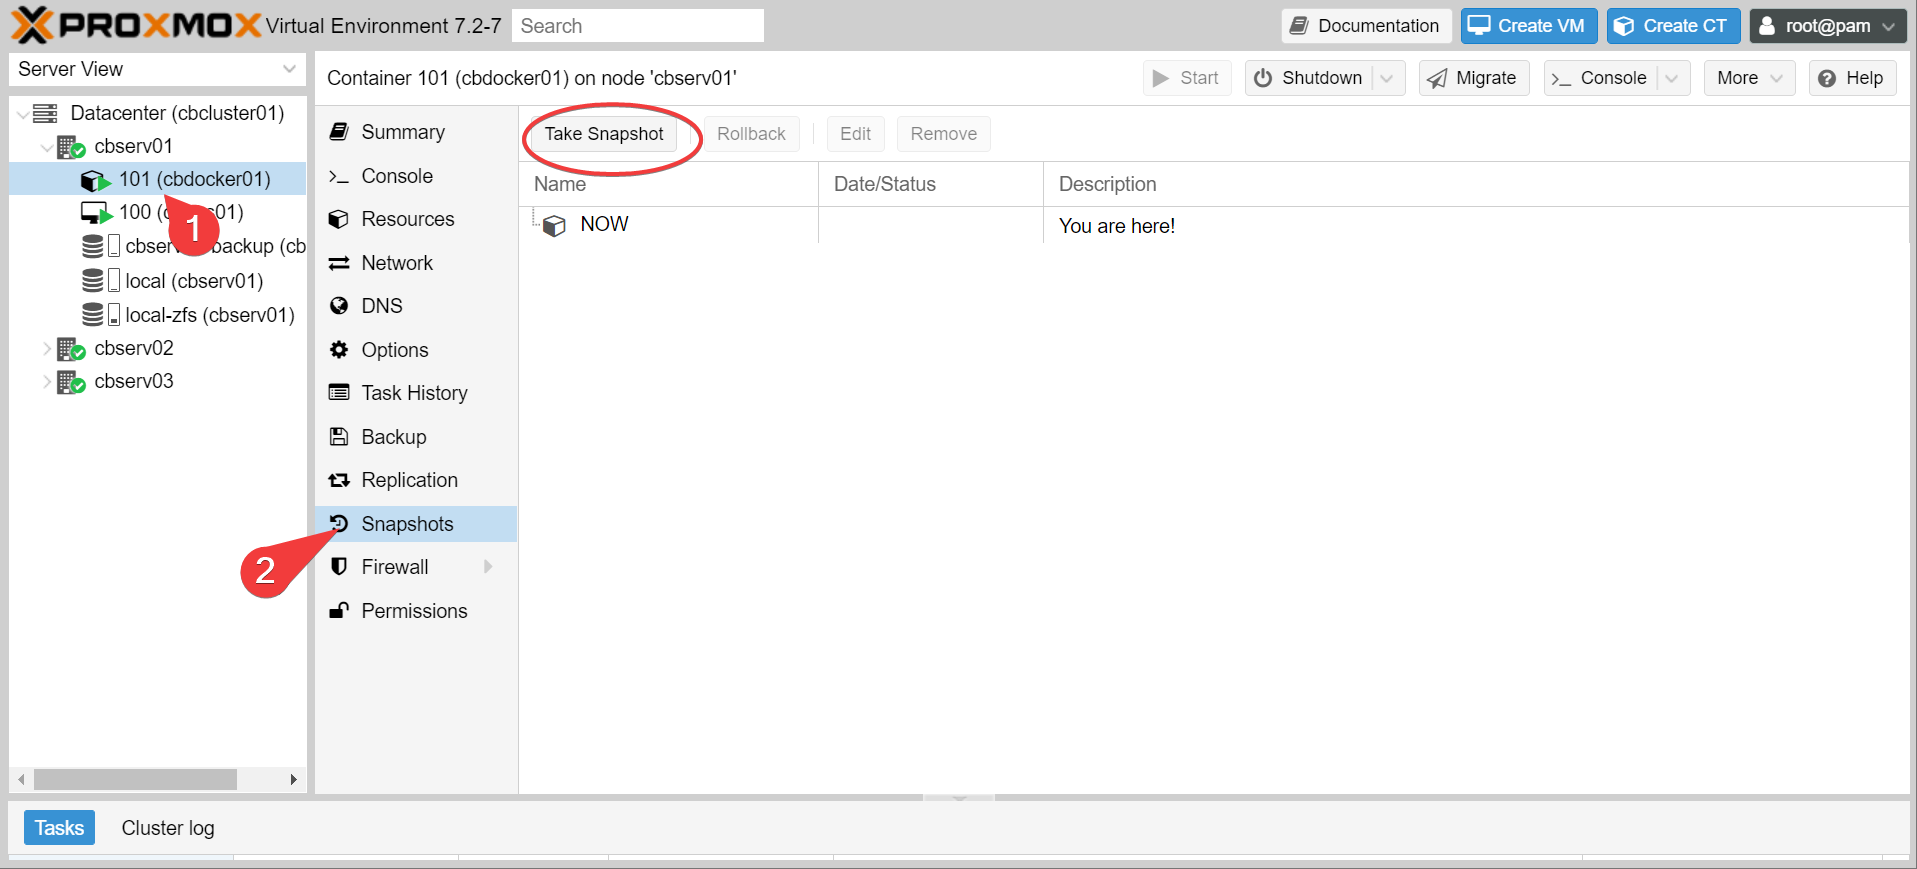
Actually with LXC, it’s even simpler than that. The LXC storage is a zfs dataset on the host. You can actually just go browse it!
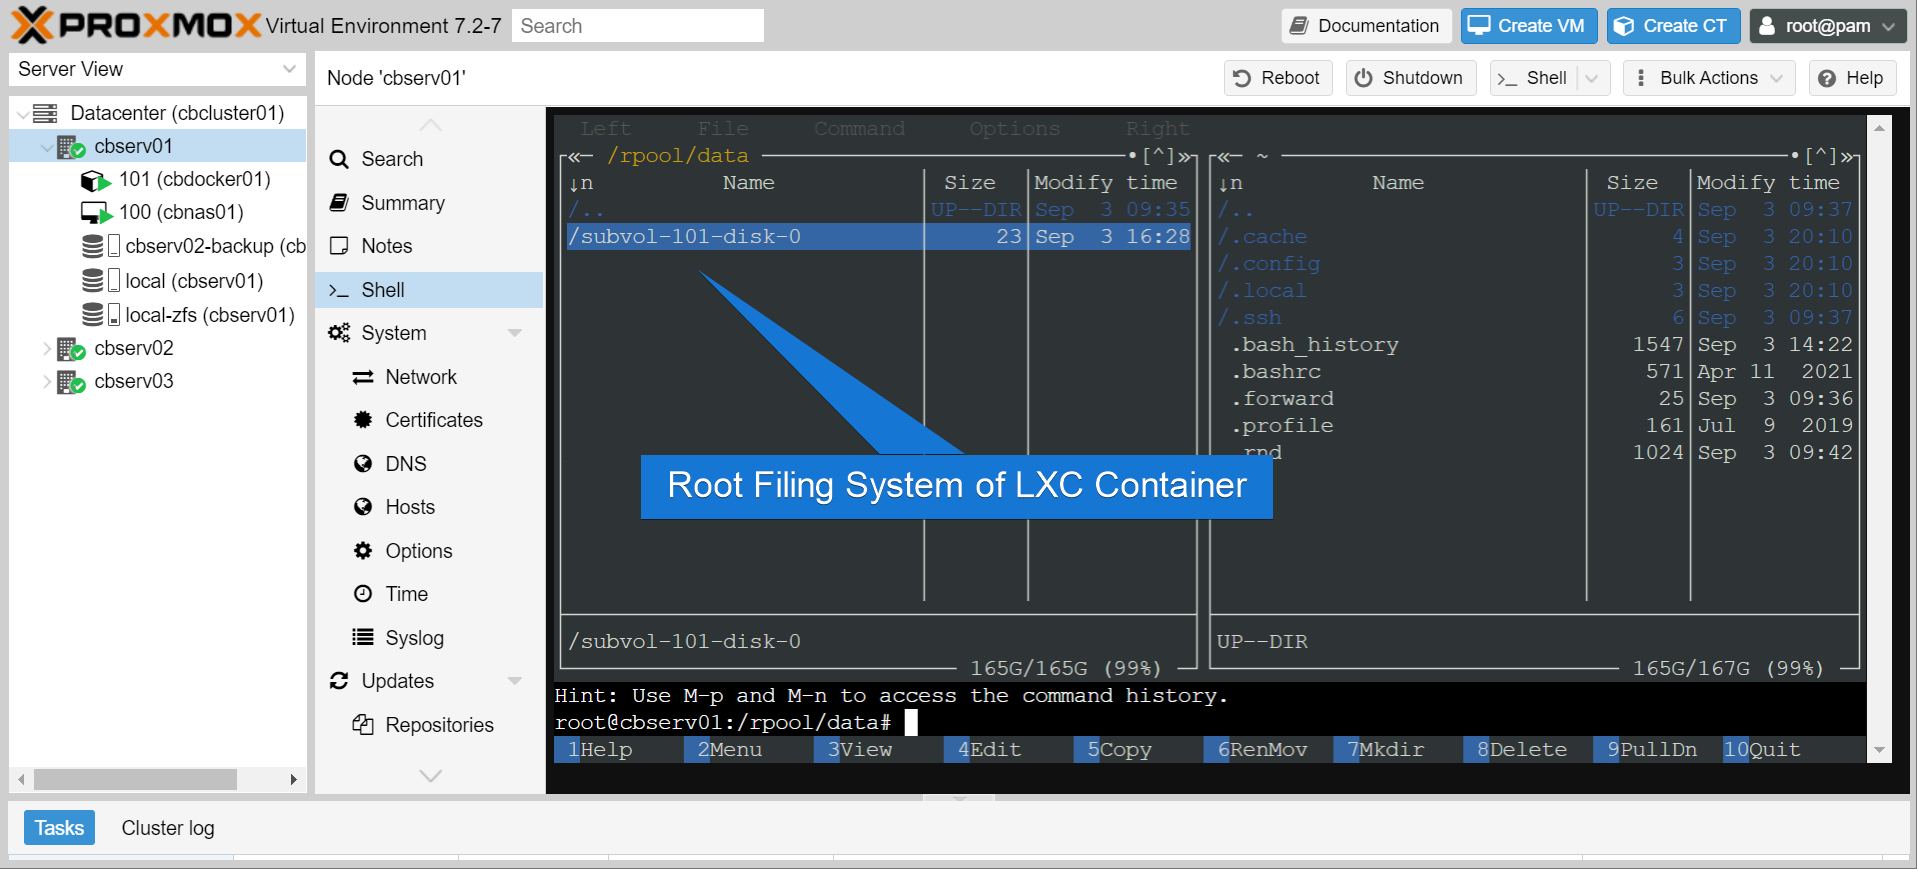
Warning
While you can directly browse lxc contents outside of the container context, I would not recommend mucking around in there. File permissions can get wonky.
So what this means is that we can snapshot the files directly and perform super custom backups of the container contents. This lets us do some very fine grained backups of the container contents.
Creating ZFS Snapshots
Right, so what’s all this about datasets? Well, let’s see whats there by running zfs list in the shell.
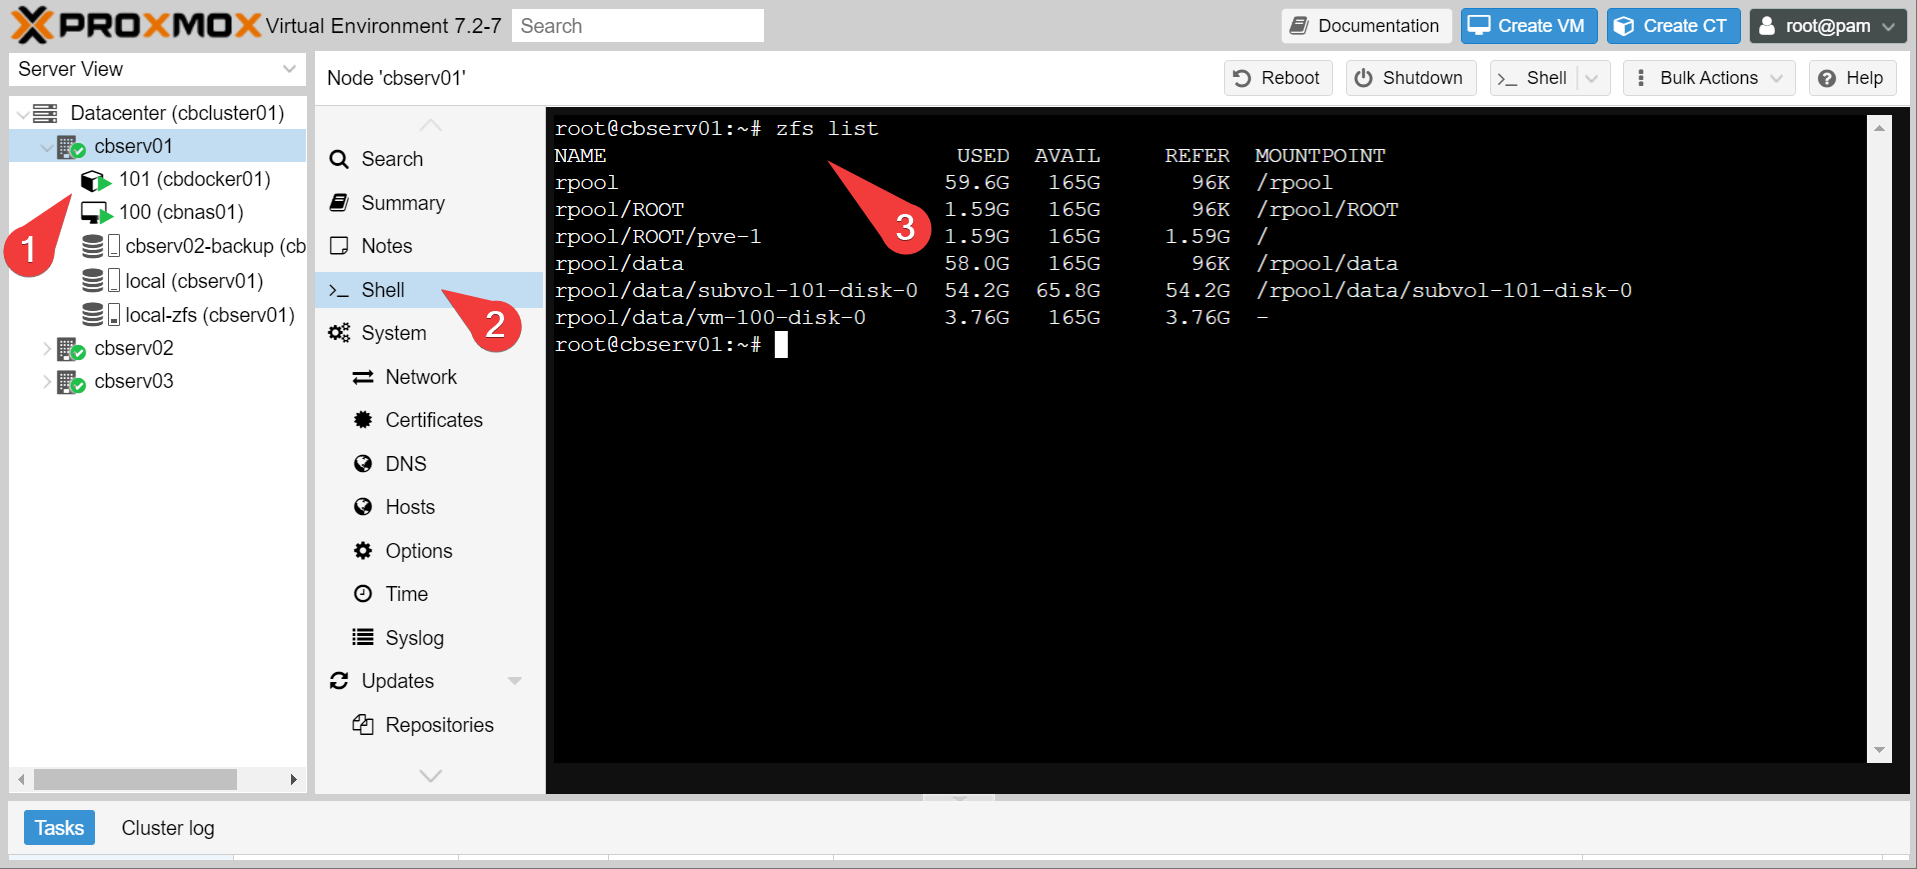
These are all distinct ZFS pools and/or datasets. You can kind of treat them like disk partitions that are created on the fly. Now let’s try making a snapshot of the LXC container that has all our docker stuff in it.
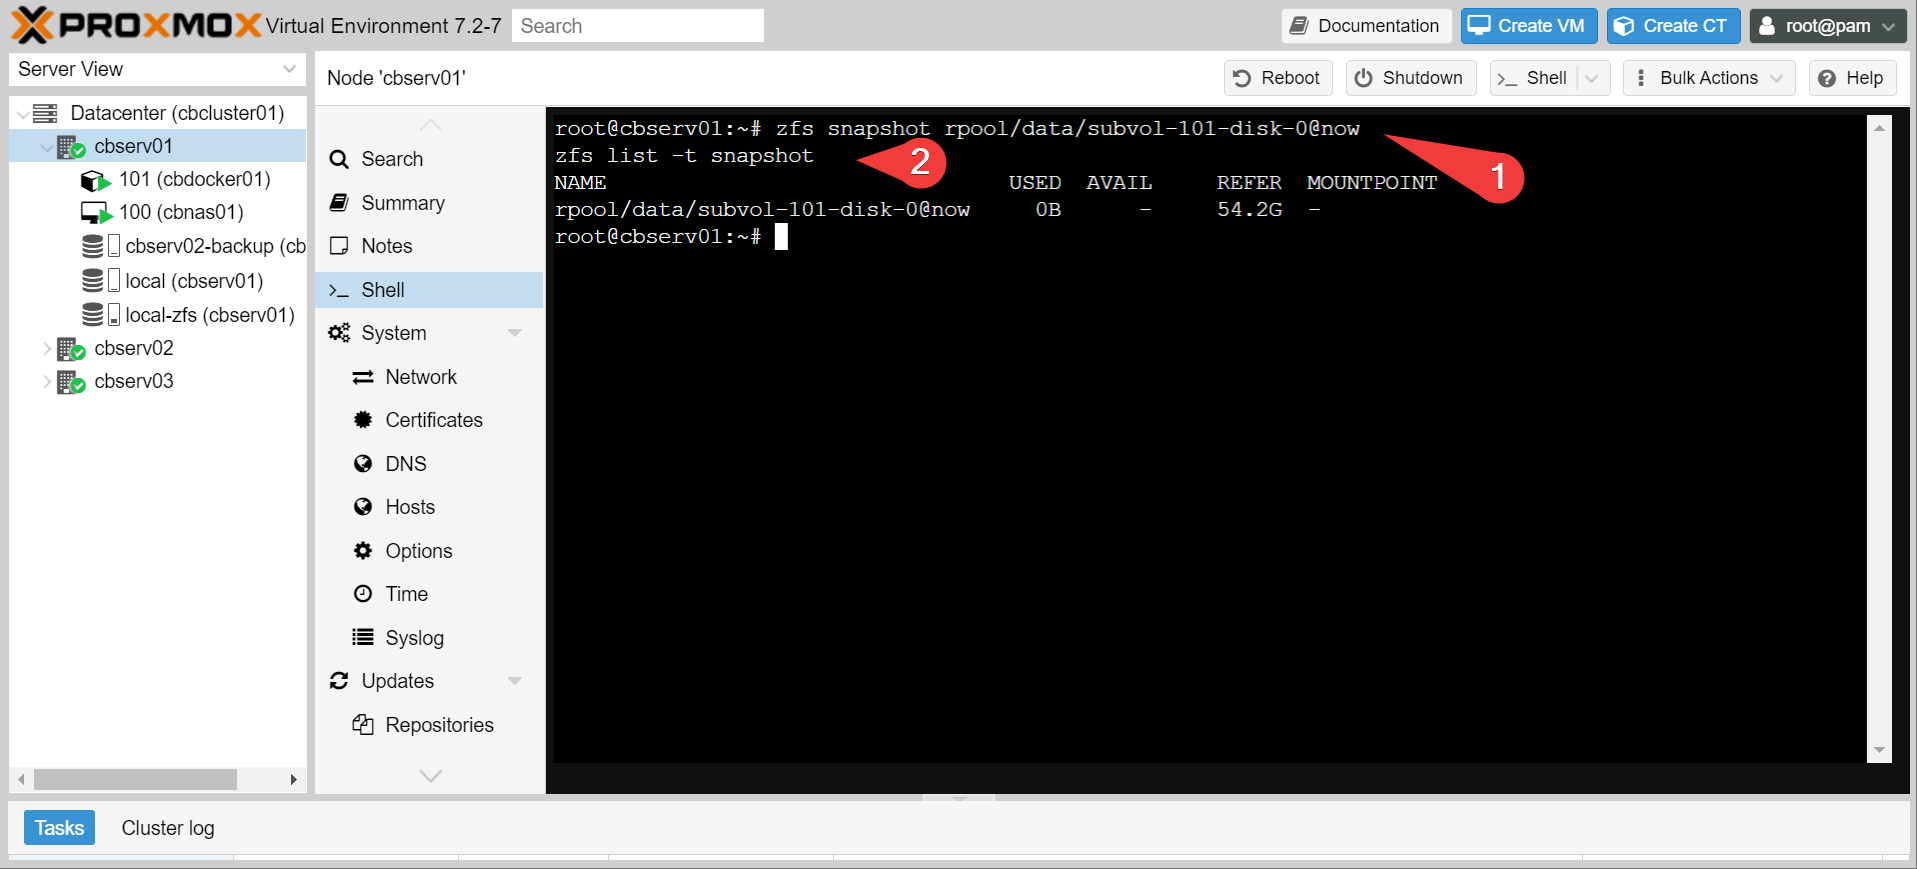
We just made a clone of our whole docker operating system! Instantly! We can even mount it like we would any other filing system, and then browse through it.
Info
This is an incredibly important feature for backups, as it lets us keep our data atomic. IE: you don’t break the backup because files are changing mid backup.

We can also destroy that snapshot when we’re done (if it’s unmounted):
Alright. That’s neat. Now it’s time to wander off the beaten path and do something useful with this
Warning
We are going to be working outside the proxmox ecosystem to make this work, which means, nothing in proxmox is going to care or know about this backup system. If you migrate the cbdocker container to another node, the backup will break. If you don’t think you have the chops to maintain this out of channel, go spin up a linode VPS and install proxmox backup server on it instead.
Setting up your backblaze account
We’re gonna send our (encrypted) backups up to backblaze. Which means you need:
- A backblaze account
- A bucket
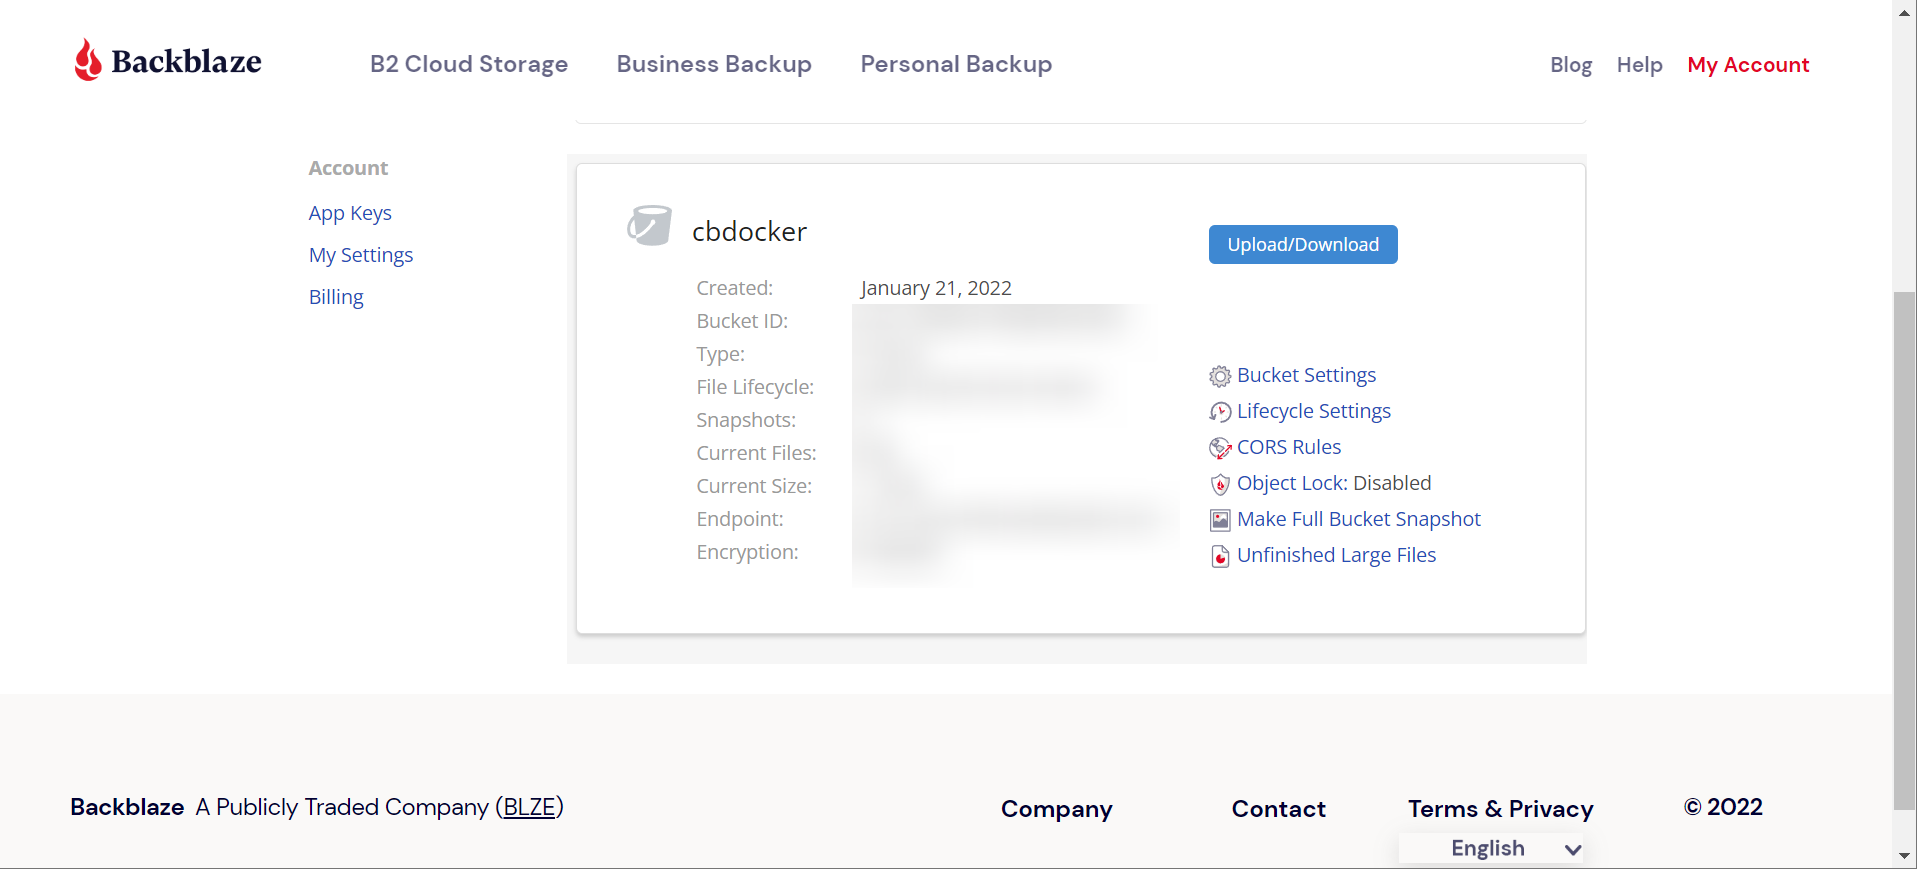
- A read/write app key for that bucket
Good news is you can do all of this on the free tier, as long as you don’t go crazy with your backup sizes
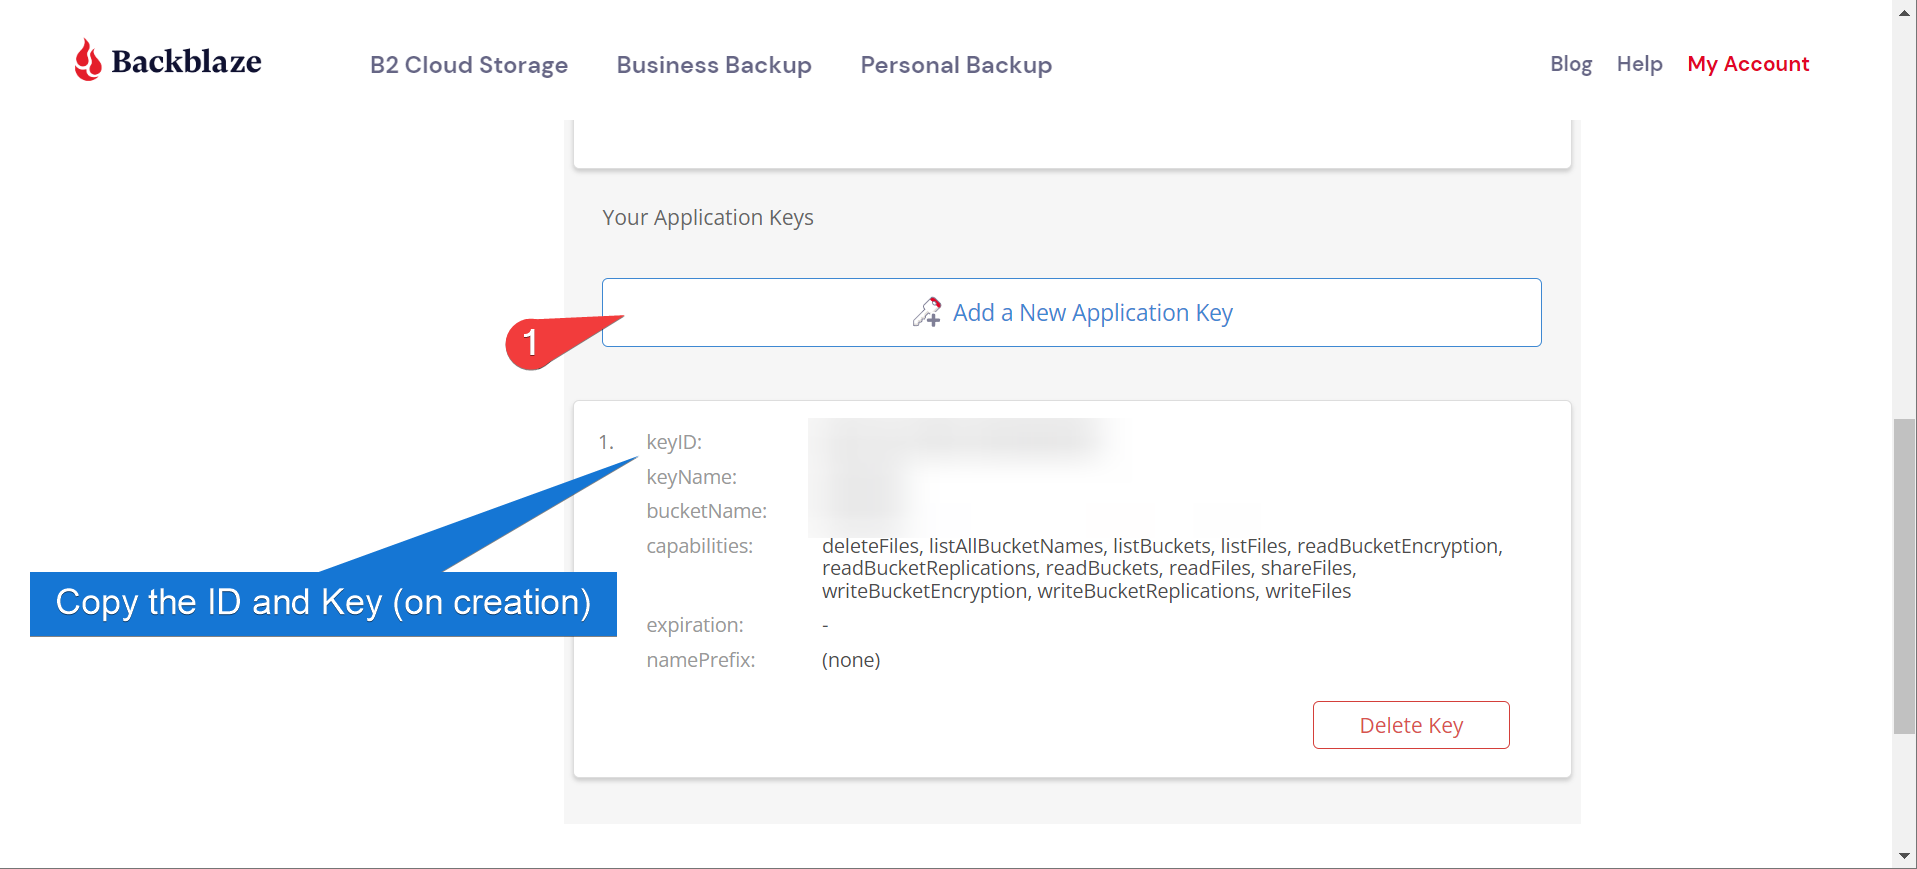
Using Restic
So now you should have:
- A Bucket Name
- An app key ID
- An app key… key
All you need is something that actually shoves data into the cloud! There’s a couple backup options, but restic is a popular choice for this and the one we will be using.
- Install restic on the proxmox host (and micro for text editing while we’re at it, see this blog post):
- Create a
scriptsfolder in your host’s home directory. We’re going to create two files: ~/scripts/.backup.env
export B2_ACCOUNT_ID="<your application key ID>"
export B2_ACCOUNT_KEY="<your application key key>"
export RESTIC_REPOSITORY="b2:<your bucket name>"
export RESTIC_PASSWORD="<a random password to encrypt your database>"
export HOME="/root"
Info
write down your restic password somewhere safe. Your backup is useless if you can’t decrypt it
- and the other file:
~/scripts/backup.sh
#!/bin/bash
set -e

# variables
SNAPSHOT_MOUNT_DIRECTORY="/mnt/backup"
SNAPSHOT_NAME="rpool/data/subvol-101-disk-0@now"
BACKUP_DIRECTORY="/mnt/backup/mnt/containers"

# set the working directory to script directory
cd "\$(dirname "\$0")"

# get the environment data
source .backup.env

# create a snapshot
zfs snapshot \$SNAPSHOT_NAME

# mount the snapshot
mount -t zfs \$SNAPSHOT_NAME \$SNAPSHOT_MOUNT_DIRECTORY

# push the backup directory to the remote target
restic backup -r \$RESTIC_REPOSITORY "\$BACKUP_DIRECTORY"

# remove the snapshot out of the backup directory
umount \$SNAPSHOT_MOUNT_DIRECTORY
zfs destroy \$SNAPSHOT_NAME

# clean up
restic forget -r \$RESTIC_REPOSITORY --keep-daily 3 --keep-weekly 4 --keep-monthly 4 --prune
Info
Note that we are specifically backing up the /mnt/containers folder inside the snapshot. This is the folder that has all of our important container data, if you have been following previous guides. We don’t need to back up the whole operating system.
- Make the shell script executable, and the environment file private:
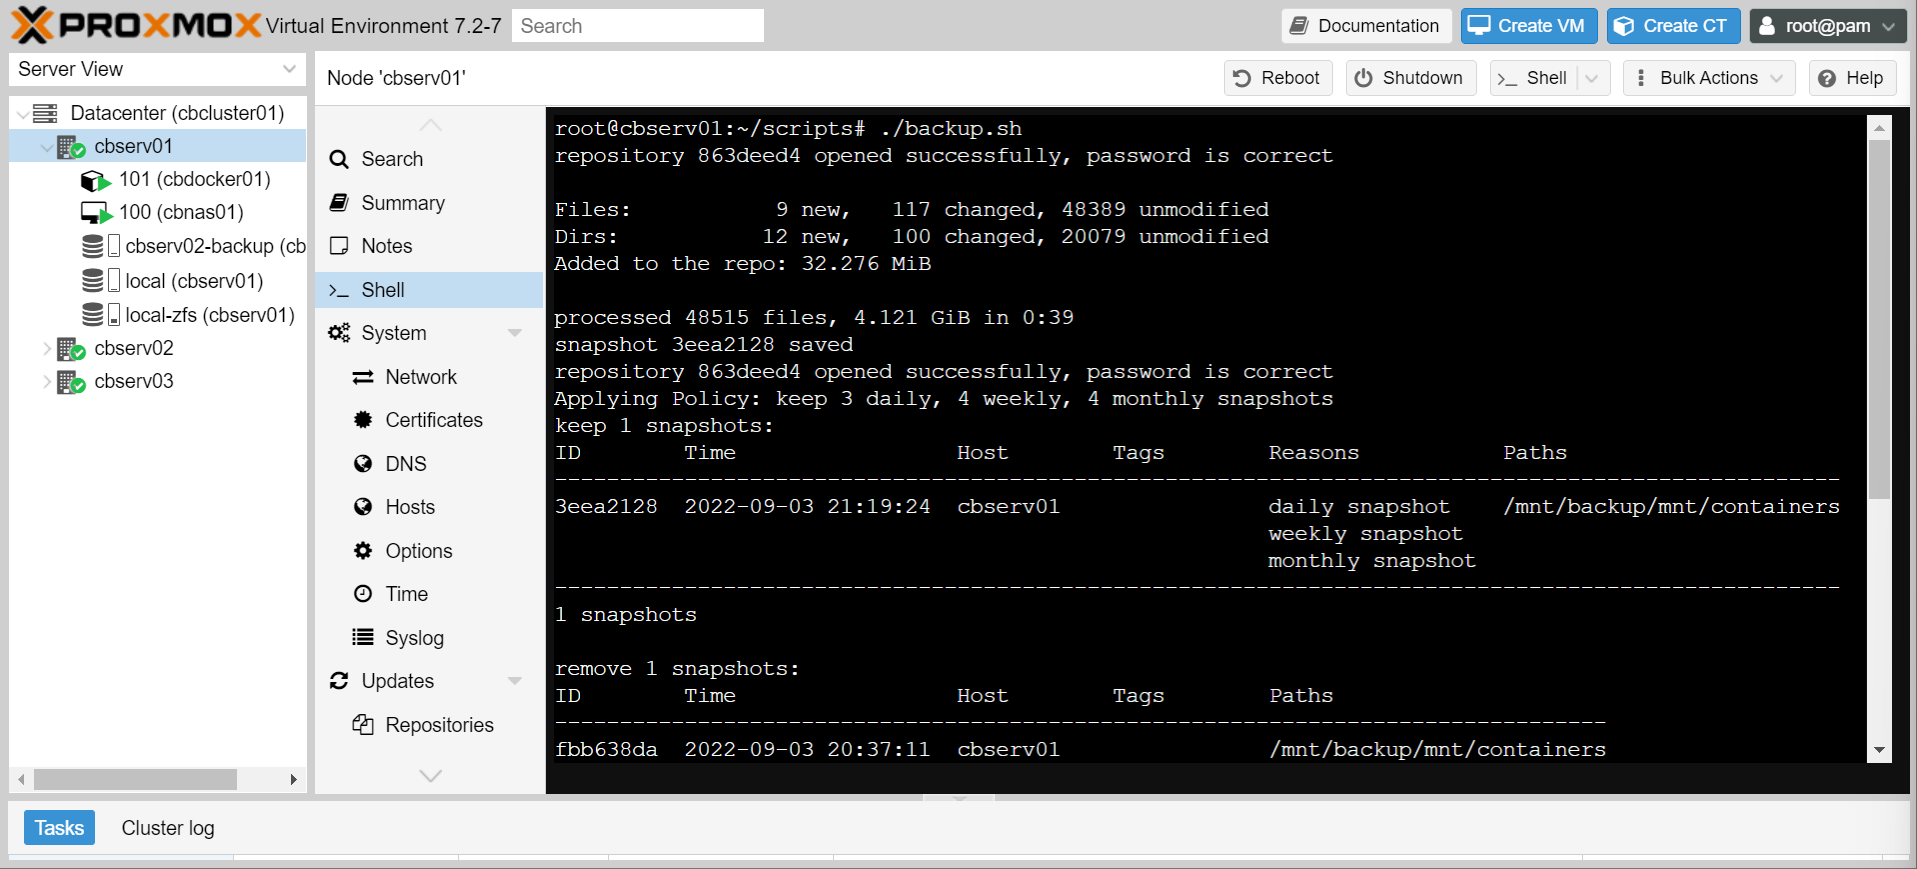
- Run the script, and if all goes well, you should successfully back up to backblaze!
Scheduling Runs
Alright, the script works. But now we need to schedule it. That’s pretty easy with systemd.
- Create the following file at
/etc/systemd/system/restic-backup.serviceon the host
[Unit]
Description=backup docker container bind mounts to cloud with restic

[Service]
Type=oneshot
ExecStart=/bin/bash /root/scripts/backup.sh
- Create the following file at
/etc/systemd/system/restic-backup.timeron the host
[Unit]
Description=run restic daily at 11

[Timer]
OnCalendar=*-*-* 23:00:00

[Install]
WantedBy=timers.target
- Enable the new timer with:

Info
You can also manually run the backup with systemctl start restic-backup, but the terminal will hang until the backup completes (or fails). Run in tmux or be patient.
- Next time the backup runs, you should be able to see the results with
journalctl -u restic-backup
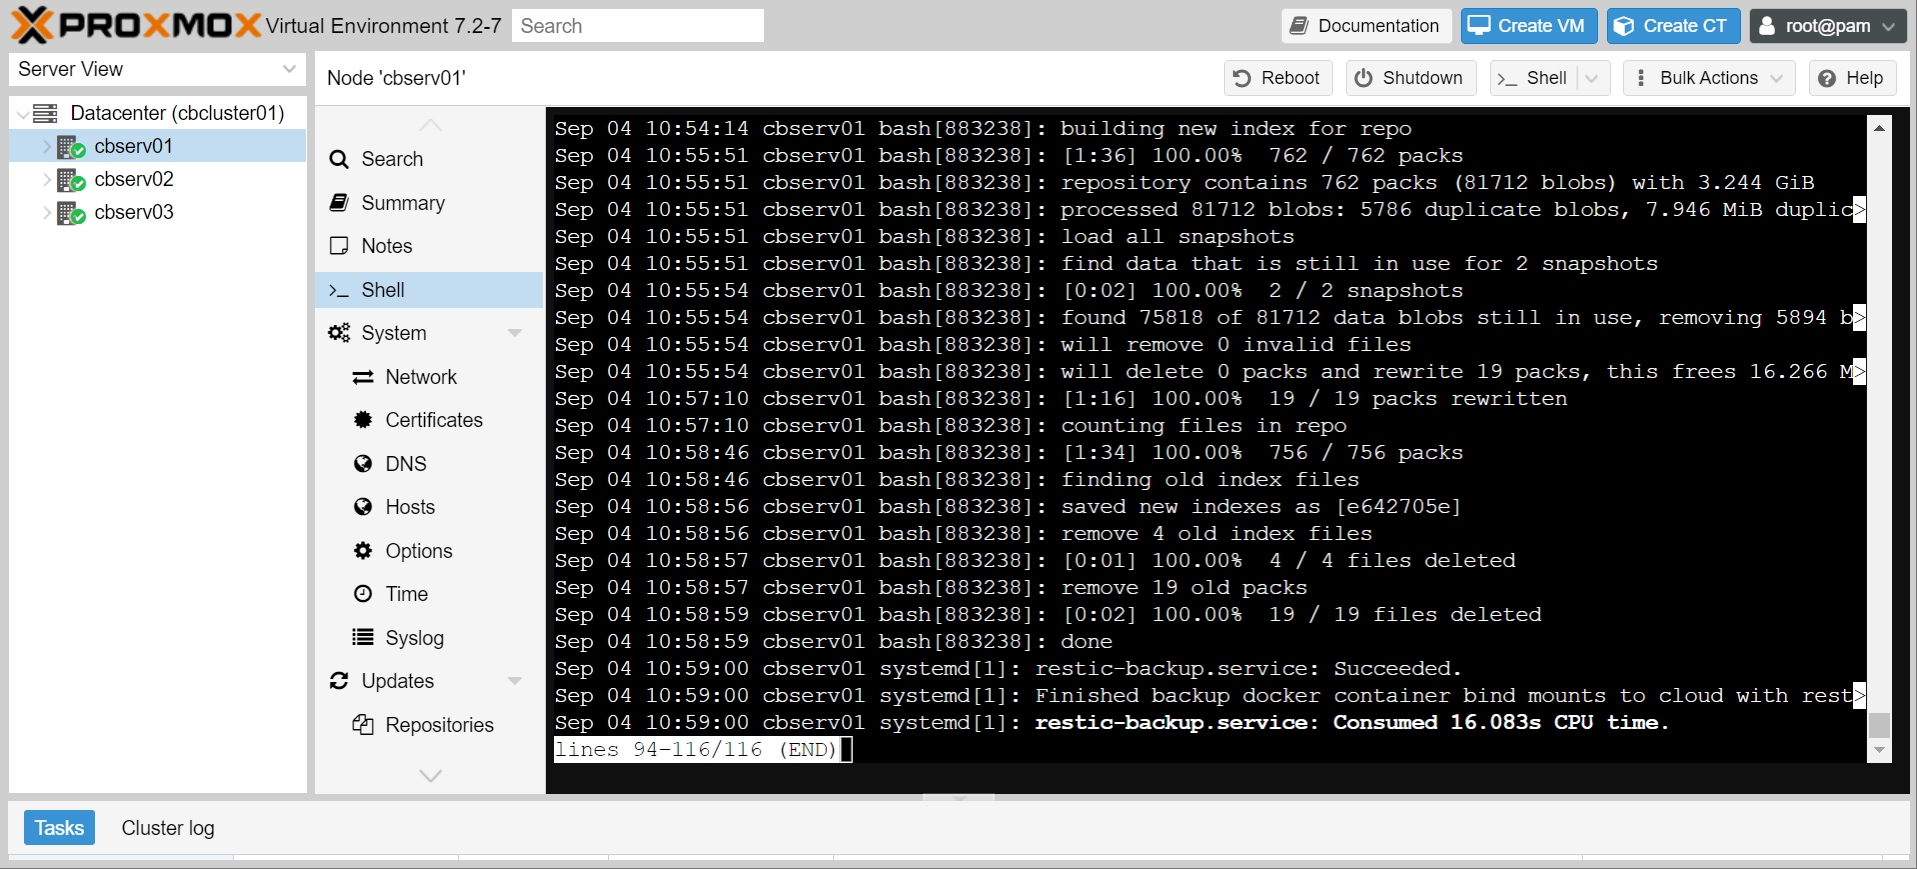
Success!
Conclusion
Woof, bet if you made it this far you wish you just set up a remote proxmox backup server.
However, what we have done is set up a very targeted, very robust off-site backup of our docker container data. It’s only getting the data we care about, and it’s doing so in an automated and secure fashion.