Advanced Usage of Caddy
Introduction
So far, we have vaultwarden being proxied to port 80 via dns. Excellent! If that was all we needed caddy for, we can pat ourselves on the back and walk away. However we still have a ton of features we still want to implement. Encryption being on the top of the list.
Let’s have a look at some of the cooler things caddy can do to help protect our services.
TL;DR
In this section of the guide, we will demonstrate:
- Snippets
- Hot Reloading
- IP Whitelisting
- Proxying self signed TLS services
- Serving with Self Signed TLS
Using Caddy Snippets
At the moment our caddy file is pretty darn short. Which is good! However, as you add more containers, it’ll get more unwieldy to manage. This is where we can leverage snippets for more reusability. Snippets are either reusable caddyfile blocks, or more commonly, a separate caddyfile block that we import as a discrete file. Let’s show how this can help break up our syntax:
- rename your
Caddyfiletovaultwarden.caddy - create a new
Caddyfilewith the following content:
- reload the
caddycontainer
Functionally we actually haven’t changed anything. However, now we can use discrete files to separate our sites, keeping our structure much cleaner. As you add more files, Caddy will automatically import their configs on load.
Hot Reloading
At the moment we are restarting caddy by restarting the whole container. Which is fine. At least until you make a syntax error in your caddyfile and break the whole darn container on reload. This is especially fun when you are relying on caddy to reverse proxy your remote connection, which now just permanently dropped.
We can prevent that by running a hot reload instead. a Hot reload will restart the caddy service without restarting the whole container, and warn you if there is a syntax problem.
- Create a new file at
/mnt/containers/hot-reload.sh - Add the following content:
- Run the following to make the script executable and run, to see if caddy hot reloads
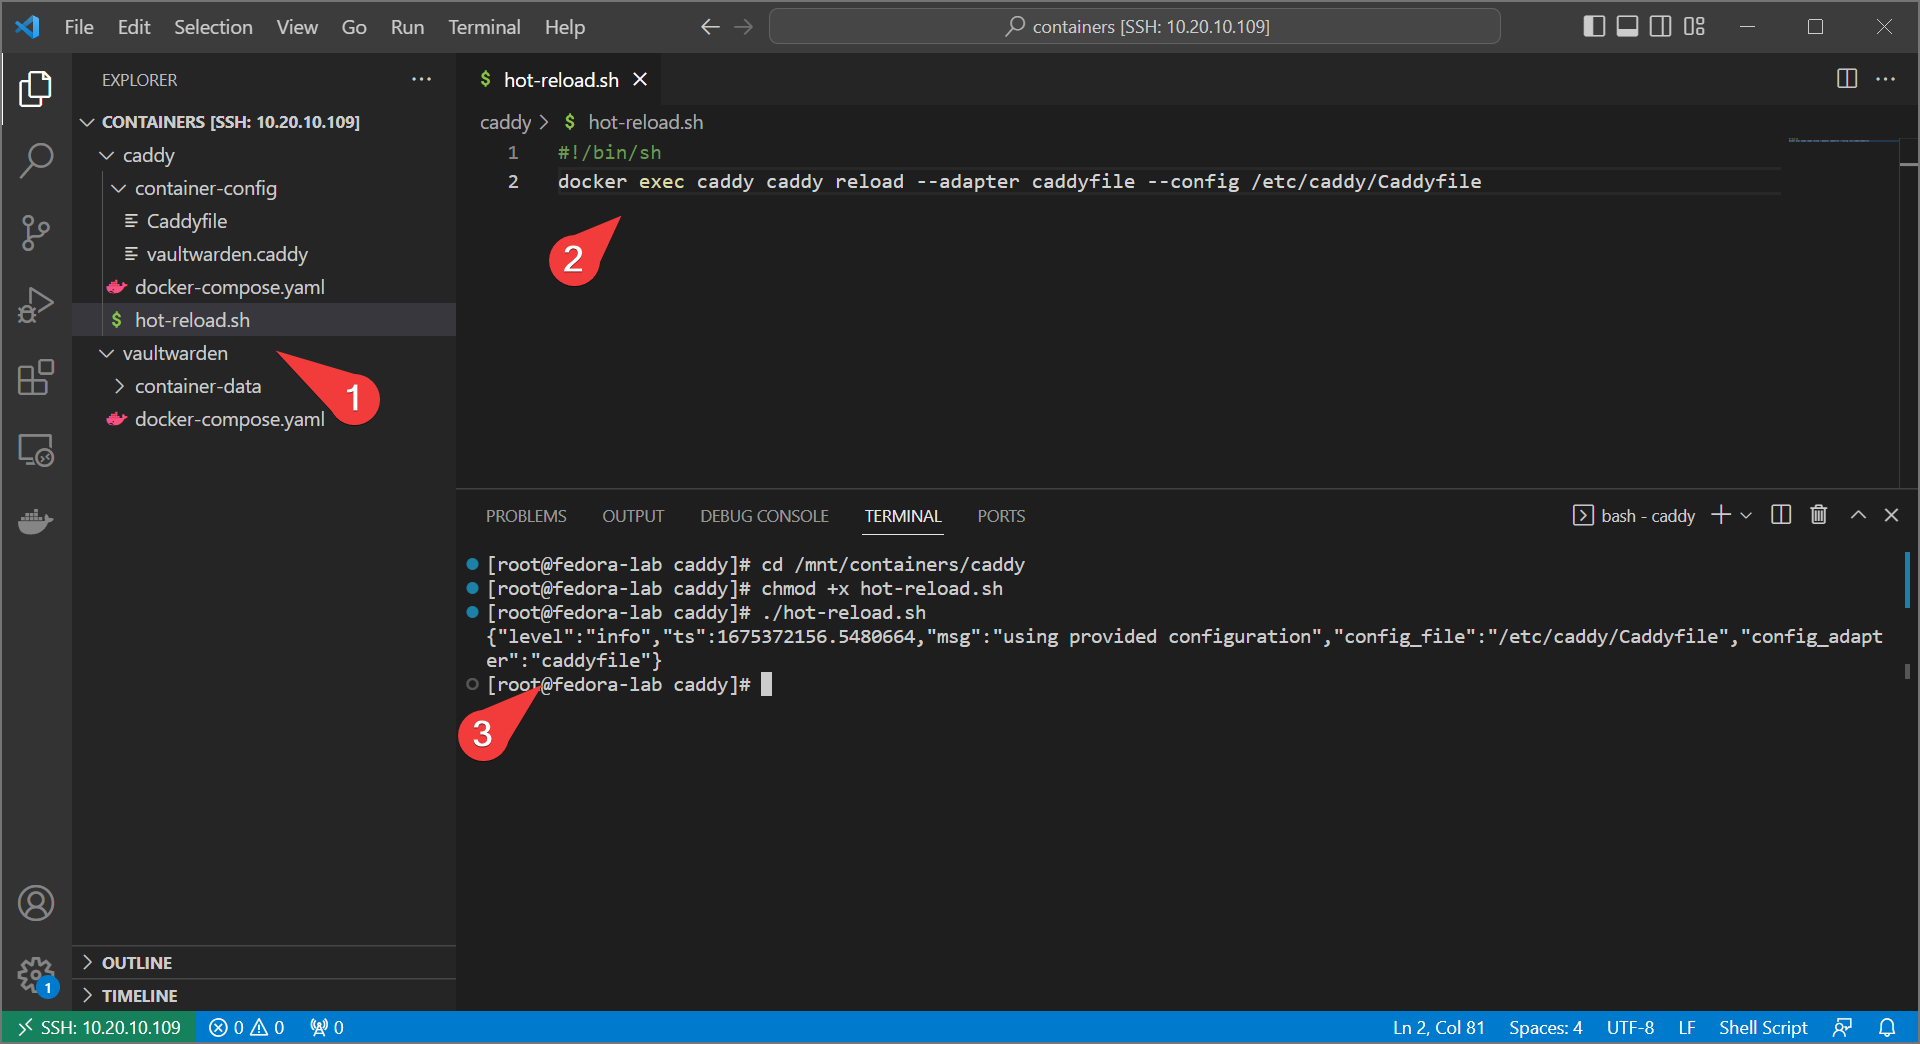
Great! Now if you happen to mess up a configuration, caddy will keep the last known good configuration and let you know there’s an error (at least until restart).
IP Whitelisting
Some, possibly even most, services probably shouldn’t be exposed to the public web. If you haven’t port forwarded, then this is true by default. If you have port forwarded, you’ll want some way to limit external access. You can do this by limiting the subnets that can have access to your service.
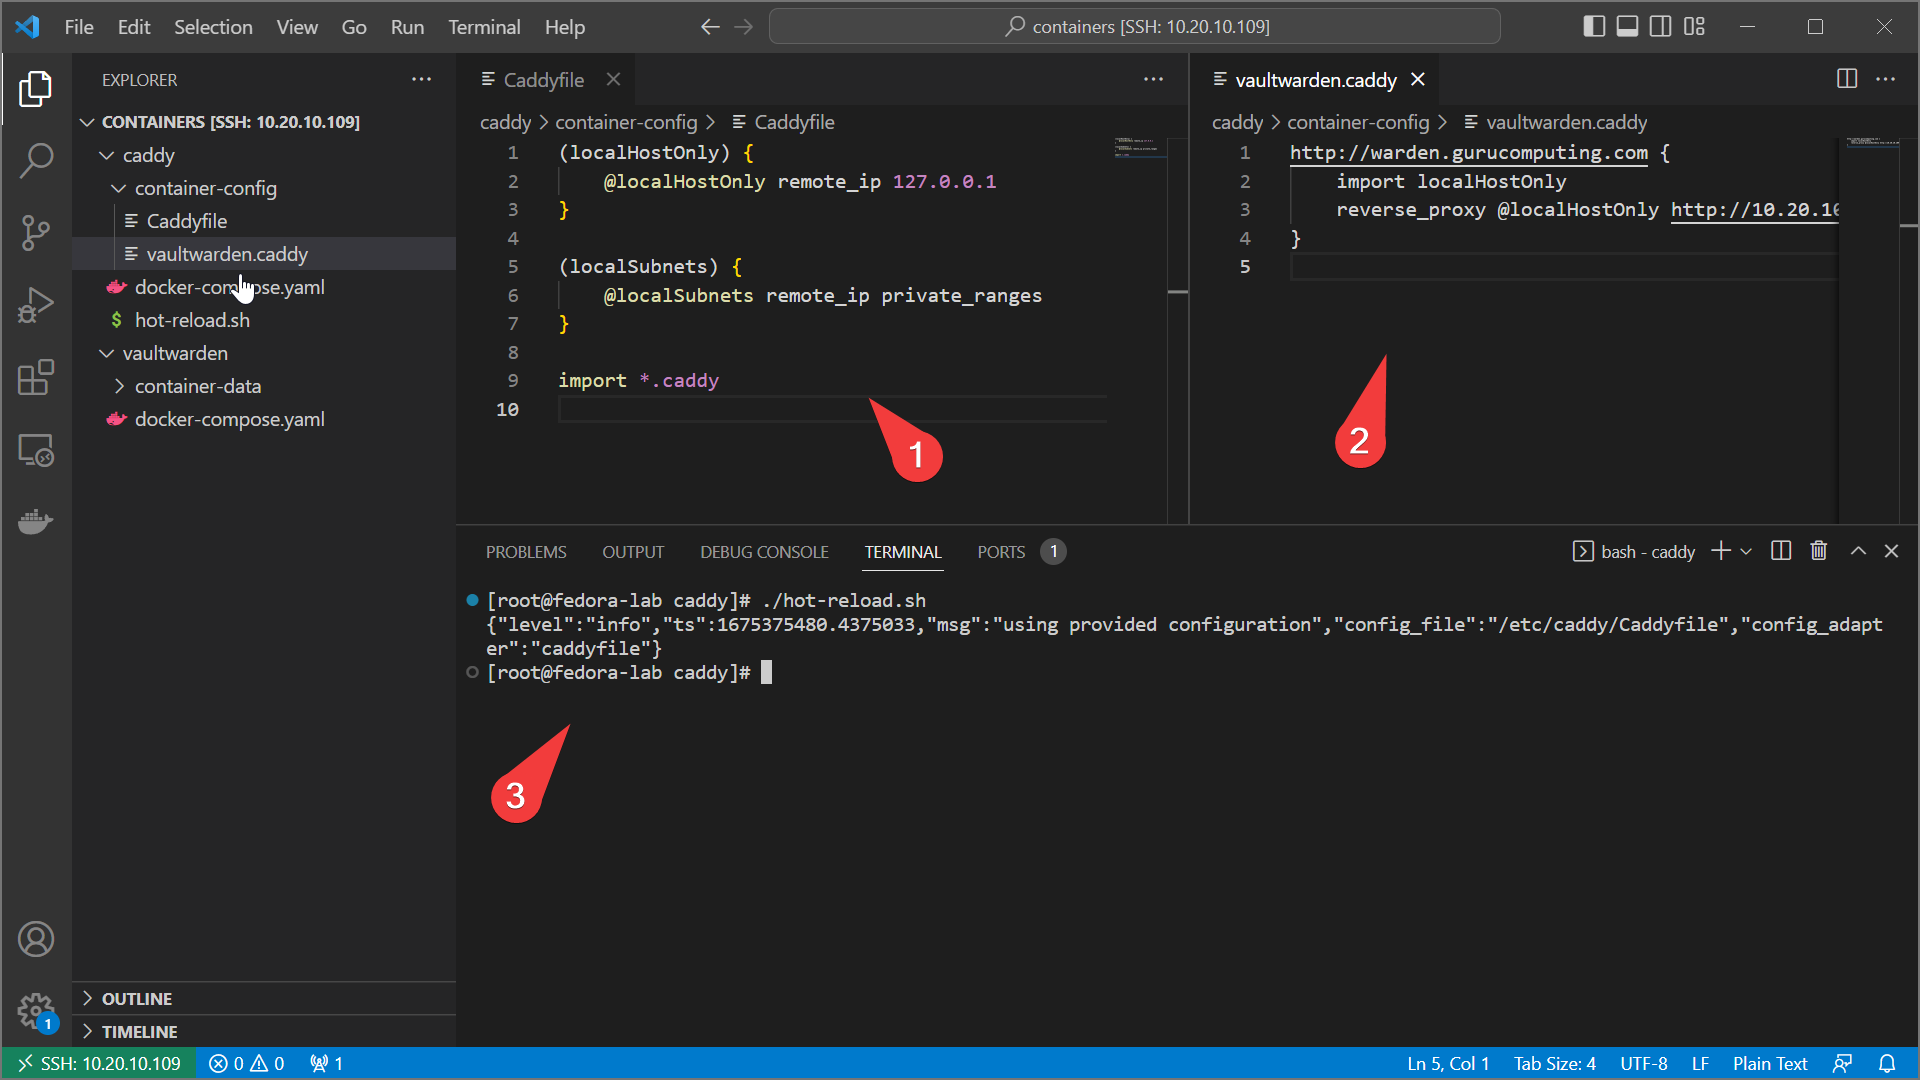
- In the
Caddyfile, define two named matchers nested in snippets: localHostOnly and localSubnets:
(localHostOnly) {
    @localHostOnly remote_ip 127.0.0.1
}

(localSubnets) {
    @localSubnets remote_ip private_ranges
}

import *.caddy
- Modify your
vaultwarden.caddyto include the remote_ip matcher set to127.0.0.1(essentially blocking all remotes)
http://warden.<your-domain> {
    import localHostOnly
    reverse_proxy @localHostOnly http://<your-IP>:8080
}
- Reload caddy and confirm you can no longer reach the site
- change the vaultwarden config to something more sane like just local subnets and reload caddy again. Confirm that you can now access the site again.
http://warden.<your-domain> {
    import localSubnets
    reverse_proxy @localSubnets http://<your-IP>:8080
}
Proxying self-signed Encrypted Services
So far we’ve been using caddy to just proxy docker services, and that’s great. But we don’t have to proxy docker services. We don’t even have to proxy services on the same host. We can even proxy services that use self signed certificates. For example, our host is running cockpit on port 9090, using self signed HTTPS. Let’s try proxying that:
Info
this example will only work if you are running cockpit on your host. Proxying encrypted services also has a performance impact (compared to HTTP), albeit negligible for anything short of production scale.
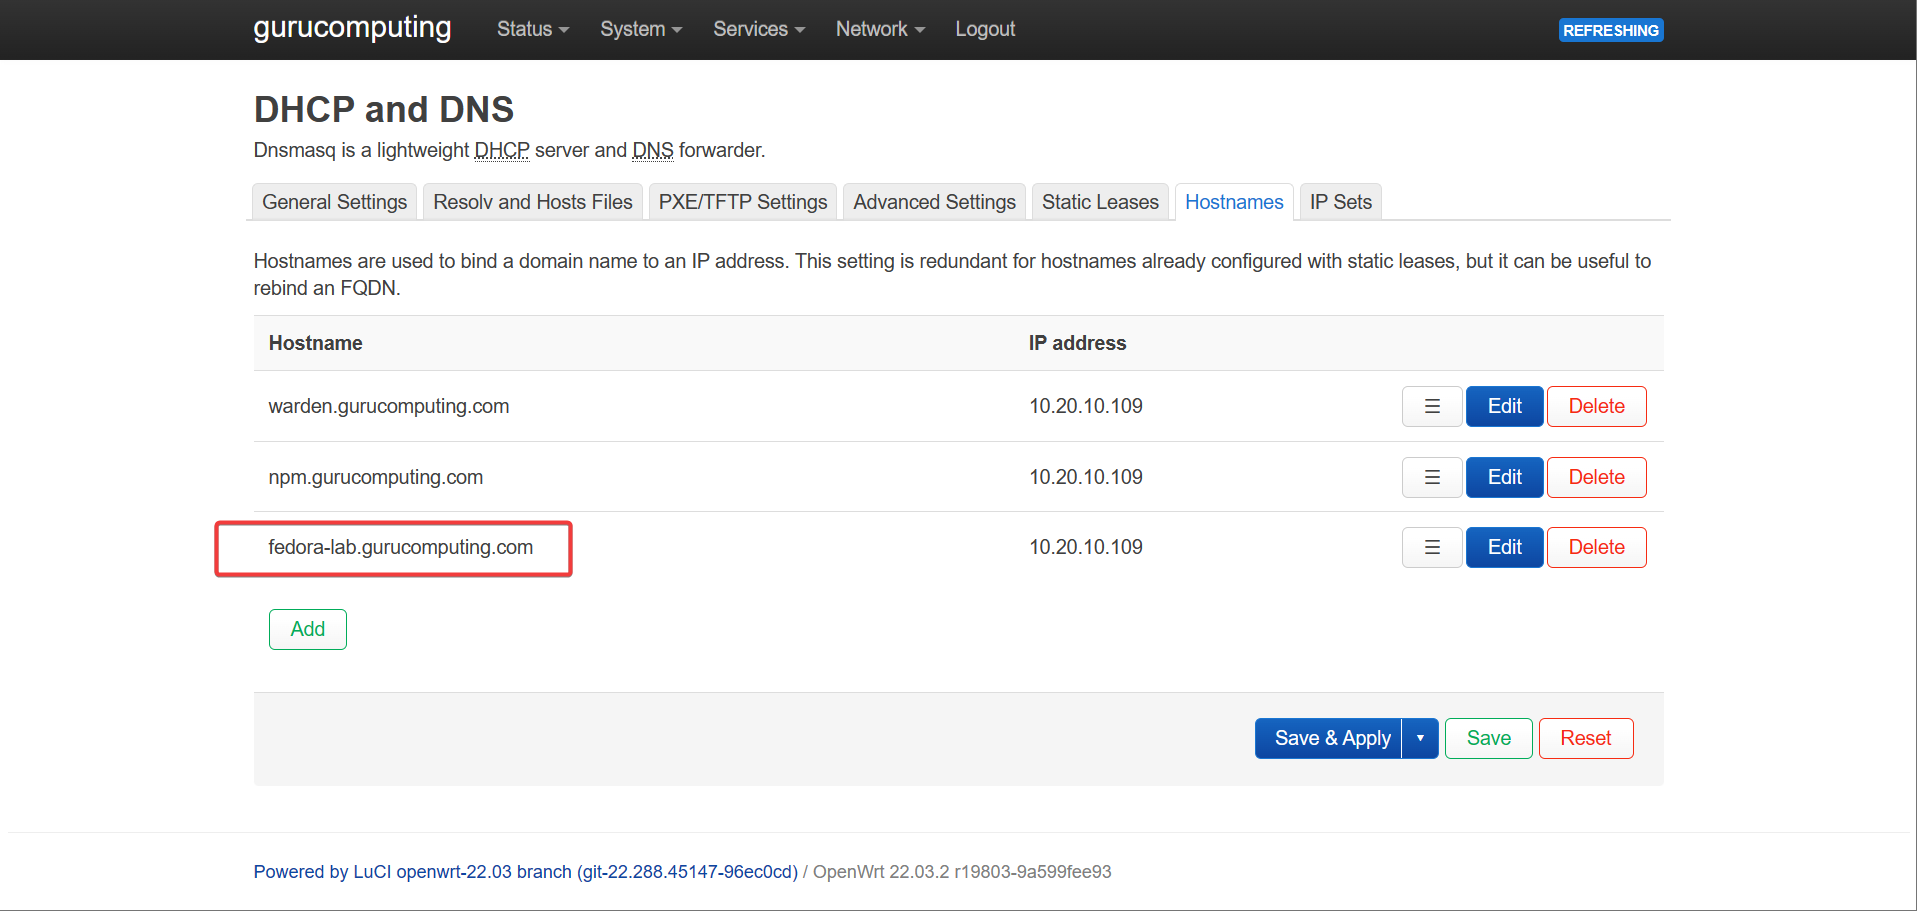
- Create a dns entry for
<yourdockerserver>.<yourdomain>.com.au
- create a
.caddyfile in thecaddy/container-configdirectory with the following and hot-reload caddy:
http://<your-host>.<your-domain> {
    import localSubnets
    reverse_proxy @localSubnets https://<your-ip>:9090 {
        transport http {
            tls_insecure_skip_verify
        }
    }
}
Info
This caddy directive tells caddy to restrict access to local subnets and ignore the self signed nature of the https certificate it’s pulling from

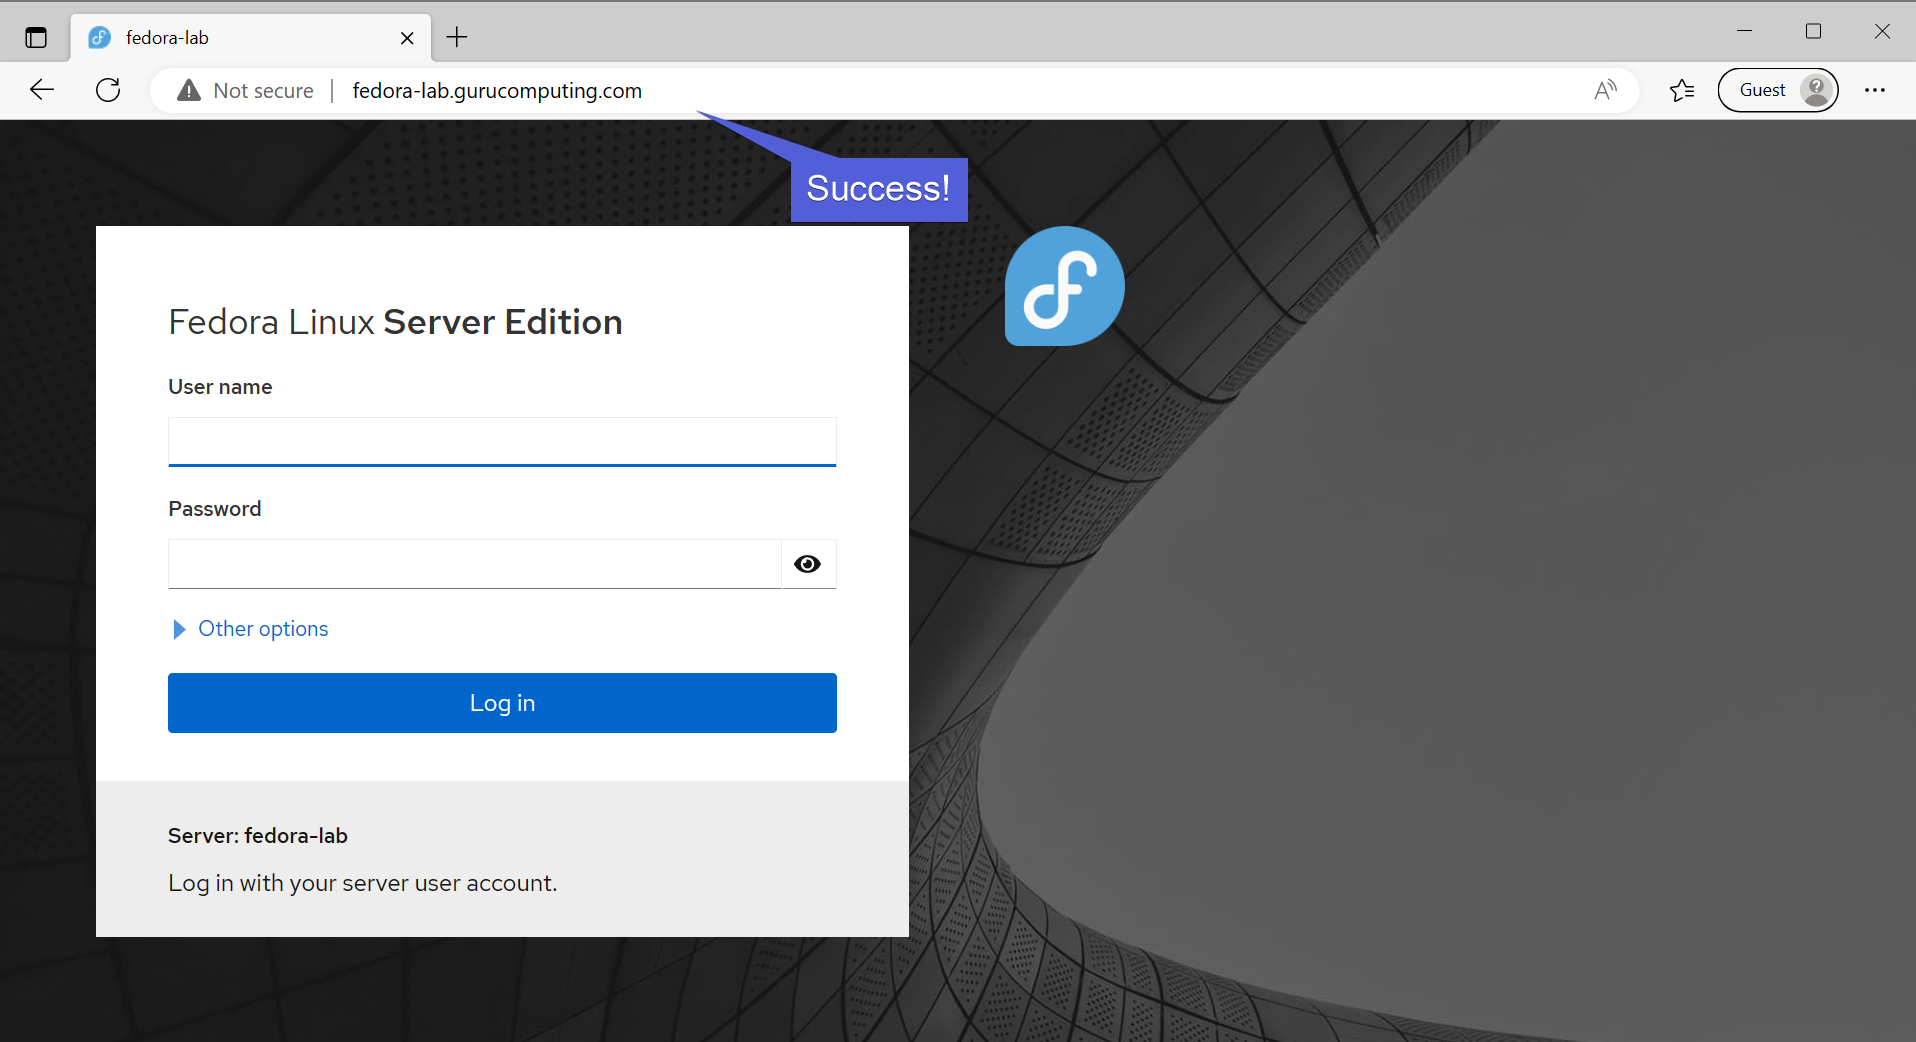
- navigate to your new dns address and see if you can get to cockpit!
Serving with Self Signed TLS
So far, everything we’ve been proxying has been back to unencrypted HTTP. In fact, we’ve actually reduced our security with cockpit since we’ve downgraded from self-signed https to normal http. oops.
Let’s get all of our services encrypted with HTTPS instead.
- Modify your base
Caddyfileto resemble the following:
{
    # do not attempt to install certs on the docker container
    skip_install_trust
}

(localTLS) {
    tls internal {
        on_demand
    }
}

(localHostOnly) {
    @localHostOnly remote_ip 127.0.0.1
}

(localSubnets) {
    @localSubnets remote_ip private_ranges
}

import *.caddy
Info
We are creating a global setting for caddy to skip trying to install itself as a root CA, in the event we want to run caddy as a rootless container. We are also adding a new snippet to self sign a site when used
- Now go into the two
.caddyfiles and change the sites tohttps. Also add thelocalTLSsnippet. hot reload when finished.
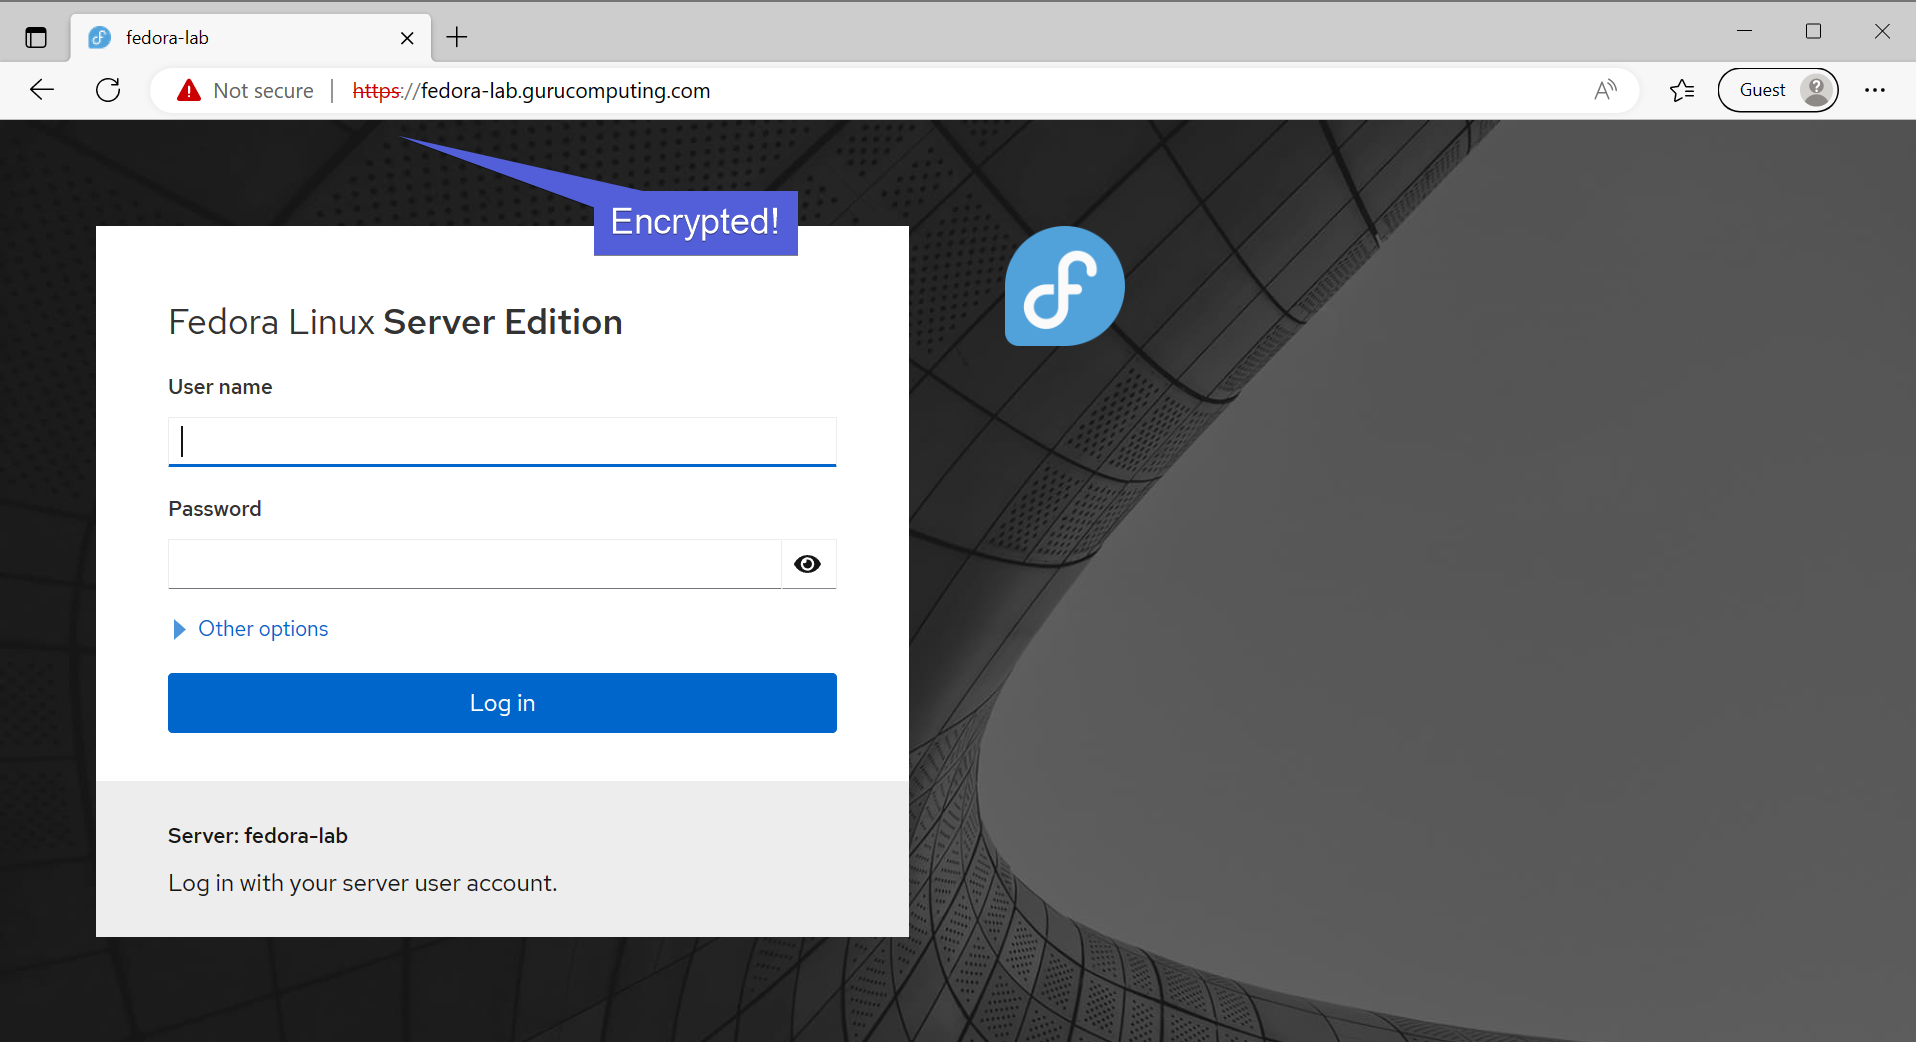
- Now browse to either site, and see it’s giving scary warnings! Don’t worry, this is a good thing. This means we’ve encrypted our sites (albeit with self signed certs).
Using Docker Networks
right now we have vaultwarden forwaded on port 8080 and our vaultwarden.caddy is referring to the host port. This isn’t ideal and isn’t necessary if both caddy and a container are running in docker.
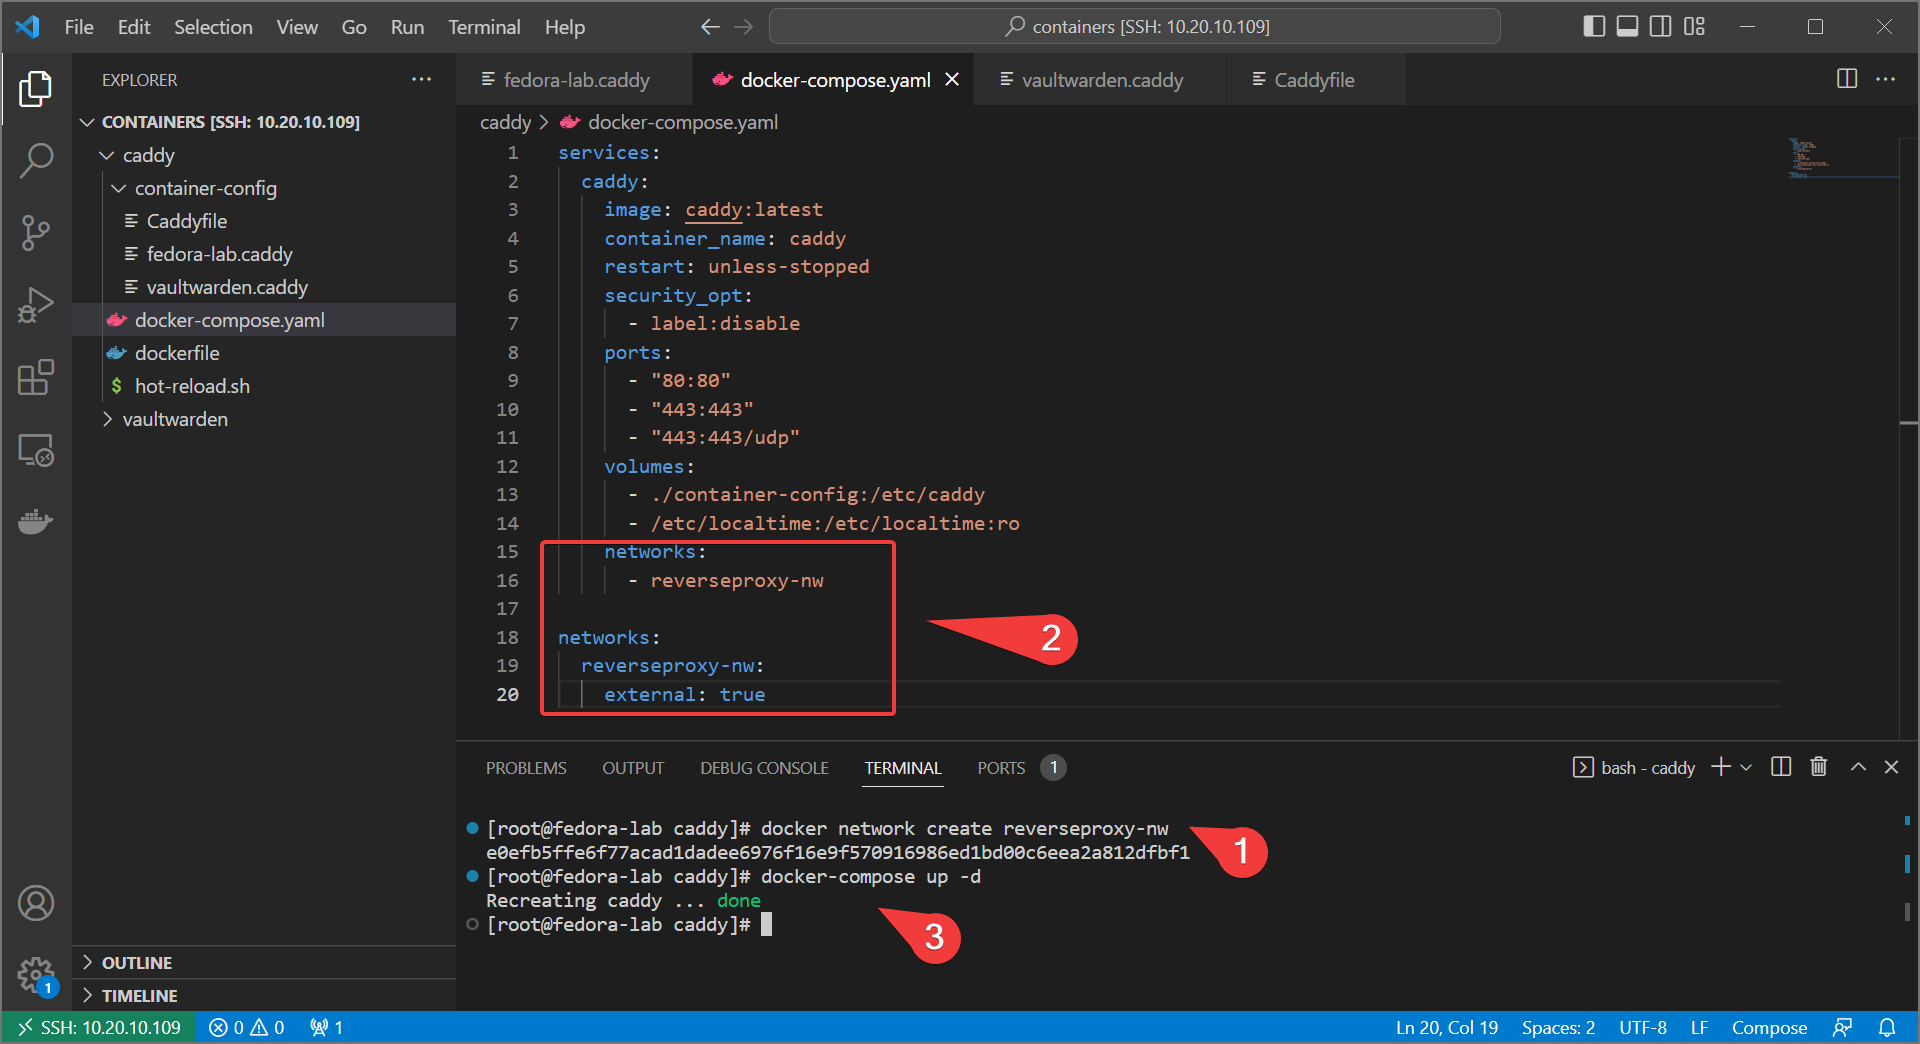
- create a docker network for our reverse proxy.
- Set up caddy to use that network and update with
docker-compose up -d
services:
  caddy:
    image: caddy:latest
    container_name: caddy
    restart: unless-stopped
    security_opt:
      - label:disable
    ports:
      - "80:80"
      - "443:443"
      - "443:443/udp"
    volumes:
      - ./container-config:/etc/caddy
      - /etc/localtime:/etc/localtime:ro
    networks:
      - reverseproxy-nw

networks:
  reverseproxy-nw:
    external: true
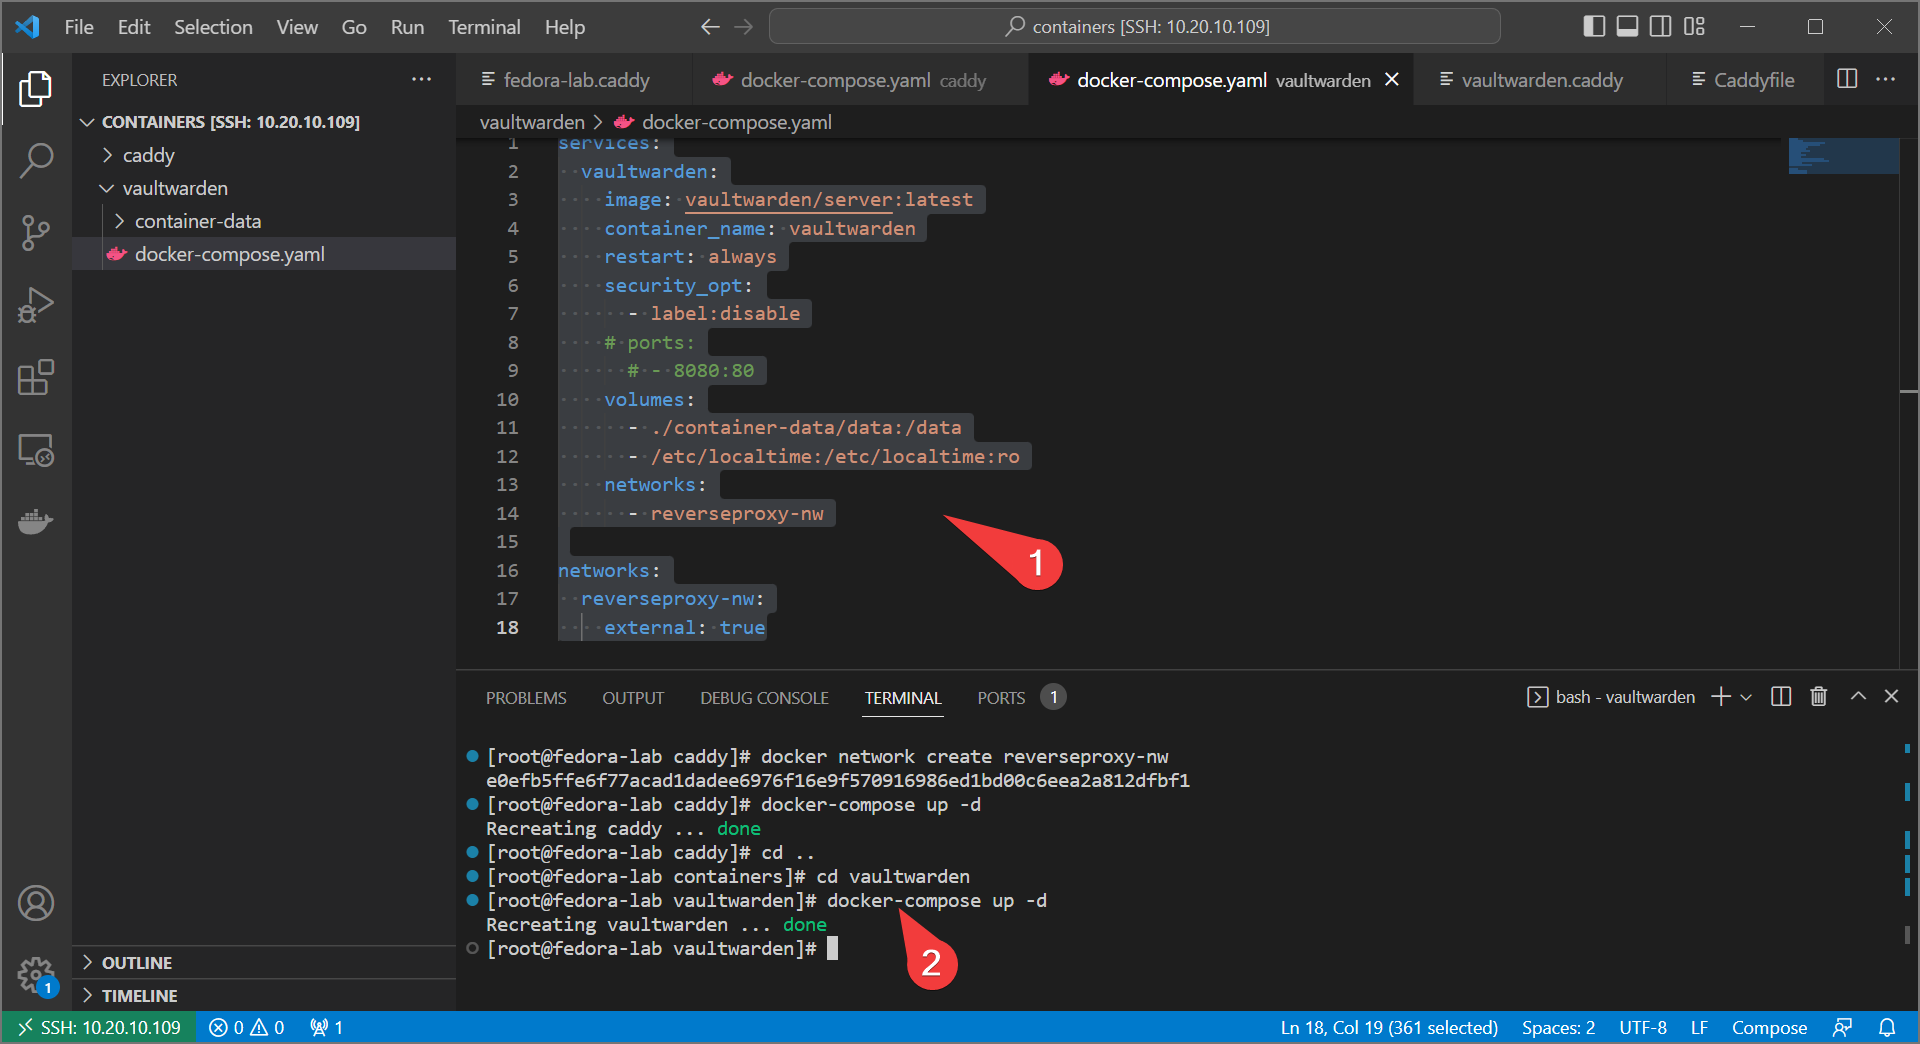
- Set up vaultwarden (or whatever your web service) to live on that network as well. Comment out the published port:
services:
  vaultwarden:
    image: vaultwarden/server:latest
    container_name: vaultwarden
    restart: always
    security_opt:
      - label:disable
    # ports:
      # - 8080:80
    volumes:
      - ./container-data/data:/data
      - /etc/localtime:/etc/localtime:ro
    networks:
      - reverseproxy-nw

networks:
  reverseproxy-nw:
    external: true
- Bring up the service with
docker-compose up -d
- Finally modify the
vaultwarden.caddyto refer to vaultwarden by its internal port and container name:
https://warden.<your-domain> {
    import localSubnets
    import localTLS
    reverse_proxy @localSubnets http://vaultwarden
}
- hot reload caddy, and you should see that vaultwarden is still accessible! despite not having any published ports.
Moving On
So far we’ve really just scratched the surface of what caddy can do. It’s a very powerful tool. However, we still have a big problem. All of our websites have scary warnings!
If we have a registered domain, this is a fixable problem. Let’s figure out how in Adding Acme Certification.