Installing Proxmox
Introduction
Well if you’re going to use a hypervisor, we need to install it! Proxmox is pretty straightforward: the only special configuration change is we will be installing on ZFS, to better take advantage of our primary disk drive.
TL;DR
We’re installing proxmox with a ZFS configuration
Get the ISO
Here it is! Current version is Proxmox VE 7.2 ISO Installer as of the writing of this guide.
Burn to a USB
You can use Rufus to make this easy.
Install Proxmox
- Start with the normal prompt (of course)

- Agree to the license, and choose the correct disk. Then Choose options. Change to ZFS Raid 0 (yes raid 0, a single drive in raid 0 is still a single drive). Make sure to deselect any additional drives you do not want erased. Press OK.
Warning
The disk(s) you choose will be erased. It is possible to erase multiple drives if the wrong settings are chosen. I strongly recommend disconnecting any drives with important data and reconnecting them post install to be safe.
- Set your timezone, choose an e-mail (probably yours) and create a password.

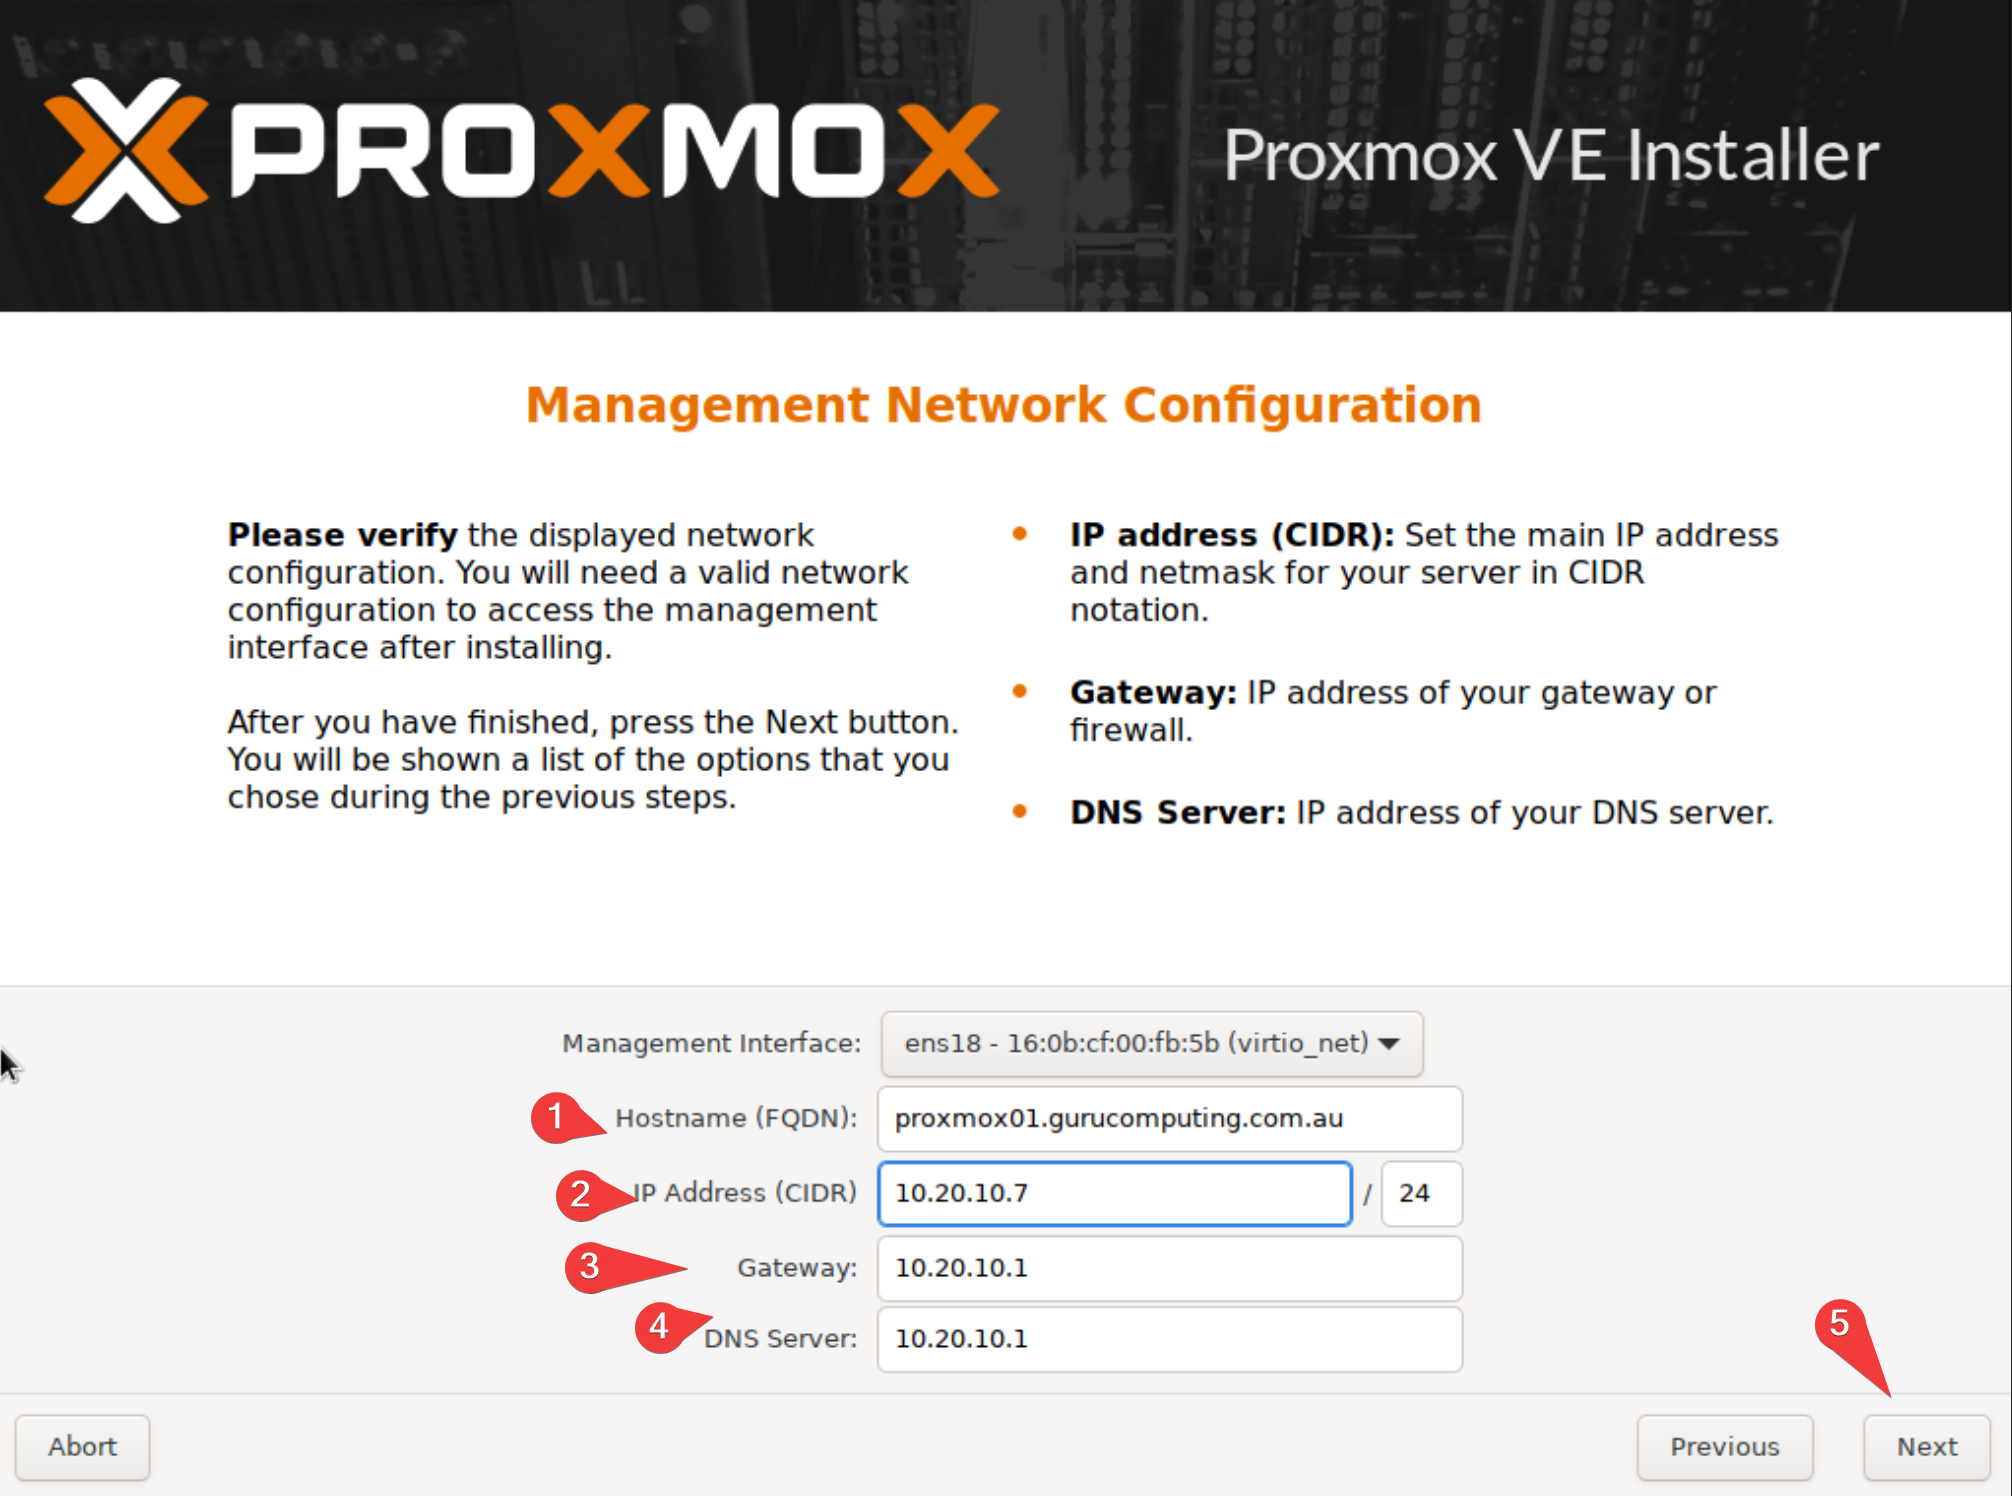
- Set a dns name (preferably a real one), and a static IP (yes it has to be static, at least by default).
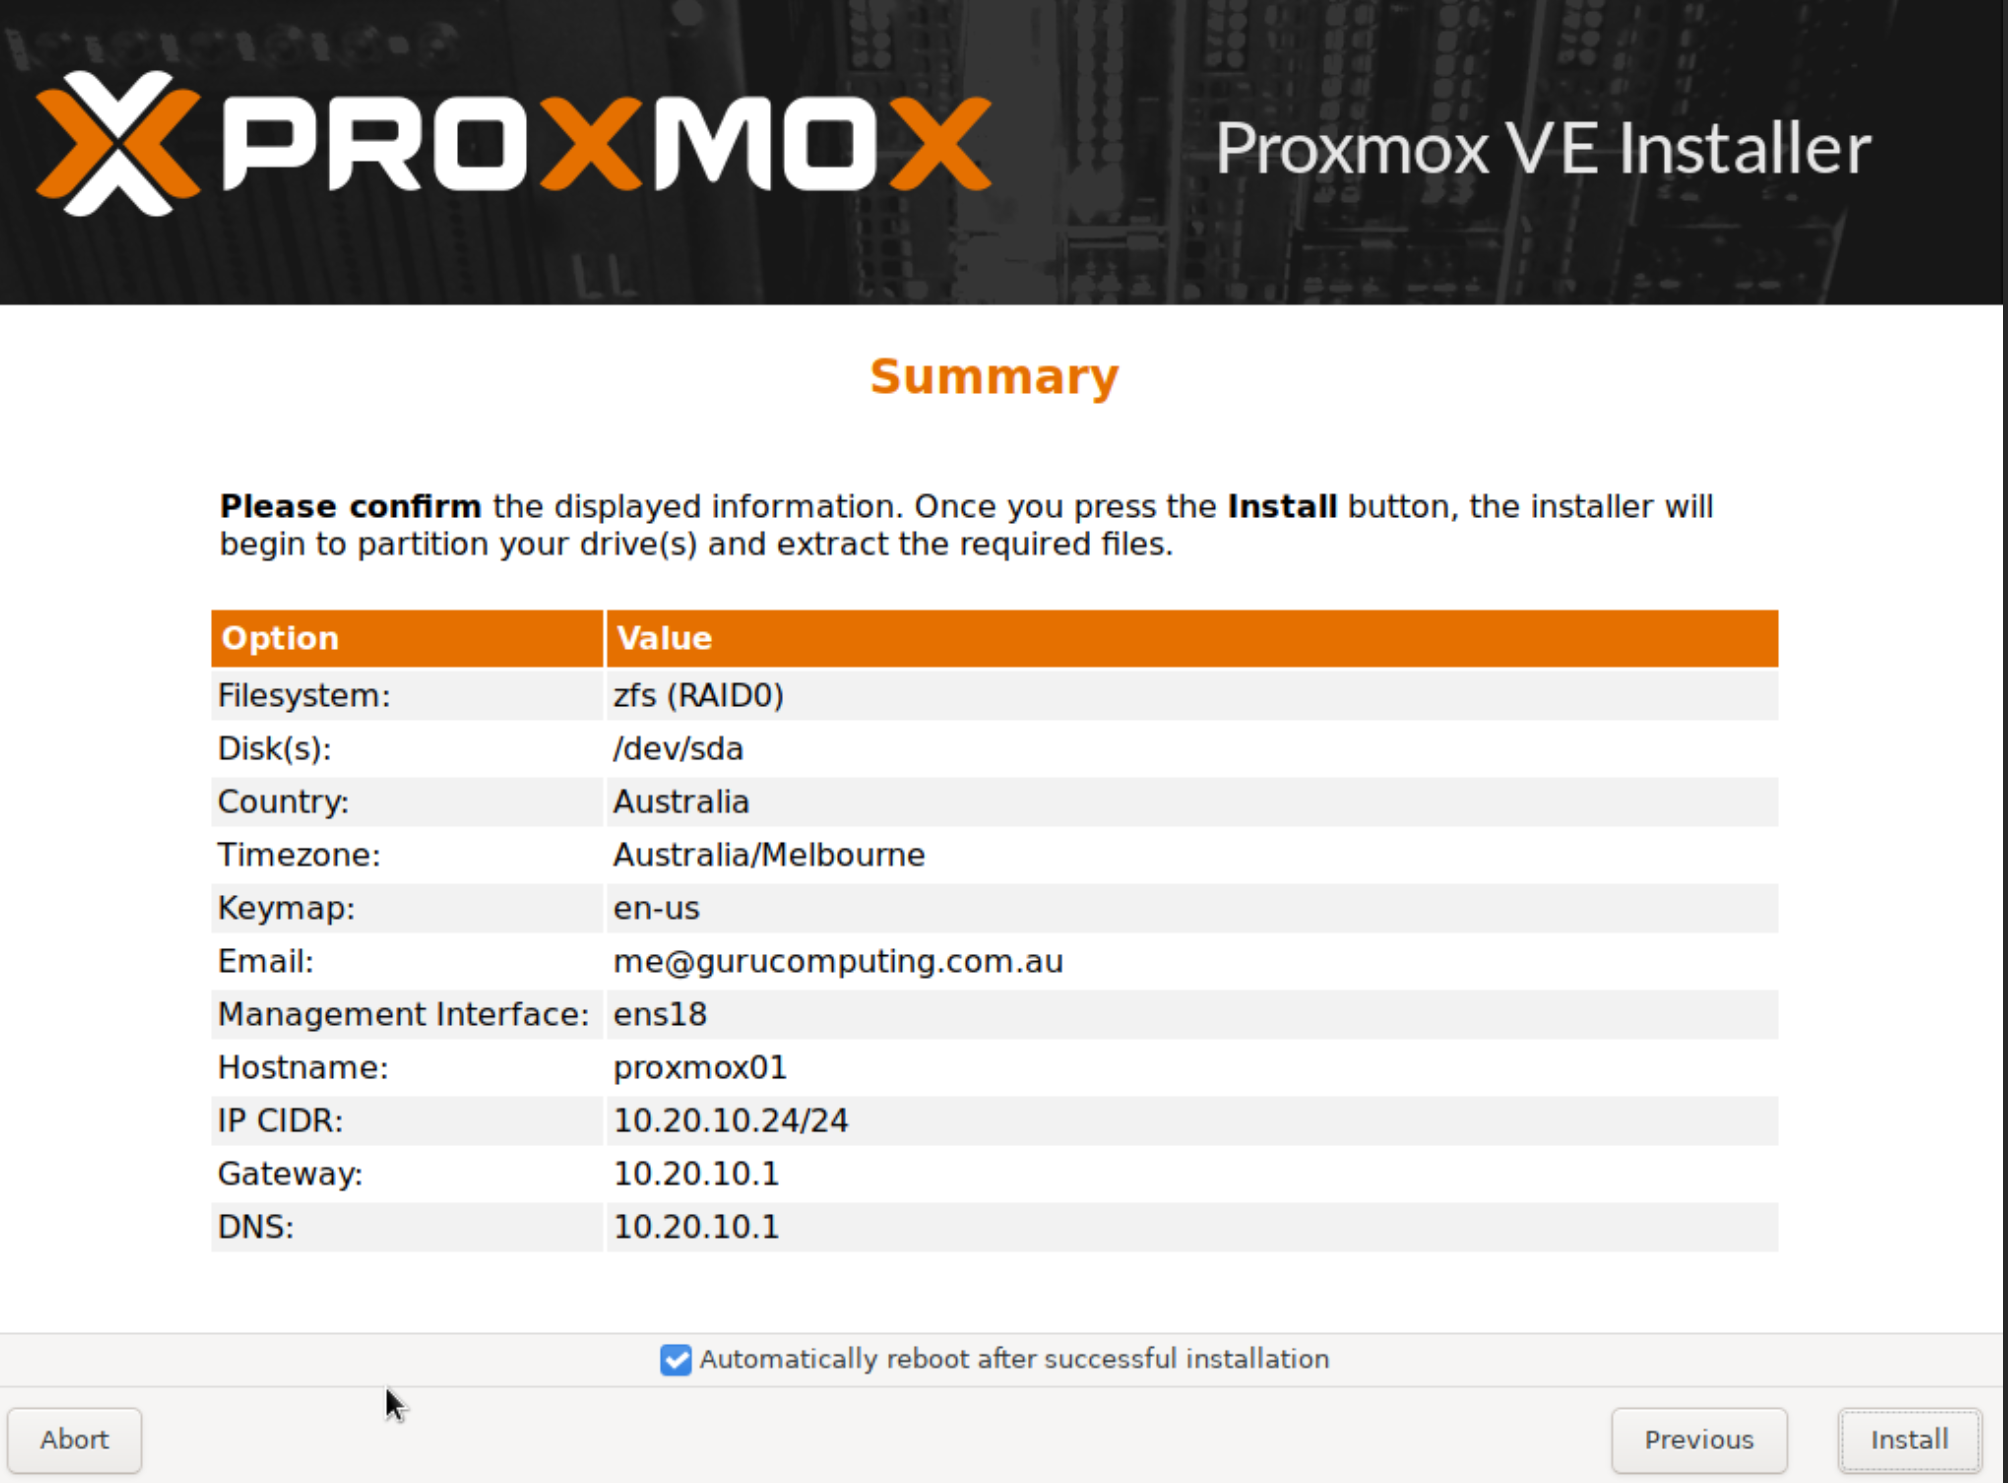
- Install! It should go pretty straight forward and reboot
- Post reboot, you should be able to access your shiny new web management interface on
https://our-ip:8006.
Moving On
Let’s do some basic housekeeping in Proxmox Configuration