Backing up Docker
Introduction
Alright, backups! Super, super important. It’s a critical part of a functioning docker environment, and a part that most people skip. Don’t skip it!
Now if we are going to back up our system, it needs to be on a remote target (no point backing up to the same drive). Which means we need a remote target of some description. Hmm… Hold on.
Shuffles around in the cable box
We have a… raspberry pi 3b and an old usb drive. Yeah that sounds pretty typical for a homelab backup.
TL;DR
In this section, we will:
- Set up a scheduled backup with btrbk and verify that it functions
Pre-Requisites
- An external BTRFS based linux server (another fedora server works great!)
- This guide will use a Raspberry Pi 3b with an external btrfs formatted USB drive
Choosing a Backup Software
Backing up is where a common programming adage is especially relevant: Keep it Simple Stupid.
There’s all sorts of fancy ways to back up. You can do it incrementally, you can encrypt it, you can encode backups into cryptocurrency… oops went off track.
The best, and easiest backup, is the kind you can easily restore from. The simplest method is, well, a file copy. You copy the file, and now you have a copy of the file. Restoring the file involves just copying it back.
As it turns out you can achieve that simplicity, and have the bells and whistles: by leveraging the features of btrfs.
Why BTRFS is amazing
btrfs is a significant reason we chose to use Fedora. Fedora (workstation), Synology and Suse all default to using btrfs
Info
btrfs based backups to Fedora and Suse should work, but btrfs backups to Synology will not (they use a custom build of btrfs)
Btrfs is a copy-on-write filing system designed to allow point-in-time snapshots of the filing system (or individual subvolumes, a term we used earlier in the guide). It’s genius in that you can instantly snapshot your data into a separate folder, and transfer that data to another btrfs filing system at a pure block level (IE: very efficiently).
With all this combined we can:
- Create point-in-time snapshots of our running docker containers without disturbing their operation
- Incrementally transfer these snapshots to an external btrfs storage, or over SSH to another btrfs based computer
- Incrementally transfer and store these snapshots in an efficient, block based, deduped manner
- Perform trivial restores because it’s all transparent at the user level: the snapshots and backups are just folders and files on a filesystem
Where BTRFS may not be appropriate
The big caveat with btrfs backups is.. well.. it has to be on btrfs. at source and destination. If you want to use a more generic storage target, you are better off using a chunk based backup technology, like restic. Restic will also work fine (as long as you back up btrfs snapshots and not the running folder structure), but it’s at the cost of a significant increase of complexity.
Setting up the Raspberry pi
We are going to start off with a raspberry pi running raspberry pi OS desktop edition
Info
running the desktop edition will allow using graphical partition editor, which the server edition won’t do by default
Start by installing some pre-requisites:
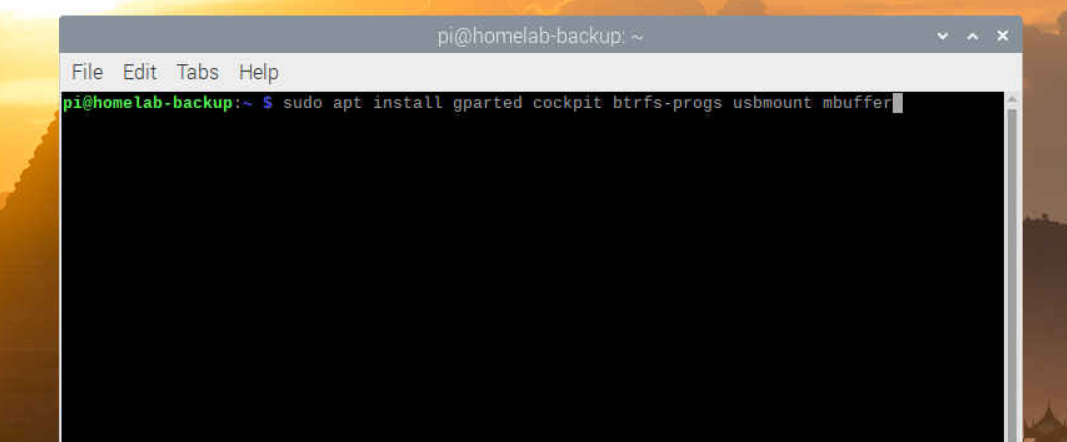
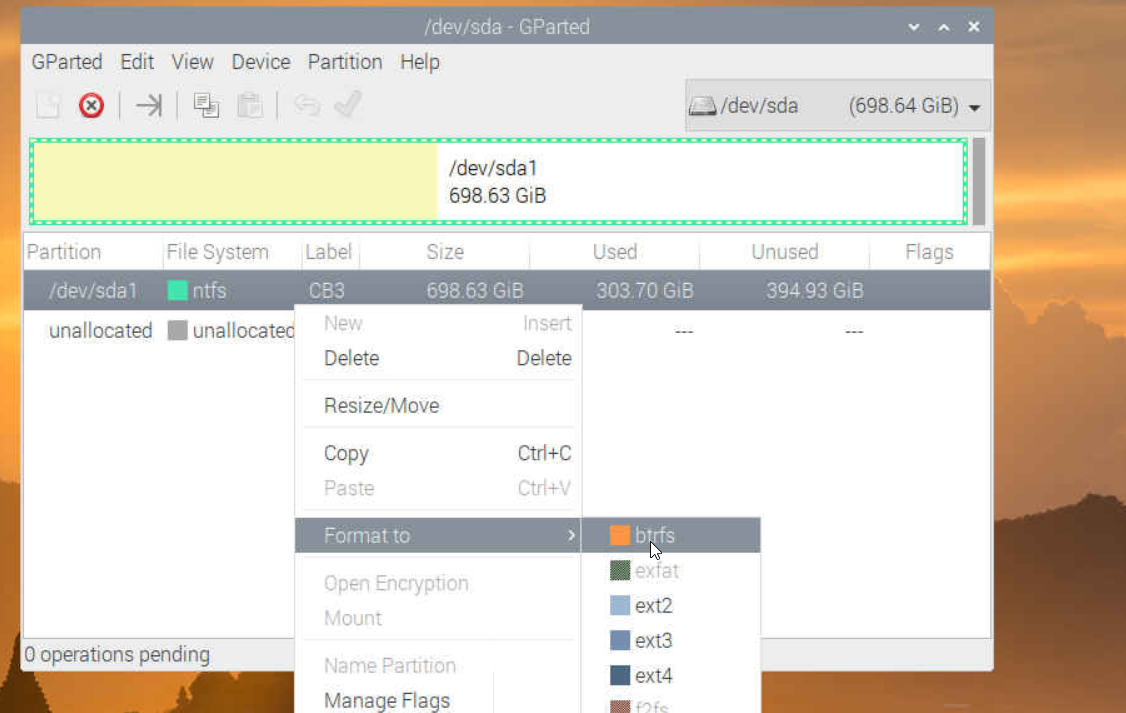
Open gparted and unmount your USB drive

Format the drive to BTRFS after unmounting
Warning
If this isn’t obvious, overwriting your filing system will destroy ALL data on the USB drive. Make sure it’s not important data, and make SURE you chose the right drive. Do not do this step with ANY important data plugged into the computer. you have been WARNED.
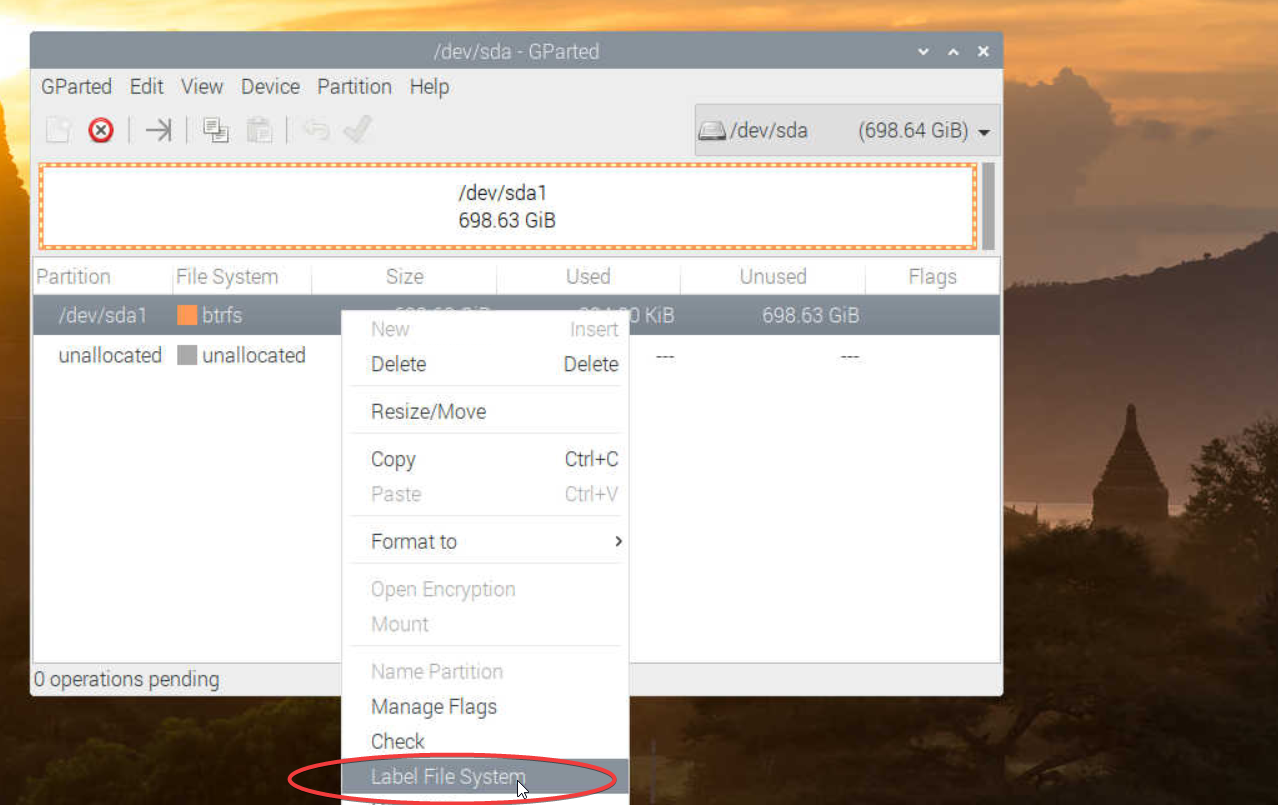
Also label the drive something descriptive (like backup). Press apply (the green check box) to wipe your drive.
Select the device in the filing system, it should mount at /media/pi/<label>
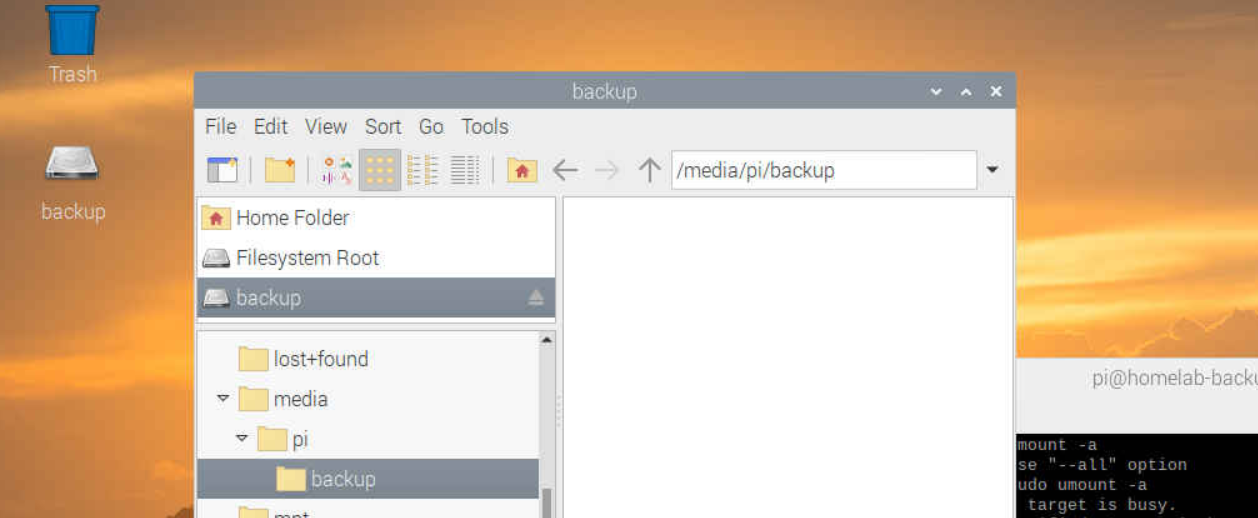
Unplug and plug your USB drive back in to make sure it shows up and mounts automatically.
Key Exchange
Now we have two cockpit interfaces: one for our docker host and one for our backup pi. For us to successfully transfer backups over SSH without requiring a password, we need to perform a key exchange. I have written a guide on doing a key exchange here. For convenience, here is the process on an any% speedrun:

Using btrbk
We’re done with the raspberry pi for now. Back at your docker host in cockpit, install btrbk:
Info
btrbk is a backup utility to leverages the btrfs filing system to perform snapshots and replication
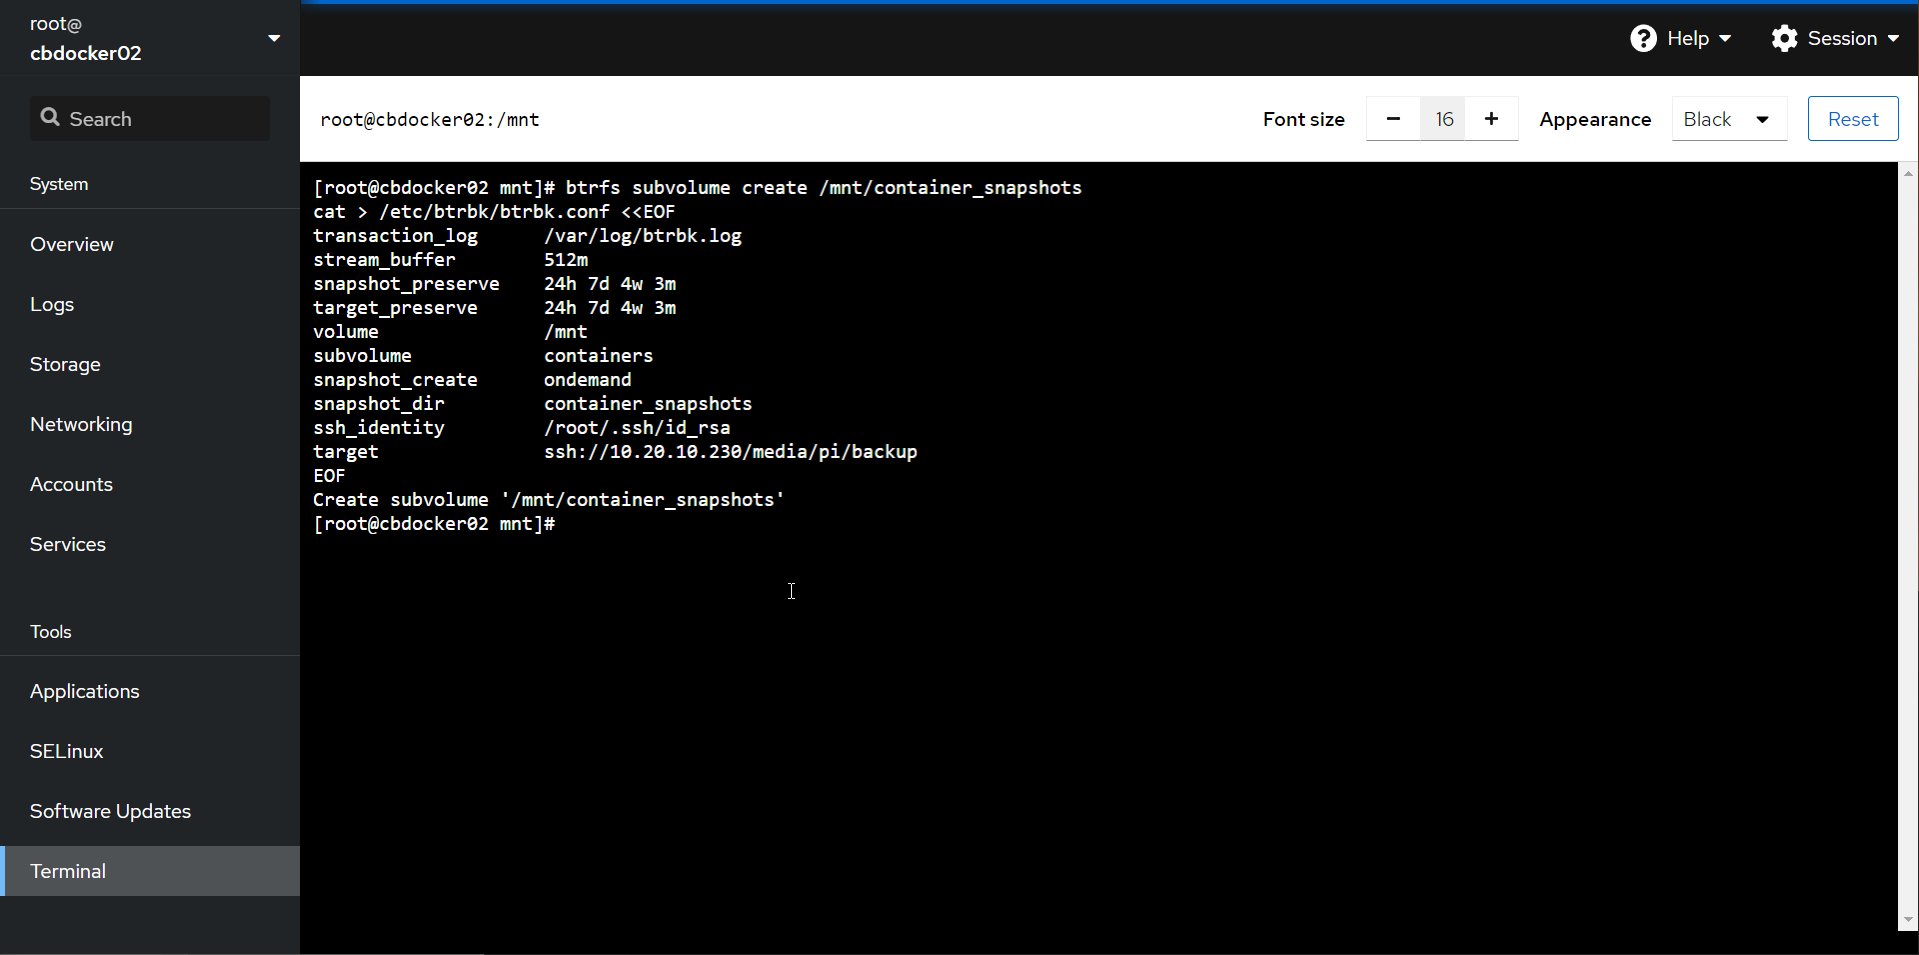
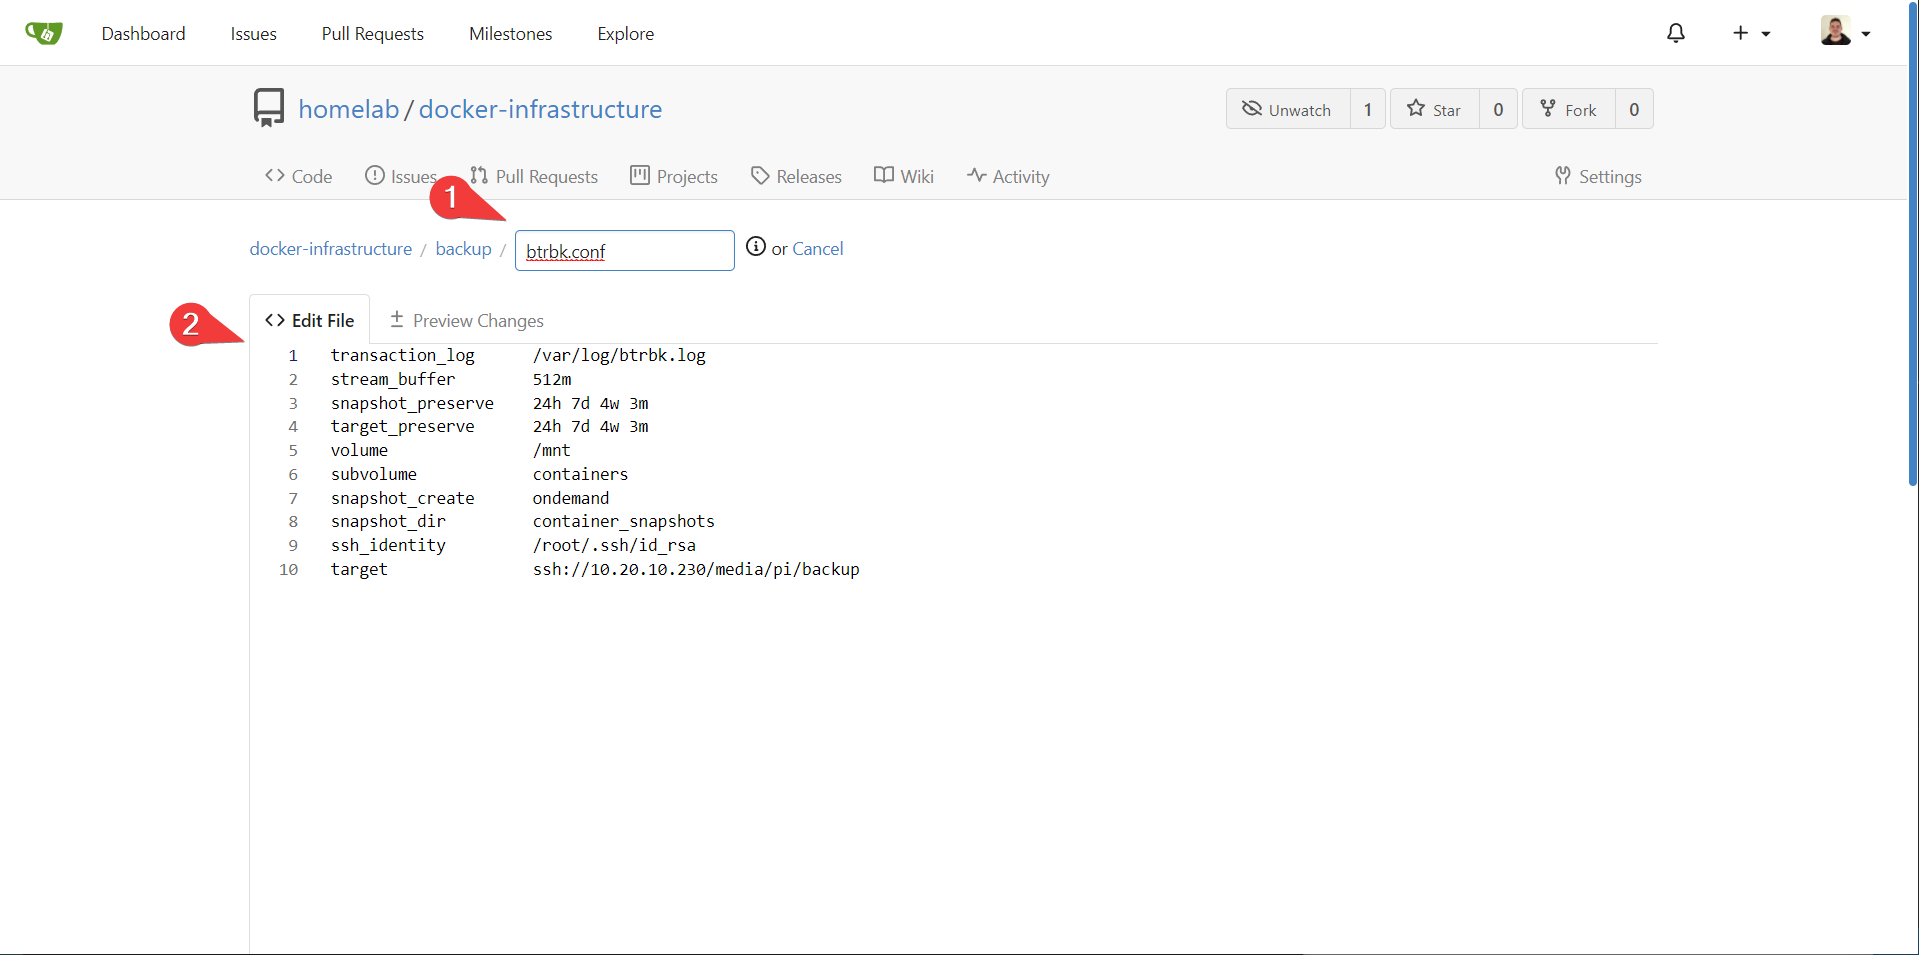
(/doing-more-with-docker/08-Backing-up-Docker-07.png)For btrbk, we set up a simple configuration file (at etc/btrbk/btrbk.conf) that describes source, destination, and retention policies. We also create a btrfs subvolume at /mnt/container_snapshots for local snapshots. run the following, changing your target to use your destination ip address:
#create a location to house our snapshots
btrfs subvolume create /mnt/container_snapshots

#place a preformatted config file at /etc/btrbk/btrbk.conf
cat > /etc/btrbk/btrbk.conf <<EOF
transaction_log      /var/log/btrbk.log
stream_buffer        512m
snapshot_preserve    24h 7d 4w 3m
snapshot_preserve_min latest
target_preserve      24h 7d 4w 3m
target_preserve_min latest
volume               /mnt
subvolume            containers
snapshot_create      ondemand
snapshot_dir         container_snapshots
ssh_identity         /root/.ssh/id_rsa
target               ssh://10.20.10.230/media/pi/backup
EOF
Info
You can find an example config here with many more configuration options.
Alright, let’s give it a test! run the following:
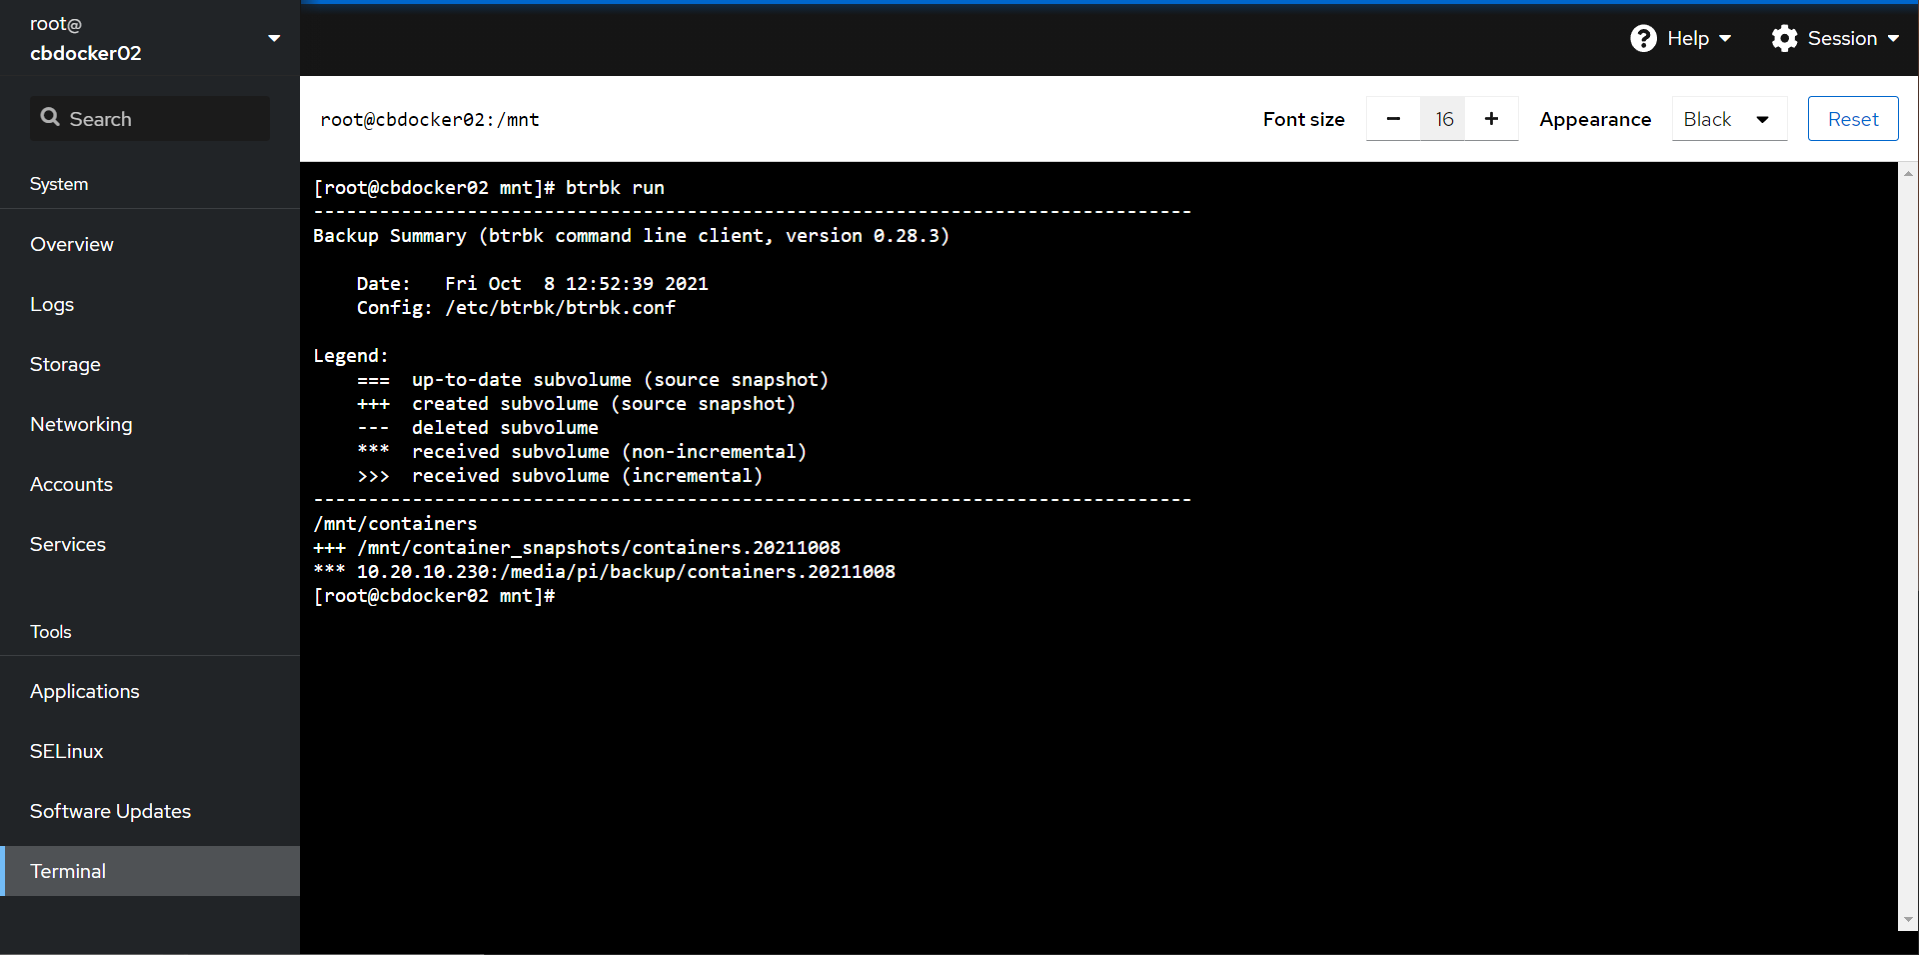
easy! We now have a point-in-time snapshot in /mnt/container_snapshots, and that same snapshot has been replicated to the raspberry pi on the USB drive.
(/doing-more-with-docker/08-Backing-up-Docker-10.png)
Info
by default, we will be retaining 24 hourly snapshots, 7 daily snapshots, 4 weekly snapshots, and 3 monthly snapshots. This should reasonably cover you for 3 months of rotating backups.
If you btrbk run again, you’ll get the same result: a second timestamped folder with all of your stuff in it. However, behind the scenes btrbk will deduplicate the contents at the filesystem level. Which means that both folders are a full backup of your data: however they are transferred and stored in an incremental fashion behind the scenes. Awesome!!!
Setting a Schedule
Last step remaining: let’s set up an hourly backup.
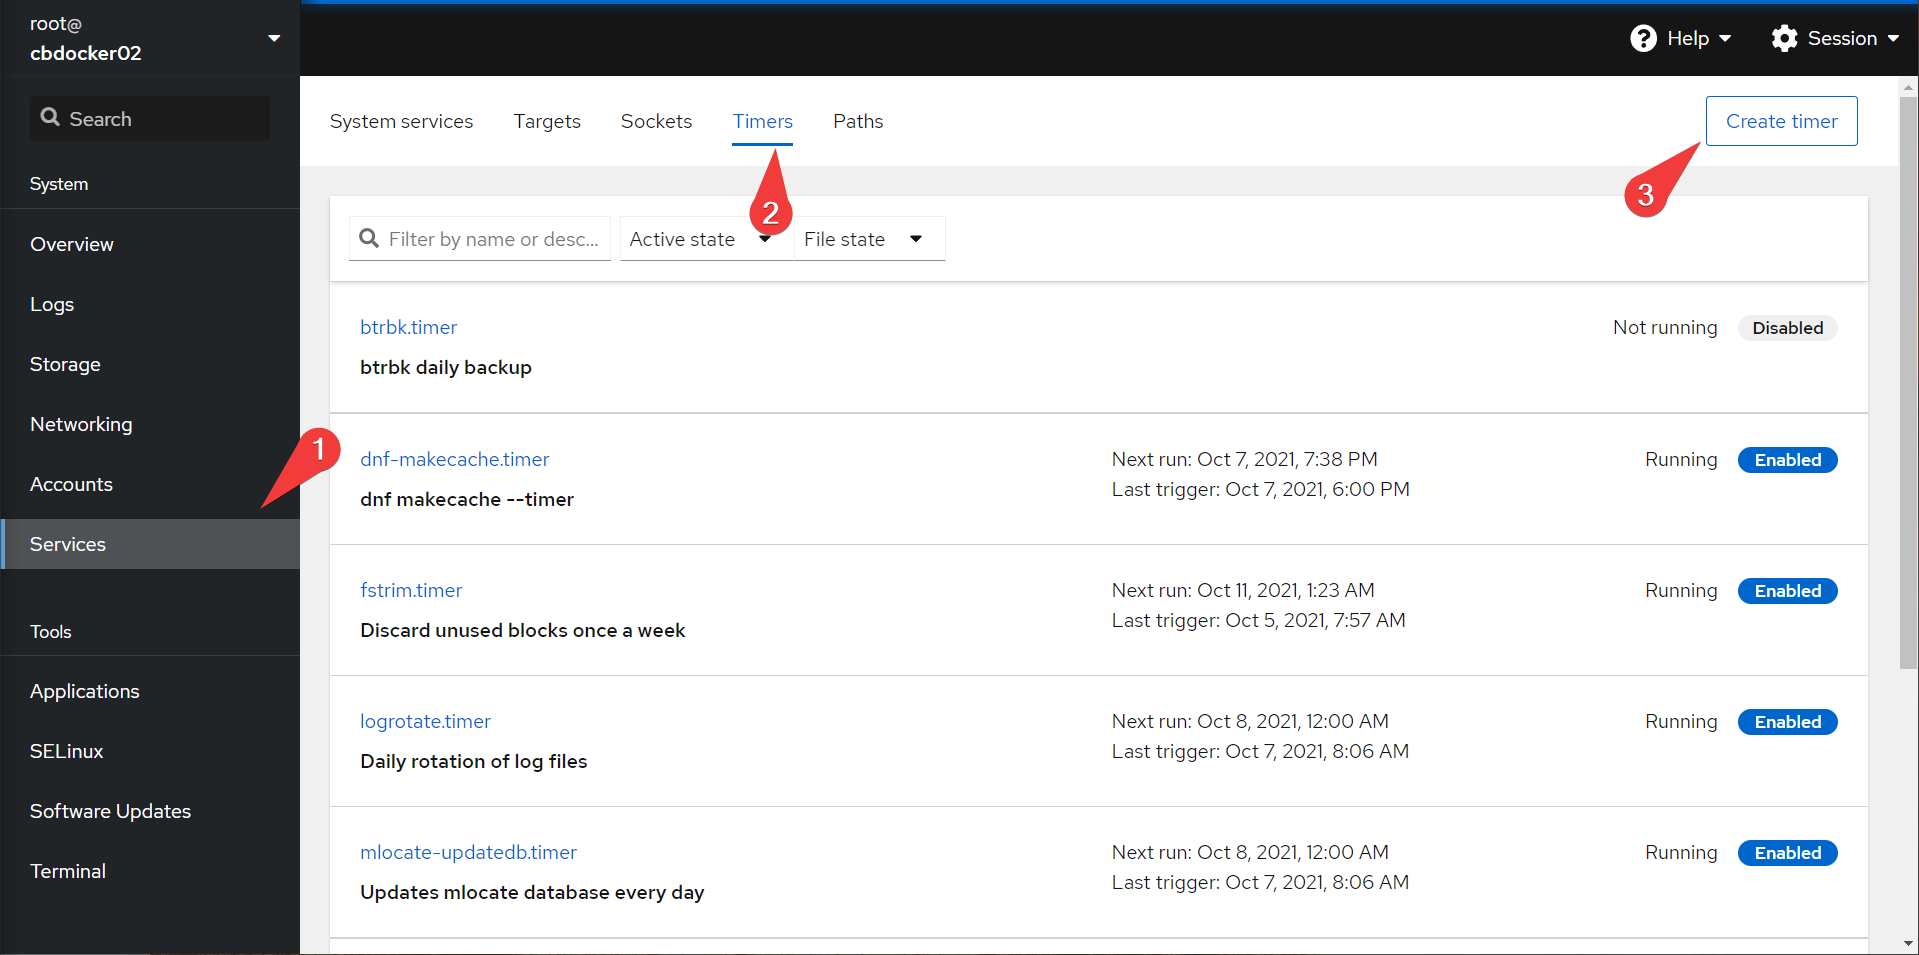
- in cockpit, navigate to the Services category, then to Timers. Create timer.
Info
btrbk already has an (inactive) timer here, but we’ll set up our own
- Create a time called
btrbk-docker, set the command to/usr/sbin/btrbk run, and set the timer tohourly. Save!
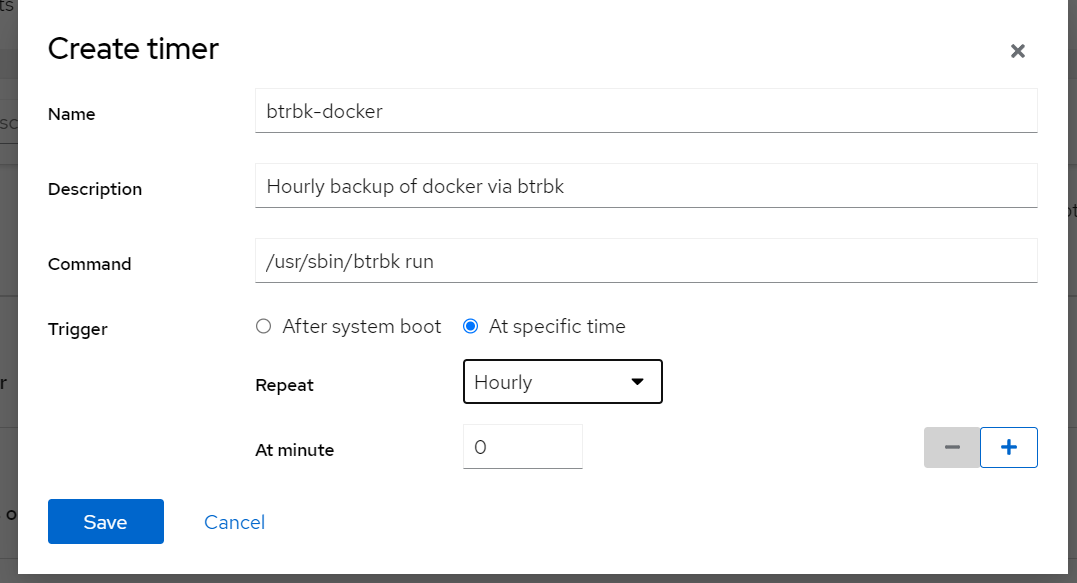
And, that’s it! You’re done. You can also find the btrbk-docker.service in the service tab to run manually and test.
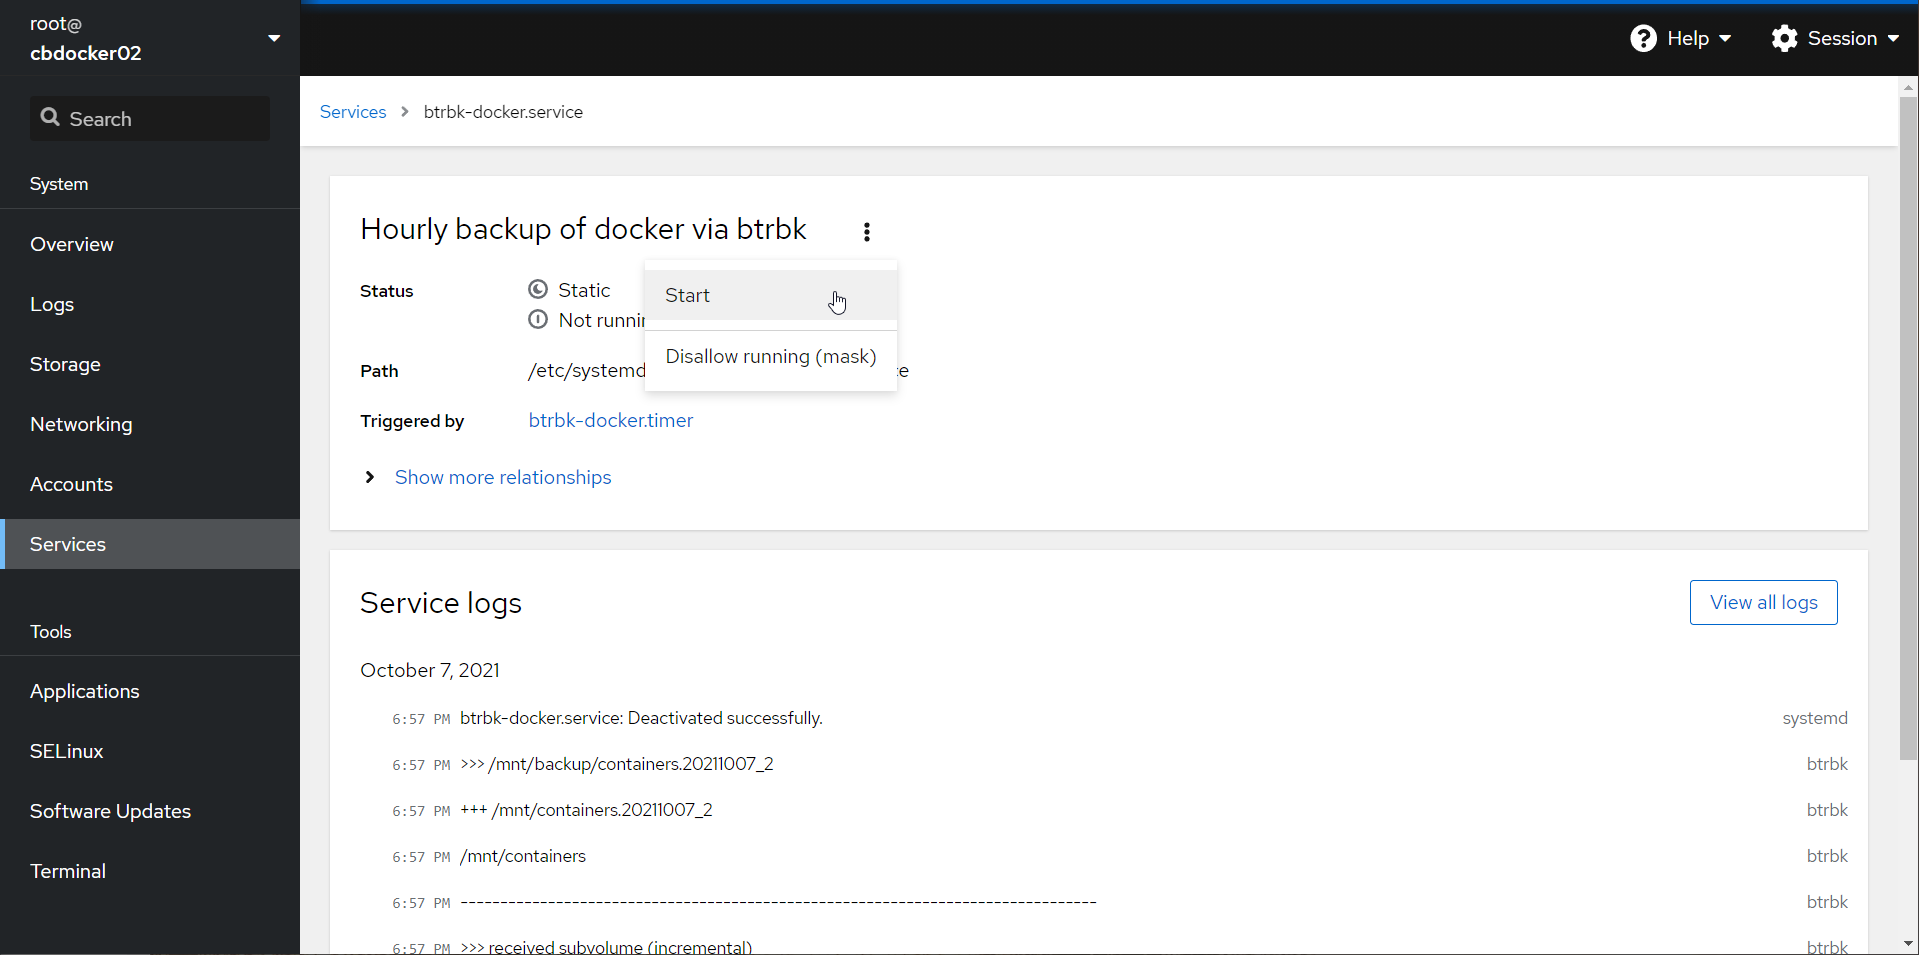
btrbk rocks.
Info
The logs tab in cockpit should warn you if there was a failure in the backup. You can also set up alerting using normal systemd alerting functions.
Before you Forget
Document your backup settings!
Moving On
So far, we are being pretty cavalier with our use of root accounts and default admin accounts. Let's fix that with Central Authentication and SSO.