Guacamole SSO Integration
Introduction
Single Sign-on is great. These days it’s less of a nice-to-have and more of an extremely necessary requirement for any business environment. SSO allows you to centralise your authentication, add MFA to any reliant service, and harden your credential system against intrusion.
It’s also super duper hard to set up for many protocols, such as SSH and RDP. This is why it’s great that we don’t have to! Instead we gate it all behind Guacamole who can easily implement SSO. Let’s see that with Keycloak now.
Pre-Requisites
- An Identity Manager of some description. This guide will be using Keycloak (see this guide on my blog for setting up Keycloak)
- A functional guacamole server
- A functional reverse proxy (SSO relies on the domains to be correct)
Choosing a SSO Protocol
SSO is usually performed against two protocols, both of which are HTTP based:
- OpenID Connect (OIDC)
- Security Asset Markup Language (SAML)
The good news is that Guacamole supports both! But we only need to choose one. Typically if we have a choice we will choose OIDC: it is a simpler protocol with less complications. So let’s do that.
Configuring OIDC on Keycloak
- in Keycloak, go to clients and create client
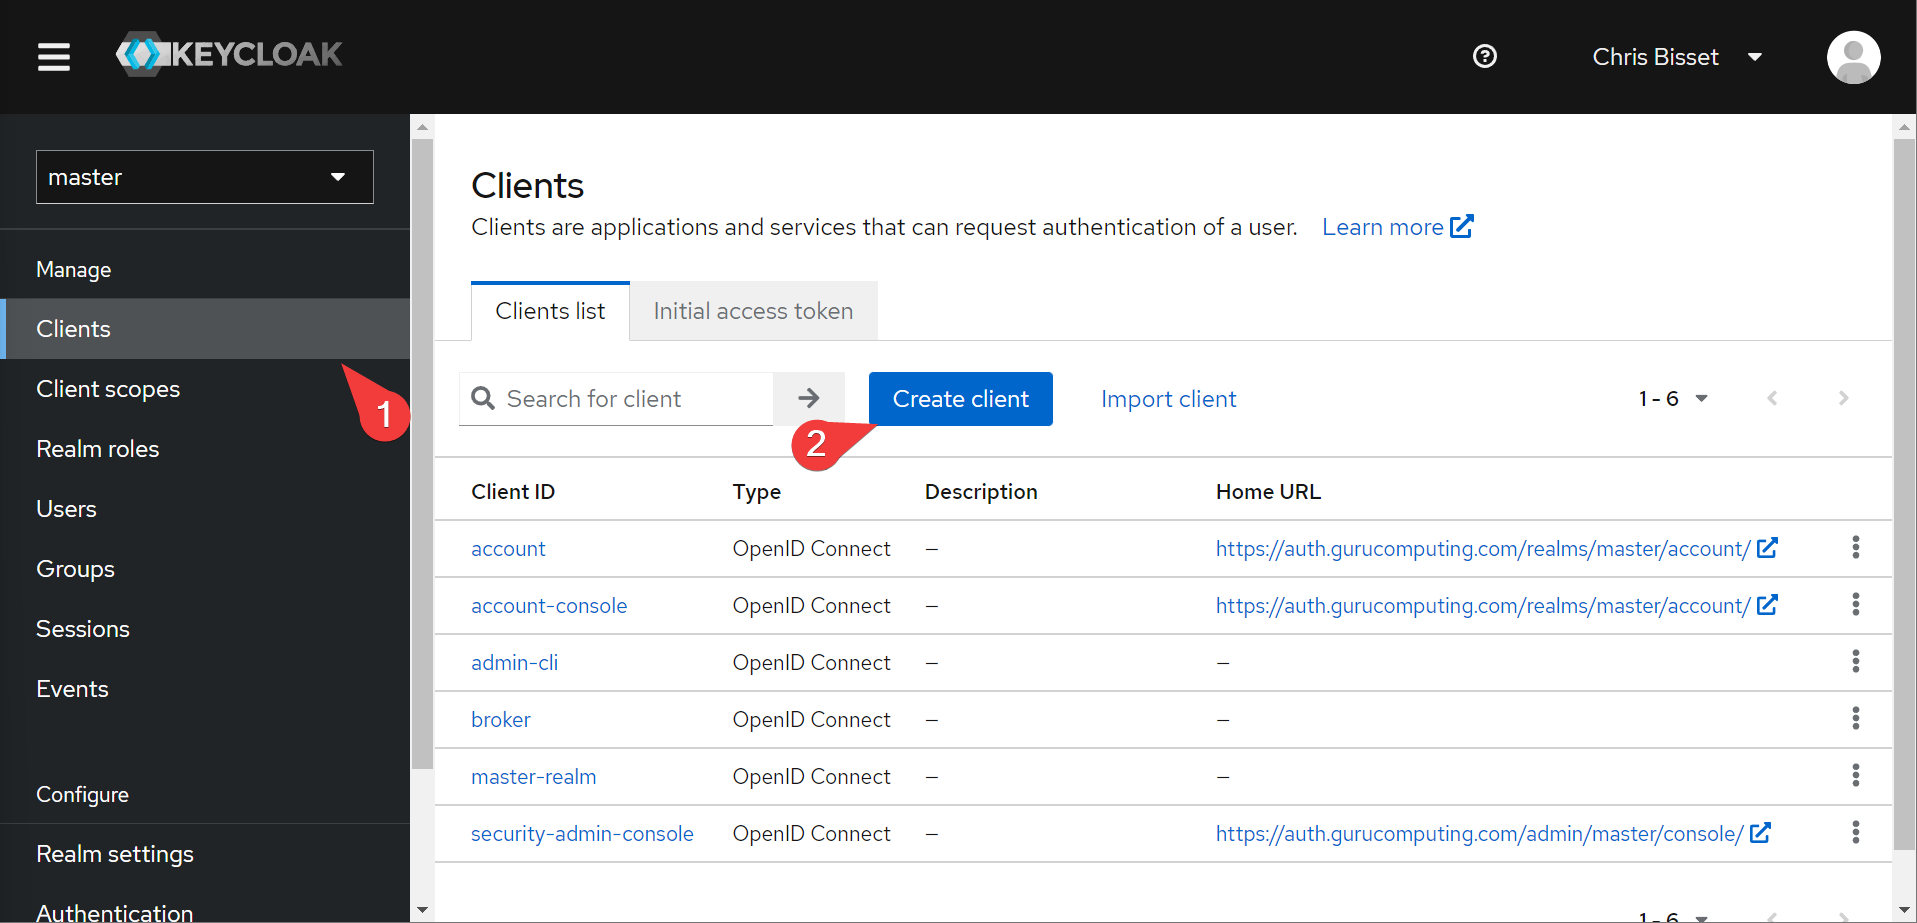
- Create a client called guacamole

- turn on implicit flow on the next page and save

- Once the configuration page comes up, set the root URL, home URL and redirect URIs to your guacamole server:
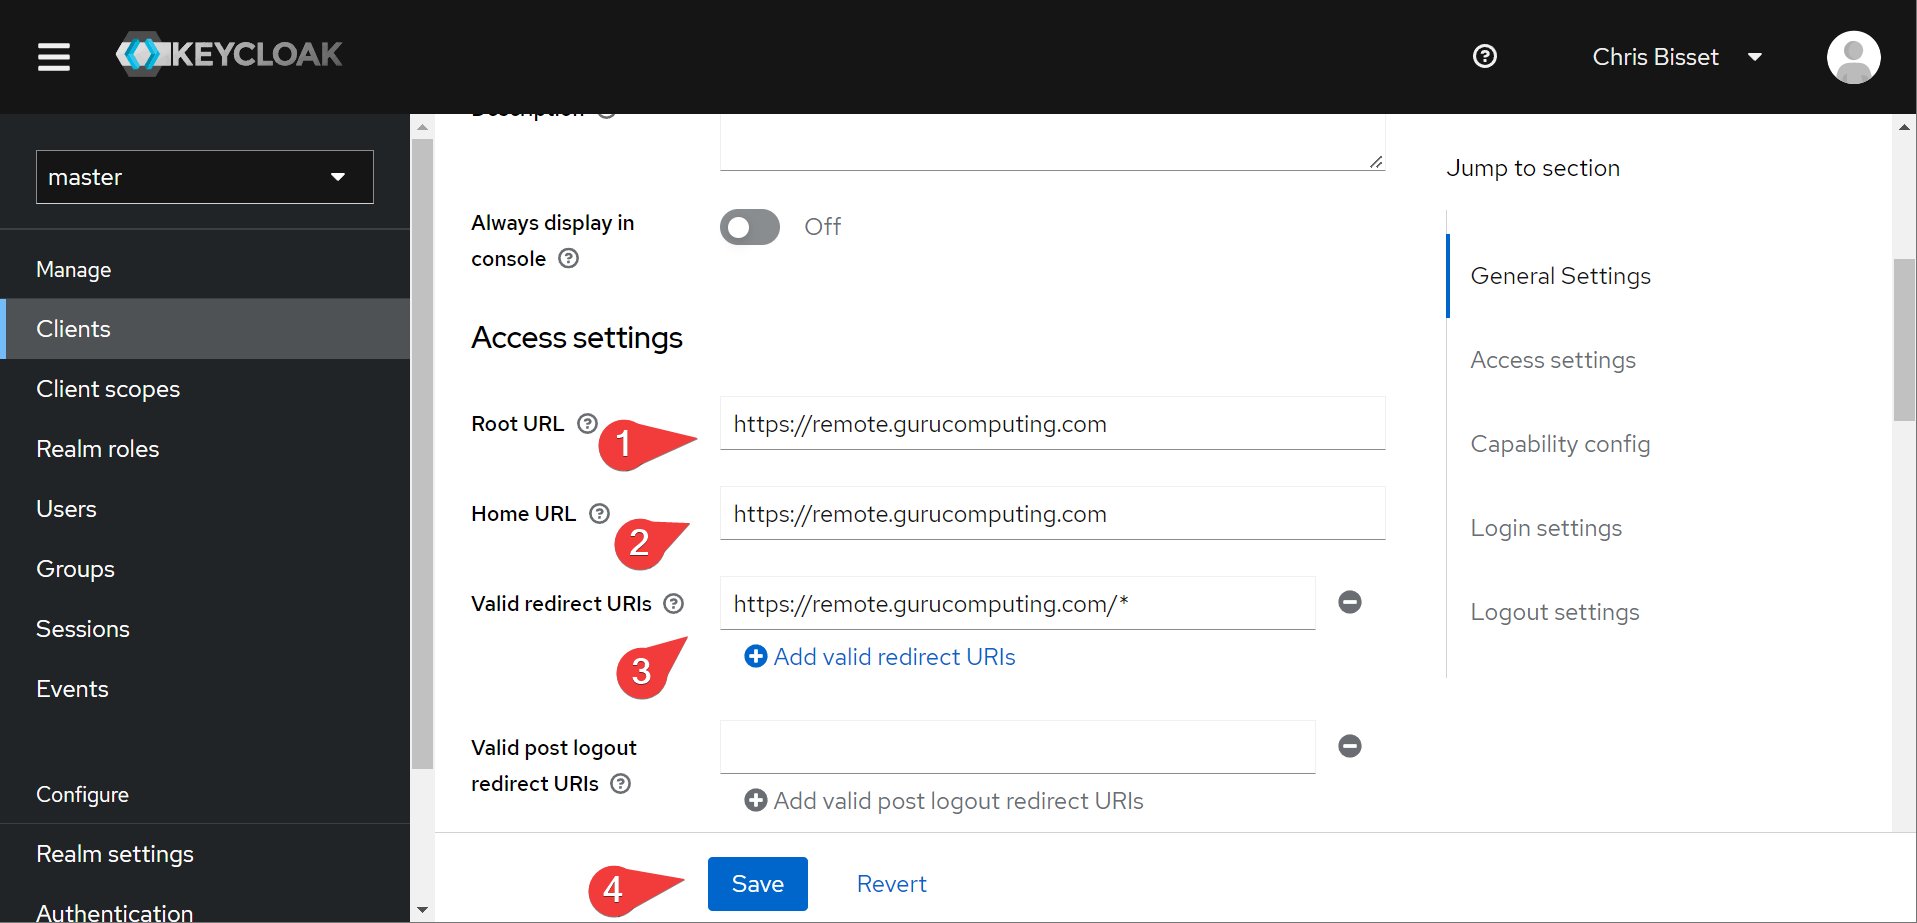
That’s it!
Configuring OIDC on Guacamole
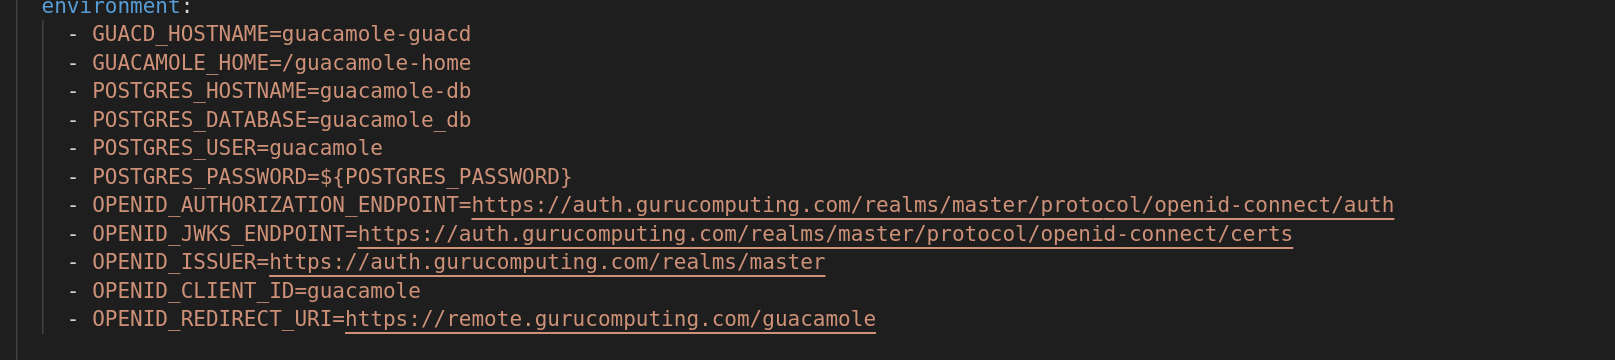
- Add the following environment variables to your docker-compose file:
      - OPENID_AUTHORIZATION_ENDPOINT=https://auth.<your-domain>/realms/master/protocol/openid-connect/auth
      - OPENID_JWKS_ENDPOINT=https://auth.<your-domain>/realms/master/protocol/openid-connect/certs
      - OPENID_ISSUER=https://auth.<your-domain>/realms/master
      - OPENID_CLIENT_ID=guacamole
      - OPENID_REDIRECT_URI=https://remote.<your-domain>/guacamole
Info
The full documentation on OIDC for guacamole can be found here. Keycloak generates a special URL where we grab most of this url data from: https://auth.<your-domain>/realms/<your-realm>/.well-known/openid-configuration.
Getting Going
- Download the SSO plugin from the downloads section of guacamole
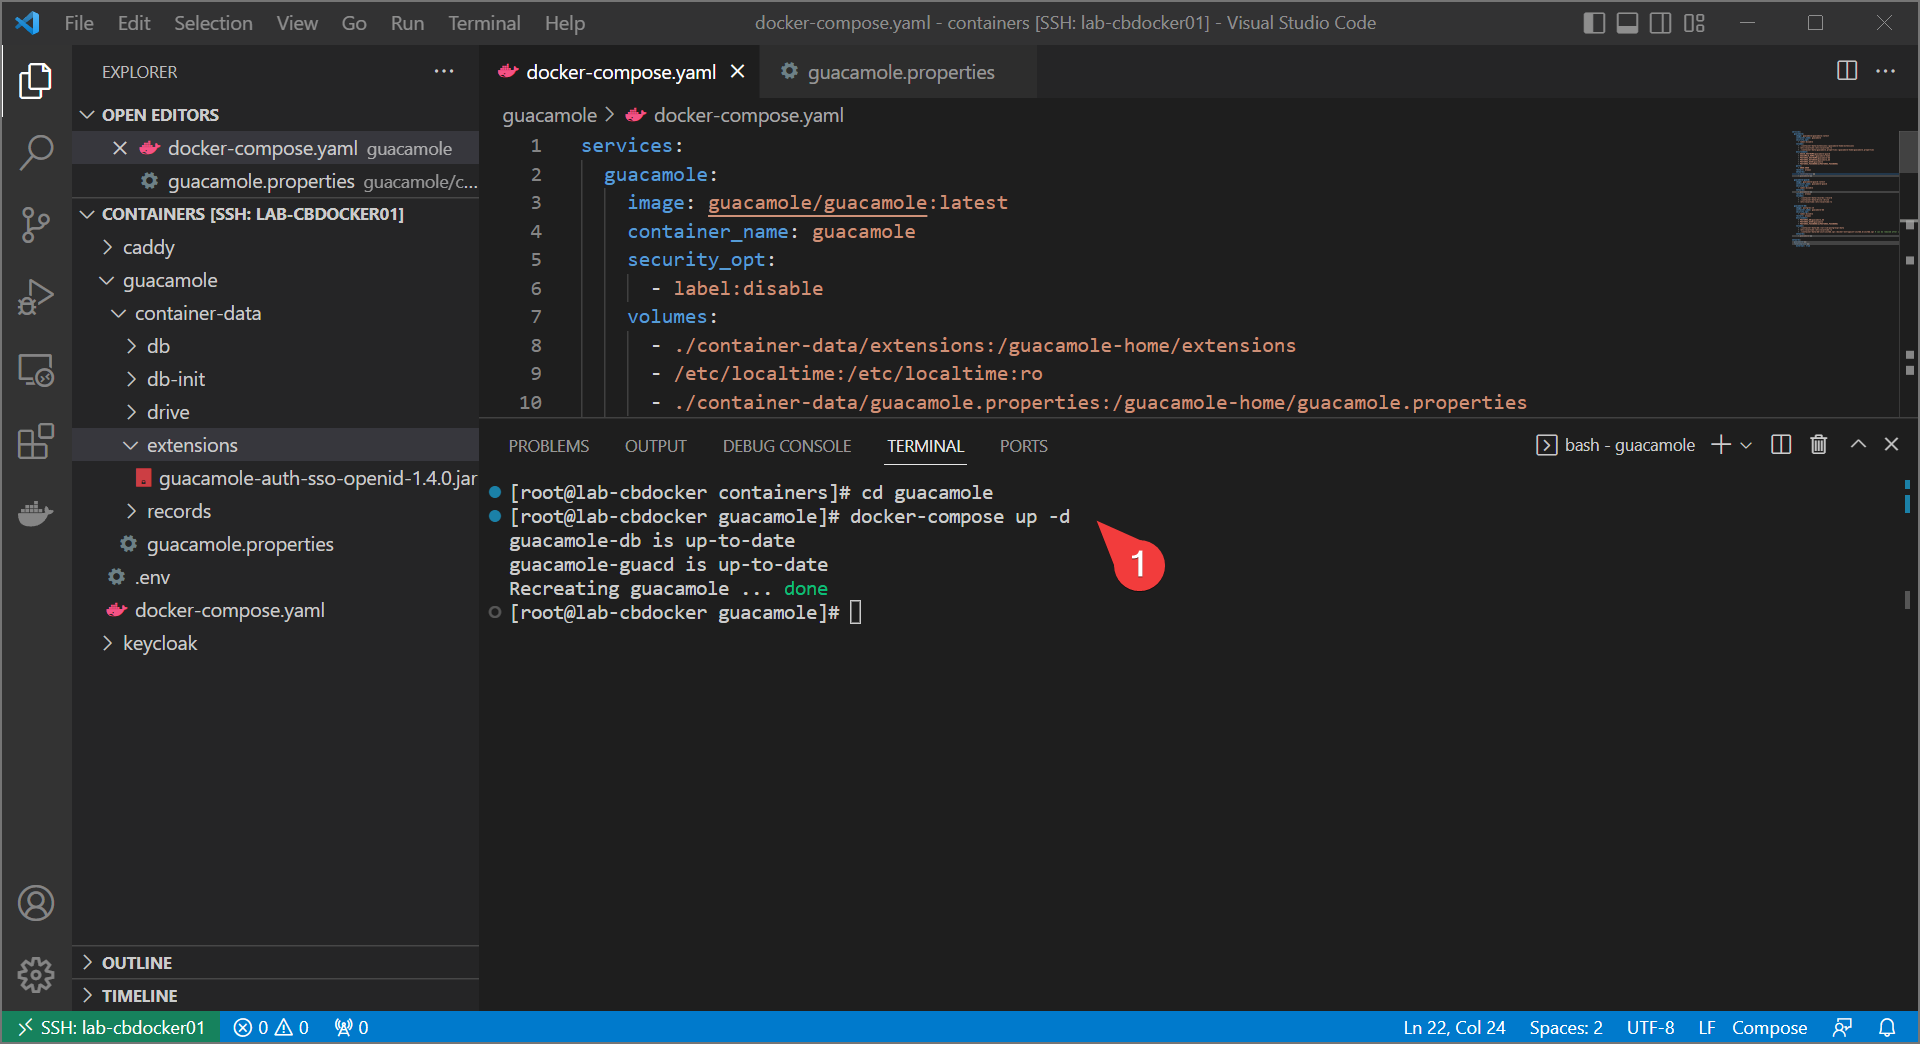
- Extract the
guacamole-auth-sso-openid-1.4.0.jarfile and place it in the guacamole extensions directory. Delete the existing TOTP plugin if it’s still there (MFA should get handled on the identity management side when using SSO)
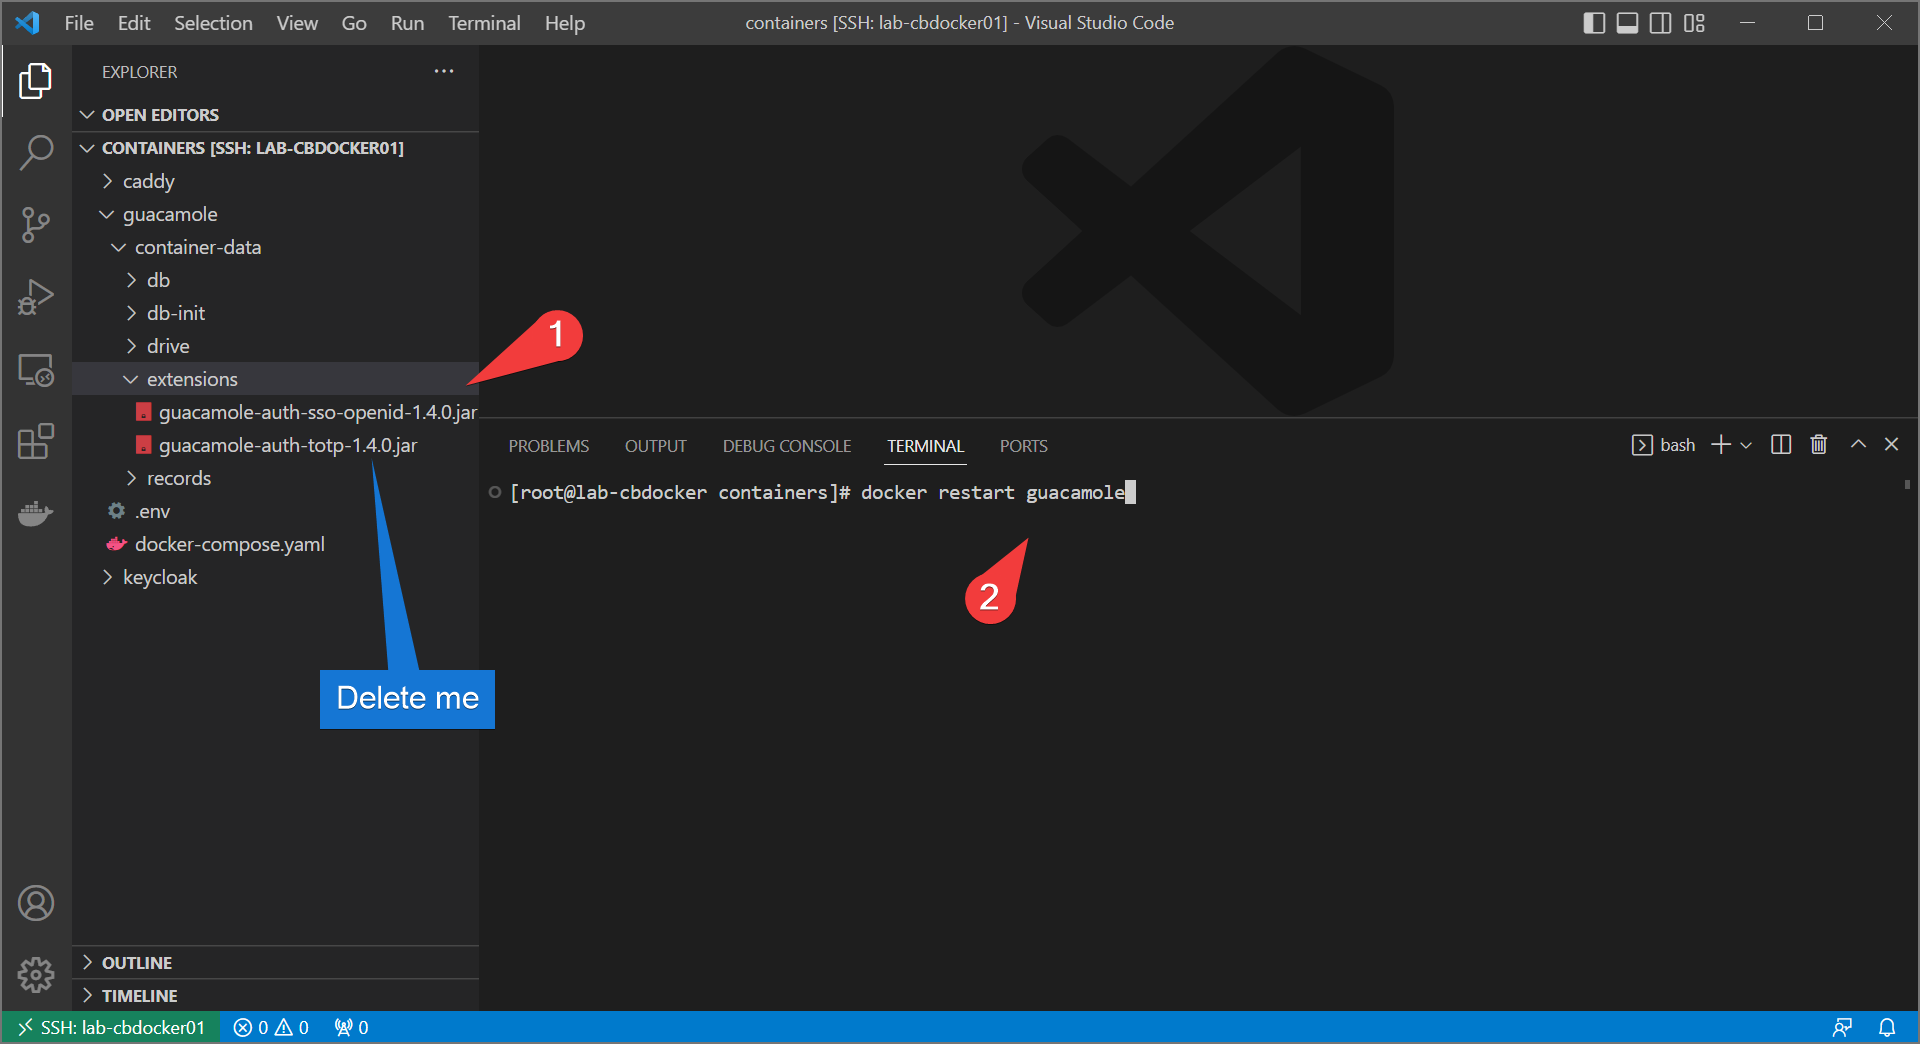
- Bring up the stack again with the changes included.
Final Test
If all goes well, you should get an option to sign in with SSO! Let’s see that below:
Success!
Info
By default a newly created SSO user doesn’t have any permissions. You will have to temporarily undo the oidc environment configuration to assign rights, or configure OIDC further to grant authorization permissions based on groups.
Conclusion
With this last step, we have:
- Created a remote gateway, complete with MFA, to provide administrative access to our servers
- Demonstrated both Linux (SSH) and Windows (RDP) remote capabilities
- Set up SSO and configured SSO with guacamole
- Testing an end-to-end login flow