Let's Encrypt Certificates
Info
This part of the guide has been updated as a standalone article here
Introduction
Let’s Encrypt is a Certificate Authority that is trusted by all major browsers and operating systems. It’s a free service that allows automated SSL certificates to be generated for services, and it’s kinda a big deal.
The main requirement for you to use them is that you need a valid, public domain name. Yes that costs money, but not much money (depending on the TLD you choose). I recommend cloudflare and will be using it as an example
TL;DR
This article will go into the following:
- Using Let's Encrypt with Nginx Proxy Manager to generate valid SSL certificates for our services
- Describing the process and differences between DNS01 and HTTP01 challenges
Pre-Requisites
This article will show how to do both a HTTP01 Let’s Encrypt challenge and a DNS01 Let’s Encrypt challenge. You only need to choose one.
- For DNS01 Let’s Encrypt Challenge, (preferred) you need:
- A Public DNS Domain, registered with a Domain Registrar. I recommend cloudflare and will be using it as an example
- Your DNS provider to be available as a certbot dns plugin. You can use a free cloudflare account to forward your nameserver if you aren’t on the list.
- For an HTTP01 Let’s Encrypt Challenge, you need:
- Your router to forward ports 80 and 443 to your docker server (potentially dangerous)
- A Public DNS Domain, registered with a Domain Registrar (does not have to be on the dns plugin list)
What is a Let’s Encrypt DNS Challenge?
A DNS Challenge is where you tell Let’s Encrypt, "I would like a certificate that covers my entire domain”. And Let’s Encrypt says, “Here’s a big text file to stick in your DNS registrar for us to read and validate your domain”. Once you do that, and once they read it, they give you a certificate that covers your entire domain (referred to as a wildcard certificate) for 3 months.
A DNS challenge is really the best option if you have the right pre-requisites. You don’t have to expose any services at all for it to work, which is especially important if you are stuck without a public IPv4 address. You also only need to request one certificate, and you can reuse that certificate for all of your services.
Registering your Cert Provider
First step is to register an API token from our DNS provider. For this guide we will be using cloudflare.
- Log in to cloudflare and go to User Profile > API Tokens > API Tokens
- Create a token with the following permissions:
- Zone - DNS - EDIT
- Zone - Zone - Read
- Include All Zones
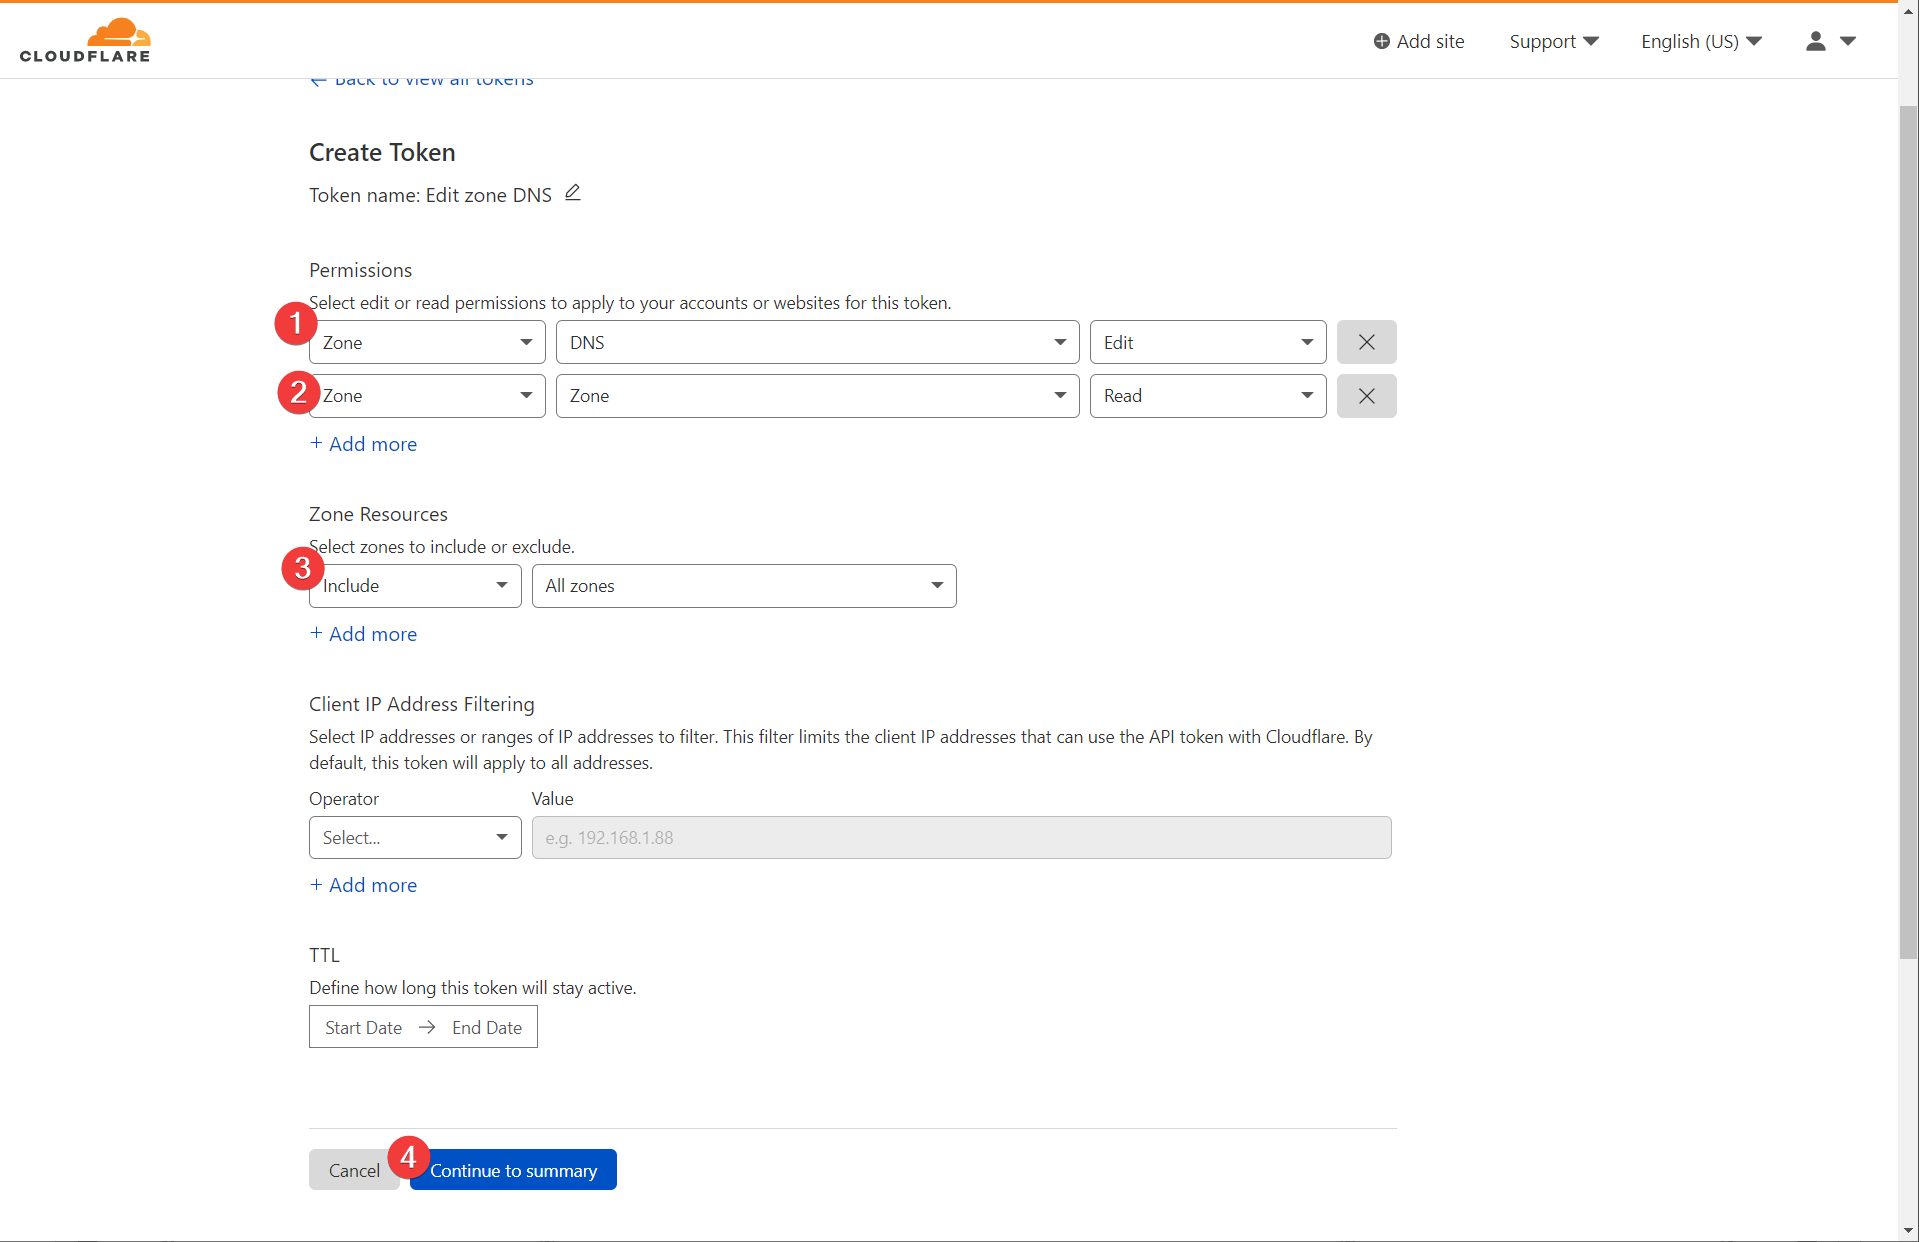
This should generate a token (a long string) that you can use for Nginx Proxy Manager to interact with your cloudflare account.
- In Nginx Proxy Manager, navigate to SSL Certificates. add a Let’s Encrypt certificate

- Add a wildcard certificate for your domain, like
*.<your-domain>.<tld>. Press “Use a DNS Challenge”. Provide your details and paste in the API token you just generated. Press Save
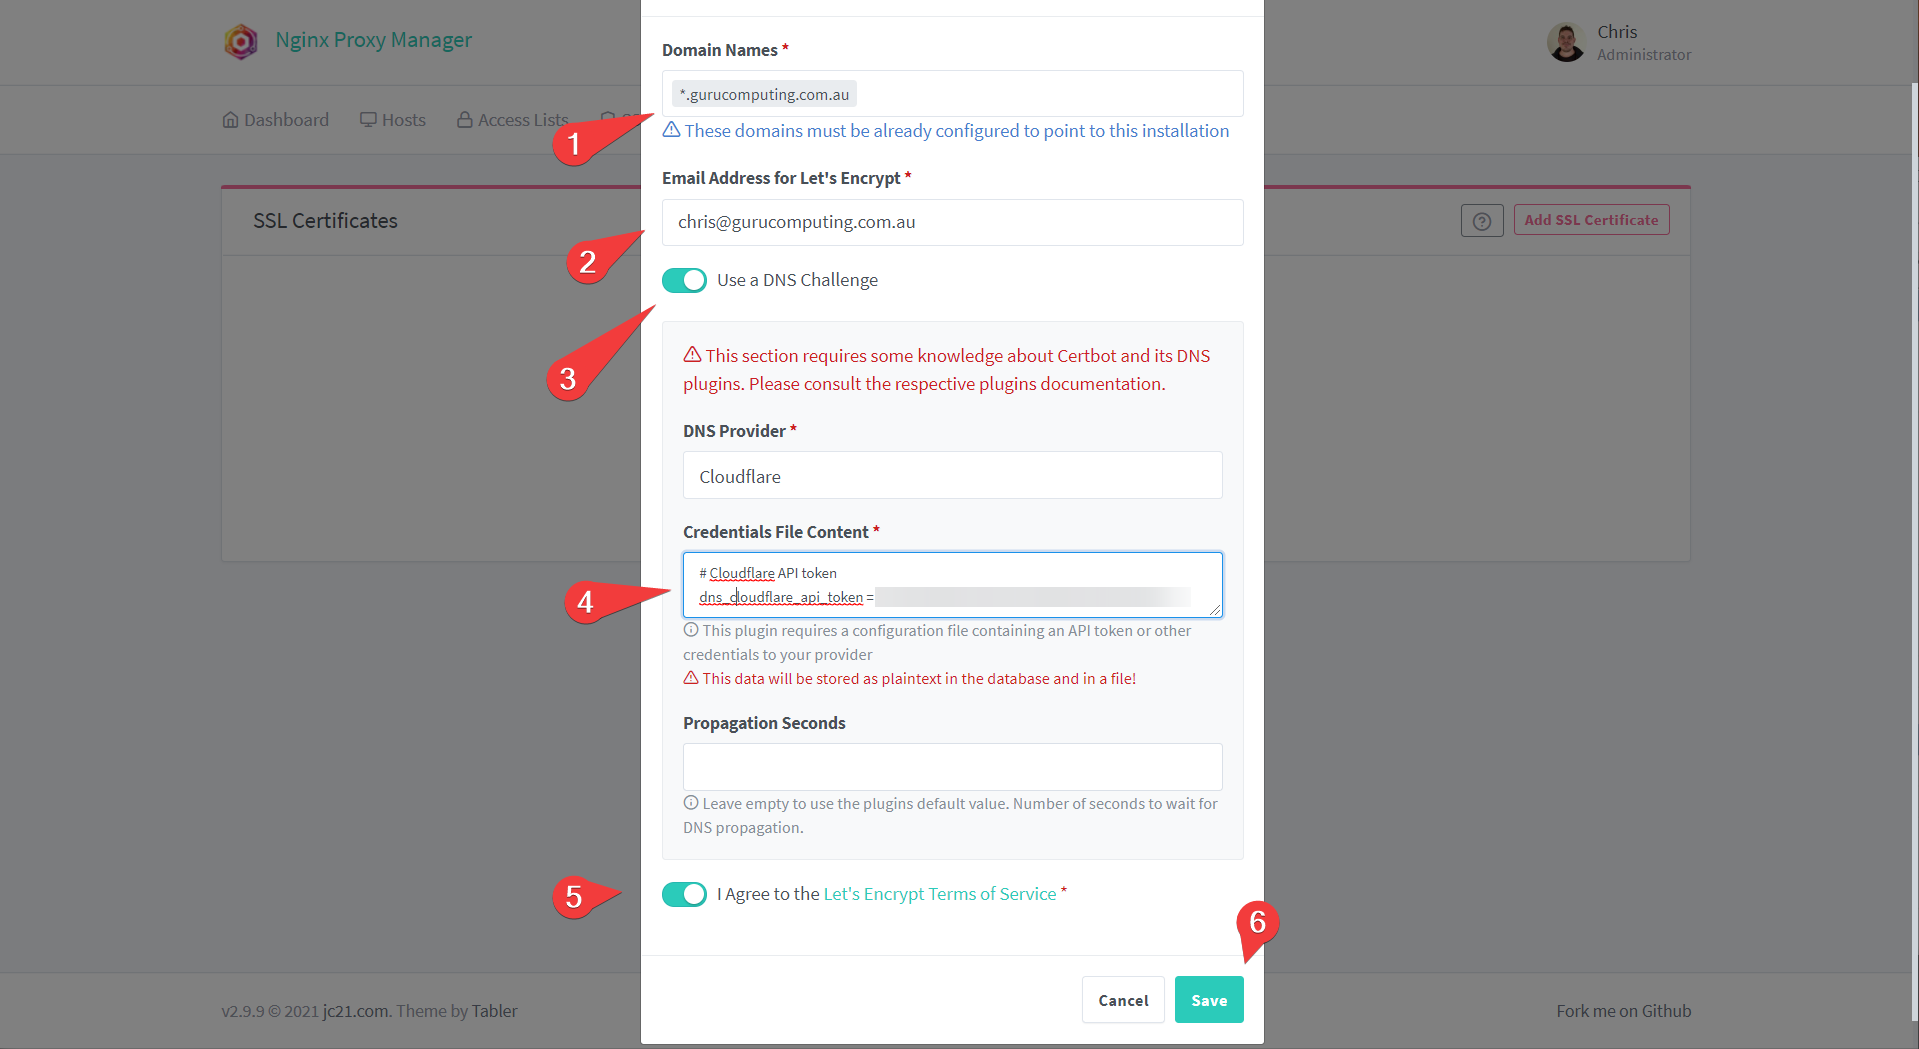
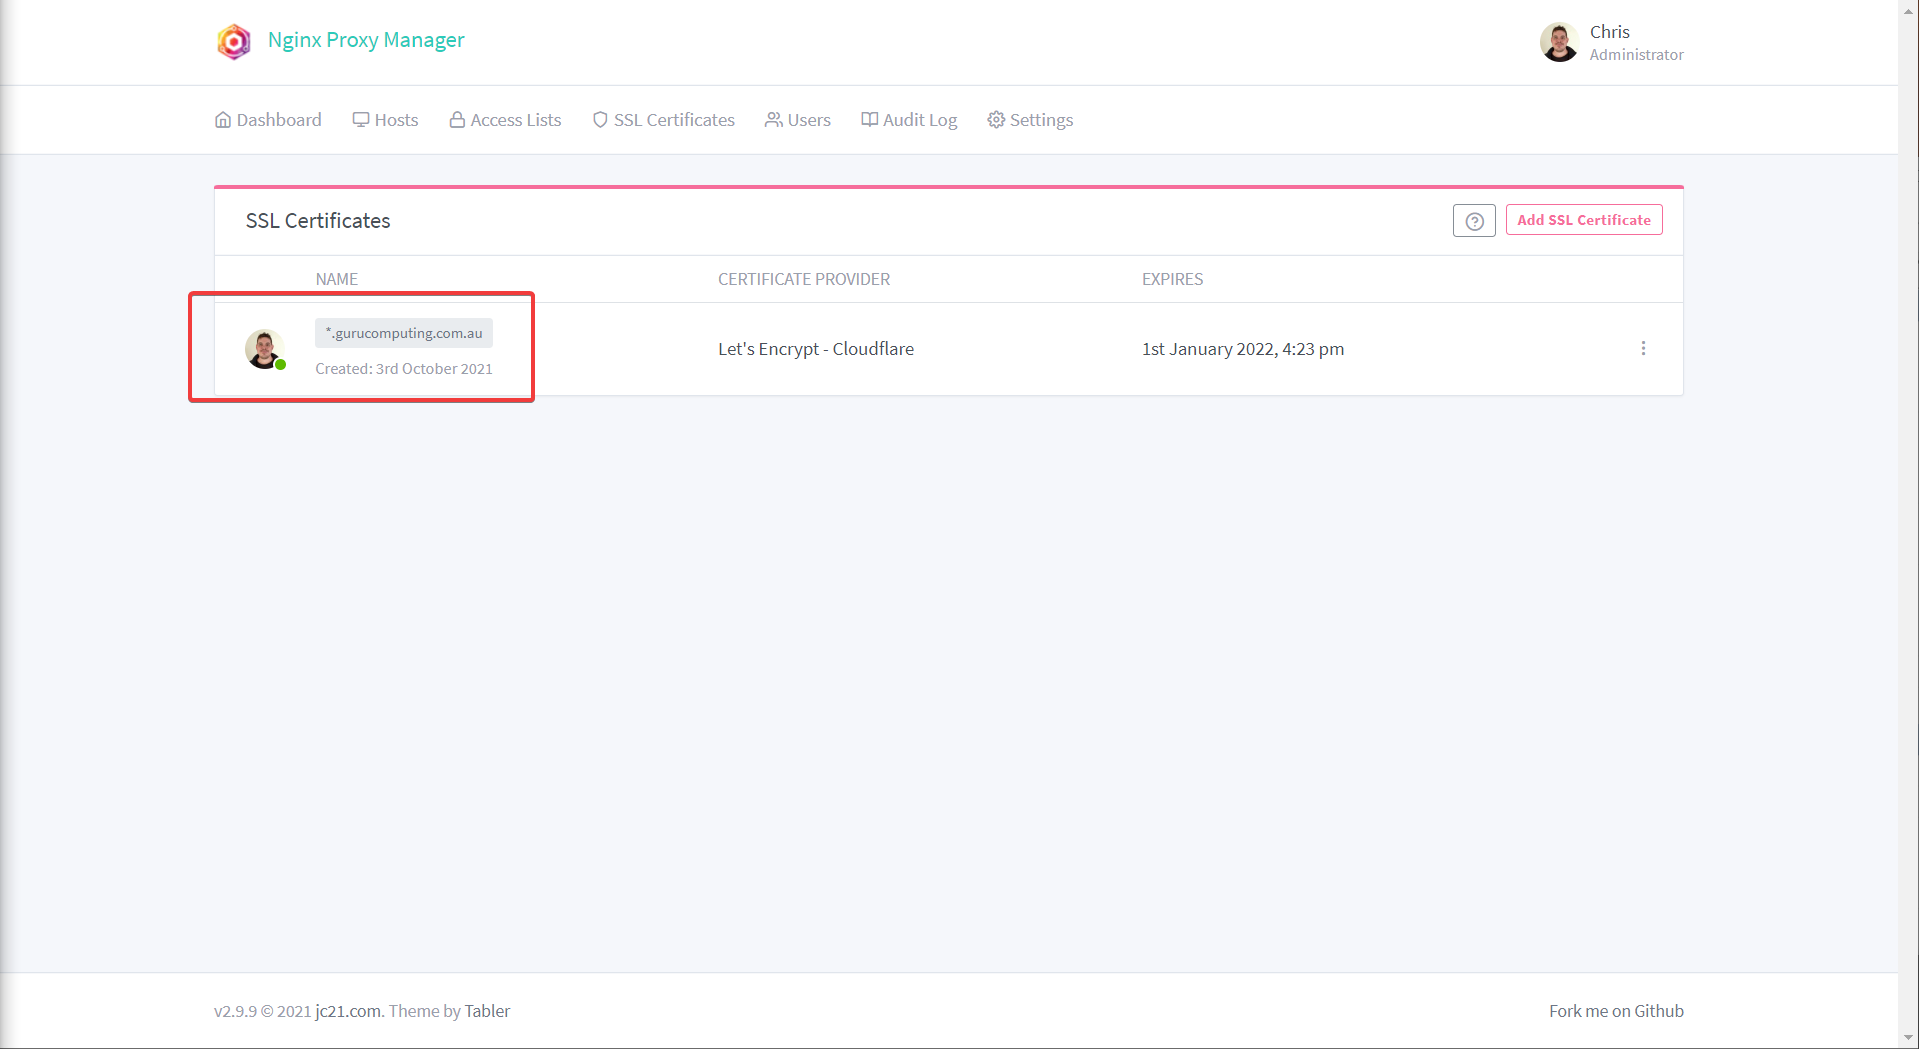
- If all goes well, you should have a valid certificate for your entire domain!
HTTP01 Challenge
This option is if you can’t, for whatever reason, use DNS challenges. If you can then you can skip this section.
Info
If you have a provider that is not compatible with certbot, you actually can still use a DNS challenge. You can register a free account with cloudflare and forward your nameservers to cloudflare.
HTTP challenges only work for specific subdomains (like git.<your-domain>.<tld> as opposed to *.<your-domain>.<tld>. Furthermore, you must:
- forward ports to the internet
- Have a public DNS provider direct traffic to your public IP.
- Oh yeah, and you need to have a public IP
Warning
HTTP01 challenges require you to expose your server to the internet to work. DNS challenges do not. Expose your docker services at your own risk
Actually using a HTTP challenge is quite easy. If you’ve met the above caveats, you just need to:
- Log into Nginx Proxy Manager and add SSL certificate
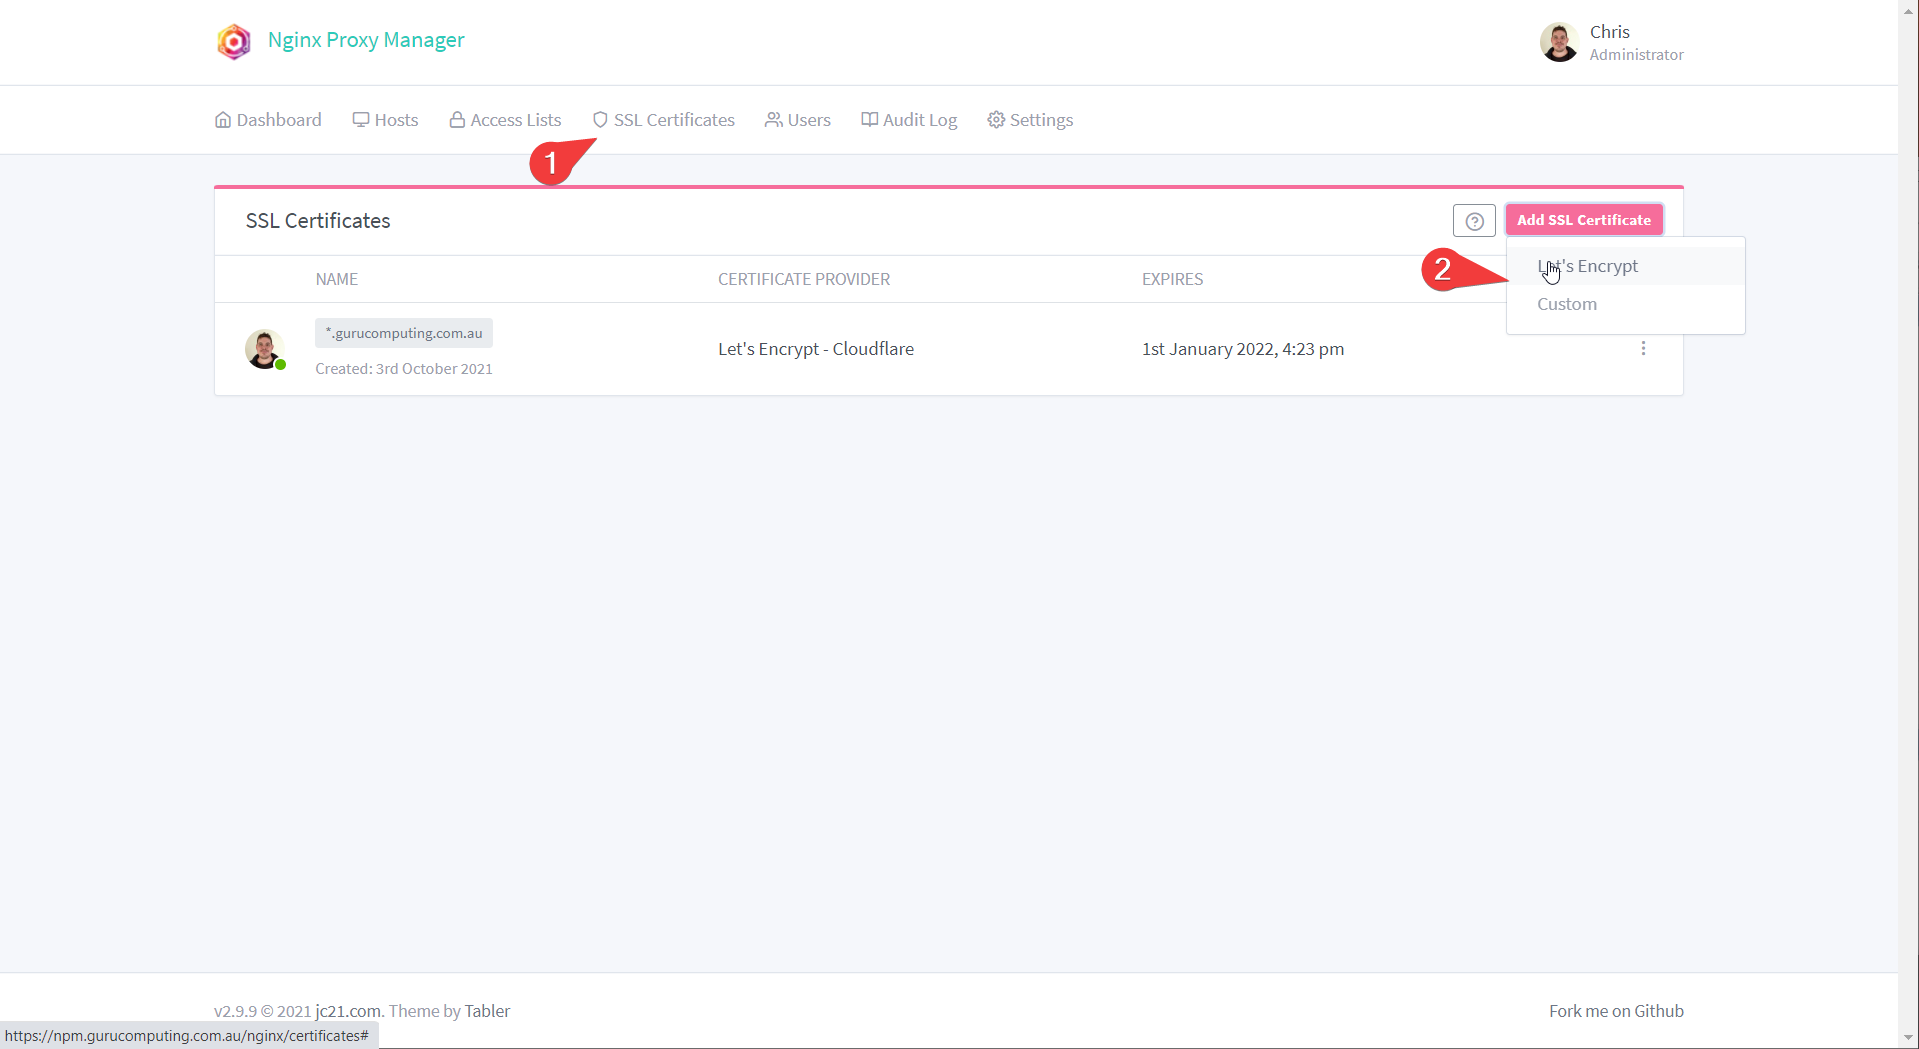
- Set your subdomain (or subdomains) in the Domain Names section, set your e-mail, and agree to the terms
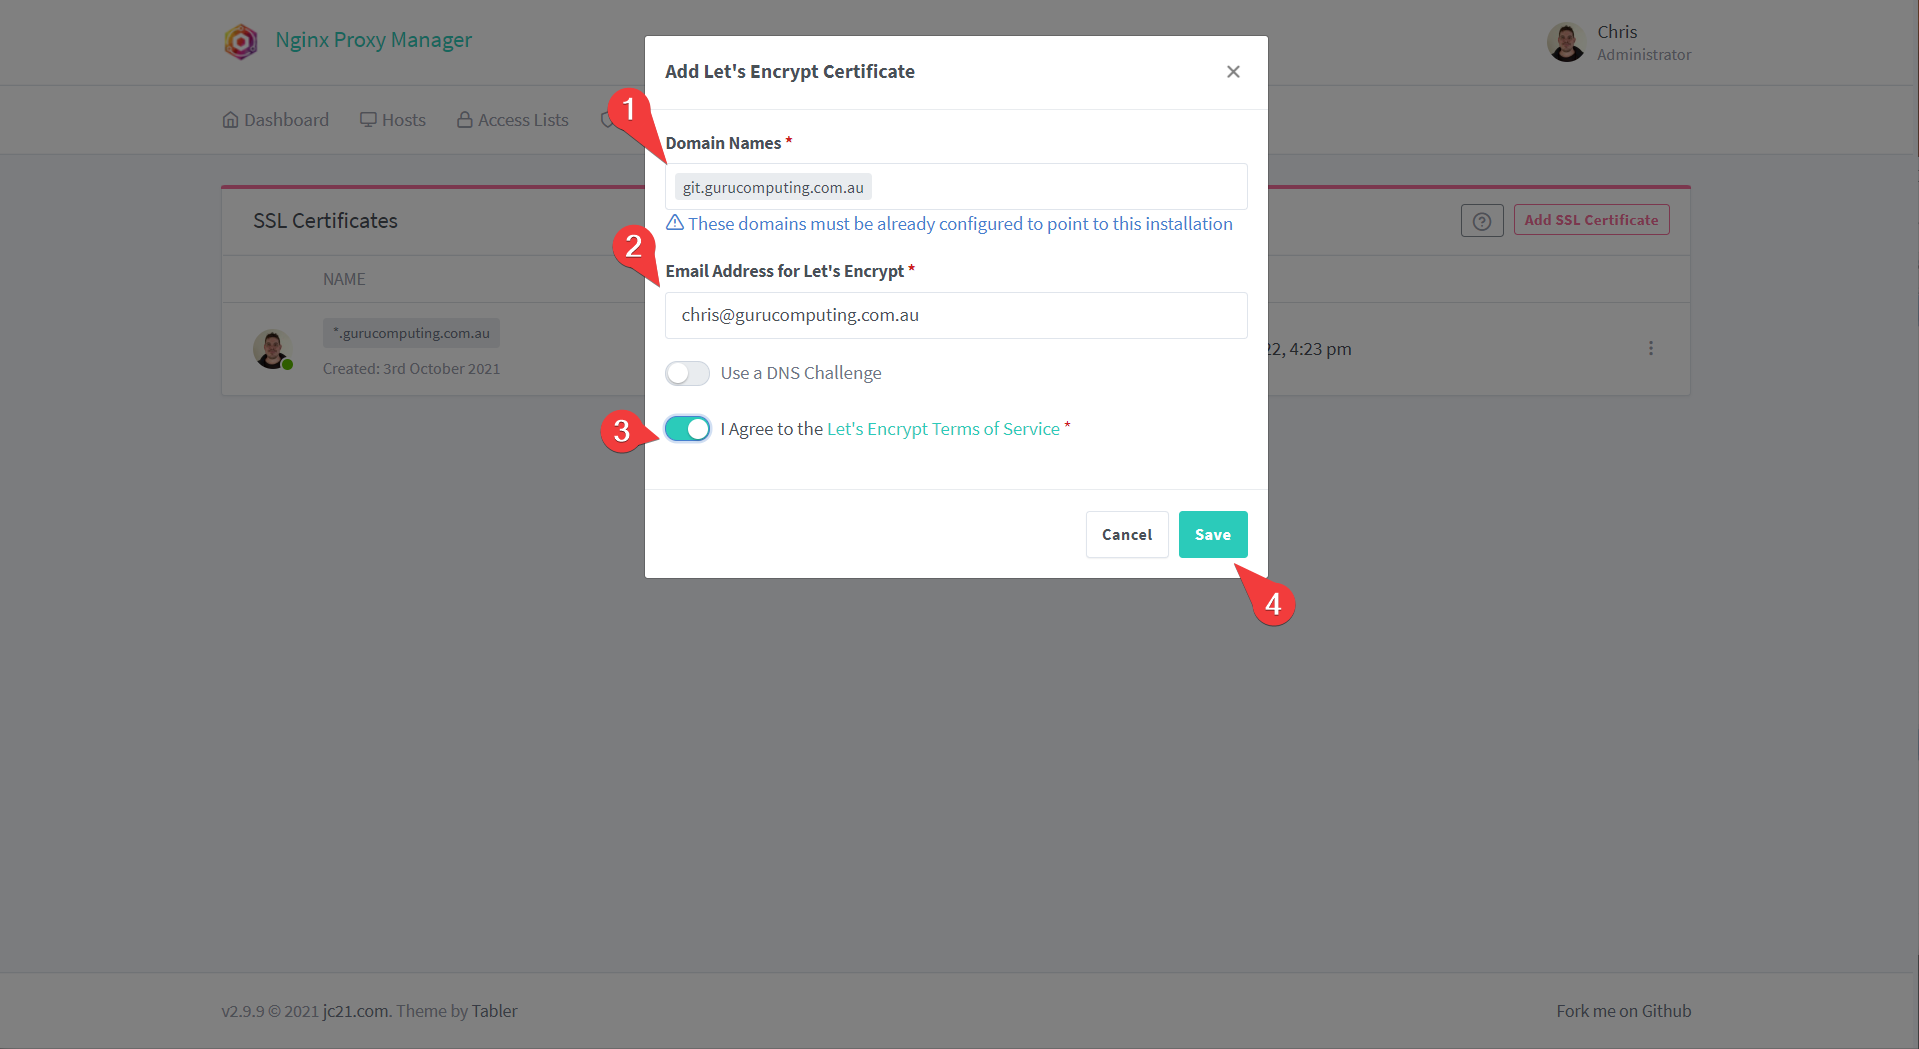
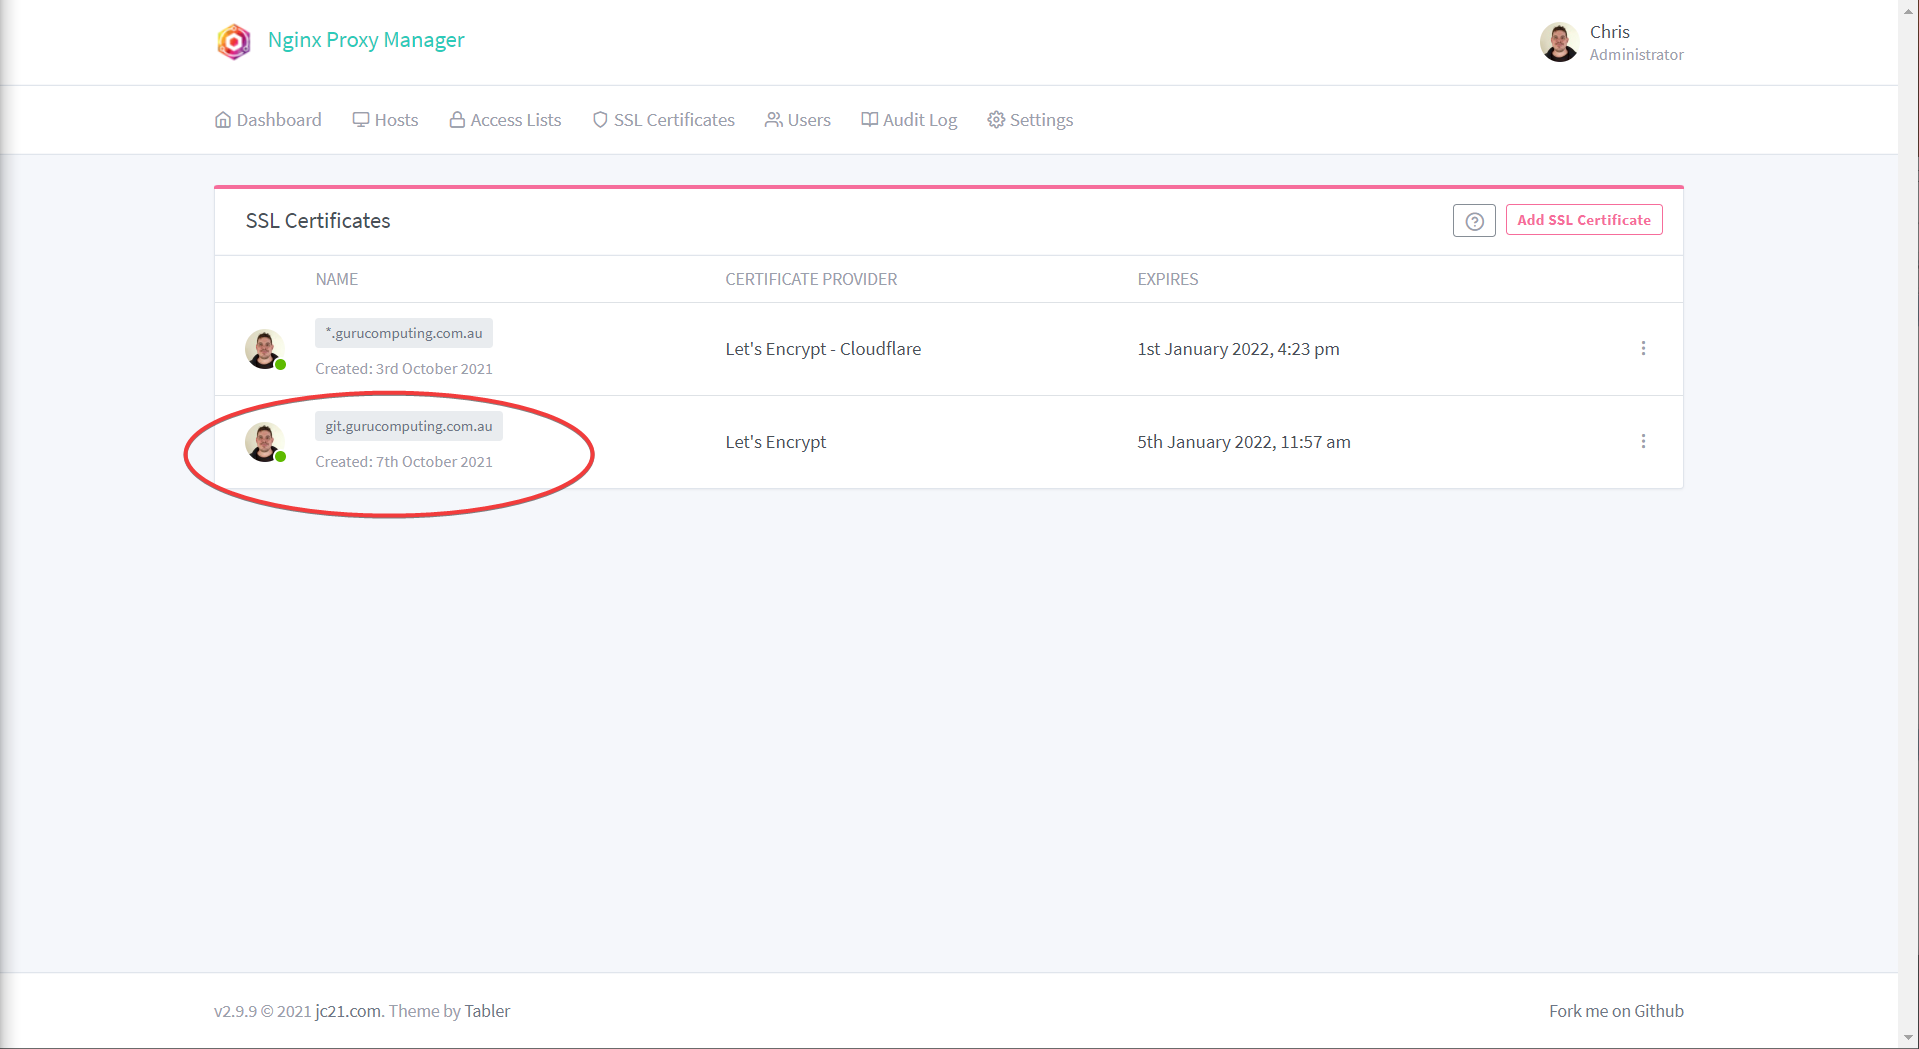
- And Like Magic, you have a valid certificate for your subdomain!
Using your Certificate
Having a valid certificate isn’t very useful if you aren’t protecting your website with it. Luckily this is easy:
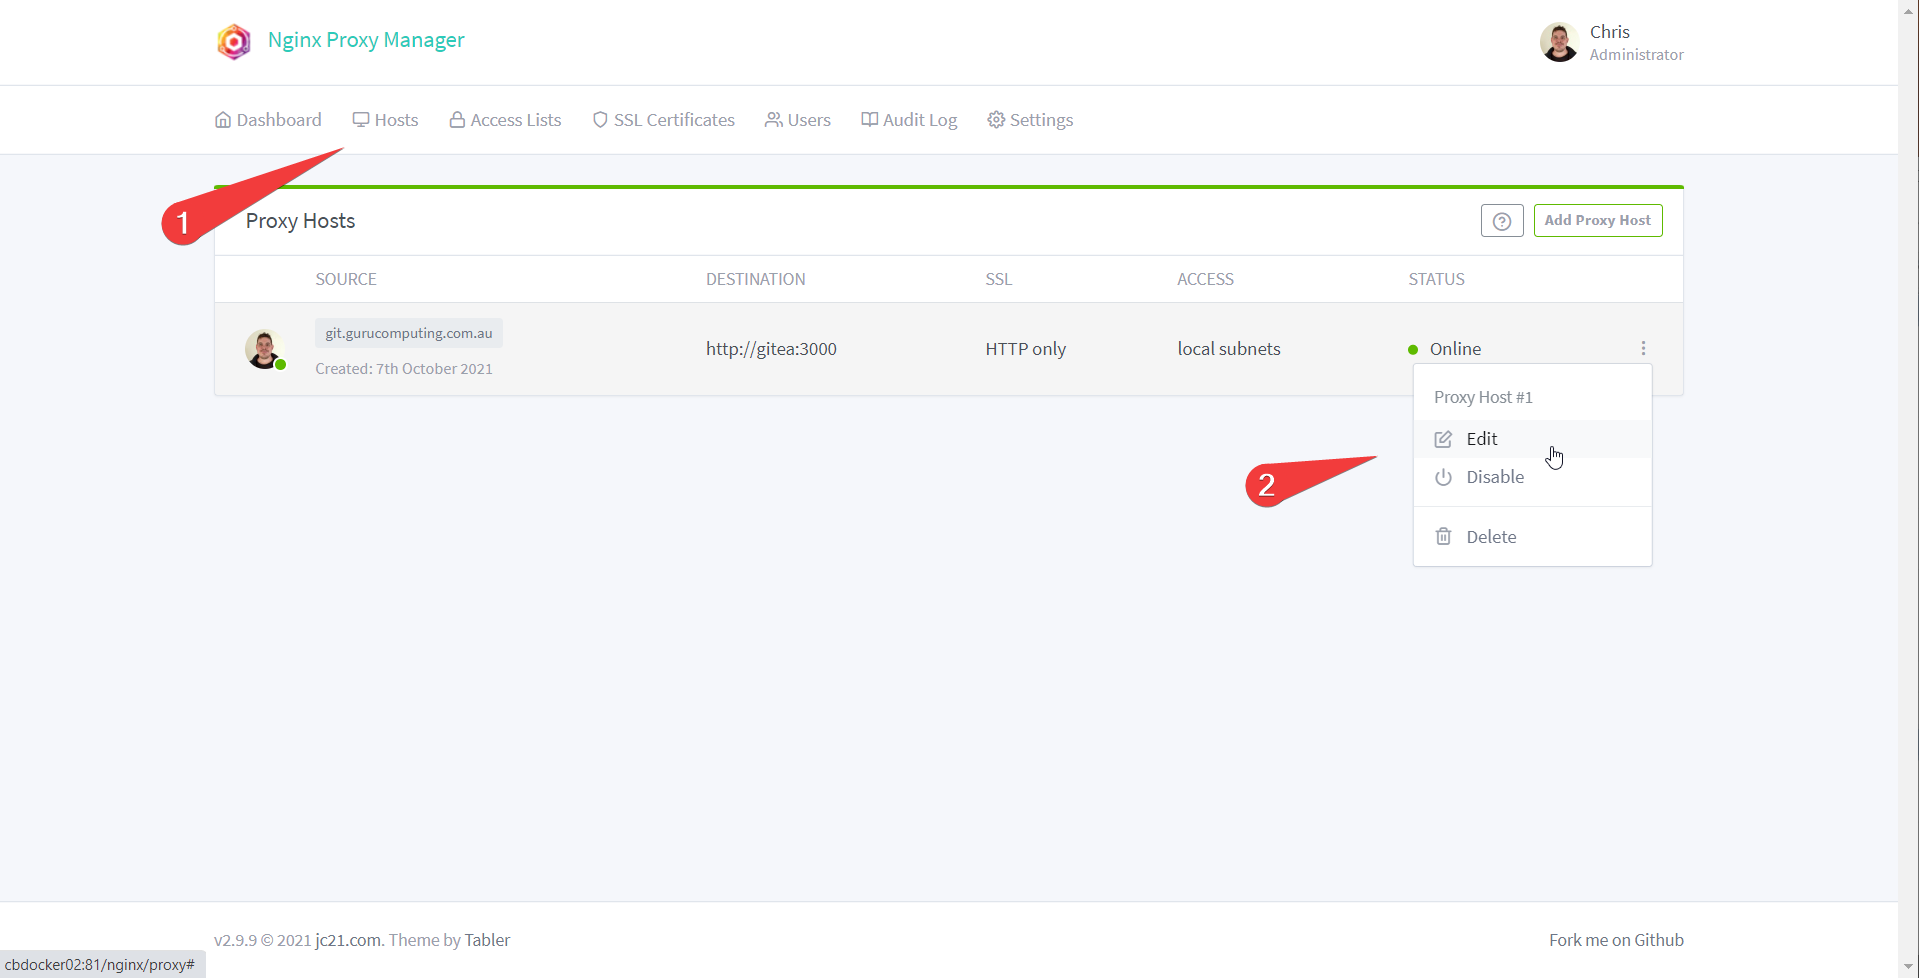
- In Nginx Proxy Manager head back to proxy hosts. Edit your proxy host
- Under SSL choose the certificate you just configured (whether it be DNS or HTTPS)
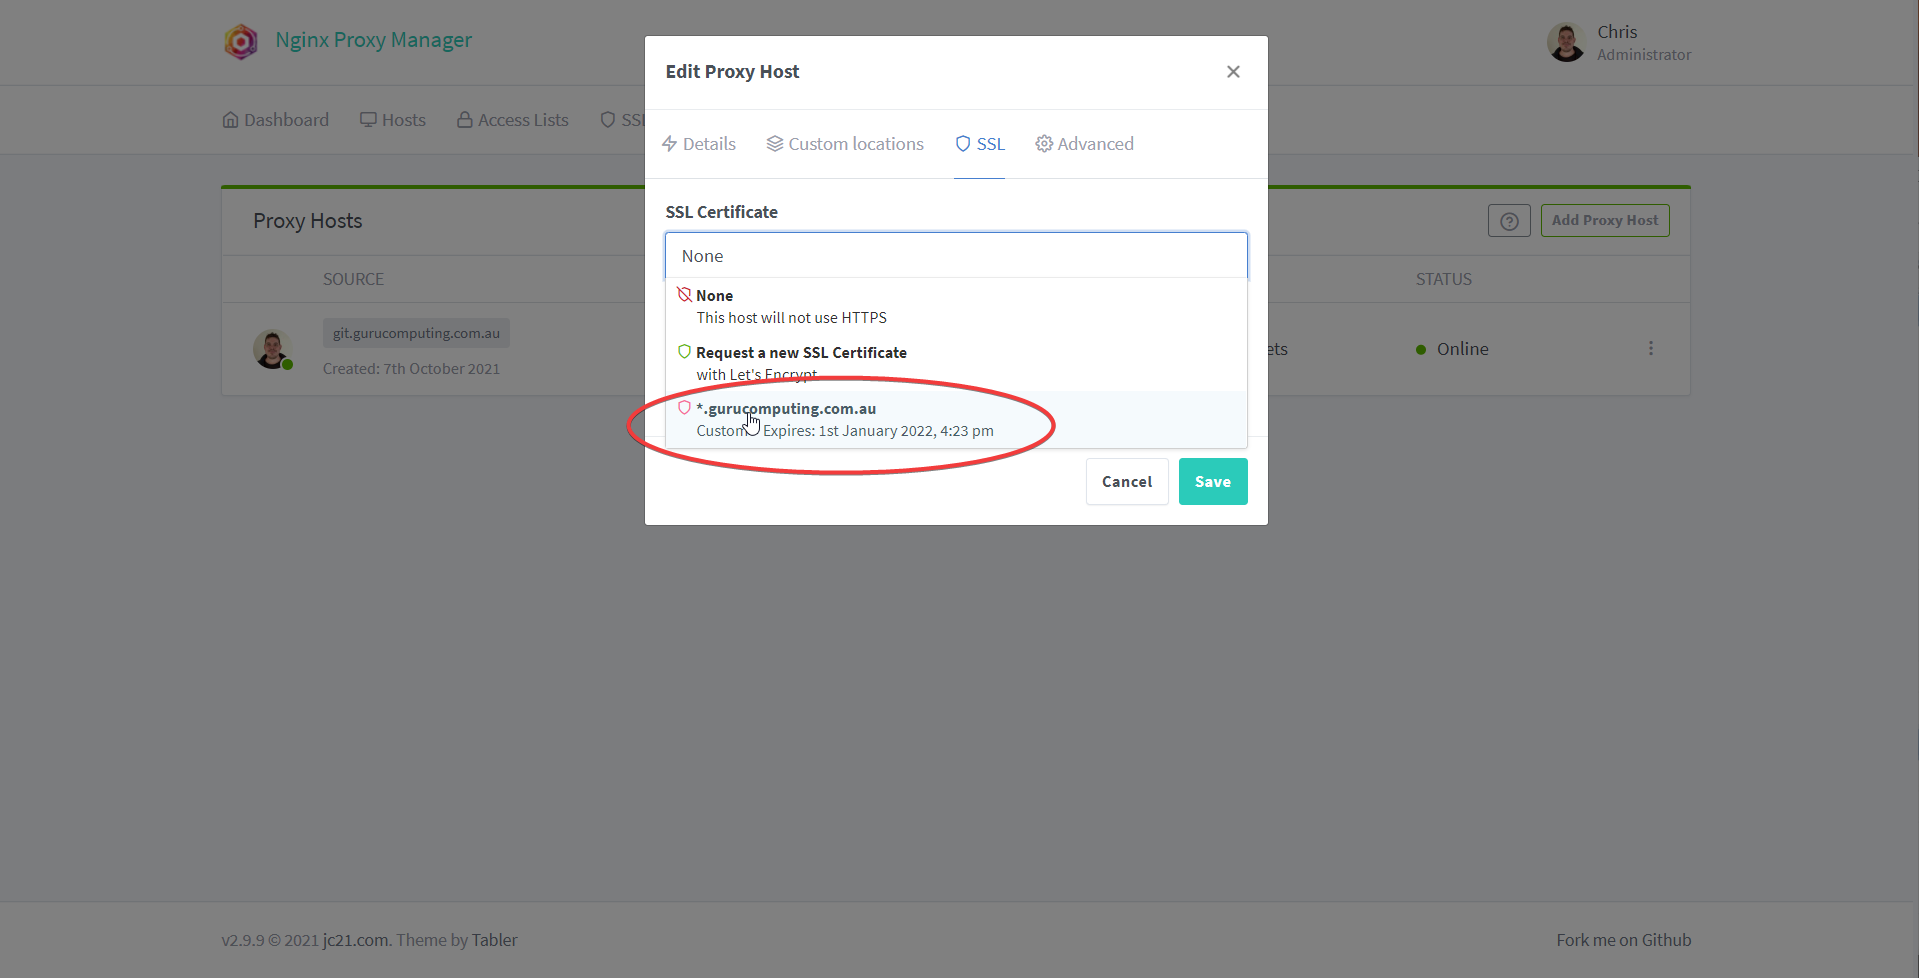
- Turn on Force SSL, HTTP/2 Support, and HSTS (basically this all forces the site to use HTTPS). Save.
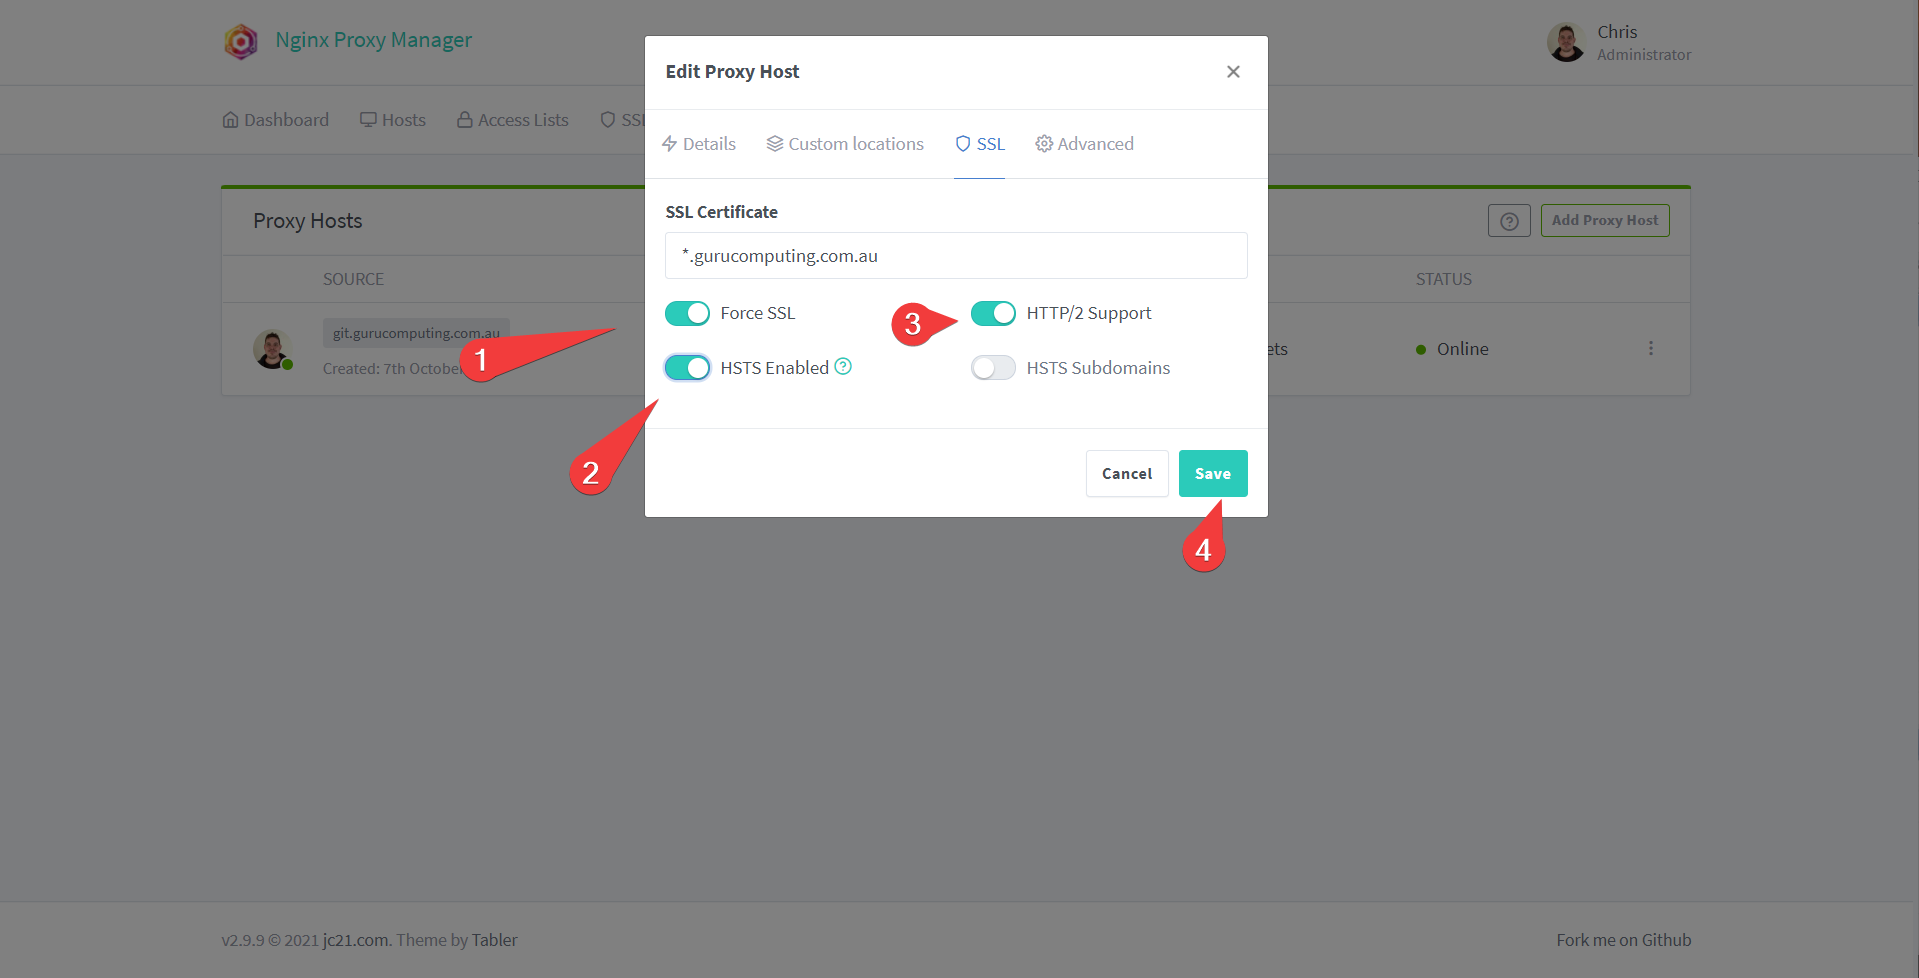
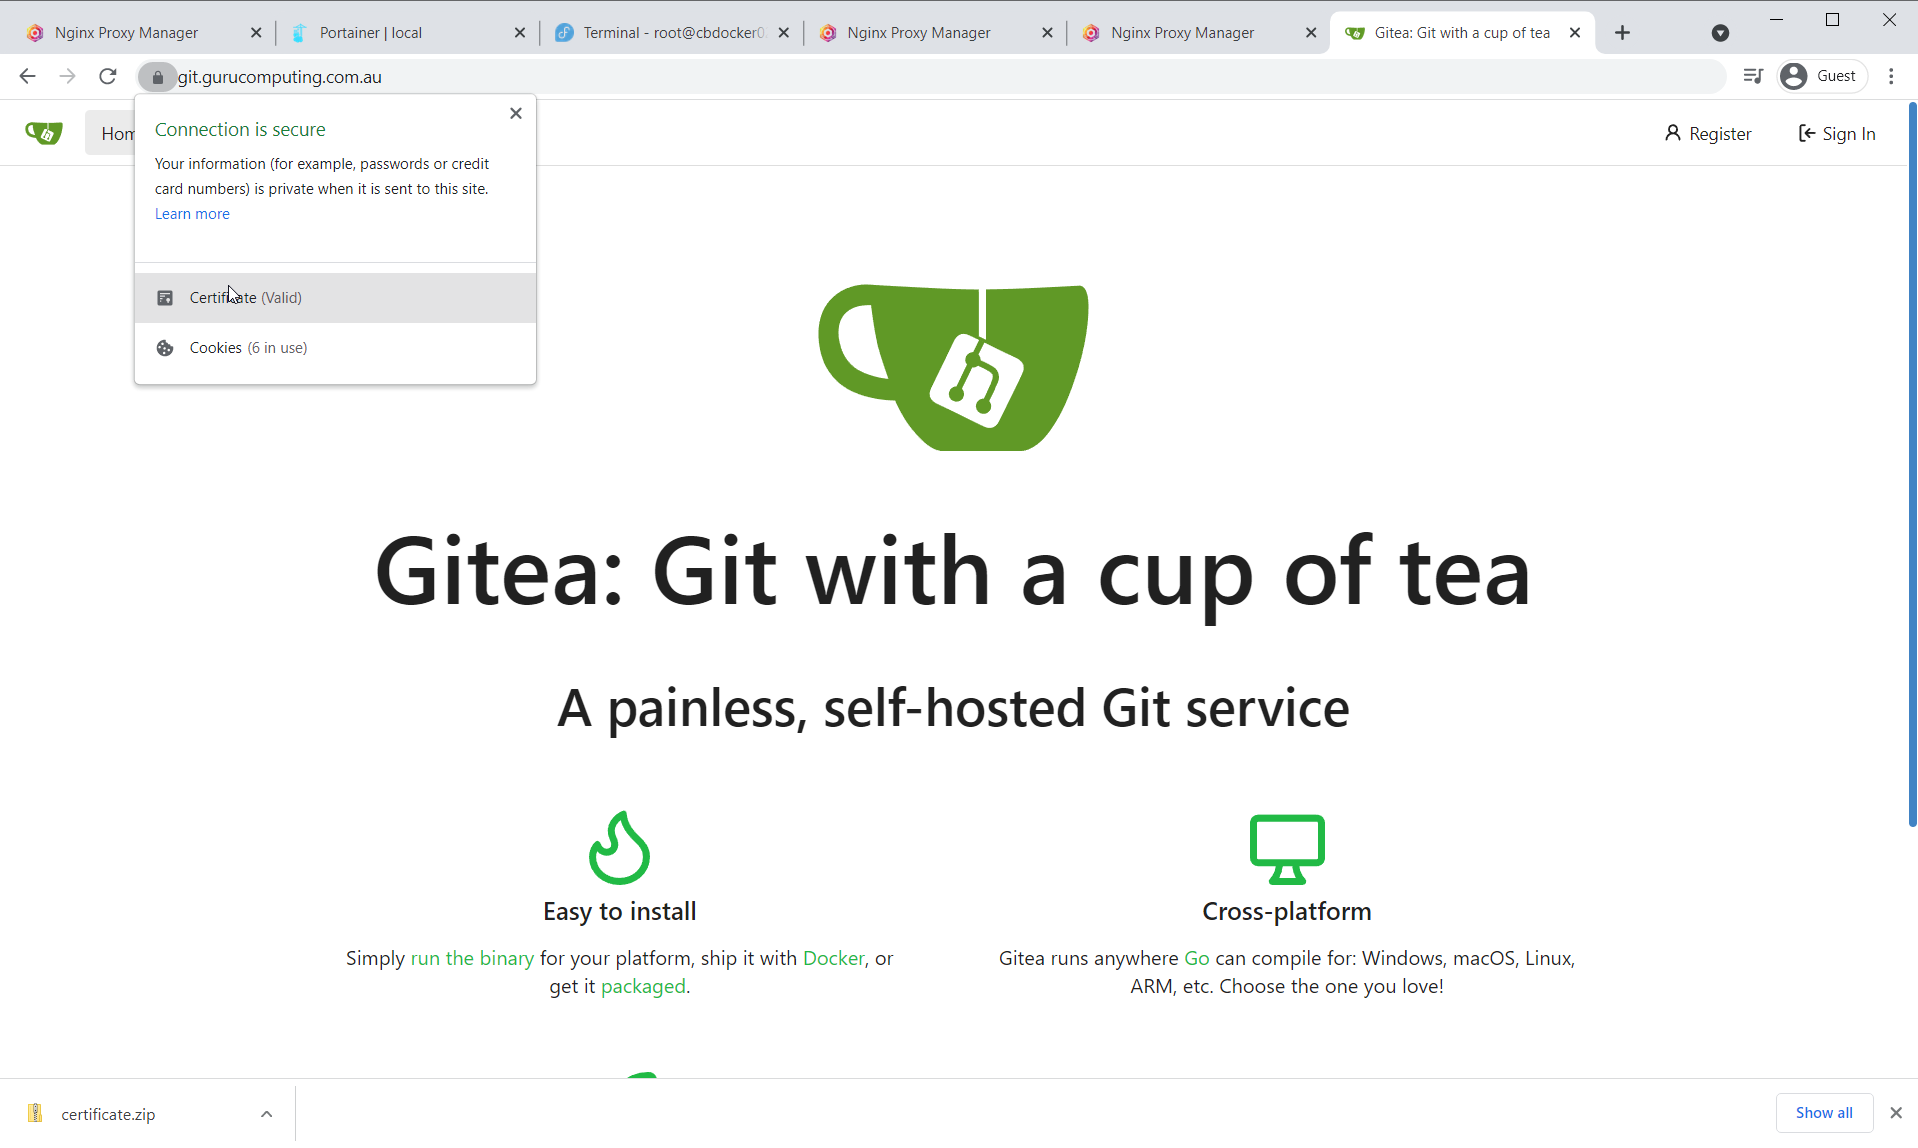
- Check that your site is now running with valid encryption!
Moving On
Awesome! We now have all the tools and techniques to start setting up our permanent docker infrastructure. Let’s cover that next in Leveraging Reverse Proxying.